I've spent the past few days gluing up the panels to replicate 10" deal planks, scraping off the glue, and planing their edges square and true. This is worth an entry on its own, but again I was too busy doing and haven't photographed it yet. You readers will be better served, anyway, when I have more experience and can photograph "doing it right" rather than the process of fumbling through learning.
In any case, I certainly know a great deal more about squaring and truing boards than I did a few days ago. Its mildly exciting to think that I will just get better and better at it, there are quite a few more to do.
Only one of the glue-ups came out less perfect than I had hoped, with a visible gap. Its minor, but its there, on one end of the board. Hopefully, I will segregate that portion to the scrap pile. It was also challenging to match the grain and coloring of the board to look well-paired, but some of the high-contrast pairings have their own appeal.
With the boards artificially enwidened, it was then, ironically, time to cut them down a little! Today involved taking 7" boards and bringing them down to 6". As the cut was 4 feet long, this was a job for the panel rip saw.
After marking the line, the next job was to secure the board to sawbench:
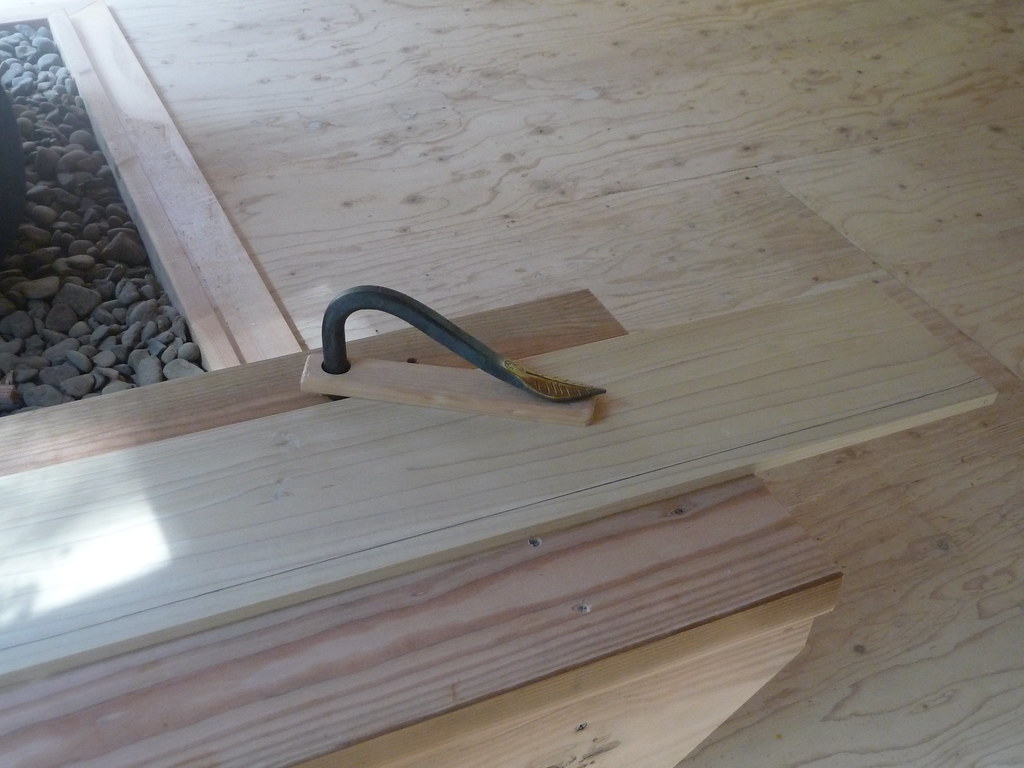
You can see there a holdfast jammed down on the plank, with the cut line cented over the "ripping channel" in the sawbench.
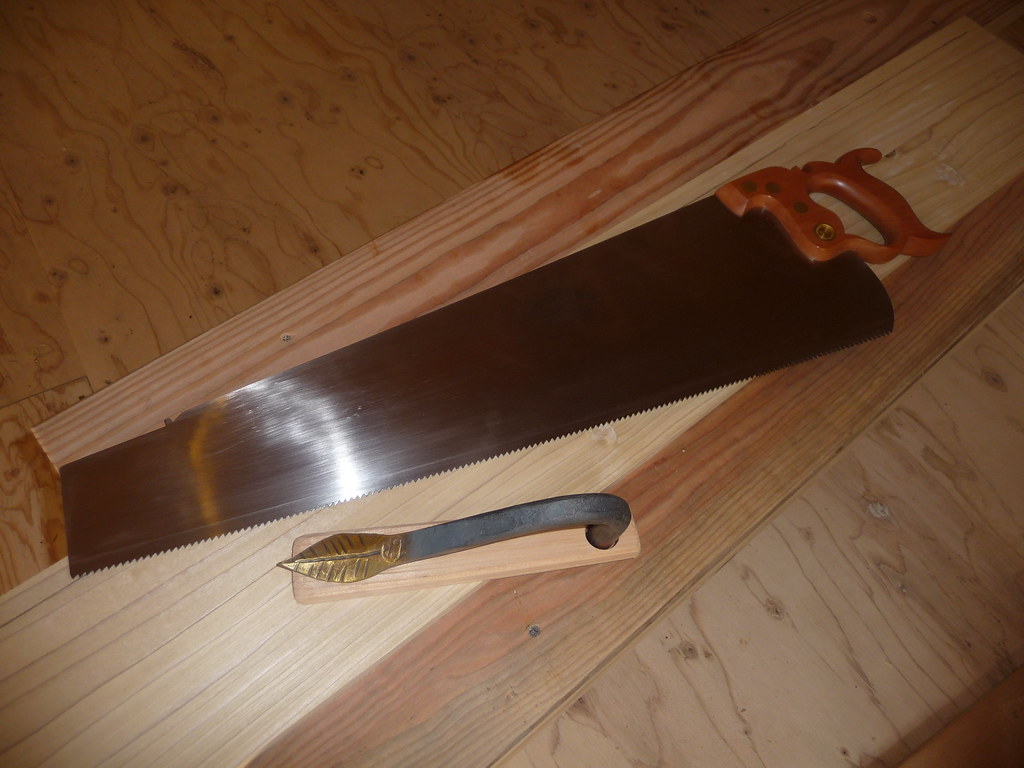
The saw itself is from Mike Wenzloff, a near neighbor of mine (when you live in a National Forest in Coastal Oregon, 3 hours away is still considered a neighbor). Its based on a 100 year old design, and is a real pleasure to hold, use, and even look at. Ok I admit I am somewhat biased, but he really does do great work and the tote (handle) is several times more comfortable than the Stanley ripsaw I have been suffering.
The ripping went just fine. The one minor hangup is perhaps my own fault, or that of my body. Since I am somewhat short, my sawbench (appropriately designed to be knee-cap high) is only 20" tall. The saw is a bit longer than that, so a full stroke runs the risk of ramming the toe of the saw into the floor, which could horribly damage it. Because of this, I had to be a bit ginger. I am debating putting a piece of tape or something on the sawblade to serve as a depth-stop. The real answer is to get some smaller panel saws, but that is low on my list of things to spend $1000 on. Keeping the angle shallow works well, but I like the more aggressive vertical stroke once the sawline is established.
After the boards were ripped, it was time to clean up the cuts and square the edges with the jointer plane. This went well and produces silky smooth edges.
The boards were then crosscut into 2 lengths, using sawhooks on the bench, and a sash saw. I'll hope to document this process at some point. The ends of the box had to be precisely cut, and identical. I planed them to get them exact. Then, the side boards were cut, but this did not have to be as accurate as they are trimmed once the box is assembled.
Assembly presented its own logistic problems. The first corner was simple to clamp and nail, but the others were not so easy. The book simply mentions nailing them, with little mention of how. Its possible that any 14 year old should already know how to nail a box together, and of course I had my own ideas, but I know there are some best practices. I might have discovered some of them, at least for my workbench. Let's just say that 4 holdfasts are barely enough for some of the jiggery I had to employ. Eventually though, I got the pilot holes drilled (only broke one bit) and was able to get the nails driven home in a dovetail configuration without too much trouble. I did stop to grind one of my nailsets to match the shape of the cut nail heads. This made it much easier to sink them home, avoiding "French marks", which sounds to me like a British slur for the hammer-dents seen on much home-made furniture. I have a feeling French joiners don't leave a lot of French marks on their work, but so it goes.
Once the shell was together, the slightly overlapping ends had to be trimmed. This went well, and the box shell emerges square, smooth, and rigid.
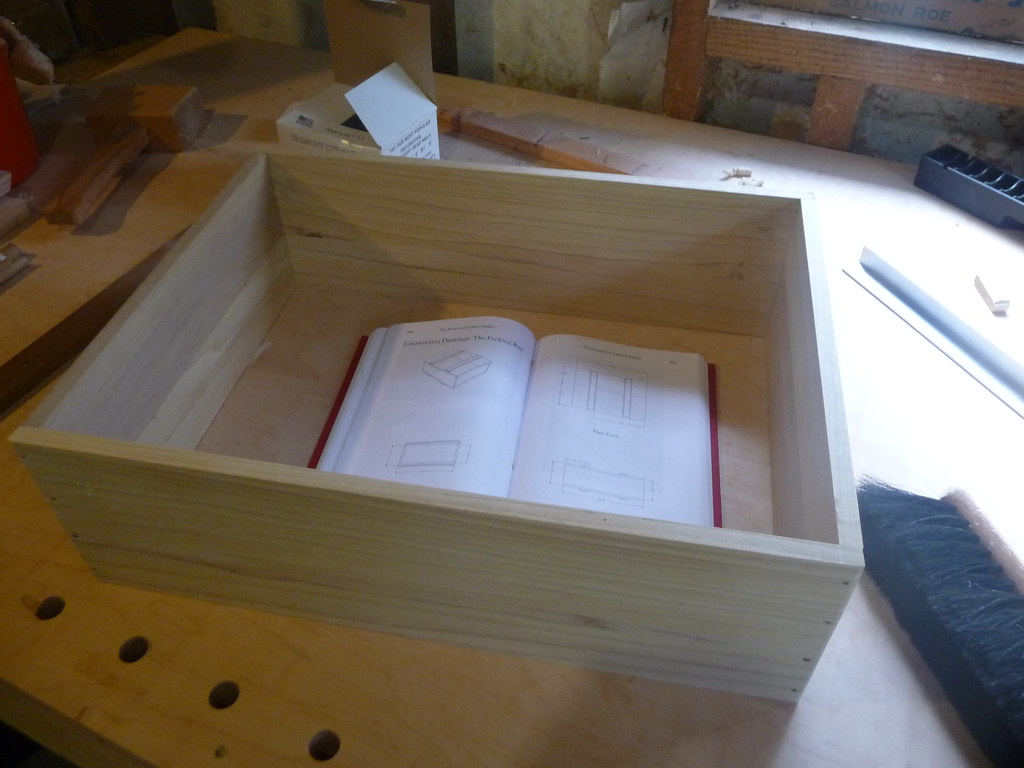
If you look closely, you can see the plan illustrations of the box in the book there.
Next up: making the bottom. And the top. And then making 2 more boxes. Maybe I'll stop to take a few more pics along the way.
Great stuff! Very much looking forward to the next Blog entry. I am also concentrating on simple old fashioned wood working and learning the basics. Isn't it amazing how much satisfaction you get from the simplest tasks. I only recently completed my first edge to edge glue joint! I also agree that its hard to break your 'flow' to take pictures when you are having fun and 'in the zone'.
ReplyDelete