Wednesday, November 30, 2011

A Joiner's Holiday Wish List

Note: please also see the post "Think Artisinal"


My family has, to a large part, abandoned holiday gifts for a number of reasons.  We have most of our material needs satisfied, and we've all learned that more stuff does not enrich life.  We do make exceptions: the kids still get some toys and clothes, and sometimes we give each other pertinent books or other small items to show thoughtfulness.  I am therefore not expecting to receive gifts, and don't generally make out a list.  However, I realize many or most others (such as readers of this blog) out there do exchange gifts, and it can save all involved some time and money to point out gifts which are actually wanted.  That said, these are the things on my own joiner's wish list, with a brief mention of why.  Since hand tool work can be so variable, I can't say everyone needs all or even any of these items.  Its impossible to make a list of what "anyone" would need, although the Anarchist's Tool Chest is a great start.  With that in mind, these are mostly luxury and "nice to have" tools.  And so, I present the 2011 Joiner's Wish List.


If you use water stones, as I do,  its important to keep them flat.  Otherwise, your edges will not be straight.  I bought the Norton flattening stone along with my Norton water stones, but it is frustrating to use and needs to be flattened itself after several uses.  This diamond based stone, while not cheap, promises to make good on the failure of the Norton stone.  This is an item I consider mandatory.


The last saw on my list, this is for making very precise and smooth crosscuts in boards larger than the sash saw can handle.  This is a saw which is not used often, but when it is needed, nothing else will do the job as well.  I have loved my Wenzloff and Sons saws, but would also like to try Lie-Nielsen's approach to saws, so my personal choice would be their 12 ppi Crosscut saw.


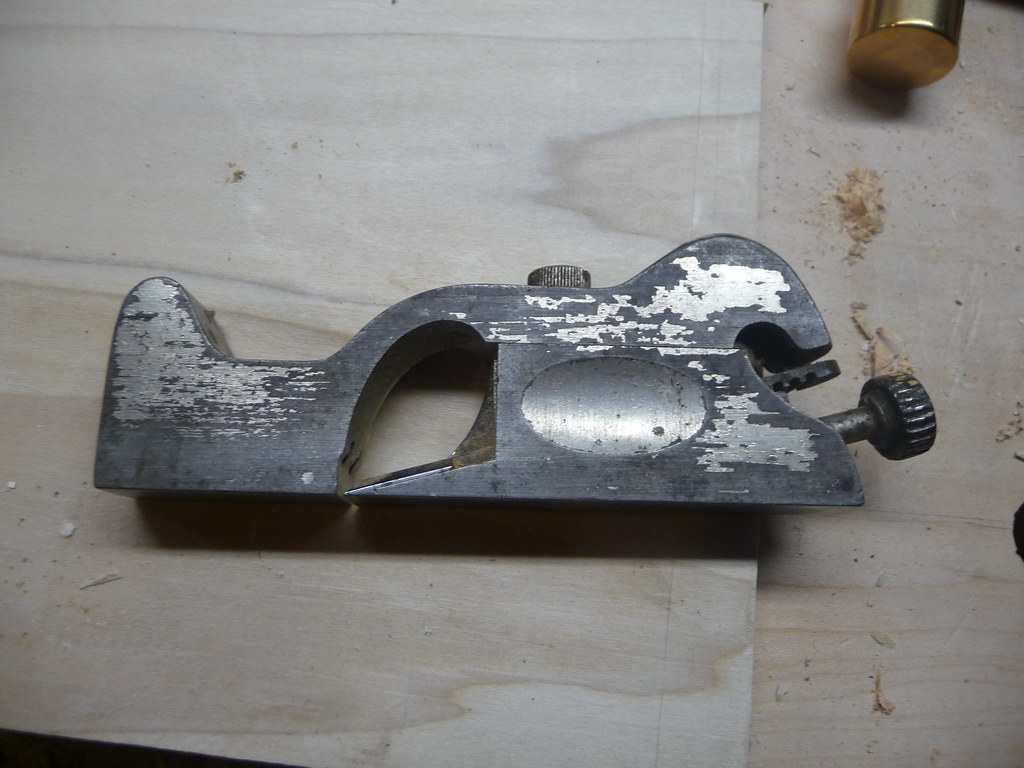
After my recent workshop on spokeshaves, I need to get one sooner or later.  The Lee Valley flat-bottomed spokeshave is very simple to use, adjust, and sharpen.  I would save the round bottom one until the need really arises. I would choose the A2 steel although both flavors are fine.


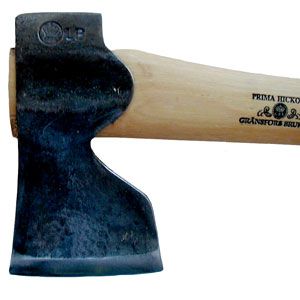
I would love to do more heavy stock removal with a hatchet, especially since I live in a forest and have an abundance of interesting hunks of wood available.  Wetterling's Hjärtum Carpenter’s Axe and Gransfors  both seem ideal.  These tools are unique in that one face is flat for precision while the other is beveled for leverage.  A typical hatchet has both faces beveled for as much leverage as possible.


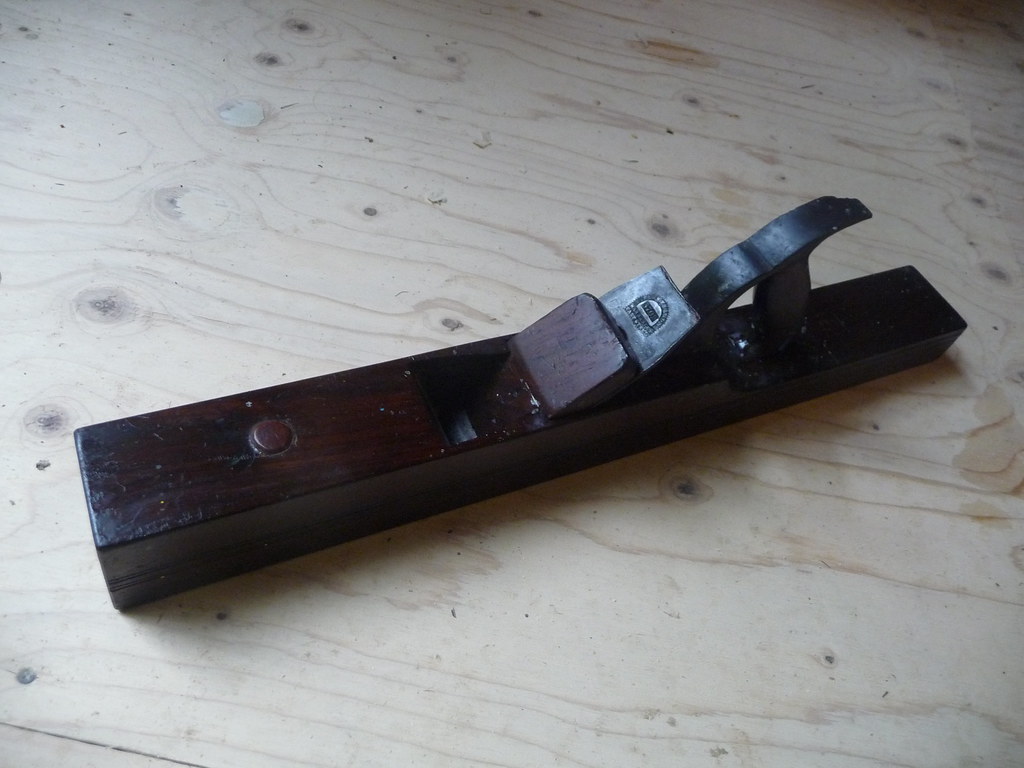
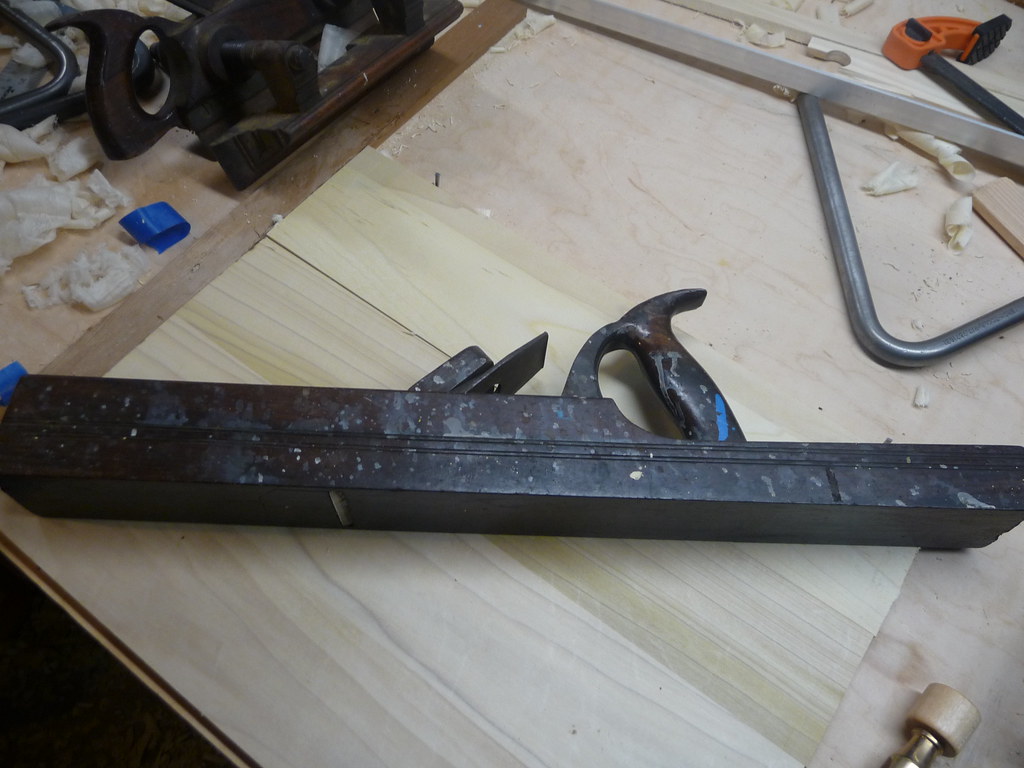
This portion of the plane can be swapped out to provide better results on highly-figured wood, such as some maple I have milled from a tree in my yard.  This very beautiful and special wood demands different tools and approaches, and this replacement frog is part of the puzzle:

The image shows the entire plane, but it is only the guts that are in question here:

50 degree High Angle Frog for No. 3 & No. 5-1/4 Bench Plane + Lie-Nielsen No. 3 Bench Plane Replacement Blade (to be ground at unique angles)

This is a very specific gift and the above is my personal situation.  If you want to help someone improve their planes, you really need to know which ones they are.  As far as I know, only Lie-Nielsen planes offer modified frogs such as this.


Veritas hold-downs and Wonderdogs


While not utterly traditional, you can't have enough of these super-handy workholding devices.  Very cleverly made and very useful.


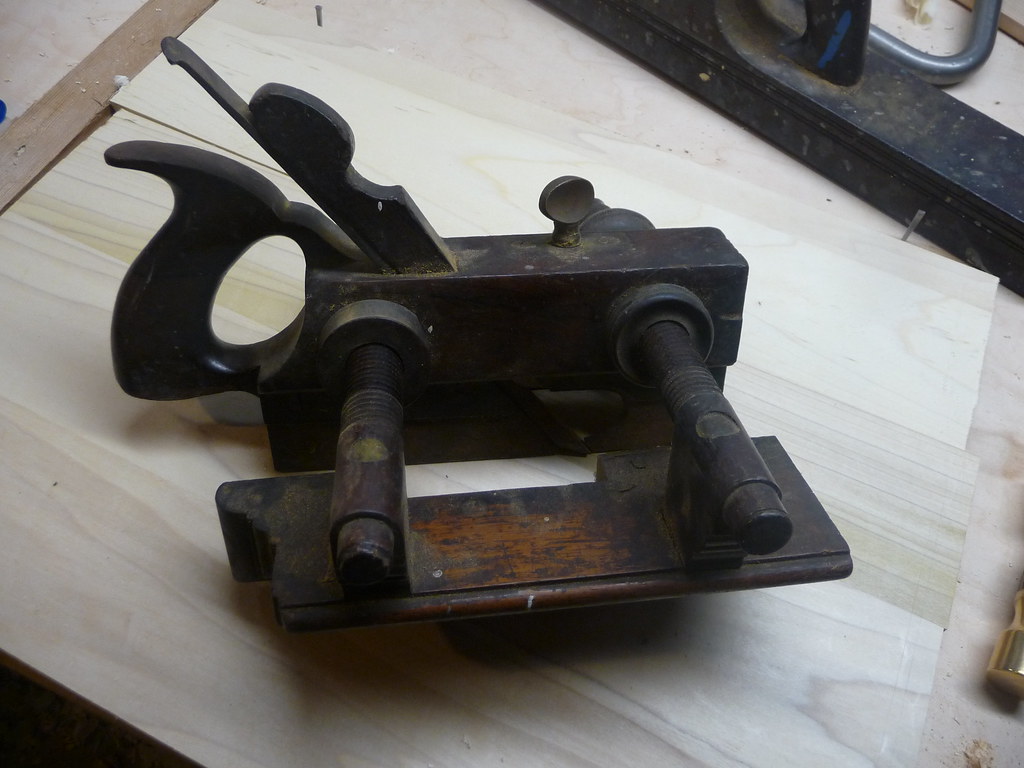
At some point I am going to have to learn to sharpen my saws.  This vise is an essential part of that operation.  It is possible to build one from scratch, and I might go that route, but a plywood jalopy is not quite as photogenic as this rig.


 Another "nice to have" item, and one which Chris Schwarz recently evicted from his shop to make room.  However, I am not as confident in my abilities to mill tongue-and-groove joints for my upcoming workbench shelves and tool chest bottom.  I would pick the 3/4" model but the 1/2" is tempting, too.  


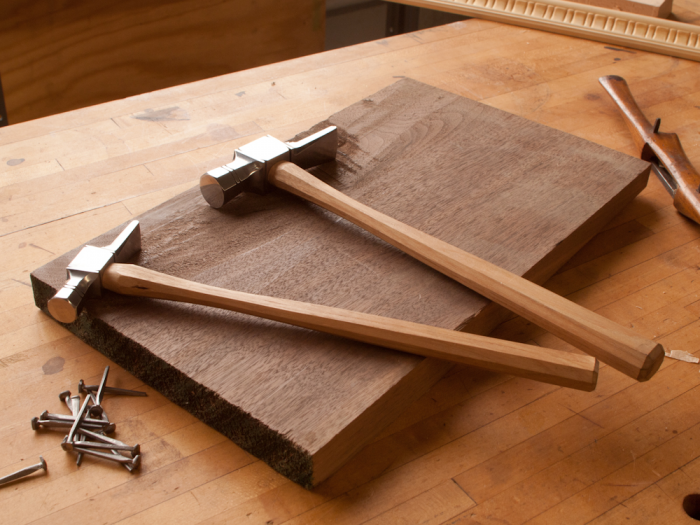
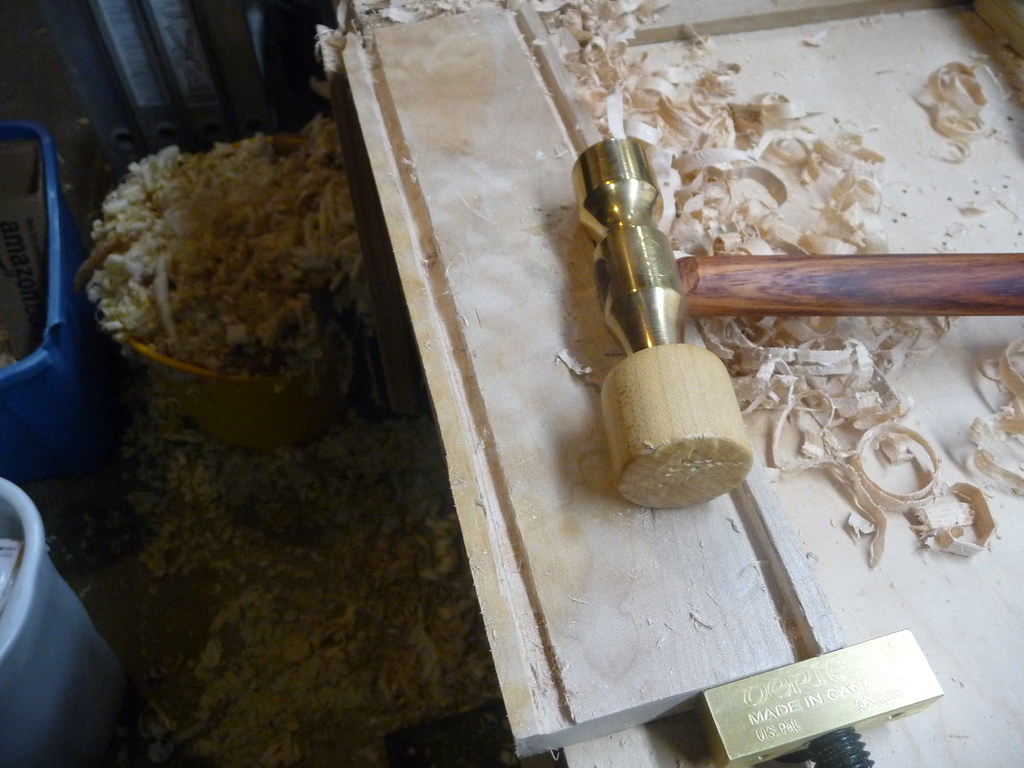
Certainly not a necessity, since I already have a cheap hardware store hammer which works ok... but these are what I want instead of a sports car or yacht.  I would probably only consider the larger of the two, but they are both a little rich for the likes of me.  Still, this is a "wish" list, right?


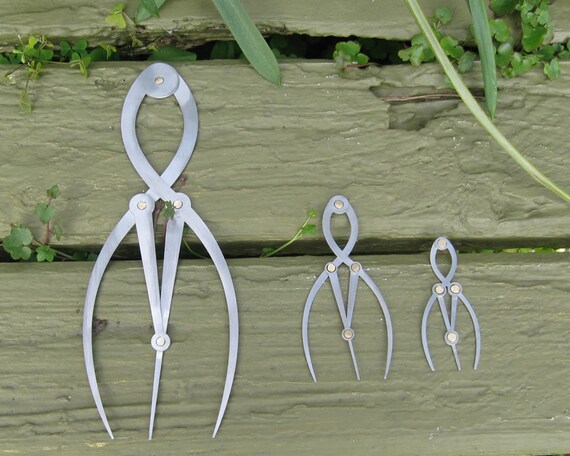
Also very high-priced but an engineering object worthy of much admiration.  Believe it or not, it is quite difficult to find a bevel gauge which truly locks its position.  The one I have is so frustrating that I refuse to use it.  I doubt I will ever be able to bring myself to buy one of these, but it is nice to know they are out there.  I am probably resigned to try one of the mass-produced versions such as this:

And on that note, all of these tools are expensive.  I probably do not have to explain that they are meant to last more than a lifetime, and are made by small firms with great senses of craft and ethics.

With that out of the way, here are some less shockingly priced "stocking stuffers" that may not break the bank but still provide much joy:

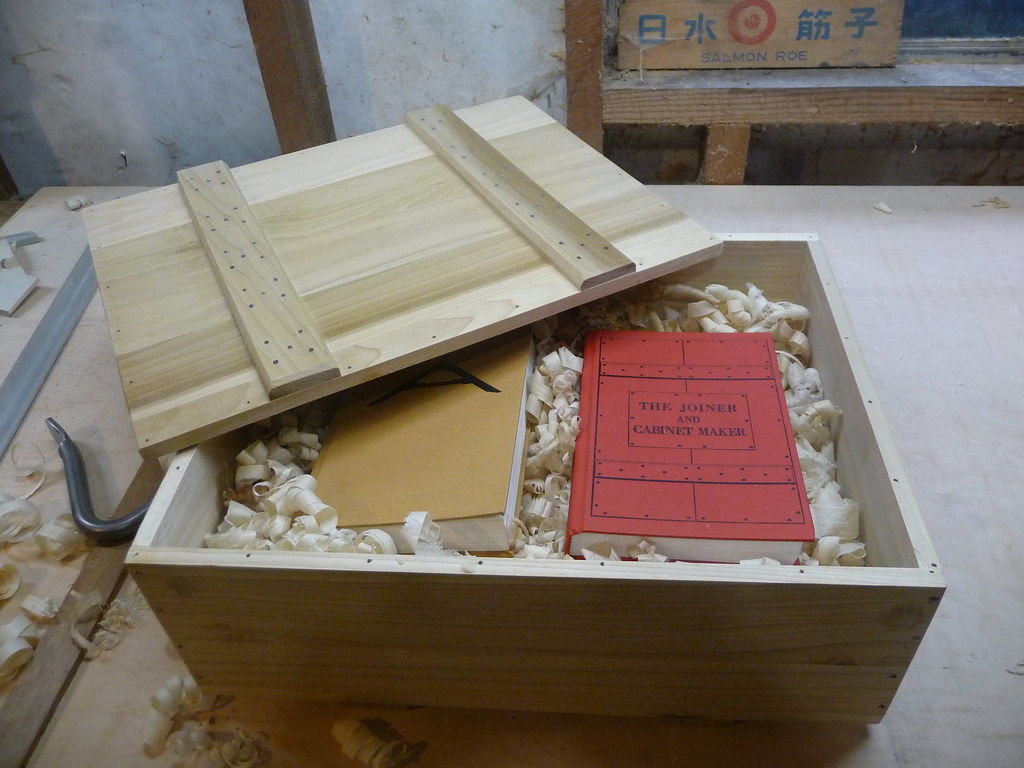
Books:  My to-read list is long, but these are near the top:

How to Build Shaker Furniture - The Completely Updated and Improved Classic
by Thomas Moser

by Bob Flexner

by Paul N. Hasluck

by Bob Flexner


DVDS:

Chris Schwarz pack:


Little Tools:


These are a really nice design tool. A beautiful way to incorporate "sacred geometry" into woodworking. 


The plain screwdrivers I have do work, but yes I have already deformed some of the slots in my tools by using them.


Again, these are all relatively luxurious tools which are not strictly needed to do great work. Those tools are a bit too personal and subject to different working styles to prepare a list for.  At the same time, these luxury items which a person is not as likely to purchase for themselves can make the best gifts, reminding the user of the giver with every use.

Whether you engage in gift giving or not, and whether you celebrate winter holidays or not, I wish you a fine new year of mirthful woodworking!

I encourage readers to add gems they have discovered recently in the comments.  If any are seductive enough maybe I will add them to my own list.


Monday, November 28, 2011

Erratum: Phil is not Peter

In my recent post about artisinal toolmakers, I made an embarrassing mistake by listing the holdfasts I had made by Phil Koontz (or, intriguingly, possibly made by Phil's partner "Jake the Russian") as made by Peter Ross.  Peter's work has a great reputation, and hence it was in my bookmark file.  When I scanned for "P", his url popped up and it sounded correct in my haste.  This is no excuse; it is merely the explanation.  I do hope that anyone interested in handmade metalworks will visit the sites of both of these smiths and see what they can do for you.

I had Peter's site marked because I would love to take one of his classes about making metal name stamps at The Woodwright's School one of these days.

Deep apologies to both men for the confusion.  I owe you both a few days of floor sweeping.


A Trip to Portland

This weekend I took part in a class at the Northwest Woodworking Studio in Portland, Oregon. The title was Hand Planes, Spokeshaves, and Scrapers, and that is a fairly accurate description of the content.


I'd been looking forward to this workshop for several weeks since becoming aware of it. In the end, I am glad I attended but have lots of mixed feelings about it. It is difficult to seperate out what was just not right for me, as an individual, from what was actually ill-conceived about it. I do not wish to really go into it publicly, since perhaps it was just not the right course for me.  I do believe the description was misleading, and have addressed this with the school.

In the meantime, I wouldn't hesitate to go back if a course were appealing.  There is a class on building a brass hand plane I would love to take.  I would offer caution, though, to anyone thinking that this hand plane course has the information needed to get going in traditional hand tool work.

Perhaps I will follow up on this soon (if/when I hear back from the school on my concerns) but in the meantime, I do encourage taking classes whenever and wherever possible, and sharing the experiences with other woodworkers, good or bad as they might be.

Wednesday, November 23, 2011

Think Artisinal for the Holidays

The holiday shopping season seems to start earlier every year.  As soon as the Halloween candy goes away at 6pm on October 31st, employees are hauling out the Christmas lights and tree stands.  Shopping advertisements get out of control and show no signs of stopping.  I want nothing to do with any of this, and yet I also have a pragmatic "if you can't beat them, join them" mentality.

A "Joiner's Gift List" post is upcoming, and I have vowed to myself not to post it until after Thanksgiving.  However, I want to get this out there as my counter to the lamentable "Black Friday" shopping phenomenon.

Independent artisans are still out there, and this is especially true in the woodworking world.  Some of the very finest tools are not made by large companies with zillion dollar budget, but by people in garages and basements with more pure passion, skill, and experience than any mass-market tool corporation can dream of.

I've been very pleased by a number of tools made by these independent makers and want to share a few of them in case any of you readers know a woodworker in need of something special.

Artisinal toolmakers are keeping old flames of knowledge alive, and when applicable, adding modern technology, materials, and twists.  They provide customer service not possible for a large company.  In many cases, if you have a unique need, they are happy to fulfil it.  This is also a gift that gives more than once; you are not only giving a beautiful, comfortable, and effective tool, but you are allowing the toolmaker to continue their existence doing what they love.  There is an added somewhat subversive joy in withholding your gift-giving funds from large companies who use much of your money for parasitical services, fees, marketing, expense accounts, international travel, executive perks, retirement plans, and all the other drains which have nothing to do with the products at hand.

If you are reading this blog, you probably already understand the value of domestic [note that in the case of heirloom tools, importing from an artisan is wholly worth considering] , old-fashioned tools designed to outlive the user.  If not, please consider this and if you need a mental jumpstart on the topic, do yourself a favor and read Chris Schwarz's The Anarchist's Tool Chest.

Without further ado, these are some of the items which have worked very well for me so far:

1. Wenzloff and Sons Saws

I'm not going to suggest specific saws, since this depends on the user and the type of work.  I have a rip panel saw and a tenon saw from Mike and I love them both.  Mike (and his sons) essentially rebuild replicas of the finest saws ever made, but using modern tools and techniques to bring them into the 21st century.  Its a real pleasure to talk to Mike on the phone about your needs, and have all of his experience at your disposal in suggesting a tool.  They are not cheap, and yet, given the quality and the lifespan, they are not expensive either.  Here's my rip saw, based on a design by Harvey Peace:


2. Phil Koontz Holdfasts
Pictured above as well as below, these are real works of art.  I use a pair of them in conjunction with the excellent Gramercy holdfasts, but I always take a little more pleasure in using these.  I cannot say they are a workshop necessity, since the more affordable Gramercy holdfasts work very very well, but their elegance is frankly a real mood-lifter in the shop.  The sharp tips of the leaf shape lend such a precise and nimble gripping force that it I honestly look forward to excuses to use it.  To me this is the sign of a superb tool. Again, the joy of supporting an artisinal blacksmith like Phil is worth it, but that goes double when the tool is of such high quality.  My honest suggestion for a typical handtool worker wanting to do it right would be to get 2 pairs from Gramercy and 1 pair from Phil.

3. Blue Spruce Toolworks

I don't have many tools from David Jeske, but I am already in love with the 2 that I do use. Made in his home shop near Portland, Oregon, these are wonderful to look at, hold, and use.  I have his marking knife: an ultra-glorified X-acto type knife for making reference marks and severing wood fibers with the bonus benefit that tools such as a chisel can register right into the cut. I also have a mallet from him, made of beautiful maple impregnated with resin so that it is strong, light and incredibly well-balanced.  I have not used his chisels or other tools but I believe it is safe to assume that they are equally well thought out.  The marking knife is in the center here, and the mallet is near the top.


4. Glen Drake Tite-Mark gauge

Shown at left in the photo above, this is a very pleasant to use cutting gauge. Any woodworker would love to have one of these, and if they already have one, having more is always better.  If you are not a woodworker and can't understand why you would want more than one marking gauge: these are very, very precise instruments.  It can take a few moments to really dial it into the correct position (dial is literal in this case, with the knurled fine-adjustment section).  Once you do, you don't want to do it again.  A given project might have 5 or 6 crucial measurements, and it makes a lot of sense to set the gauge once, and leave it for the whole project.  Its very, very, very nice to have multiple gauges, marked with masking tape, for each tenon, board width, groove, etc in the project.  3 or 5 of these admittedly pricy tools should make any woodworker squirm with the glee that only comes when total satisfaction is reached.

5. Ron Hock plane irons

Perhaps the finest aftermarket plane irons available for your vintage tools.  Not only are the blades nice and thick, but his chipbreakers make a huge difference in the stability of your tool.  A very affordable upgrade for your garage sale find.  Ron is fast to communicate, and is able to meet special needs.  Highly recommended.

6. Various services

I have had a very positive experience using Bob Rozaieski's saw sharpening  service.  Fast, affordable, and very effective.  I know there are many other sharpeners out there, and I will probably try them until I have my own abilities locked down, but in the meantime Bob is the one I can say I have used and enjoyed.

Joshua Clark's Hyperkitten Tool Shop is amazing.  I almost hesitate to mention it because I do not want competition from other customers, but the kitten is out of the bag, as they say, so do yourself a favor and tell Josh what you are seeking and you'll quickly see for yourself that he can find it and you will be impressed with his discerning service.

Even if you don't know a woodworker in need of gifts, I hope that this post serves to inspire you to consider doing business with individual artisans and small firms whenever possible.  Without getting too philosophical, I believe these types of businesses are the future just as much as they are our past. Top-heavy corporations with homogenous products will never be able to comfortably suit a craftsperson's needs.  Just as its almost impossible for me to find shoes which truly fit due to my mutant wide feet, I am much happier with the wares from these small makers than I am with my mass-produced tools.  Its reassuring to know that your money is going right to the makers, with very little middlemen, ridiculous trucking and warehousing, or salaries of people who have no role in the actual toolmaking inflating the prices.

I personally encourage you to turn Black Friday into Buy Nothing Day, but come Saturday, why not look up some of these small tool makers and see what they can do for you and those you love?

Plane Tote

This weekend I am attending a workshop at Gary Rogowski's Northwest Woodworking Studio in Portland.  The topic is Hand Planes, Scrapers, and Spokeshaves, and we are encouraged to bring our own tools, especially if we have questions about them which I certainly do.

I'm bringing the main 3 bench planes: a jack/fore (vintage Stanley #5), a jointer/try (vintage Stanley #7) and a smoother (a brand new Lie-Nielsen #3).  The jack has given me no problems, I feel like I understand it pretty well.  I've added a Hock iron to it, ground at a 10" radius which works beautifully for taking deep scoops out of the wood, and when I put the stock iron back into it, I can almost dial it in to a smoothing-like role.  However, I also bought a Hock iron for the jointer plane, and I cannot get it to fit right.  I believe the mouth needs to be filed open, but I need someone who knows more to confirm this before I destroy the body.  My smoother works very well, usually, but I am still getting tracks (lines on the edge of the planed area) fairly often, no matter how I adjust it.  I'm hopeful that the workshop will address these concerns and ensure that my tools are tuned and ready to go.

I've also had trouble getting my cabinet scraper sharpened properly, even though I have read perhaps a dozen "how tos" on the subject and they all make perfect sense.

At any rate, since I do have questions about my own tools, and not just general questions about how to use these tools, I am bringing them with me.  As I thought about how to transport them, I couldn't really come up with a good answer, so I had to make something.

This tote is brutally simple - based in large part on the packing boxes.  It was made in half a day.  I would have liked to have spent more time, but I just did not have it.  It will serve its purpose (to hold my planes for the car trip and allow them all to be safely carried with one hand), though I still intend to add a lid to it.  It might even be a semi-permanent home for them until I get my toolchest completed.  It has room for the 3 bench planes, the card scarper, burnisher, spare plane irons, block of plane wax, and a "woobie travel tube", which is a spice jar doused with jajoba oil and a saturated synthetic towel, used to wipe down and oil the tools.  Its nailed together - no fancy dovetails, and the handle was quickly shaped with a bowsaw and a couple rasps.  It will not win any beauty pageants, but I feel much better about sticking my planes in the back of the car in this tote than I did with any of my other ideas (cardboard box, rolled up towels, etc).


This was a fun project, using a couple lessons learned in the packing box, such as not bothering to carefully dimension the end pieces, but roughing them and then trimming in place.  I actually measured nothing - I set the planes down on the floor piece, and cut accordingly.  All other pieces were sized to each other.  This is a fast and enjoyable way to work!  The proportions therefore do not follow any pre-approved or golden ratio, but this is a purely utilitarian object and not furniture.  I am already fond of it though, perhaps because it fills a huge need not only raised by the workshop, but the fact that my current workbench is not in the shop, but in an adjacent room and I do have to carry the planes back and forth frequently.  I've been wanting to make one of Jim Tolpin's totes for a while, and still plan to, but this is already a welcome addition to the shop.

And before the flames about storing planes sole-down: I retract the irons before setting them in like this, and they are also up on tiny shims for good measure.

Sunday, November 20, 2011

Bracing for Winter

Family sickness, visiting guests from afar, and an upcoming trip to honor a recently departed friend have slowed down work in the shop (and by extension this journal).  However, much is happening behind the scenes and there is much more to come.  With the completion and shipping of the packing boxes, I am now gearing up for "dovetail month" (an exercise to get my joinery skills sharpened before diving into the schoolboxes).  Additionally, this weekend I will be in Portland, OR at the Northwest School of Woodworking for a workshop on hand planes, card scrapers, and spokeshaves.  This is perfect timing, as I have some more or less advanced questions about 2 of my planes, and I have had a very hard time getting my card scraper to co-operate despite lots of book-learning on the topic.

I will also be starting to work on my new workbench soon, and updates of its progress will show up here interlaced with the schoolboxes and other Joiner &c posts.

It was nice to have my virtual mentor Chris Schwarz mention my experiment on his blog, which is one of my favorites.  For those who haven't read the book, "Thomas" is the name of the apprentice who's work I am using to guide my education.  Somewhat interestingly, "Thomas" was my father's middle name, and "Robert" is Thomas's mentor in the book.

Holidays are upcoming, so work and posts will be sporadic, but I am betting that 2012 is going to be a great year for traditional woodworking nationwide as well as my own experiment.  More and more people are (ahem) crawling out of the woodwork to express interest in these arts, and I find it timely and encouraging.

I have a very special project in the works but cannot say more just yet.

Until then, I remain your faithful apprentice.


Monday, November 14, 2011

Three Packing Boxes Completed!

At long last, all three Packing Boxes are complete.  Full disclosure: the third box still need a couple more coats of oil.

This has been a truly wonderful project, and I have to agree with co-author Chris Schwarz that it should not be skipped no matter how simple it seems.  There are many lessons hidden in this simple-seeming project.  Unless one is already a hand-tool expert, this is just a partial list of the skills to be learned:

- Edge jointing boards
- Chamfering by hand
- Precision marking and measuring
- Planing to thickness
- Squaring edges without a shooting board
- Clinching nails
- Trimming end-grain
- Use of battens in place of glue
- Division of space without measuring

and much more!

I feel like I would need to make 5 or 10 to feel like this box is mastered, but making 3 of them has certainly boosted my skills to the level where I am comfortable plunging onward.  I was hoping to have enough scrap to create one for myself (these are all going to new homes) but alas...  However, I will be making a similar box soon using a myriad of materials.  More on that as it happens.  This box looks brutally rustic, but it actually is quite pleasant to behold.  Very smooth, very solid feeling, and the geometry is satisfying.  It would look great to have stacks of them full of tools, nails, etc in any shop.  While I am moving on to other projects, I doubt these will be the last I will make.  Its a great design.


Here's how they came out:


and packed as they might be for Mr. Green:


I do have some lingering questions, although I have ended up answering most of them myself already.  What remains:

1) What are the appropriate nails for the cross-strengtheners?  I had a lot of trouble with clinching 4d fine finish nails.  I believe brads would be adequate, and that I use a LOT of overkill.

1a) Given the difficulty I had with the clinching (and sinking the clinched portion), isn't the interior a little too rough for books?  I would put a lining panel into the box if I were to put delicate items in there.  This is most likely because I used poplar instead of pine as specified.  I could not sink the clinched portion of the nails completely no matter how much force I used.

2) In the text, the overhang of the bottom and lid which are trimmed to fit is never specified.  How much is too much?  I played with various sizes, and settled on 1/8" on all sides.  This is no problem for the long grain, but is quite a bit for the end grain, which is a bit of a chore to trim without spelching (even with a preventative bevel cut).

3) Is use of alcohol or other moistening agent to trim edge grain traditional?  I do not recall it in the text.  Perhaps men were just made of sterner stuff back then, but trimming end grain even with a razor-sharp plane is no joke.  The block plane made this easiest, but the added mass of the fore plane was most effective.  Even with a relieving bevel, blow-out (spelching) was difficult to avoid.

4) How should the carcass be held while initially nailing it?  This is glossed over in the text.  I used a few types of clamping and jerry-rigging.  All worked, none were wholly satisfying.  This is perhaps so simple that it is taken for granted, but I found working with a 3/4 complete carcass to be rather awkward.

5) This is really only supposed to take 5 hours?  Maybe I will get there some day, or maybe I took too much time to enjoy myself.  I did not track the time, but it was a lot more than 5 hours per box.  At the same time, I added extra steps such as gluing up the panels and planing them into shape, as well as adding much more smoothing inside and out than the text calls for.  I felt this was important to meet modern standards of quality, and to bring the boxes to something close to "furniture grade".  I am going to guess that even 10 hours per box is a conservative estimate.  This obviously makes a rustic box like this unaffordable for its intended use and rough appearance, but this is one of the rubs of hand-made woodcraft.  Even working at minimum wage, a box like this would be $60 or so.  I suspect you could buy a similar crate made in Asia at a import shop for $15.  It will be a long time before our economy adjusts to this and makes locally-made items more appealing.


Saturday, November 12, 2011

Trying the Try Plane and Closing up Box #3

After a troublesome week of sickness in the family and other chaos, some shop time was secured once again.  While the sharpening stones soaked, I started to clean up an old try plane.  It is in overall decent shape, but was covered with a layer of grime and paint.  I did not want to aggressively scrub it (especially the sole) but a lot of work with mineral spirits and Simple Green removed a huge percentage of the offending material.  Here's how it was to start:


And after a bit of elbow grease:


Much nicer, wouldn't you say?  The sole was actually fairly clean so I just gave it a wipe with mineral spirits, and then waxed the whole thing.  Of course I also flattened and sharpened the iron.  This plane works very well!  It will be interesting to give it a try over the course of a project.  It is possible that it is a bit easier to push on edges than the metal plane is, but it also seemed a little more difficult to plane face grain with it.  It does take a different technique, so after some practice it will be more useful to compare.

There is no maker's mark on the body of the plane that I can find.  The iron, however, had one:


Looks like F, K or R Parker & Sons.  Quick websearches don't reveal anything.  I'll do a little hunting.

I then honed my jack and smoothing plane.  The smoothing plane has been leaving track marks, despite having filed the corners of the iron.  I did a little more filing and fine-tuning of the blade projection.  I -think- its improved, but time will tell.  I am really looking forward to my plane workshop at the end of this month, where I can get some expert feedback on the condition of my tools.

I ripped the cross-strengtheners for the lid of the final packing box, chamfered their sides, and nailed them onto the lid.


Those nails then needed clinching, which has become my least-favorite part of this box's construction.  I believe I am using nails that are too thick; I should be using brads instead of finish nails.  On paper, the clinching operation looks like a lot of fun, but it is not.  This could also have something to do with my choice of relatively hard wood (poplar) since Eastern White Pine was not available locally.

With the boards smoothed and the battens clinched, the lid is almost complete.  It still needs final trimming, and after a few coats of oil, it will be completed and finished!


I have a few lingering questions which I will try to have answered for a post-mortem post on The Packing Box.  I am excited for the next phase: The Schoolbox, which will feature tons of dovetail joints, chisel work, and installing hardware like locks and hinges.


Wednesday, November 9, 2011

Trying the Wooden Plow

I kindof love the spelling "plough" for a plow plane, but its a bit much even for me.

Anyway, yesterday I was able to borrow this rig from a neighbor:


I asked permission to clean, tune and try it for a while.  With his blessing, today I got it looking a little better and operating rather smoothly:


I really should have taken a better "before" photo showing the condition of the metal.  It was solid, with no pitting, but totally covered in a thin layer of rust.  You can get a slight sense by looking at the brass screw on the top of the first photo.

After cleaning it and sharpening the iron,  I tested it on what I thought would be a difficult material, some curly maple.  It worked astonishingly well!  I am having trouble getting the backmost part of the cut (where only the toe of the plane is on the board) as deep as the rest of the cut, even tilting the plane a bit.  I am sure there are a whole host of techniques to learn, but this thing is great.


I hope to find one of my own someday.  In the meantime, I do have a metal one which is what I will use on the bulk of my projects.  This has been a ton of fun, though.  I really enjoy cleaning old tools and seeing what lies underneath the nasty exterior layers.

Tuesday, November 8, 2011

A New Workbench and Picks from a Chest of Wonders

Today I bought a new workbench, an 8' Roubo. Here it is in the shop:


As you can see, there is "some assembly required".  It is currently a pile of Douglas Fir 2x10 boards, needing to be dried, crosscut, ripped, planed, glued, mortised, and drawbored before it will resemble a workbench.  The wood needs to acclimate in the shop for a few months, and I want the bench yesterday, so it is good to at least be making some motion towards it.  On top of the pile are a couple alder boards milled by a neighbor using a giant gas-powered bandsaw.  Really looking forward to using wood from my road!

Hopefully, it will look a bit like this someday:


I still need to finish the lid for packing box #3, but on my way home from the lumberyard, I stopped at the home of another local woodworker for a visit and to check out a toolchest he had recently scored.  He wasn't sure what many of the items inside were, and I was delighted to share with him what I knew.  It was full of great stuff, I was quite envious.  I was able to borrow for a while:

A Stanley #92 Cabinetmaker's Rabbet Plane (a hint ugly, but in good working condition)


A plow plane which seems quite servicable, it was even sharp enough to cut some test grooves:


And a jointer plane:


I don't want to derail my studies with the metal jointer plane I have, but have been curious to compare a wooden bodied plane with mine.  This one seems in very good shape despite the paint splatters.  The iron is very sharp, though I will give it a honing anyway.  Whoever had these tools took very good care of them - almost all the edges were sharp enough to use, or nearly so.  The chest itself was interesting as well.  Hopefully some day I will go back and photograph it and some of its more interesting contents.  I dream of finding my own chest like this someday, as I guess all woodworkers do.  Amazing how these things are just given away by those who inherit them and don't know what to do with them or what they are.  This one was received for free by someone who didn't want it.


Thursday, November 3, 2011

When Fairs Were Frequent


Shop-keeping, merely as shop-keeping, is injurious to any community. What are the shop and the shop-keeper for? To receive and distribute the produce of the land. There are other articles, certainly; but the main part is the produce of the land. The shop must be paid for; the shop-keeper must be kept. When fairs were frequent, shops were not needed. A manufacturer of shoes, of stockings, of hats; of almost anything that man wants, could manufacture at home in an obscure hamlet, with cheap house-rent, good air, and plenty of room. He need pay no heavy rent for shop; and no disadvantages from confined situation; and then, by attending three or four or five or six fairs in a year, he sold the work of his hands, unloaded with a heavy expense attending the keeping of a shop.


Quoted from: Rural Rides, William Cobbett, 1830.

Wednesday, November 2, 2011

Rewards for Friends

Many of you reading are already aware that this project was in large part financed by a Kickstarter.com campaign.  If not, now you do!  The toolrolls and patches screened for the project just arrived and I am quite pleased by them.  After they are sent out to sponsors, there may be some extras available if anyone is interested.  In the meantime, please enjoy the fine work by our friends at atxdiy.com


And the patches: