Friday, April 27, 2012

[interview] Bob Rozaieski of Logan Cabinet Shop


Q&A with Some of My Woodworking Mentors

(If you want to know more about this series, please see the first installment)

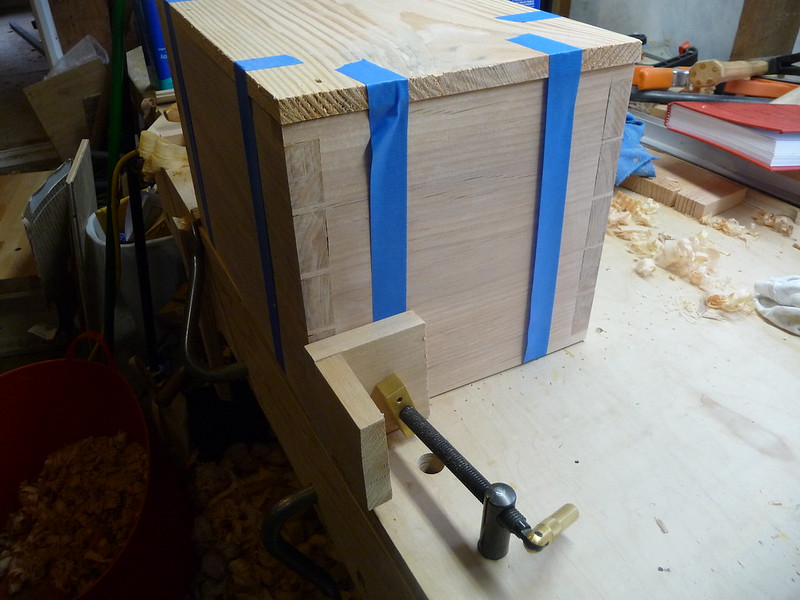
I've always liked the home-spun videos at logancabinetshoppe.com. The host of the video series is Bob Rozaieski, a woodworking hobbyist who puts out these tutorials from his home workshop in New Jersey. I believe it was his workbench video that I first discovered, and he does have an interesting design. I started poking around his site more, and really became fond of his simple, humble, and almost disturbingly placid methods of explaining his work. Bob is also great at showing how to get started on a shoestring, combining affordable antiques with shop-made tools and also suggests how to make do with hardware store tools in a pinch. His videos are a rich collection of free info for someone considering getting into hand tools, but also have some very useful tips for those who are already immersed in the world. 


Bob also offers a saw-sharpening service, which I took advantage of when I found a Disston D-8 (with a bit of a kink and very dull teeth) for $1 at a garage sale. I sent the saw to Bob and he sent me back a very capable tool which I have greatly enjoyed using. 


Without further ado, here we have The Joiner's Apprentice (TJA) asking a few questions of Bob Rozaieski (BR):

TJA: How long have you been woodworking, and what changes have you seen in the field since you started?

BR: I've been at it since high school; a little over 20 years I guess. I've been doing it by hand only for almost 12 years now I guess. I'd have to say that the biggest changes that I've seen in the 20 years has been the amount of information available outside the mainstream. What I mean is the amount of historical and traditional craft information that has become available only in the last 10 years or so. When I was getting started, anything you read about woodworking was heavily machine and power tool oriented. Now, things seem to be going the other way, at least as far as a lot of hobbyists are concerned. It's encouraging to see so many new folks come into the craft and want to learn the traditional ways.

TJA: What is your favorite style to work in? what styles do you just not understand or have no interest in?

BR: I like late 17th to early 19th century furniture. I mostly prefer the simpler forms that aren't overly carved or decorated. Some ornamental carving is nice, but over the top pieces with tons of insane carving, like a lot of the heavily carved rococo pieces that came out of Philadelphia just aren't my style. I tend to work more in these simpler styles. I think the designs and pieces, especially in their simpler forms, often referred to as "country" or "plain & neat" are timeless and can fit into just about any decor and period. I don't like most of the art deco stuff. I've never been all that trendy or contemporary and that stuff just doesn't appeal to me.

TJA: What tools do you always look forward to using and/or what operations do you most look forward to, time after time?

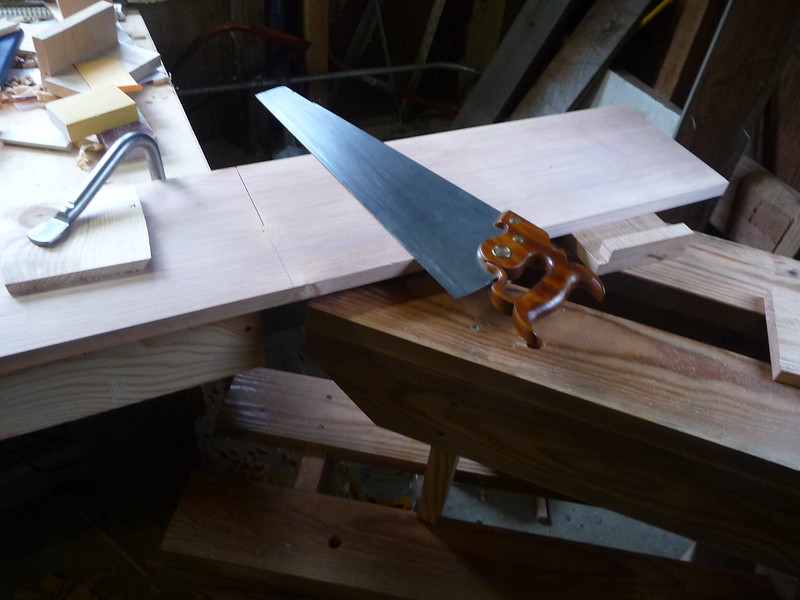
BR: I wouldn't say there's any one tool I always look forward to using. I think it is just more the sharpest tool and the one most suited to the job at hand. I'm probably most proud of my home made hand saws, but there's also something very satisfying about using a well tuned molding plane. I think making moldings by hand with molding planes has to be one of the most satisfying parts of any project for me.

TJA: How much time do you actually get in your shop in a typical week?

BR: This really depends on the week and what time of the year it is. In the summer, it's always a lot less for me. Once fishing and fair weather season is in full swing, my family and I really would rather be out of doors doing something than cooped up inside. So during the nicer months, I spend a lot less time in the shop. In the colder months I typically spend a couple of hours a day in the shop maybe 4 to 5 days a week.  The cooler months from October to about April are when I get most of my woodworking for the year done.

TJA: Have you had any memorable masters or mentors help you gain the
skills you currently possess? How did you meet them?

BR: I'm pretty much self taught. No one in my family was ever a woodworker. It's just something I decided I was interested in and wanted to learn how to do. There's a lot of things I d that are like that. Fly fishing is another. I taught myself. Roy Underhill's show and books have inspired me a lot, but I only found them 10 or s years ago. Where I grew up, the local PBS stations never carried his show, so I was in the dark for a long time.

TJA: You use almost only hand tools (or are you actually wholly hand-tool in your work?), and mostly antique or shop-made tools at that. How did you get started down this road? Do you ever long for a planer, drill press, or bandsaw?

BR: At this point in my journey, I am 100% hand tools when it comes to my woodworking (home improvement stuff is different). I started off as any other woodworker might. I had a table saw, bandsaw, jointer, planer, routers, etc. at one point. I just never really enjoyed using them that much. About 10 years ago, when I started using hand tools, I found I really enjoyed it. So I kept studying them and using them more and more. At one point, I got interested in 18th century American period furniture (I still am of course). To me it just seemed logical that if you were going to reproduce 18th century work, you should use 18th century methods to get the most authentic appearance in the finished piece. Moldings made on a router or shaper just don't look like the same moldings made with planes. Ditto for period surfaces. So I went hand tool only for my period work. Eventually, I found that I preferred the hand tools for pretty much everything, regardless of whether it was period work or not. So I sold all my woodworking power tools and machines. Honestly, now that all of those machines are gone, I don't miss any of them. Maybe a band saw from time to time when I have to rip some really thick stuff, but really I'm doing just fine without it. I can work in far less space, I don't have a thick layer of dust covering everything, and I can enjoy the company of my wife and kids in the shop with me. It's very peaceful and enjoyable work actually.

TJA: Your shop is pleasantly efficient (OK, small). Do you dream of more space? Any real plans to expand or have you hit your stride in the current location?

BR: I do dream of a slightly bigger shop, but don't we all? Honestly, I'm comfortable in my just under 100 square foot space, but I also would like to expand one day. My dream shop is a 15' x 20' detached building modeled to look like an 18th century shop. I have so much inspiration from the small shops and buildings at Colonial Williamsburg that one day I'd like to build a detached shop that resembles one of those buildings. I'd like it to be just big enough to one day perhaps be able to run small traditional woodworking for 2-3 people at a time. That's a long time from now though.

TJA: You've hinted that your day job does not have much to do with woodworking, but what else you enjoy outside of woodworking and time with your family?

BR: No, my day job has absolutely nothing to do with woodworking. I have a degree in chemistry and do regulatory work for a large pharmaceutical company. It pays the bills. That's about it. My family is my life outside of woodworking and my day job. We do an awful lot together. I coach my girls' soccer teams, we all like to fish and camp, we take lots of trips to the beach, museums, etc. My life pretty much revolves around my girls. The way I see it, they're only going to want to hang out with Mom & Dad for so long before we're not cool anymore, so I need to soak up as much of them as I can while I'm still more than just a bank and a ride to the mall.

TJA: What is happening in the hand tool world (toolmakers, blogs, books, projects) that you think need more press?

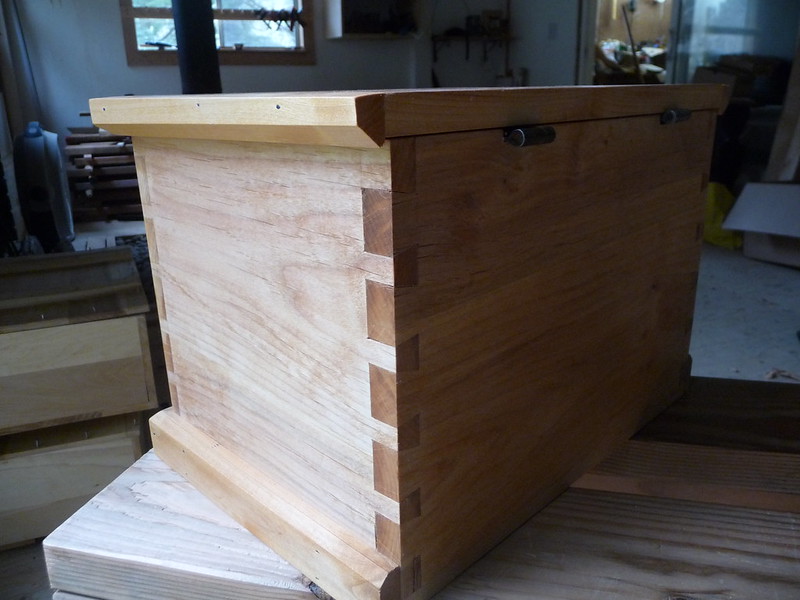
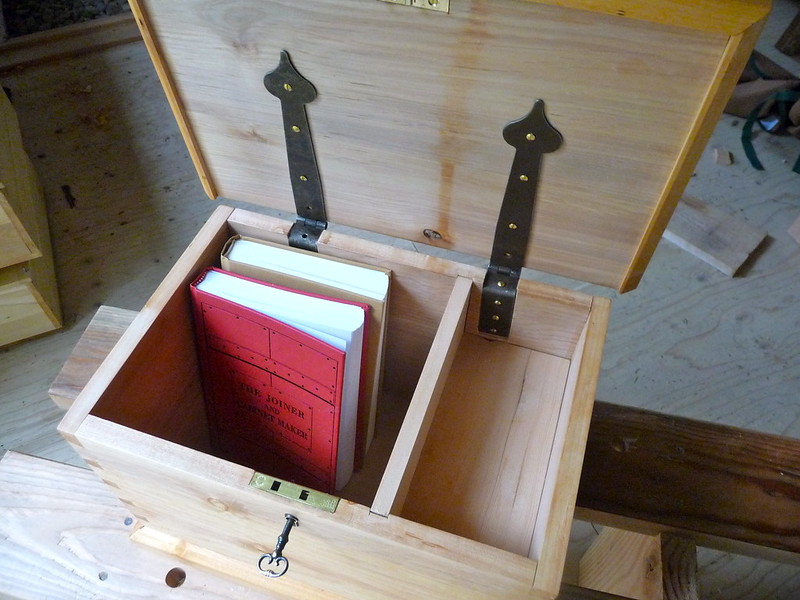
BR: I think we need to see more project based learning for folks interested in traditional methods. There have been so many books and videos and magazine articles written over the years pertaining to tuning up hand tools and how to shop for hand tools and how to sharpen hand tools and how to cut dovetails in scrap lumber and the list goes on and on. What I haven't really seen a lot of though are project based material dedicated to traditional methods. Folks interested in working by hand are almost always faced with taking a project book or magazine article, weeding through all of the machine and power tool based methods, and trying to adapt the construction or methods to hand tools. While this is fine for those of us who have the experience and know how to do so, folks that are new to the craft and traditional woodworking have a very hard time figuring out how to adapt. The Joiner & Cabinet Maker is a great introductory book, but very limited in the scope of construction techniques, different joinery and tools. It's excellent for what it was intended for, to get people interested in the craft. In my opinion, it's not comprehensive enough for someone really wanting to go farther than the basics though. Outside of that book, there's very little in print in the way of hand tool project based material. There's some, but not a lot, and not a lot that is well known and publicized. Graham Blackburn has a great book from the 70s or 80s (I forget at the moment exactly when it was written), but in my opinion, it's pretty out dated.  We've learned so much about hand tool techniques and traditional woodworking since it was published that I think it could really be improved upon in today's environment. It's a project that I really would like to one day take on, but it's not going to be something I'll get to for awhile yet.

TJA: Have you been able to get your children interested in becoming woodworkers?

BR: Absolutely. In fact, I didn't even have to try. I just let them come in the shop with me whenever they want. I think that is one of the under-appreciated aspects of working in a traditional manner. I don't have to be watching them like a hawk around the machinery. I don't have to have eye protection and ear protection and respiratory protection for them. The hand tool shop is inviting for them, not loud and dirty. The wood and the tools and the work all sell themselves. We just need to make them available. Children are naturally curious and instinctively creative. My shop is a place where they can come in and be creative. They can make what they want, on their terms. Sure there are rules, and they can't use any tool unsupervised, but a lot of times they don't need to be using the tools at all. They just want to be in there with me. My 4 year old will often come in and play with her Barbies in the shop while I'm sharpening saws or working on some small part for a project. My girls just like to be in there. I didn't have to encourage the craft on them. Their natural curiosity and creativity was enough to get them interested. The traditional tools and methods just allowed it to happen. They'll learn at their own pace, and when they are ready to take it seriously, the tools and the shop and the wood will be ready.

TJA: Thanks, Bob!

Saturday, April 21, 2012

A Meditation in Motion


My friend Ben Discoe sends this comment:


For many years, my father taught both Zen Buddhism and Japanese carpentry, to the same students, using the same method: having them diligently sharpen their plane blades, slowly, by hand, then diligently planing wood by hand, for long hours, as a meditation in motion.


The work speaks for itself. Just look at the above joint, and imagine the mental discipline and concentration required to perfect this type of work. Read more about it in Paul Discoe's book:


Zen Architecture: The Building Process as Practice


Thursday, April 19, 2012

A Better Way to Label

Recently I mentioned making a mistake in marking my boards and transferring dovetail patterns as a result. A helpful reader has sent me a great idea for marking box or carcase components using "carpenter's triangles". I had already been using this type of mark when gluing up larger panels from component boards, but the clever part here is something I was not clever enough to think of: marking the box components on the top edge instead of on the faces. The top of the box is generally planed once assembly is complete, so the marks will come off. If this is a concern, you could always do this same thing on the bottom. This is perhaps not news to any of you experienced joiners, but I sure appreciate knowing about it. The reader says he learned this from Chris Schwarz.

The images tell the story better than I could, so here they are:


Tuesday, April 17, 2012

[Schoolbox 2] Unsung Heroes of Workholding

As Roy Underhill explains, most of the things we do to wood to change it, (shorten, shape, split, thin) use a wedge or edge. This can be a saw, a plane, a chisel, a spokeshave, sandpaper, an axe, or any of a hundred other tools. In almost every case, though, there is an oft-neglected helper... the workholding appliances. A simple vise is probably what comes to mind for those who took shop class or have some casual experience with a birdhouse or two, but there are almost as many ways of holding work as there are ways to work wood.

Today, the schoolbox needed a bottom.

The board chosen was rough-milled Douglas Fir from my road, with a tiny "live edge" at that. Since the bottom is purely functional, not as aesthetically important, but does need to be strong, I figured it would be better to use a little fir than plane down alder into such a thin board. I was able to use one solid piece, rather than jointing and gluing a larger panel, and I also made the decision not to orient it as Thomas did, "for strength" but ran the grain lengthwise, as modern wisdom would have it.

Here's the bottom board, with the live edge of bark still attached and visible:


I've been going back and forth between sawing on the sawbenches and just doing it off the edge of my bench. I am not sure which is "right" and so I am going by results. The bench is too high for almost all operations (it was not originally a woodworking bench) but I do like the standing height for precision saw work more than the sawbench height, which I feel is better for rough operations. I've been flirting lately with using my fine crosscut panel saw on the bench as much as my backsaw. Sinful in some ways, but it is working very well. I feel I am almost as accurate with it as I am with the carcase saw, but there is one major problem. With a benchhook, the work is wholly supported underneath and there is almost no danger of the board floppping over and breaking off as the cut is complete. To address this, I have pulled my sawbenches up to act as cutoff supports, but in cases of just trimming a tiny bit off a light board, I have had good luck just going carefully and orienting the saw to cut the front edge before the cut is complete, so that if any "ripping" happens, it is inside the cut rather than on the edge.

Here's the ripping setup I used for a thin piece of Douglas Fir (the partition):


This might be very "wrong" in any number of ways, but it did work just fine. The board is held in place with a holdfast (the golden leaf thing, with a pad of scrap protecting the workpiece). Like the fine crosscut saw, this rip saw is very precise when enough care is taken. Hardly any shooting needed to happen after the cut. I am pretty pleased with this setup, given my non-ideal workbench!

Once the board was cut to nearly the right size, it was time to nail it on. I've found it is almost always best to secure a piece before drilling, and in the case of something like this bottom, it is best to hold it in place, too. Turns out that a bit of tape is just enough to keep it from pulling up as the drill is removed, and so I use it. Not period correct, but Thomas does not say how he pulls this off, he merely nails the bottom on. Clamps would be better, I guess, but this painters tape has fit the bill for me.


You can also see, in that picture, the Wonderdog pressing sideways on the box (against the planing stop, not in view). This little jammy, which is essentially a benchdog with a screw-vise built in, has saved me lots of money and cost me only a bit of time. It is not really a replacement for an end vise or a wagon vise, but it has worked for me 100% of the time, because I have neither of those. It is a little annoying at times, but it does work and is utterly flexible. I have not attached a wooden jaw to it yet since I am not sure what the dimensions should be, and so I just put a piece of scrap between it and the work. In the above, you can see that I used a sample piece from "dovetail month" to pad the work. This little piece of hardware is something I would certainly suggest to someone on a budget. It sounds expensive but compared to the hardware it is apparently replacing, its a steal. It works on the vertical too, if your apron has holes, like mine does).

Once the bottom was nailed on, it needed to be trimmed to size. This is easy on the long grain, but for the edge grain, some serious planing had to happen, so the box needed to be held securely in place. Slab of tree to the rescue!


A holdfast securing a board (in this case a pretty raw one) is plenty to hold the box in place. I should say though, that I have a "vertical" planing stop screwed to my bench. I am sure I am not the inventor of this appliance, but I am not sure where I got the idea other than it seemed reasonable. It works very well, and is not often in the way. Its just a thin strip of wood screwed to the apron, removable in 5 minutes if need be, but there has been no need thus far.

The box shell is slipped over this "diving board" thusly:


and is then clamped down with a holdfast (on another pad of scrap).

The box then is immobilized, and planing is simple enough. I still use denatured alcohol to make the end-grain softer. With the Douglas Fir this is even more important, as it really likes to flake out in big hunks.

This time, I did not go by "the book" but installed the partition and lock before doing the moulding. I really cannot think of any advantage to doing the moulding first, and it does create a disadvantage: the box is no longer "square" so manipulating it is a bit of a hassle. The partition was made from the same Doug Fir as the bottom, and went in simply. The lock was also simple, much faster than the first time around, since no figuring out needed to happen, it is just a simple complicated mortise.

I again use the birdcage awl to make the hole for the lock's pin. Not sure if I have discussed it before and so I will again. It is a really neat tool, really just a sharp square with a pointed tip:


By spinning those sharp edges around, a hole is rapidly ground out of the wood. Here's what the tool looks like if it isn't clear:


This is different from a scratching awl, which is shaped like an ice-pick, and is probably what comes to mind when most civilians think of an awl. Likewise, a brad awl was the old standby for making little holes, but almost nobody uses one anymore and I do not have one (although I would like one). A brad awl is more like a sharp flathead screwdriver or spinning chisel, but the birdcage awl is unique in that the arrises or edges of the tool do the work. The square shape becomes round as the tool is twisted back and forth, and all in all this is a very nice way to work, especially in a tight spot like this where a drill would not fit. I am not sure I would say every hand tool woodworker needs a birdcage awl, but it is a really great tool and it is too bad that it has fallen into oblivion as lithium batteries and cheap drill bits have taken over the jobs.

I also spent some time using rasps to create the keyhole shape, which (after knowing what to expect) was remarkably easier than the first time. I made a minor mistake, although it is advantageous to my skills, by choosing escutcheon inserts which require a rather precise hole to fit into. The oval-shaped ones have much more tolerance for concealing ugly holes... And so with the ones I chose, some fancy rasping has to happen. It is really not that bad though, and is almost enjoyable.

At the end of the work day, I had the shell complete, with a bottom, the partition in place, and the lock and escutcheon liner installed. The partition still needs to be planed down and fine-fitted. The lid still needs to be created, and hinges installed, and of course the moulding has to be created and attached. This box has gone much more quickly than the first, though, and I am looking forward to the others.


Monday, April 16, 2012

[Interview] Matt Cianci of thesawblog.com


Q&A with Some of My Woodworking Mentors

(If you want to know more about this series, please see the first installment)

When you search the web for information on traditional hand saws, at some point you are going to discover Matt Cianci: sawsmith and editor of the aptly named site, thesawblog.com. I don't recall how I initially discovered his writing, but it was, I believe, related to figuring out how to safely get the rust-orange layer of crust off my $1 garage sale Disston without ruining the thing. Matt has lots of useful information: detailed (and possibly mystical) insights on the byzantine reckonin' involved in divining optimal rake, fleam and hang angles of tooth and tote. For those who just want to get the most out of their sawing, he explains in simple terms how to boost your odds of success when fondling a hopefully worthwhile saw at the flea market and lots more.

I've long been inspired by Matt's matter-of-fact writing, as well as his intensely narrow focus. I've had a couple questions where he was the one to go to, and he gave me quick and thoughtful replies each time. This prompted me to go to him when I wanted a fine-toothed crosscut panel saw. I wrote to Matt for advice, and happened to mention my "3/4 scale" hands, wondering if he had come across a tote made for the younger apprentice, or perhaps from a time when humans were a little more efficient in their dimensions. Something suitable for a man like myself. Yes, a man with slightly below-average hand size. What he sent was a thing of beauty; a re-purposed old Disston blade cut into a new vision, and with a wonderfully comfortable tote crafted in Osage Orange by Matt himself. It was more than I had asked him for, and it has opened my eyes to how wonderful, and radically diverse, the world of hand saws can be.

My fine crosscut saw, made by Matt Cianci

You can read more of Matt's ideas on saws at his blog, thesawblog.com or at wkfinetools.com.

I am The Joiner's Apprentice (TJA) asking a few questions of Matt Cianci (MC):

TJAHow long have you been woodworking, and what changes have you seen
in the field since you started?


MC: I have been woodworking seriously since I was in college, about 15 years ago. I first started building guitars and then got into furniture making when I bought my first house. I've definitely noticed a big shift to hand tools over the last ten years. Most notably, in the last two years, handsaws seem to have gotten a big following.


TJAWhat is your favorite style to work in? What styles do you just not understand or have no interest in?


MC: I love furniture with simple lines and classic construction. Shaker work has always been my favorite. I think the honesty and simplicity of their work and forms is absolutely perfect. I also appreciate the clean lines and gorgeous use of grain in a lot of contemporary work. I am admittedly a sucker for exposed joinery. I am the kind of person who is completely in love with the character of wood. I like big, beautiful slabs with simple lines and graceful curves. I try to never laminate boards together. If I need a 24 inch wide table top, I find a 24 inch wide slab. If I can only find 20 inch wide, then I change the dimensions of the piece. I don't do a glue up to make it bigger. I think mother nature is the greatest designer, why go against her?

I'm not a big fan of some of complex American styles. Federal period stuff and anything with inlays or veneers is really not my bag. Some of it is amazing in its construction details and the skill required, but I really don't care for its aesthetics. I also don't care for arts and crafts or mission style furniture, mostly because of the dominant use of oak. Oak is a 100% utilitarian wood for me. I would never use it in furniture, yuck! I also find the lines too confined and boxy or angular. The best forms should incorporate some free flowing lines and curves-- it compliments well with the natural lines of wood grain.


TJAWhat tools do you always look forward to using and/or what operations do you most enjoy, time after time?


MC: SPOILER ALERT: I LOVE HANDSAWS. I just love every single time I pick up a handsaw of any kind for any reason. I still get excited when I hear that familiar "crunch" of a well filed saw biting through wood. For that matter, I am completely seduced by all hand tools. I can probably only think of one thing in life more pleasurable than working wood by hand (and modesty prevents me from explicitly mentioning it here). I am really into wooden planes right now. The first time you push a wooden try plane across a board you will pee yourself. I did.

And of course, sharpening saws is the greatest of all. I spend hours every night filing. I still love every minute of it. It never gets old and its ALWAYS fun. I can't believe people pay me to do it!


TJAHow much time do you actually get in your shop in a typical week? Do you even do much woodworking anymore, or are the saws taking up all of your time?

MC: I spend about 20 to 30 hours a week in my shop. I'm working on customers saws five nights a week. On the weekends I always try to spend at least a few hours on Sat or Sun doing my own work. I make a lot of things for my house. I just finished a live edge ash mantle for our living room. The slab came from a friend's ash tree that he cut down from his from yard. I love ash, and this piece is particularly gorgeous-- its a full quarter sawn section from the pith to the bark edge. The heart wood is a beautiful rich brown that changes dramatically to the creamy sap wood. Its got some great curly grain as well.

TJAHave you had any memorable masters or mentors help you gain the skills you currently possess? How did you meet them?


MC: I don't really have any mentors, woodworking has always been a solitary pursuit for me. Books and periodicals have been my only guide thus far. I would say that Adam Cherubini and Roy Underhill have been my greatest guides thus far.


TJAWhich styles of saws do you think are the most underappreciated? 


MC: An excellent question! I could write pages in response. Suffice to say that the most OVER appreciated saw nowadays is the dovetail saw. These small saws were intended for cutting dovetails on thin stock for drawer construction and similar work. I see people cutting carcase joinery with DT saws and it makes me want to pull my hair out (if I had any). No wonder they are frustrated with their DTs!!!! A proper DT saw is the LAST saw anyone needs, not the first. The first saw should be a sash or carcase saw, and a proper English design, not the bastardized versions popularized by Disston, et al. In fact, the only saw most of us really need is one of these. File it with a touch of rake and fleam and it will rip and cross cut with aplomb. Its amazing how much work you can do with one saw. That's really all you need.

As for under appreciated saws, those are clearly the true English forms. Most of the high end boutique makers in the US today are copying late 19th century American saws....these are not nearly as functional and refined as the earlier English forms. I get lots of saws from customers asking me to refile their very expensive, brand new saws because they they can't make them cut, or hate the way they feel. Its tough to fix these saws because the issue with them is their basic form to begin with: the saw plates are too thick, the tote hang is far too parallel with the toothline, and the teeth are the wrong size and shape. You want a great saw? Get one of Mike Wenzloff's Seaton saws. That's as perfect as a new saw can get. Otherwise, find an old English saw and tune it up. You'll fall in love.

TJAHave you considered writing a book on saws?

MC: A book? Not really. I think I'd actually need to have something to add to the conversation. Perhaps in a decade or two.

TJAI bet lots of people would love to read what you have to say about saws. I know I would. There may be nothing new to say, but there are always new ways to organize and present it. Anyway, do you have a "day job" you are willing to confess to?

MC: I do have a day job. Its totally unrelated. I am a vocational counselor for people with psychiatric disabilities.

TJAWhat is happening in the hand tool world (toolmakers, blogs, books, projects) that you think need more press?


MC: Hmmmm... tough question. That guy Rob Campbell is doing some great work. I'd love to see him get more attention.  ;)

TJA: I don't think any of the readers of this are going to find his work all that different than the stuff I already talk about here. There is one more question though, and please be honest - how often do you use power saws?


Haha! Great question. In my own work, never. I don't even own any. I am a hand tool purist; power tools are the devil's work! But when I teach at woodworking schools, I unfortunately have to walk someone through using a band saw or scroll saw to cut out the handle blank for their saw. As soon as I have enough bow saws for everyone in class...those days will be over!

TJAThank you, Matt!

Saturday, April 14, 2012

[Schoolbox2] Glued and Proud


A dirty secret of hand tool methodology is that the "proud" or protruding dovetail pins in the above photo are just fine. They will be planed flush with the tails once the glue has cured. This is the type of knowledge which, when shared,  could literally result in death in the days when guild secrets were taken a bit seriously by modern "information wants to be free" standards. There are even now probably some woodworkers who don't want this type of thing known. When a casual observer looks at a joined box, they don't really think about how it was done, they are just amazed that it all fits together so perfectly. This is not that much different than drywall in a modern home, where the depressions from the screws are taped and "mudded" over, and then blended and sanded flush with the sheetrock, followed by a couple layers of liquid plastic (or "latex paint") which are smeared over it to further conceal the truth. Arthur C. Clark claimed that any sufficiently advanced technology is indistinguishable from magic, and traditional woodworking is certainly no exception to that maxim.

I marked the above dovetails to be exactly as tall as the mating board is thick, and the joint went together very tightly, perhaps my best yet. So why are the pins sticking up? It could be minor inaccuracies in my planing, in my setting of the gauge, in my marking, or that the joint is not quite as tight as it looked/seemed. But this is all a good thing! I will plane those nubs off and the surface will be as smooth as glass. This is so liberating as to be mildly exciting. Its almost as eye-opening as the realization that much measurement can be done away with as well. Make one board as tall as the other, no need to know if its 18 3/64th or 458.1906 mm... just hold them next to each other and plane the taller one down until you get shavings from both boards! A straight edge or a handplane will tell you if two surfaces are flush long before a human eye or hand will, and in almost every case, the human eye and hand are all we care about. I had no idea traditional woodworking would be so compatible with my personality, worldview, and humble abilities.

The 2nd School Box has so far gone together well, despite the oops incident in labeling. This time around was also indeed much faster, and the dovetails are my best yet. Its very gratifying to see the results of practice panning out. Even if the results are exactly the same (aka "as bad") as my previous attempt, its wonderful to be faster, more at ease, and have more fun while doing it. For my first dovetails during "dovetail month", I was tense and unsure on nearly every step of the process. After about 5, I no longer had  to consult notes to make sure what the next step was, it was just a question of doing it properly. Now, I know the steps inside and out, but start to question the very subtle nuances: should the saw be moving a little faster or slower? Should the chisel be skewed a bit? Does the music playing make a difference?

I should note that sharpening all my chisels before this round of dovetailing was a good move (how can it ever not be?). I need to do it more often, since the transition from very sharp to passably sharp is a slow and subtle ramp, and it is one best avoided altogether. I am redoubling my efforts to never dip below very sharp, and this round of joining has indicated this is a good policy. I was able to chop to the baseline with almost no tearing at all, and although this surface is never seen, that leaves me with a good feeling.

Friday, April 13, 2012

[Interview] Joel Moskowitz of TFWW and Gramercy Tools


Introducing a New Series: Q&A with Some of My Woodworking Mentors

A core element of my entire meta-project here (not just the blog, but why I am doing it and what I am doing with it) involves the fact that we have no (formal) apprenticeship system for woodworkers in America, and this fact distresses me. An overall goal of my work here is to suss out ways to best utilize what instruction is available out there, and distance mentorship has gone a long way for me. Books are fantastic, if you are that kind of learner (I am), and there are plenty of them out there spanning the centuries and dozens if not hundreds of styles or disciplines. There comes a time, though, when a question or two needs some expert thought, or a different set of eyes are required to troubleshoot technique or methodology. Internet forums have their place, but the noise-to-signal ratio is often prohibitive, especially for a novice without the ability to discern the quality of information being delivered. I've therefore been extremely pleased by the willingness of a number of woodworking experts (although not all of them will refer to themselves as such) to generously offer support to an aspiring novice.

As such, I would like to bring to your attention a few of the folks who have helped me along my journey in a deep way. Some have provided motivation, some inspiration. Some have actually given me tools, and some have been patient with what a dunce I can be as I learn to use them (and sharpen them). Some have shown me a type of a support one normally finds only from close friends or family, and some have given me what I consider secular sacred knowledge; the type of distilled information you can normally only obtain through years or decades of trial-and-error. This type of information is historically very closely guarded, and generally for good reasons. 

I'll be posting brief interviews with some of these people. Together, they form the virtual master whom I am apprenticing under. It is therefore appropriate that the first is Joel Moskowitz, co-author of the new edition of The Joiner and Cabinet Maker and founder of the woodworking supply company with an extremely accurate name: Tools for Working Wood. TFWW not only has the expected array of hand tools, but they also specialize in difficult to find traditional supplies such as hide glue (and pots to warm it in), veneering tools, and they also carry the house brand, Gramercy Tools. I've been personally delighted by their holdfasts, their dovetail saw, and their bow saw. These tools are beautiful to look at, beautiful to hold, and work as promised. Its a joy to know that small manufacturing concerns are still able to thrive in  this economy, and I hope that all readers consider favoring these types of manufactures and vendors, regardless of the industry.

Moskowitz is much more than a tool maker and seller, however. He is also a scholar; his academic understanding of woodworking history is most impressive. His edition of The Joiner and Cabinet Maker, the book which inspired this blog, has footnotes almost as lengthy as the original text; in fact they might even be lengthier. A single sentence in the book, or reference to a tool, will launch Joel into a several-paragraph frenzy of contextualization and explanation, and this is exactly the kind of thing which floats my boat as a reader interested in not only how wood was worked, but also why, when, and everything else. It was Moskowitz who rediscovered this long-lost book, and recognized its potential to illuminate many of the lost mysteries of the past. He's also an expert in old tool catalogs, and his appreciation of their design sensibilities abound in TFWW literature. Be sure to peruse their website for pdf examples of their retro-layouts and stupendously useful isometric design sheets.

He's a very busy man, but on the few occasions I have had questions about the Joiner Etc book, concerns about his tools, or other issues, he has responded in all necessary detail. More than once I have had some rather bone-headed ideas about how to use these tools and he has patiently set me straight.  

Without further ado, here we have The Joiner's Apprentice (TJA) asking a few questions of Joel Moskowitz (JM):

TJA: How long have you been woodworking, and what changes have you seen
in the field since you started?

JM: I took my first class in woodworking when I was 6. I have been seriously working as a hobbyist or an ironmonger since the mid-'80s. The big change is a renewed interest in traditional techniques and a resurgence of availability of quality hand tools.

TJAWhat is your favorite style to work in? 

JM: Sadly with a business, a kid, no basement shop, and very little time I currently do very little hands-on cabinetry. Previously, I built a lot of [Arts and Crafts] furniture; increasingly, my interest is in more decorative work and currently I am studying (slowly) woodcarving with Chris Pye. My goal is to make smaller pieces, more attuned to my schedule, but decorative ones.

TJAWhat tools do you always look forward to using and/or what operations do you most look forward to, time after time?

JM: I have always loved casework, although now carving is catching my fancy.  Tools - I like all tools but these days a well tuned carving tool is such a pleasure and a new exciting experience for me.

TJAHow much time do you actually get in your shop in a typical week?

JM: I am trying these days to get in at least 1 hour of carving. In addition I do more woodwork for demos, and photo setups. but for "me" time. not much (see above for reasons why)

TJAHave you had any memorable masters or mentors help you gain the skills you currently possess? 

JM: Maurice Fraser taught me most of what I know. My friend Ken Carr taught me even more.
Lately I have been learning from Chris Pye and I areally appriciate his approach to teaching
(It's really important that the teachers you select speak to you in a way that you can learn and people learn differently).

TJAYour tool shop is unique in offering historically relevant tools, often updated with modern materials. Your holdfasts, for example, are among the least costly and most effective available. Which of your offerings are you most satisfied with, or do you feel have met the best reception?

JM: They are all my children. I think the bowsaw is awesome and was the first of the really complicated projects we did.

The dovetail saw is near and dear to me also. No, I cannot judge, we make stuff we are proud of and I am proud to be part of a great team.


TJAYou helped make the case, in your republishing of The Joiner and Cabinet Maker, that working through the book will leave one with basic skills necessary to continue on as a Journeyman. Have you seen anyone take this challenge seriously? Do you feel the book is lacking much in serving as a core curriculum for traditional woodworking?

JM: Lots of people are building the first two projects. A fair number are doing the dresser too.  These are all straightforward projects that don't require going crazy.
No - There are specific areas of technique - like sharpening that additional instruction might be useful, but a lot of woodwork is practice and having real projects to work with is a great book. What do you think? You are in the midst of it all.

[TJA: I am not actually familiar with anyone else working through the book, per se, but I have been contacted by one person who made some packing boxes, and another who made variations of the schoolbox several times. Christopher Schwarz says nobody has yet sent photos of all three projects yet, and he is looking forward to the day when that happens - I am sure it won't be me. I feel the book is mostly complete, but that is due to the notes you and Christopher have added. The original text would be a fascinating read, but much of it would have been lost on me without your updates. Sharpening is also a weak spot in it; although it goes into detail, it does not use the types of systems likely to be found in even a "Traditional" woodworking shop now. As for the big picture question of "is this book a good central text for a general woodworking education"? Ask me in another year! I think it does not hurt.]

TJAFrom your blog I gather that you greatly enjoy architectural strolls through New York City. What else do you enjoy outside of woodworking and time with your family?

JM: I cook, (dinner 7 days a week). I read. I write.

TJAWhat is happening in the hand tool world (toolmakers, blogs, books, projects) that you think need more press?

JM: We need to hear more about what people are building, not just he fancy project but the bread and butter of simple furniture for daily living.

TJAIs New York Pizza the best there is? Have you had anything passable outside of NYC?

JM: The pizza in Milan is so much better than anything I have had in the USA it's just not funny. Sad really if you live here. I haven't been to Naples or Rome so I can't speak of what's going on there. There is great pizza all over the US. Different styles, not all to my liking, but worthy of note. I don't hold with weird ingredients, I like it simple. If you go to any independent pizza place in a big city, unless they are really clueless they should be able to do a decent pie. Sometimes even a great pie. It's about wanting to and having access to good sauce and cheese.  Craftsmanship is Craftsmanship no matter what you are doing - but it's true in some places the standards are really low.  (I've had excellent pizza in New Haven and Chicago too)

TJA: Thank you, Joel!


Thursday, April 12, 2012

[oops] Confessions of an Inept Apprentice


The day started well and productive. I stopped for a coffee, a rare treat, and drove up 101 with its alternating sand and rock cliff coastline to get a few bales of straw for my chickens. The ocean air smelled great, and the occasional rain sprinkles seemed cleansing rather than ominously relentless as they can this time of year. It was a good day. After cleaning the chicken coop and spreading the fresh straw for them, it was time to hit the shop.

An eclectic mix ranging from flamenco guitar to bluegrass to punk was playing. The stacatto spring rain was breaking into royal blue skies. The shop door was open, and the dogs were laying on the stoop. A perfect day.

In the last session, I had carefully marked baselines and dovetails on all 4 boards for the next school box. I made sure to carefully label each board on either end, so that I would know which end to connect to which. I did this last time, too, but somehow became confused towards the end (did I plane off a letter? Not sure, but thankfully I recovered and it went together well.)

With nothing to do but cut to the pre-marked lines, I really concentrated on my saw technique. Better than usual! Maybe I am starting to figure this out? I remember the song "Los Angeles" by X playing, reminding me of my time spent in Southern California. I was in that timeless mindstate, where I feel most great art happens. Nothing is forced; its not that effort is not involved, but it doesn't feel like a drain. The saw was following the line, an extension of my will, and despite entering a type of revery, I was alert enough to stop cutting precisely as the baseline was reached. Rotate the board, do the other side. I was really feeling pleased with how well the cuts were going, looking forward to test-fitting the dovetails, wondering if they would be my best yet. Has it just been a matter of relaxing all along? Is this what competent woodworking feels like?

I was able to check myself here, knowing that pride is always a source of problems, and is one of my personal list of sins. I slowed down, made sure I was actually cutting as sweetly as it seemed. All looked well, but I would take no chances. I redoubled effort and attention, focussing more on the sound of the saw than on the hypnotic drone of Spacemen 3's "Mary Anne". All was still well, and I was re-pleased with my successes in sawing these precise joints.

Transferring the shape of the tails to the pinboard is always my most tense moment in dovetailing. Its kindof a one-shot deal... the knife needs to mark quickly and confidently-- if you do a 2nd stroke you will never know which is the more correct one--, and the board cannot move at all during the series of strikes (about 10, depending on how many tails are present). I try not to get too tense, but at the same time try to muster all available energy to maintain focus and perform as intentionally as possible. It seemed to go well.

Since the shape of the pin depends upon the shape of the tail as it was cut, each pinboard has a "parent" tail board. The tails are cut as close to the line as possible, but it doesn't really matter if this is the case. What matters is that the pins match the tails exactly. If there is some variance in the shapes of the tails, the pins just have to be tweaked similarly to match. This is why the pins are marked from the tails (as cut) instead of from a similar layout process using dividers. This diagram shows the relationship between the boards:


I probably should have used lowercase letters to show that the 2nd letter of each set is dependent upon the "parent" but you get the idea.

It was only after working halfway through the 2nd set of pins that that I realized I had actually done this:


Then 2nd set of pins, already marked and 2/3rds of the way cut, SHOULD have been transferred from the C tails... but I somehow used the other end of board I had already cut from instead of fetching the other.

If you are having trouble following along, it means that I marked the joints as if one board would be looped around in a U-shape, forming a D-shaped construction. No good.

In a perfect world, all of the tails would be marked using the same process, and no errors would be made, and all of the joints would be interchangeable. In this world, though, and especially when I am in command, this is not how it works. "A" is quite different from "B".

My options were few and far between. A negative spiral of panic was the most likely outcome. I did not have a spare pinboard to use (I had not milled any more lumber to the precise thickness of the box, and was not looking forward to that as part of the solution here). I could either continue with my chopping out of the joints, and pray to any number of deities that one or more would be interchangeable, or I could start over with a new board somehow.

I ended up ritualistically harvesting some alder trees and burning them in an ornate pyre-- just kidding. I just took a deep breath and rolled with it. Amazingly, I was able to pull out of this nose-dive at the last second, and it turned out that "A" and "D" (or something, I even confuse myself when the rules dynamically change like this) were close enough. Well, they were after some surgery. I did not take photos of the fit, I was too busy covering my rump. Suffice it to say that a couple deft paring strokes with a chisel eased the wrong pattern into the right one, and a 3/4 hammered-home test fit indicated this should work out ok.

Lesson learned.

Really, though, what is the lesson?  This is not the kind of thing I want to do again, so it is important to integrate this fully. It boils down to relying upon myself (as the "marker"), and then faithfully carrying out those marking instructions (as the "maker"). In this case, my marking was to blame. I dutifully wrote "A" and "B" correctly, but something happened with my pinboard labeling. Was I tired? Hurried?  Not sure, but I really do not want it to happen again. "Measure twice, cut once" works ok for saw cuts, but I need something like "Mark once, check twice, and then sign your marks with a complicated symbol indicating you actually thought about your mark 3 times".

My mantra in these times is "This is how I learn!".

Tuesday, April 10, 2012

[Schoolbox 2] Dovetails and Saws

Not a whole lot to say, but a fair bit was taken care of today. There are some pretty exciting things afoot in the background, and these are taking more of my time recently. They will all be explained shortly, I hope, and will be of great benefit both to myself and readers of this blog who are interested in hand tools and the types of things I write about!

As far as the schoolbox goes, today I was able to eke out a little shop time and I marked all of the boards for cutting the dovetails. With the 1st box, I did each joint seperately, from start to finish. In this case, I have marked out all 4 edges on the tailboards. The pinboards (the short sides) depend upon the tails being complete, so they have to wait. However, my thinking was that by doing all of the marking at once, then all of the cutting at once, and later, all of the chopping at once, that I would stay in some sort of zone a bit longer. This is a nod towards production thinking, and it is an edge I would like to flirt with. I never want speed or mass production ideals to interfere with my quality, but there are times (such as doing a similar operation 4 times) where ganging up the tasks does make sense.

I wanted to shake off any rust, so started with a little cutting exercise, just 5 each of the 4 variations of cuts involved with dovetails: saw plumb with left and right skews, and then saw tilted left and right while remaining plumb.

My focus was on 2 things: not crossing the pencil line, and on remaining level on each face of the board. I did ok; its ok when cutting the first half of a joint to be a bit away from the pencil line, so long as you are away on the waste side, but the baseline is sacred and this is an issue I would like to take care of. I was pleased with the results of the practice so I went ahead and cut tails on the real boards.


I marked out the real deal:


the cuts went well though I did not take photos. I cleared the waste with a coping saw, on all four edges of the tailboards. Chopping did not occur in this session, so there will be a lot of chisel work next time. In anticipation, I did sharpen all of the bench chisels (and the 3 bench planes, too).

I also thought it was worth mentioning, since I praised it last time, how precise the crosscut panel saw continues to be. In this case, I was trying to stay away from the pencil line, and even 1/8th of an inch is fine when I am trying to be conservative. Nonetheless, I was able to get right next to the line:


That leaves very little shooting to do! 2 or 3 strokes...  very nice results for a hand saw (not a backsaw!).  This was just done on a sawbench (I did not feel like stacking them again), and I have to say I am quite pleased. This kind of thing may be old hat for skilled old-timers, but I have been so impressed with my carcase saw that I have been shy about using hand saws for precision cuts. I love seeing how precise the handsaws can be - and thanks again to Matt from thesawblog.com for crafting this tool for me!

Monday, April 9, 2012

[Schoolbox] Here we go again

I'm making another Joiner and Cabinet Maker school box. I will probably not have as much to say about each step of it, but as they come up I will record what I am doing and what I have learned. I've already dimensioned and flattened a 8' board of alder for the box. There is not much more to say about this process other than that the more I do it, it simultaneously becomes easier and more tedious. I'm also learning a bit more about how to feel when the plane iron is going from very sharp to just pretty sharp. There is a zone where it works just fine and leaves a clean surface, but it takes a little more effort to push the tool. I am trying to avoid this by re-honing before it needs it.

This time I decided to use a fine-crosscut panel saw instead of the carcase saw for cutting the boards to length. This saw was made by Matt at thesawblog.com and while I have mentioned it before, I have to repeat that I love it! It is rather small and light, and fits my hands nicely. It is nearly as thin and precise as my carcase saw. I set the board up here on my benchtop for comfortable full-height operation, though I had to get a little creative with supporting the rest of the board. My sawbenches stacked on top of each other worked just fine! Probably not OSHA approved but it was a lot more comfortable than cutting on the sawbench for something this precise, and also a little easier than using the carcase saw, which gets laborious with boards this wide. The final cut was close to perfect and barely needed shooting, if it did at all.


Next up will be dovetailing the shell of the box.

Saturday, April 7, 2012

No Plastic Grass Here

I can't be the only person doing this tonight:


Maybe hard to see in this shot, but the bedding for our daughter's holiday basket is made of alder plane shavings.

Happy Spring to all of you, unless you are in the Southern Hemisphere, in which case Happy Autumn!

[Schoolbox] Done and Finished

The schoolbox from Joiner and Cabinet Maker is complete! The one in the book is made of "deal" or soft pine, this one is all alder from a tree on my road. Its fairly heavy, and I suspect fairly indestructible.

3 coats of BLO-Varnish-Thinner, and I couldn't really tell a difference between coat 2 and 3. I might put on one more just to verify that 3 was plenty, but I think we can call this one finished.


In other news, a neighbor gave me some incredible quilted maple from a tree in his yard. It is going to be a real challenge to work with (as you can see from the tearout on this little sample board) but what figure! Its almost too much... I am not sure what to do with it, although box lids seem like an easy choice. This is after some very quick planing to see what it looked like. The boards were given to me in the rough, and the fish-scale shaped figure was just barely visible.


Friday, April 6, 2012

Pasadena Bound

It is with great joy that I have confirmed my registration at Woodworking in America, Pasadena this October. While the Cincinnati event has some appealing speakers, I need to remain on my own coast. I am looking forward to Roy Underhill's First Annual Feast of the Ribald Society of Old Moxonians in particular. Anyone else thinking about going to this?


Tuesday, April 3, 2012

[Schoolbox] End in Sight

Schoolbox #1 is just about complete. The moulding needs a bit of trimming to be absolutely flush with the top, and it needs finishing. I was planning to paint this one with milk paint, but looking at it now, I feel the wood might want to be uncolored.

It was a bit of a challenge to find appropriate screws for the hinges. The best I could do have rounded tops which extend up a little higher than I would like, so the hinges wouldn't lay flat until I deepened the mortises a bit more. The weird benefit of this is that the hinges now compress on top of the screws and "pop" the box open when it is unlocked. I like this action.

I have some of the screws soaking in vinegar to age them a bit; they are a bit too harshly bright right out of the box. I was concerned that brass and the blackened steel hinges would be too weird in general, but it actually looks pretty nice. I think once the hardware is dulled a bit, it will look great. I would like to find a better profile on the heads of the screws for future boxes, but for now this will have to do!

Laying out the hinges:


Installing the selvedge in the lid. I do not generally like to use gimlets, but for a quick shallow hole, this is a great tool:


The hinges, lock, and selvedge are all installed. Still needs its moulding on the lid.


Moulding installed!  The box is just about "done" except for final trimming of the moulding, smoothing, and finishing.  Just about time to start on box #2!


Sunday, April 1, 2012

Push, Pluck, Preen, and Position

I have yet to try out this new tool, but today Lee Valley has released something we all need, the No-Fuss-Tool Shroud (NFTS). They put it better than I can:

"This revolutionary planing accessory not only makes planing faster, it ensures the cabinetmaker's focus remains directed solely towards the surface being produced, and not on the "quality" of the waste generated."


See for yourself at the Lee-Valley website:


http://www.leevalley.com/us/wood/page.aspx?p=69302


I know what I am asking for this holiday season!