Gentle Readers,
Thank you for your continued support, readership, and general interest in this site. It was my deepest ambition this week to show the 3rd and final Packing Box in its completed state. However, things happen.
It became very cold here suddenly, as can happen this time of year. On Tuesday morning, I fired up the woodstove in the shop and started to work, planing the lid and bottom boards of the box. The stove started to smell really horrible, and that is when I remembered that the paint I used recommended a few fires to "cure" it, which I kept procrastinating and eventually completely forgot. So Tuesday and yesterday, I made fires but otherwise stayed out of the shop. Today was warm enough that I thought I would do some work with no fire, but start the 3rd and hopefully final "curing" fire as I finished for the day.
It turns out, whatever terrible particles are in the fumes from the "curing" cause horrible corrosion to metal. Today nearly every steel surface in my shop was covered in a thin, chalky film of rust. My planes, saws, dividers, all of it. The most painful were the tools I have not even used yet. The day was spent with steel wool, green scrubbies, and a mild-to-middlin sense of dread and despair.
I've gotten most of the tools cleaned up, not "good as new" (they never will be again) but rust-free. The steel wool of course scratches and dulls them, so my new saws no longer look like mirrors, my chisels and planes will need to be sharpened again, and so on. However, I think I can see that other than cosmetically, no real damage was done. It is a valuable lesson though, and a very good example of why a tool chest is superior storage. Many of my tools had a rust shadow; a crisp line where the smoke did not hit them. They will retain this line for a very long time, maybe forever, to serve as a reminder.
I have most of them now heavily wiped with oil and packed in boxes in corrosion-resistant paper. I'll probably be using plastic storage boxes until I can build a proper toolchest.
Hopefully more work on the Packing Boxes will come soon.
Another lesson learned,
Your Apprentice
Thursday, October 27, 2011
Tuesday, October 18, 2011
Making Amends and Renewing Edges
The last update from the shop revealed a terrible situation:

After realizing it just would not do, I used a rasp to flatten the slope, cut a wedge of new wood, grain-matching as best I could, glued it into place and let it dry. Then I moistened it with denatured alcohol and planed it flush as much as possible. The end result is visible, if you know what to look for, but I dare say passable for casual observers, especially since this is the bottom of the box.

I think it will be even better once oil finish is applied.
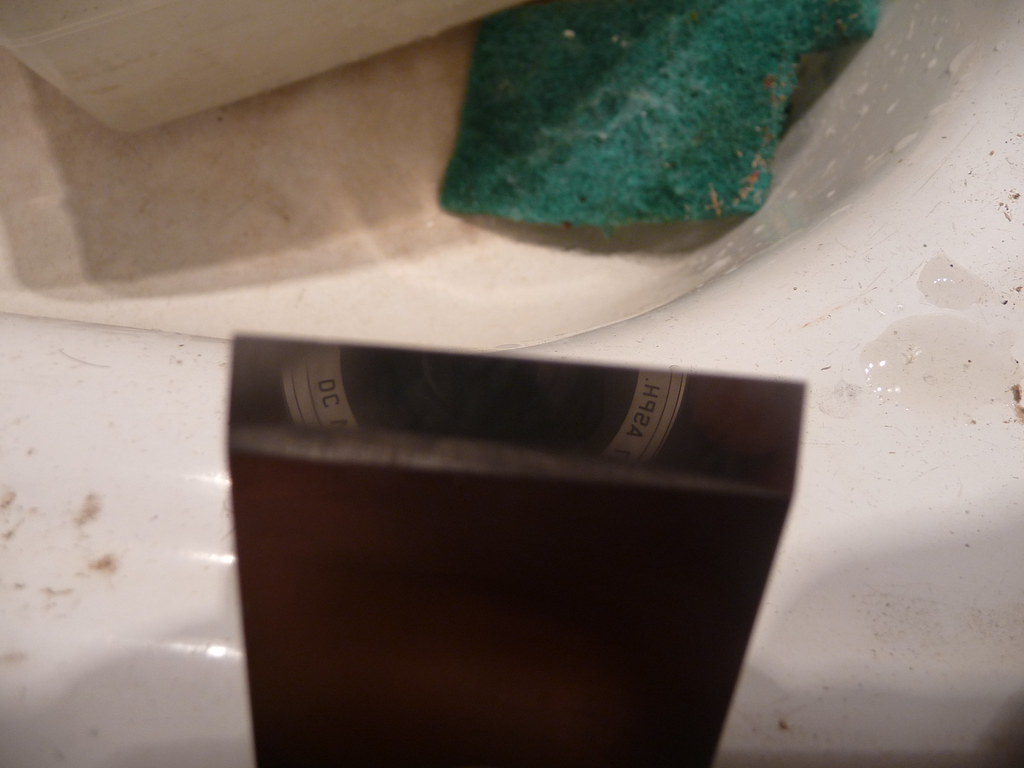
That was the first order of business for the day in the shop. After that, it was setting up more glue-up boards for box #3, the final Packing Box. While they dried, I sharpened. Unfortunately, upon examining the block plane iron, I noticed a nasty nick (perhaps from working around the nail where that wedge was placed)
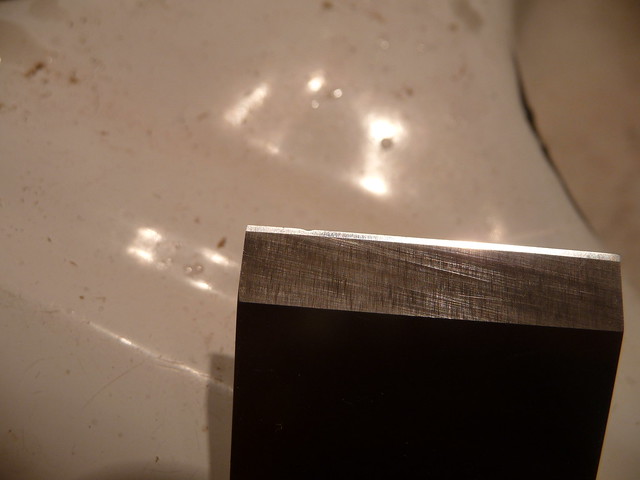
Its just barely visible in the left 3rd of that image as a little dip on the tip. Its much more visible as a track it leaves in the wood upon usage.
I should back up a moment to show the sharpening station I put into the shop. Fortunately, running water is right there, which steered me towards water stones as a sharpening system. Its easy to rinse them in the sink, prepare the tub for soaking, and rinse the slurry down the drain. I don't have hot water (yet) which will become annoying in the midst of winter, but for now this works quite well. I did install a little strip of halogen lights which help a great deal. More will be better, of course. I also need some shelves on the sharpening wall, all in good time.
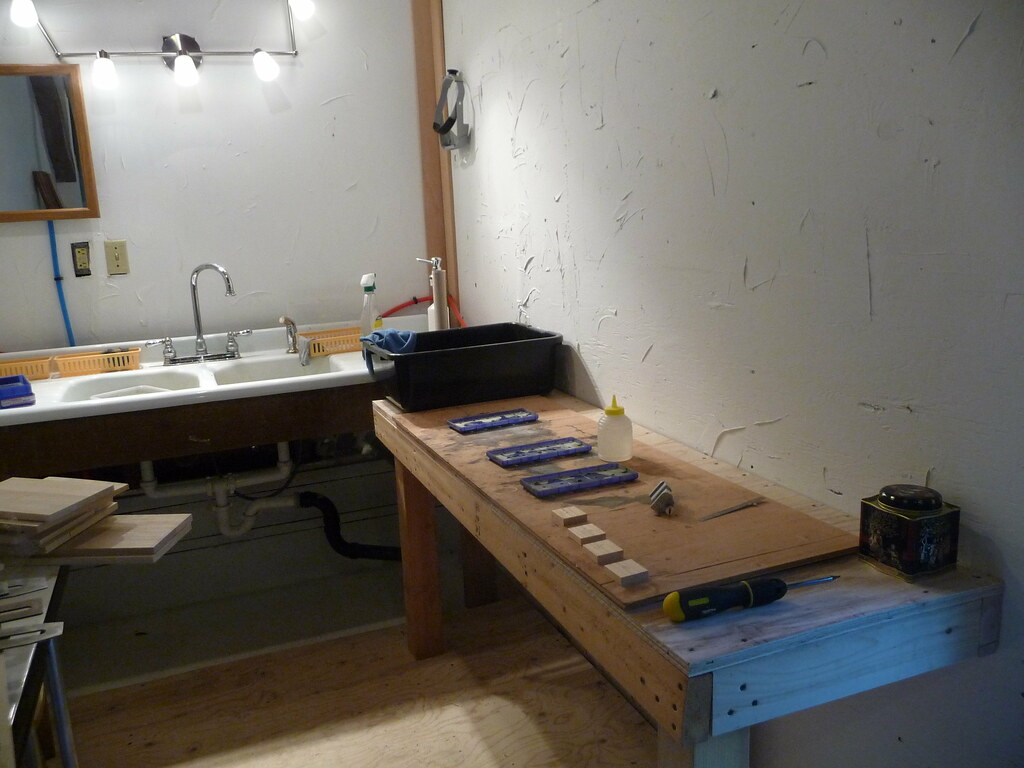
Other than just being a "table", which is really all it is, the sharpening station is somewhat unique in that I have a temporary piece of plywood (visible) to deal with the somewhat nasty spills that the stones emit. I plan to replace it with waterproof cafeteria trays, but for now it does well. You can also note a series of blocks on the right side:
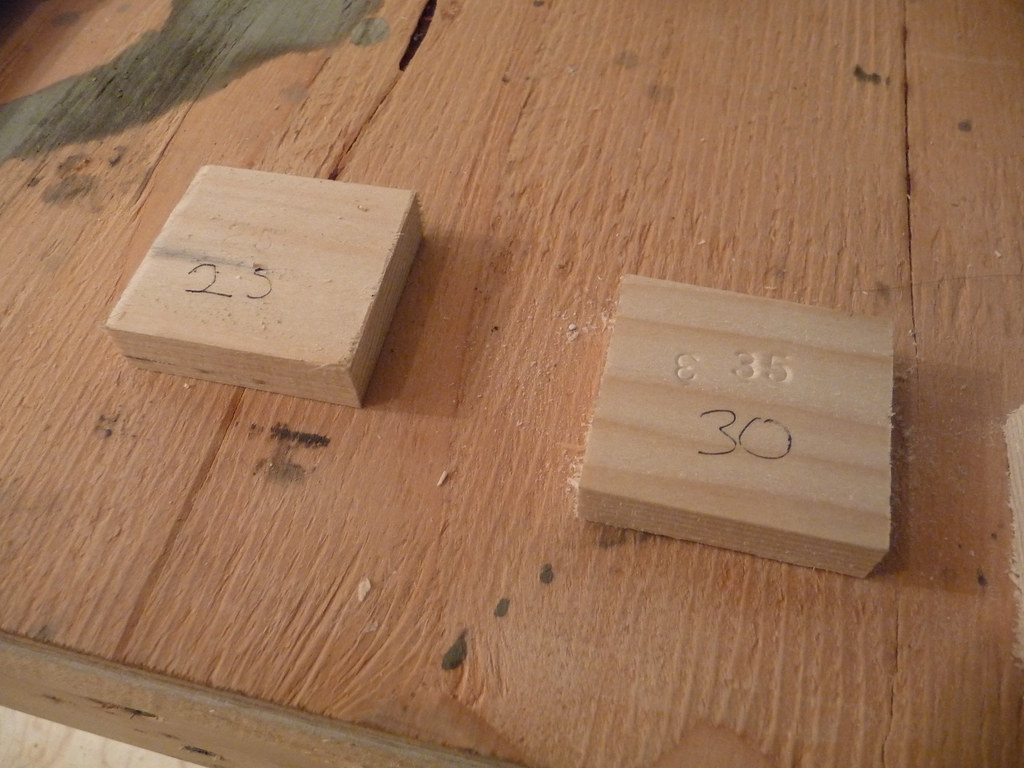
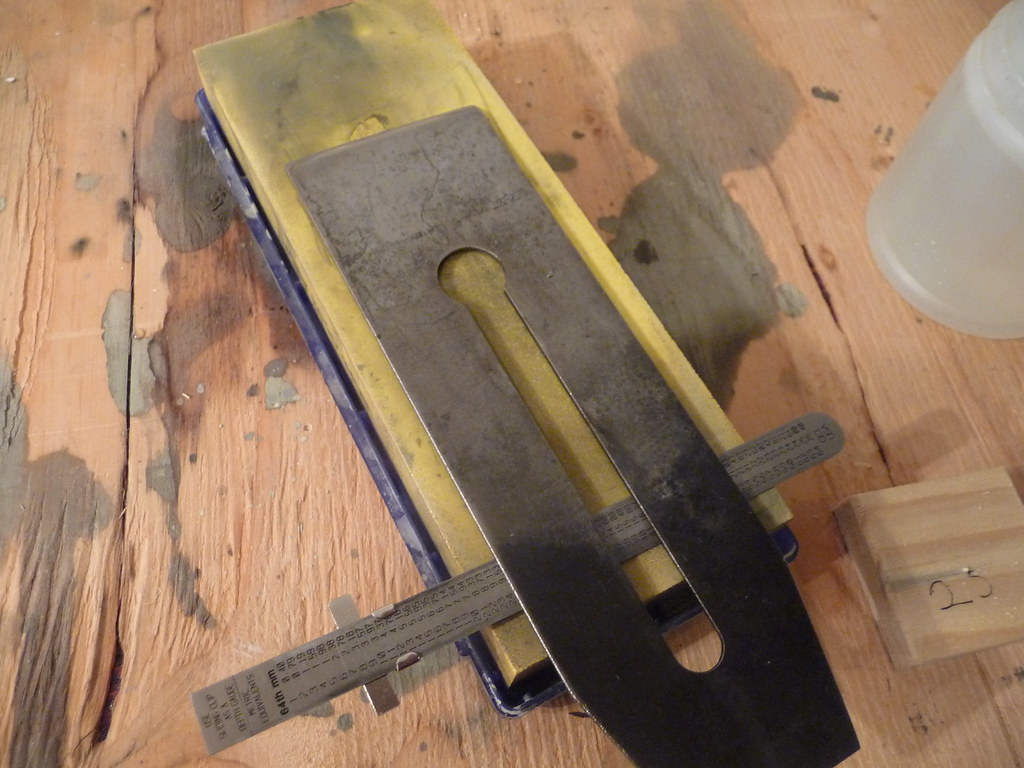
These are set up to help plane irons into a sharpening jig at the right position upon each sharpening, like this:

This one, for example, will yield a sharpening angle of 25 degrees, which is the initial bevel of a bench plane.
It bears mentioning that I did start off learning to "freehand" sharpen, without a jig. I still believe this is a valid skill, and it is not all that hard to do. However, I want repeatability and speed, and the simple "Eclipse" style jig I am using is all about that. It does not work for skewed irons, very narrow irons, or any other oddball items, but for my bench planes it is working very well, and I have to confess I enjoy the crisp angles it delivers compared to the ugly yet acceptable bevels my freehand approach was providing. I am committing myself to sticking with this system until I have mastered it enough that I find flaws in it.
So, the angle in the iron set with the block above works out like this:

Set at the appropriate angle, it is, at the risk of over-simplification, rubbed over various grits of stone.
Remember that nick in the iron? After a few minutes on the rough stone, the nick is pretty much gone:
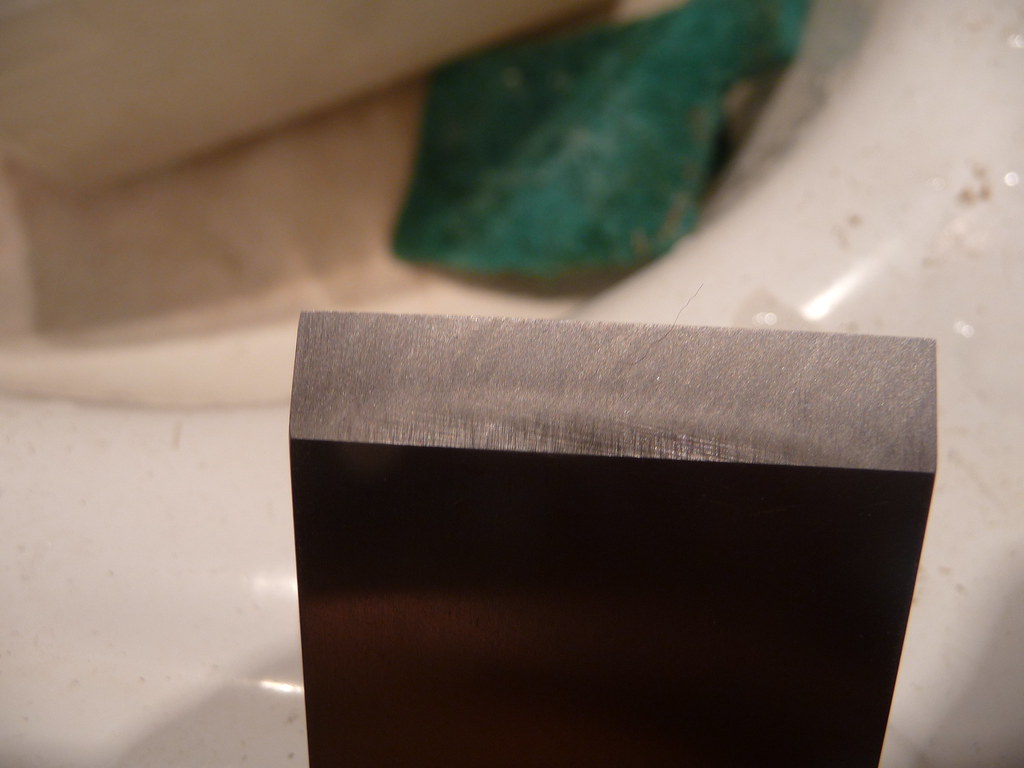
But, it is now very rough. And it needs to be smooth. So it goes from one stone to another, up to 8000, which is the finest stone I have.
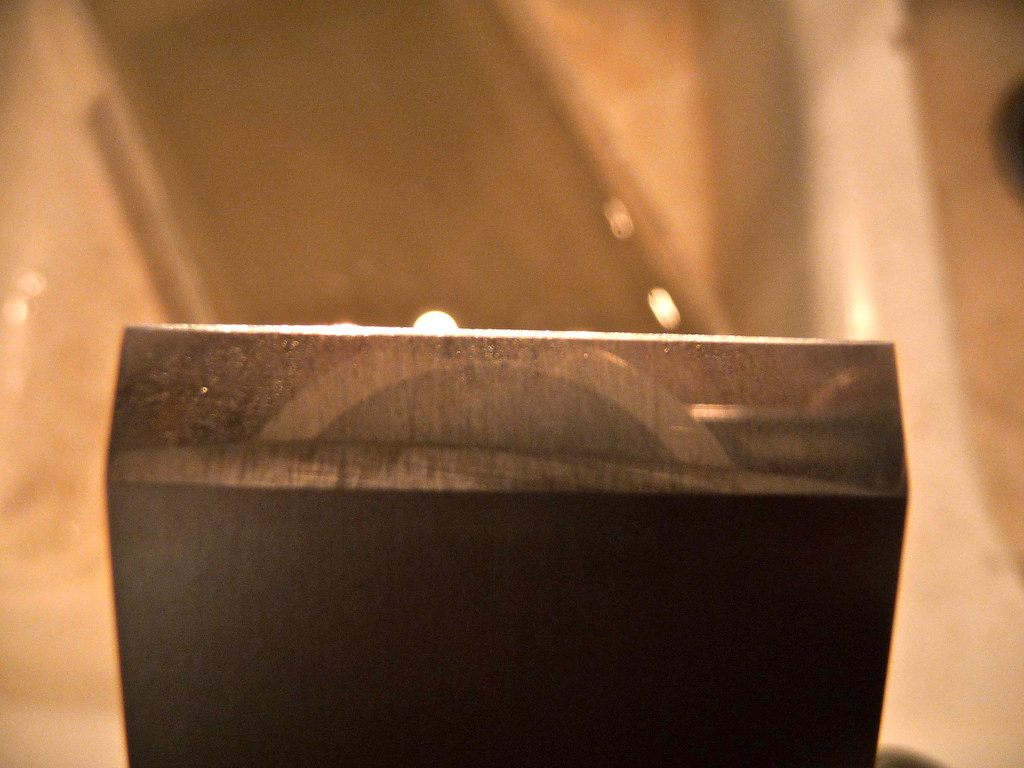
At that point, its pretty close to a mirror (as can be seen by the camera lens reflection):
Its easy to think that its done at that point, but what I do is then put a "microbevel" on it, which is a slightly steeper angle just at the tip. This will be the area where it wears down, and a few quick swipes on the 8000 stone will refresh it. This is what I would have done today, if it were not for that pesky nick.
The back face is also flattened, using what is known as the "ruler trick". By elevating the back of the plane iron a tiny bit (the thickness of a very small steel ruler), only the very tip is ground, allowing the flattening to be focussed where it counts - at the intersection with the cutting edge.
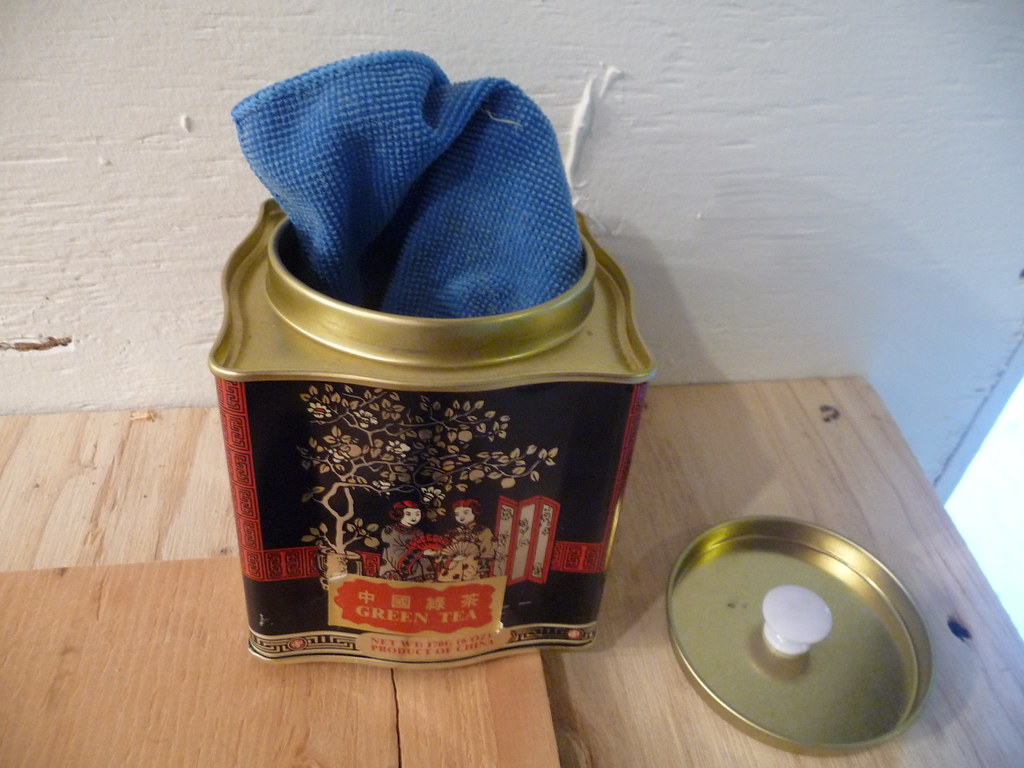
After testing sharpness (I forgot to take a pic of my bald forearm, subject of many test shaves), the iron is wiped down with jajoba oil. This is stored in this fancy tea container, and dispensed via a microfiber "woobie" cloth:
This process was repeated for all 3 bench plane irons, 2 extra irons, and 2 chisels. That took up most of the shop time for the day, although I did also start on a special project, somewhat unrelated to the Joiner Etc projects, but quite tangential. More soon.
After realizing it just would not do, I used a rasp to flatten the slope, cut a wedge of new wood, grain-matching as best I could, glued it into place and let it dry. Then I moistened it with denatured alcohol and planed it flush as much as possible. The end result is visible, if you know what to look for, but I dare say passable for casual observers, especially since this is the bottom of the box.
I think it will be even better once oil finish is applied.
That was the first order of business for the day in the shop. After that, it was setting up more glue-up boards for box #3, the final Packing Box. While they dried, I sharpened. Unfortunately, upon examining the block plane iron, I noticed a nasty nick (perhaps from working around the nail where that wedge was placed)
Its just barely visible in the left 3rd of that image as a little dip on the tip. Its much more visible as a track it leaves in the wood upon usage.
I should back up a moment to show the sharpening station I put into the shop. Fortunately, running water is right there, which steered me towards water stones as a sharpening system. Its easy to rinse them in the sink, prepare the tub for soaking, and rinse the slurry down the drain. I don't have hot water (yet) which will become annoying in the midst of winter, but for now this works quite well. I did install a little strip of halogen lights which help a great deal. More will be better, of course. I also need some shelves on the sharpening wall, all in good time.
Other than just being a "table", which is really all it is, the sharpening station is somewhat unique in that I have a temporary piece of plywood (visible) to deal with the somewhat nasty spills that the stones emit. I plan to replace it with waterproof cafeteria trays, but for now it does well. You can also note a series of blocks on the right side:
These are set up to help plane irons into a sharpening jig at the right position upon each sharpening, like this:
This one, for example, will yield a sharpening angle of 25 degrees, which is the initial bevel of a bench plane.
It bears mentioning that I did start off learning to "freehand" sharpen, without a jig. I still believe this is a valid skill, and it is not all that hard to do. However, I want repeatability and speed, and the simple "Eclipse" style jig I am using is all about that. It does not work for skewed irons, very narrow irons, or any other oddball items, but for my bench planes it is working very well, and I have to confess I enjoy the crisp angles it delivers compared to the ugly yet acceptable bevels my freehand approach was providing. I am committing myself to sticking with this system until I have mastered it enough that I find flaws in it.
So, the angle in the iron set with the block above works out like this:
Set at the appropriate angle, it is, at the risk of over-simplification, rubbed over various grits of stone.
Remember that nick in the iron? After a few minutes on the rough stone, the nick is pretty much gone:
But, it is now very rough. And it needs to be smooth. So it goes from one stone to another, up to 8000, which is the finest stone I have.
At that point, its pretty close to a mirror (as can be seen by the camera lens reflection):
Its easy to think that its done at that point, but what I do is then put a "microbevel" on it, which is a slightly steeper angle just at the tip. This will be the area where it wears down, and a few quick swipes on the 8000 stone will refresh it. This is what I would have done today, if it were not for that pesky nick.
The back face is also flattened, using what is known as the "ruler trick". By elevating the back of the plane iron a tiny bit (the thickness of a very small steel ruler), only the very tip is ground, allowing the flattening to be focussed where it counts - at the intersection with the cutting edge.
After testing sharpness (I forgot to take a pic of my bald forearm, subject of many test shaves), the iron is wiped down with jajoba oil. This is stored in this fancy tea container, and dispensed via a microfiber "woobie" cloth:
This process was repeated for all 3 bench plane irons, 2 extra irons, and 2 chisels. That took up most of the shop time for the day, although I did also start on a special project, somewhat unrelated to the Joiner Etc projects, but quite tangential. More soon.
Monday, October 17, 2011
This Post is About Woodworking
"There are no stars in the daytime," said Benny.
"Yes," replied John, "there are as many stars in the daytime as there are in the night only we can't see them."
"Oh John!" exclaimed Benny. He was quite surprised to hear John make so extraordinary an assertion. "Yes," continued John, "the stars stay in the sky all the daytime just as they do in the night, only we can't see them because the air is so bright."
Here Benny gazed long and earnestly into the sky, but he could not detect the faintest semblance of a star and finally said that if there were any stars there he was very sure that he could see them.
--The Boy's Own Workshop; or, The Young Carpenters By Jacob Abbott, 1866
Thursday, October 13, 2011
Mistakes were made
In The Joiner and Cabinet Maker, a careless journeyman named Bill Sharp is "dismissed". He creates a cabinet both quickly and "very well", but upon delivering it, realizes he mistook a 4 for a 6 when taking notes with a nail on the bottom of his pewter tobacco box (after neglecting to take a pencil with him).
My name is Bill Sharp, and I made a mistake. Two mistakes. Actually, my name is not Bill Sharp, but I am willing to admit my mistakes. As Thomas learns through Bill's demise to always measure very carefully, I have learned to take great care in nailing.
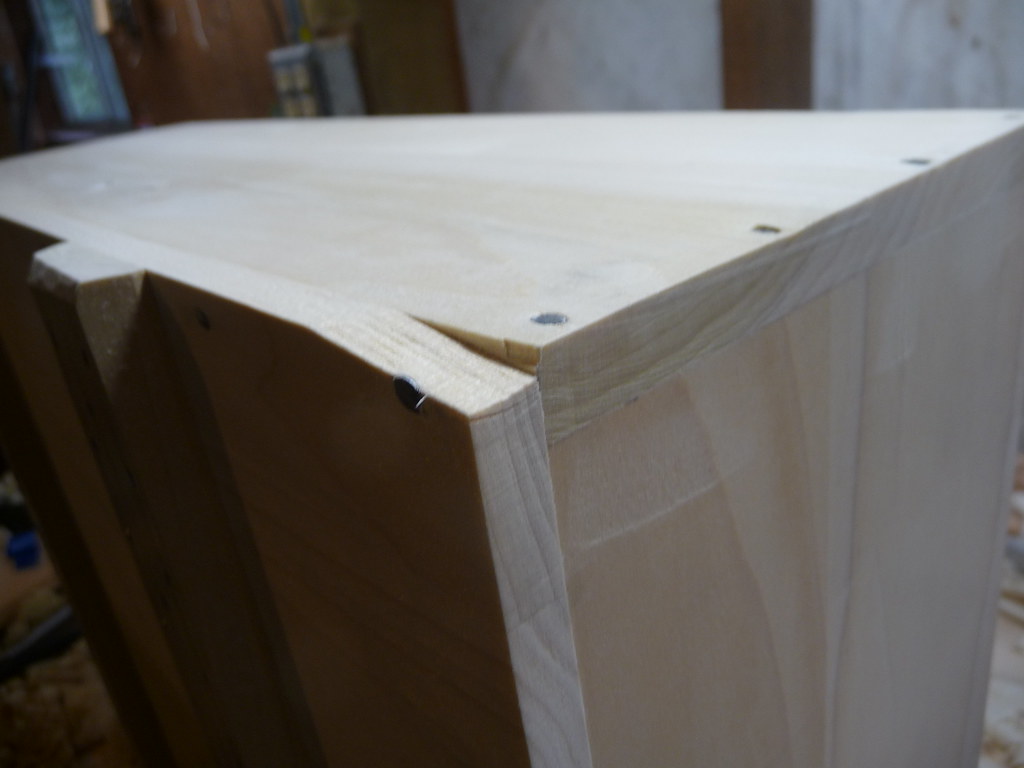
A nail should not be placed too close to the edge of a board:
I am actually not sure what went wrong here, as the nail was put into the center of the target board same as all the others. Cranky piece of wood? Not enough finesse with the hammer? I am not sure. I am also not sure what to do about this. Its on the bottom of the box, and can be aimed towards the back, but it is still very disappointing. I am tempted to glue a wedge onto it and shape it flush. At any rate, I would probably have been in a good bit of trouble if I did this in a Victorian-era joiner's shop.
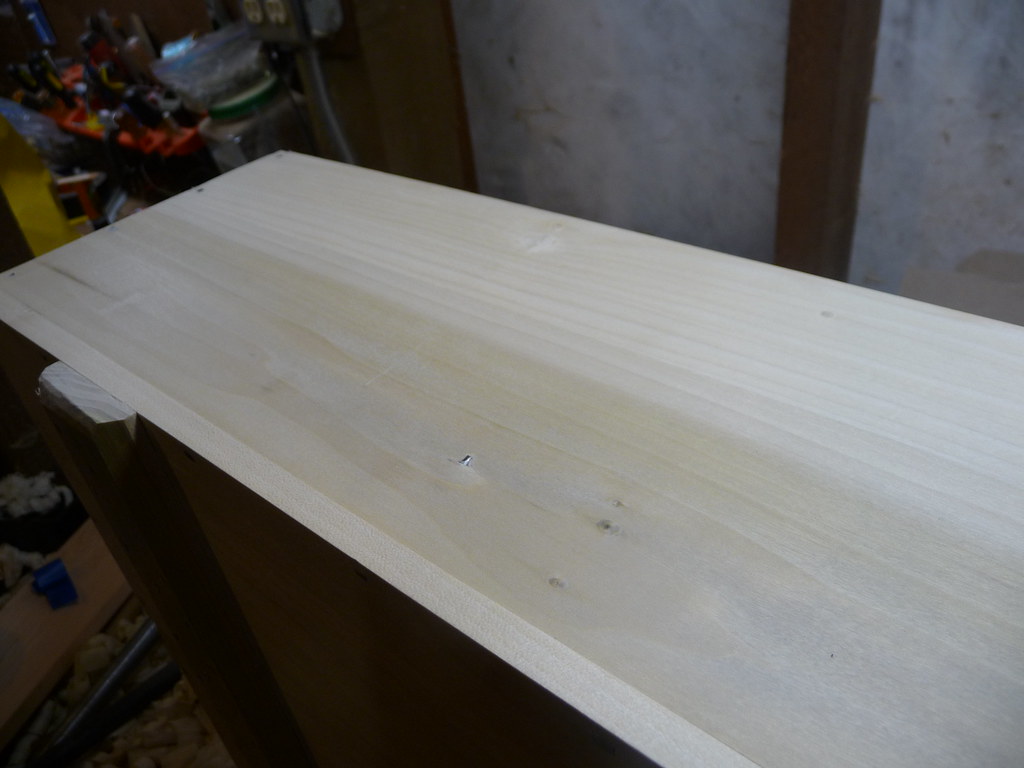
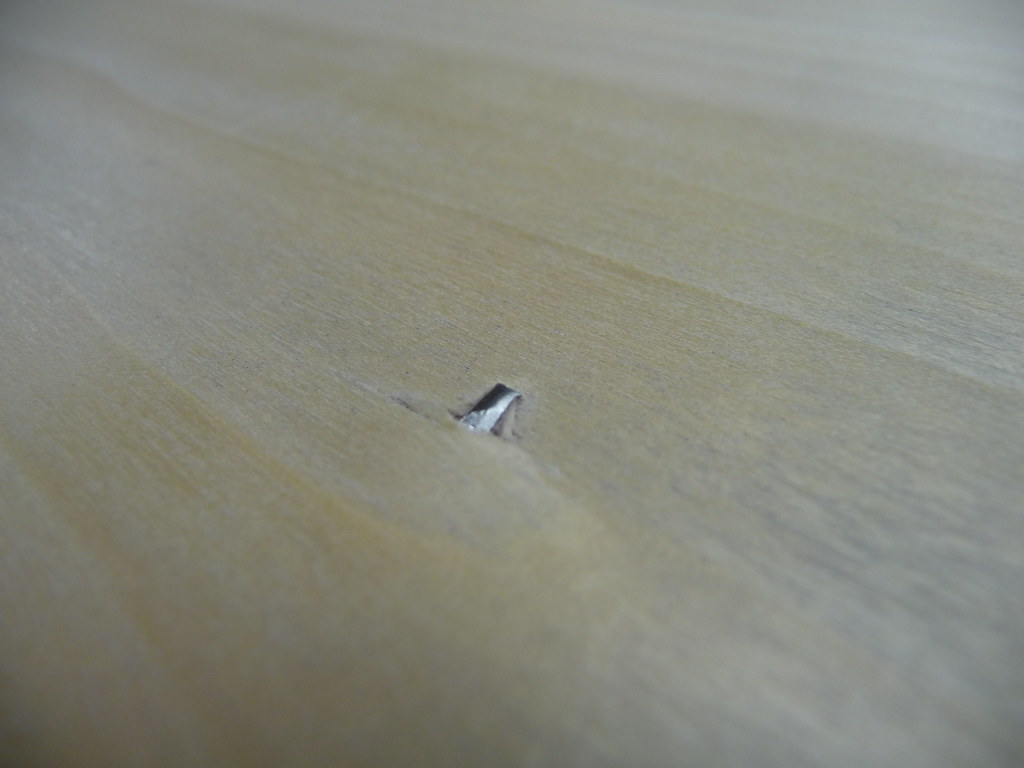
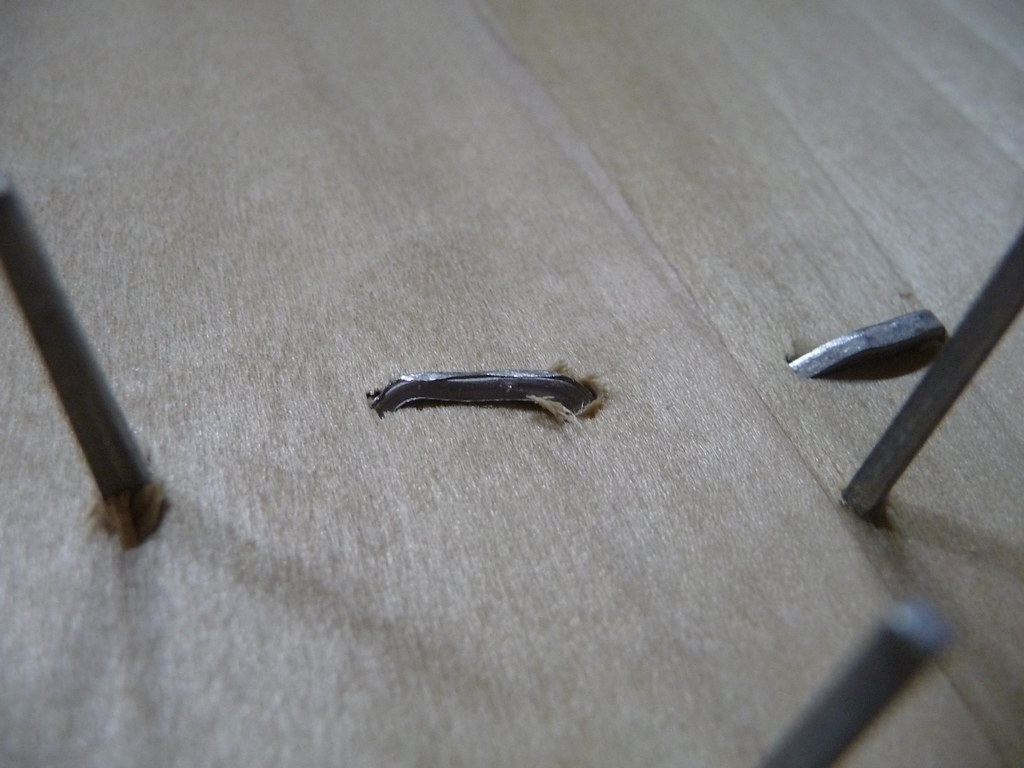
The other mistake is a little less ambiguous about what went wrong:
My pilot hole was obviously not plumb. It did not go so off-course that it exited the box, but it canted the nail enough that the tip did break through. I did not notice the nail being angled while driving it, but it must have been. Especially when working in such thin wood, I need to ensure that pilot holes are perfectly plumb. I did double check to make sure that the holes did not pierce the board, but I also was not drilling them the full length of the nail, only about 3/4 or so. This is another aesthetic flaw, it does not affect the nails holding ability, but it is visible on the outside of the box and would also earn a serious punishment from a stern shop master. I do not believe there is any way to repair this; I tried driving the nail back out with a nailset, but it was in too firmly. I don't believe it could be pulled from above without horribly mangling the board, so this nail tip remains as a grim reminder to take the utmost care with even the most trivial tasks in joinery operations.
In Which Nails Are Clinched
These nails Thomas takes care not to drive quite home, or his work would be nailed to the bench; whenhe has put them all in, he takes out those which he drove at first to keep his joint close, and lifts up the whole bottom together. He then drives home all the nails, taking care for this purpose to place the bottom so that they shall be clear of the bench. To clench them, he uses the iron on which he has been accustomed to straighten nails: he turns the box bottom with the inside upward, and placing one nail-head after another on the anvil, clenches each separately. There is a good and bad way of clenching nails. The careless workman gives each nail one blow, and is satisfied; but he thus breaks many, or turns them down at best, so that they are apt to start up again, and present their points to catch any thing that is put into the box. The good workman is not content with such slovenly work, but by one or two skillful blows coaxes the point a little downwards, and then by one other harder knock sends it down deep into the wood, out of ever body's way, and holding the two pieces firmly together.
-- The Joiner and Cabinetmaker, 1839
Clinching is spelled clenching in the book, but I prefer "clinch" as it has a more appropriately archaic feel. At any rate, nails were clinched. Its much harder than it sounds, or at least I find it to be.
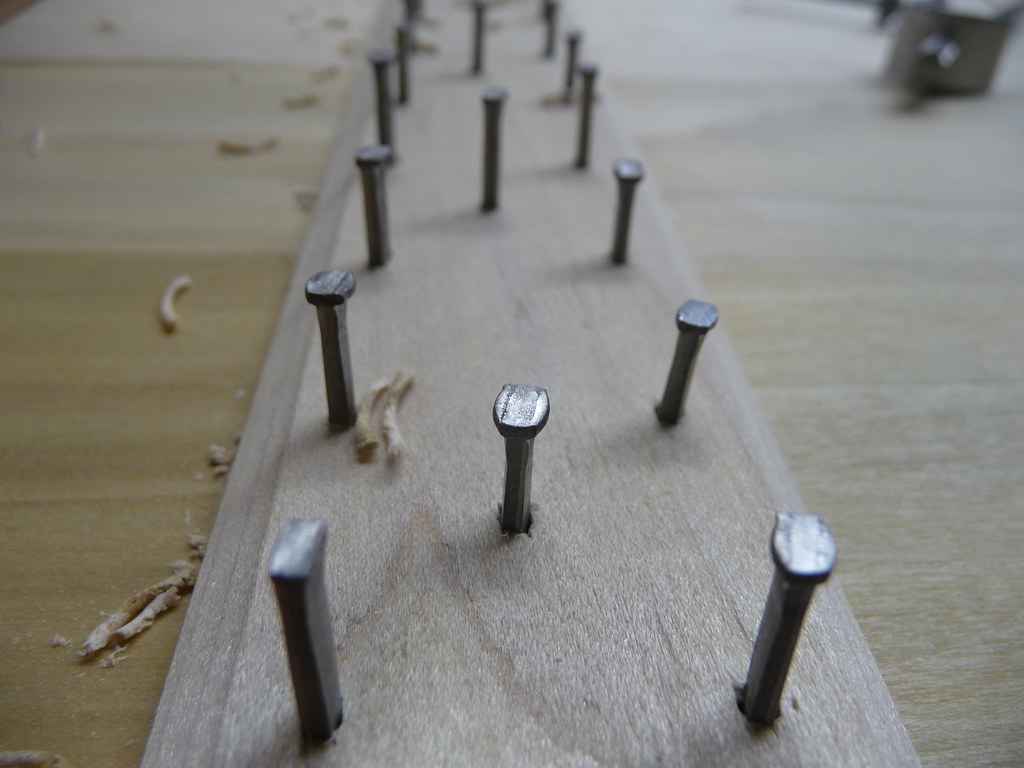
Like Thomas, I started out using a tiny anvil underneath the box. However, my little anvil is terribly rusty, no matter how much I clean it. It leaves nasty discoloration on the wood, so I aborted that. I took a tip from Chris Schwarz, using the wing of my table saw as a giant backing plate. Then, I used a hammer to coax the nail tips downward (also not as easy as it sounds):

A few more taps, and it bends a little more, making contact with the wood:
More blows are delivered until its sunk all the way in:
And then repeat the whole process for the other 63 nails:

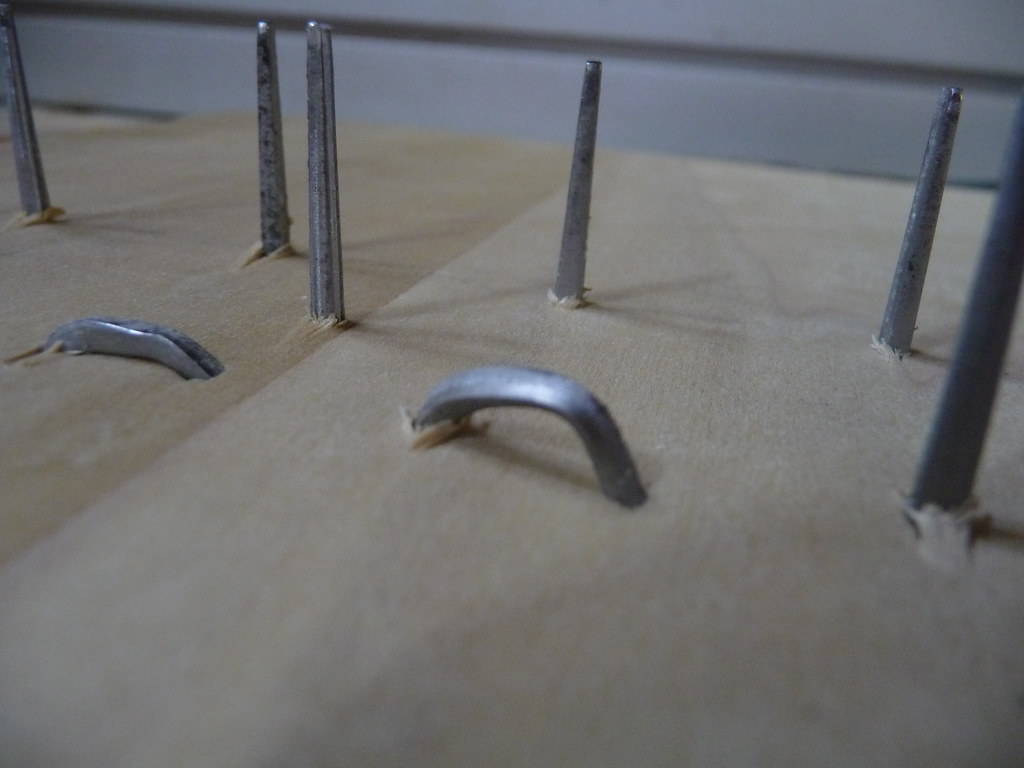
I probably should have used thinner nails, or brads, but had only 4d ("four penny") fine-finish nails on hand, the same ones used to attach the sides and bottom to the box. Thomas uses 4d nails as well, but no mention is made to their thickness or if they are nails or brads. Studying Schwarz's images does not provide further clues, but his demonstration on the Woodwright's Shop makes it look like he is using brads and not finish nails. I suspect that makes this process much easier.
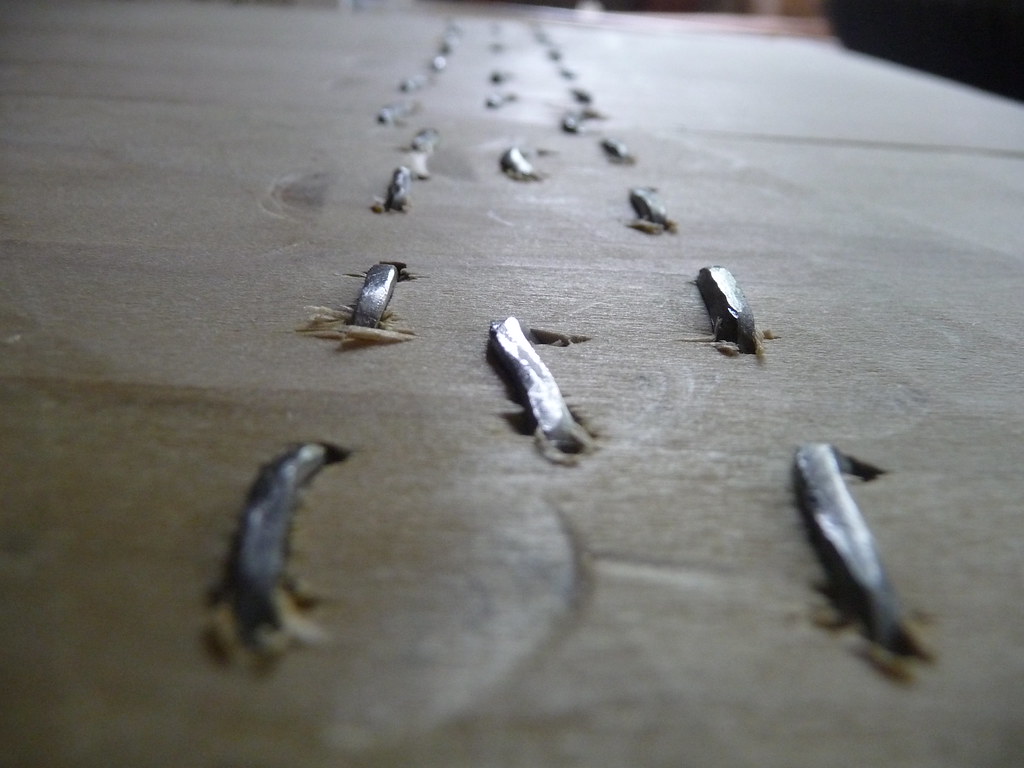
It is very difficult to sink the flattened, clinched nail flush with the wood. The hump which remains is near impossible to drive flat into the wood, although surely this is easier in a softer wood. You can see in the above photo not only the humps which remain, but the hammer-face-shaped "French marks" which result from trying to pound them flatter.
The result is an extremely strong joint; 8 or 10 nails would likely be more than enough to hold the cross-strengtheners onto the box, but remaining faithful to the illustration, I overbuilt the box just as Thomas did.
I worry somewhat about the nails on the bottom of the box and what they could do to delicate conents, such as Mr, Green's fancy books. This could be easily remedied by placing a panel over the nails, or even a piece of cardboard.
My impression now is that clinching is indeed a very effective mechanical joining technique, but it is not attractive and is not pleasant to the touch. I would only reserve this for the crudest construction projects, or when strength is much more important than aesthetics. In the images above, I tried using all of my might to keep the nails as parallel and straight as possible while clinching. I am sure that skill comes with time, but I still feel the end result is rather nasty looking, and it took a very long time to do it.
-- The Joiner and Cabinetmaker, 1839
Clinching is spelled clenching in the book, but I prefer "clinch" as it has a more appropriately archaic feel. At any rate, nails were clinched. Its much harder than it sounds, or at least I find it to be.
Like Thomas, I started out using a tiny anvil underneath the box. However, my little anvil is terribly rusty, no matter how much I clean it. It leaves nasty discoloration on the wood, so I aborted that. I took a tip from Chris Schwarz, using the wing of my table saw as a giant backing plate. Then, I used a hammer to coax the nail tips downward (also not as easy as it sounds):
A few more taps, and it bends a little more, making contact with the wood:
More blows are delivered until its sunk all the way in:
And then repeat the whole process for the other 63 nails:
I probably should have used thinner nails, or brads, but had only 4d ("four penny") fine-finish nails on hand, the same ones used to attach the sides and bottom to the box. Thomas uses 4d nails as well, but no mention is made to their thickness or if they are nails or brads. Studying Schwarz's images does not provide further clues, but his demonstration on the Woodwright's Shop makes it look like he is using brads and not finish nails. I suspect that makes this process much easier.
It is very difficult to sink the flattened, clinched nail flush with the wood. The hump which remains is near impossible to drive flat into the wood, although surely this is easier in a softer wood. You can see in the above photo not only the humps which remain, but the hammer-face-shaped "French marks" which result from trying to pound them flatter.
The result is an extremely strong joint; 8 or 10 nails would likely be more than enough to hold the cross-strengtheners onto the box, but remaining faithful to the illustration, I overbuilt the box just as Thomas did.
I worry somewhat about the nails on the bottom of the box and what they could do to delicate conents, such as Mr, Green's fancy books. This could be easily remedied by placing a panel over the nails, or even a piece of cardboard.
My impression now is that clinching is indeed a very effective mechanical joining technique, but it is not attractive and is not pleasant to the touch. I would only reserve this for the crudest construction projects, or when strength is much more important than aesthetics. In the images above, I tried using all of my might to keep the nails as parallel and straight as possible while clinching. I am sure that skill comes with time, but I still feel the end result is rather nasty looking, and it took a very long time to do it.
Wednesday, October 12, 2011
Nailing the Strengthening Pieces
The box is wanted to pack some books which Mr Green has been getting bound for a friend in the country. It need not be planed either inside or out, as the nicely-sawn wood is quite smooth enough for a packing box. It is to be eighteen and a half inches long, fourteen wide, and six deep, all inside measures; and it is always better to make a box for such a purpose a little too large than a little too small. Half-inch deal will be quite strong enough, if we put two strengthening pieces across the top and bottom.
-- The Joiner and Cabinetmaker, 1839
Saturday, October 8, 2011
Imageless
Today was a good day in the shop, and I took tons of great photos of the work.
However, I just experienced a "card read error" and now the memory card is wiped, all images are gone. Bummer! Its taking a bit of the fun out of reporting, but I will still labor to recap the events.
I was very sick this week so did not get to do as much as I had hoped, but today had me feeling fine and I continued work on box #2. This time around, my glue-up was not as nicely fitted as the first batch, and I had to do a lot more planing. This ended up in a little game of back-and-forth as I struggled to get the 2 pieces planed to the same thickness. I kept telling myself to stop at the line, but sure enough I would realize I had gone too far. I did this 2 or 3 times before getting the boards to agree. All is now well...
I took mostly photos of the nail-clinching operation. This is where the nail goes through both boards, and is then bent back into the board, like a staple. Its ridiculously strong, but not all that sightly. Still, this is how Thomas did it and so this is how I did it. Its a lot easier to explain with images, so I will endeavor to do it again on upcoming box #3 (the final packing box).
The cross-strengtheners are now all nailed on, something which seems to take a lot longer than it should. Maybe my cross-peen hammer is too light? Maybe I am not strong enough? I used a 16-ounce claw hammer a bit, too, but no matter how much I clean it, it seems to cast aside all kinds of funk onto the wood. Maybe I should keep my eyes out for a new(er) one.
I also used the table saw. Let me expain! I used the cast-iron wing of the saw as a bench for hammering the nails. Clinching takes a lot of force, and if done on the wooden bench, the nails might just back out and go into the bench. Using the table saw's table keeps them in place and forces the blow to be absorbed back into the clinching, where it should. I started off using a small metal block under the boards, like a little anvil, but has the same problem as the hammer - it leaves rusty residue on the wood so I nixed it.
The bottom is now on the box, so one more lid and its a done deal. It is indeed a little nicer than the first one, although I have also done some learning on this one (in other words, made different mistakes). Maybe the third one will be a charm?
I will get my camera situation straightened out and post images next time!
Saturday, October 1, 2011
Flattening Glued Boards, Motion Towards Packing Box #2
Work has begun on Packing Box #2. It starts with gluing up boards to make them wider, although this is not part of the project in the book. I simply could not get ahold of 9" boards like I needed, so I have glued together 2-3 smaller boards. This is standard (and is done in the School Box project) but it bears mentioning that isn't properly part of the Packing Box project.
The glue-up starts off by ensuring the edges of the boards are square and true. I didn't bother to photograph it this time. Next, they receive a bit of glue and are laid side-by side in the clamps:
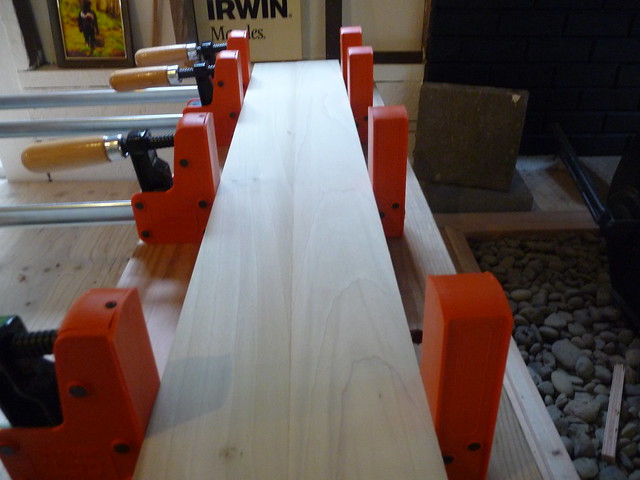
There they rest a few hours. I like to leave them at least overnight, to be sure the glue has fully cured. This becomes an issue when there are not enough clamps and the boards are needed quickly.
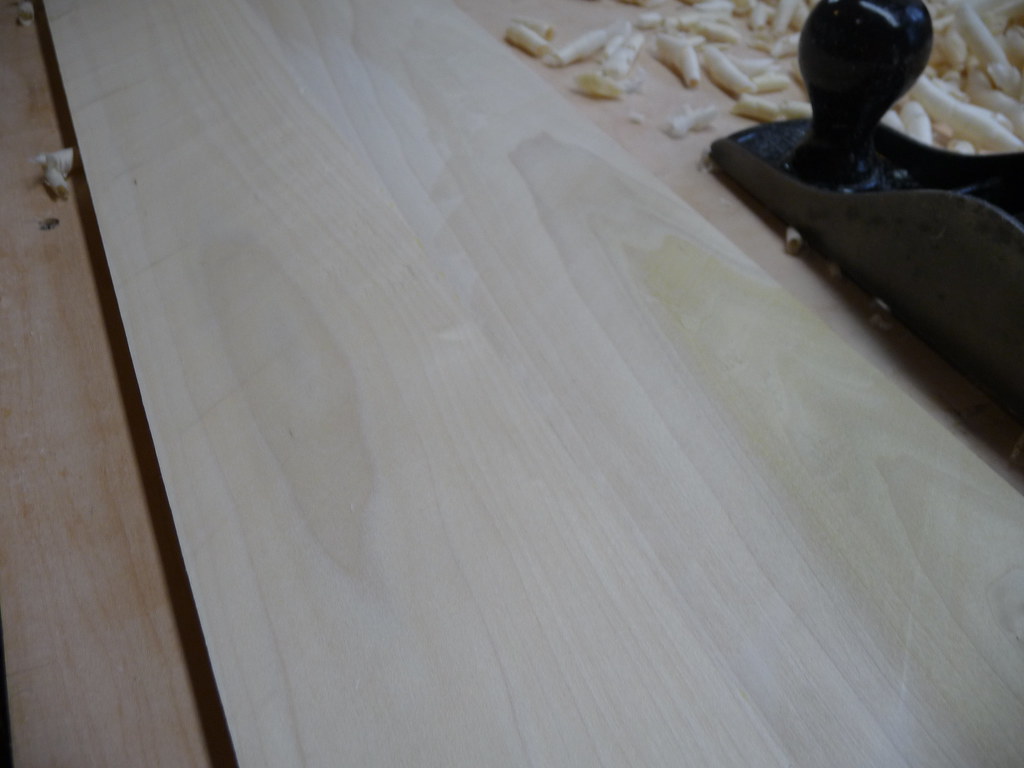
Once the glue is dry, there can be a bit of "squeeze out" remaining. Its visible in this image. A little run down the seam with a chisel removes most of it, and the planing will get rid of the rest. The boards are not exactly in line with each other (one is slightly higher than the other), as can be seen in this photo. This will soon be corrected with the planes:

The now-single board is then traversed with a jack plane, fitted with a curved iron. This allows it to take deep scoops out of the board, quickly bringing it all to the same level, though it leaves a gently undulating pattern which has been likened to Atlantic Ocean waves. They feel great, simultaneously smooth and broadly rippled. They do not show up well in this photo, but a keen eye can see some diagonal lines around their edges:
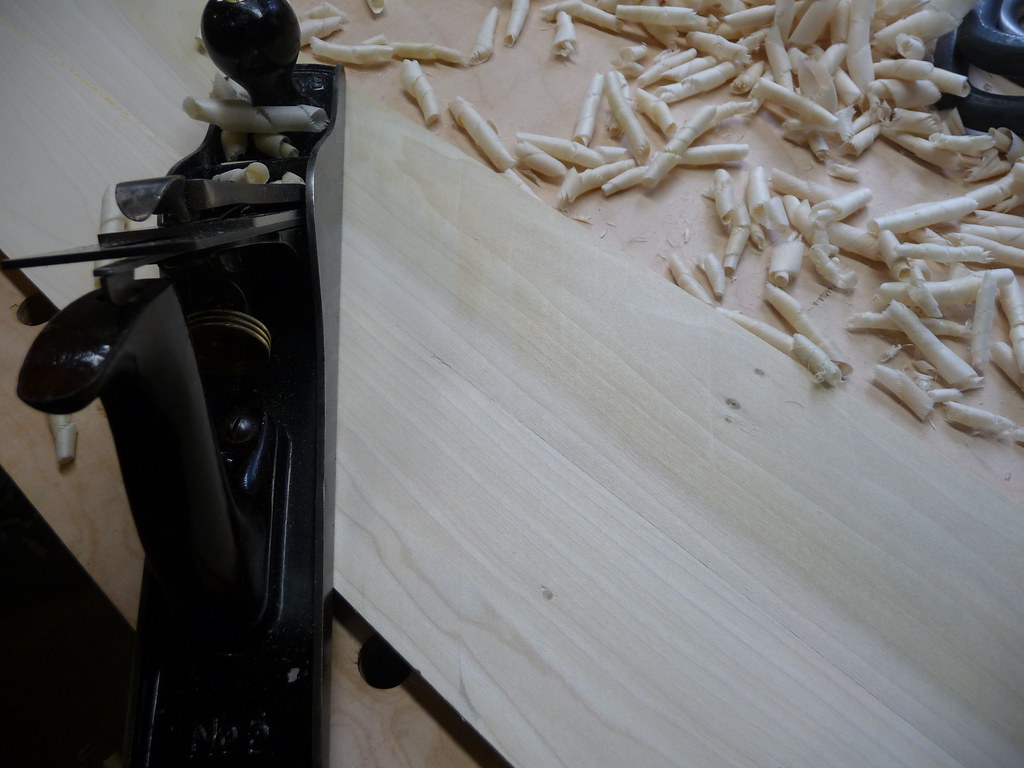
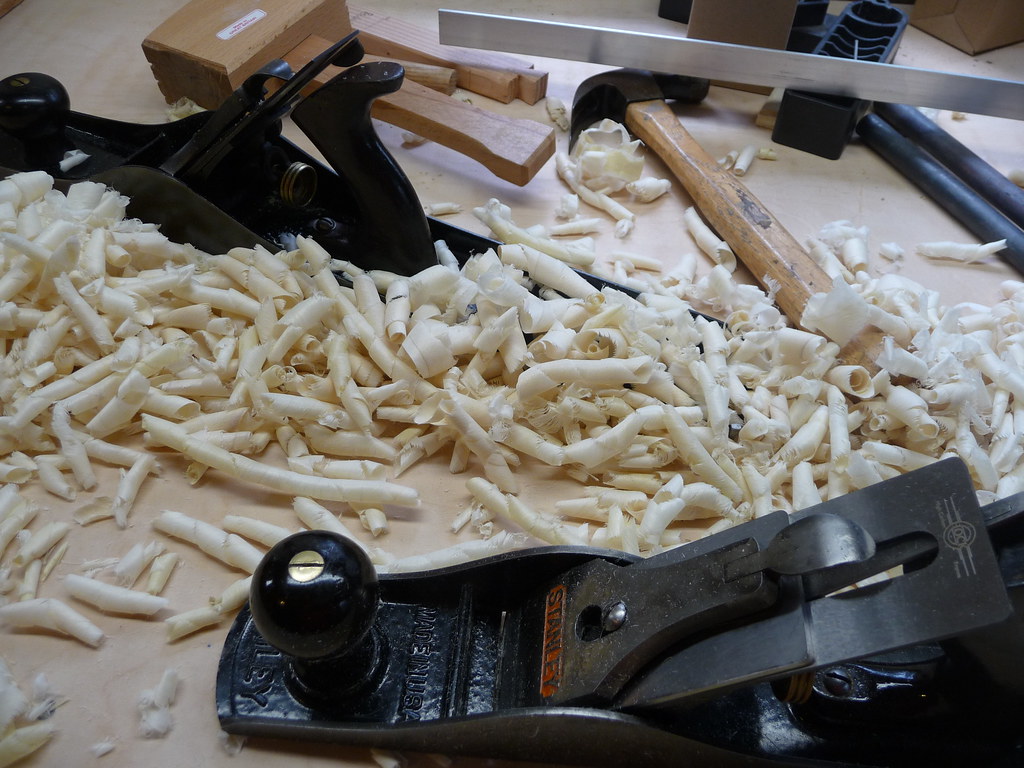
This process generates tons of curls. Treating 3 boards like this involved sweeping the workbench several times, filling large tubs. The shavings look like some kind of pasta, or maybe I was just hungry:
When complete, it is very difficult to tell where the seam is (unless the differing grain pattern gives it away). I like to check the whole seam with my eyes closed to find tell-tale gaps or ledges. The scallops mostly go away also, using the jointer plane and a bit of the jack with a straighter iron, a sortof improvised smoothing plane. The insides of the box won't get any more attention, so the echos of the ripples will be there for someone to discover. The outside will be smoothed after assembly, ideally bringing them totally smooth to the touch.
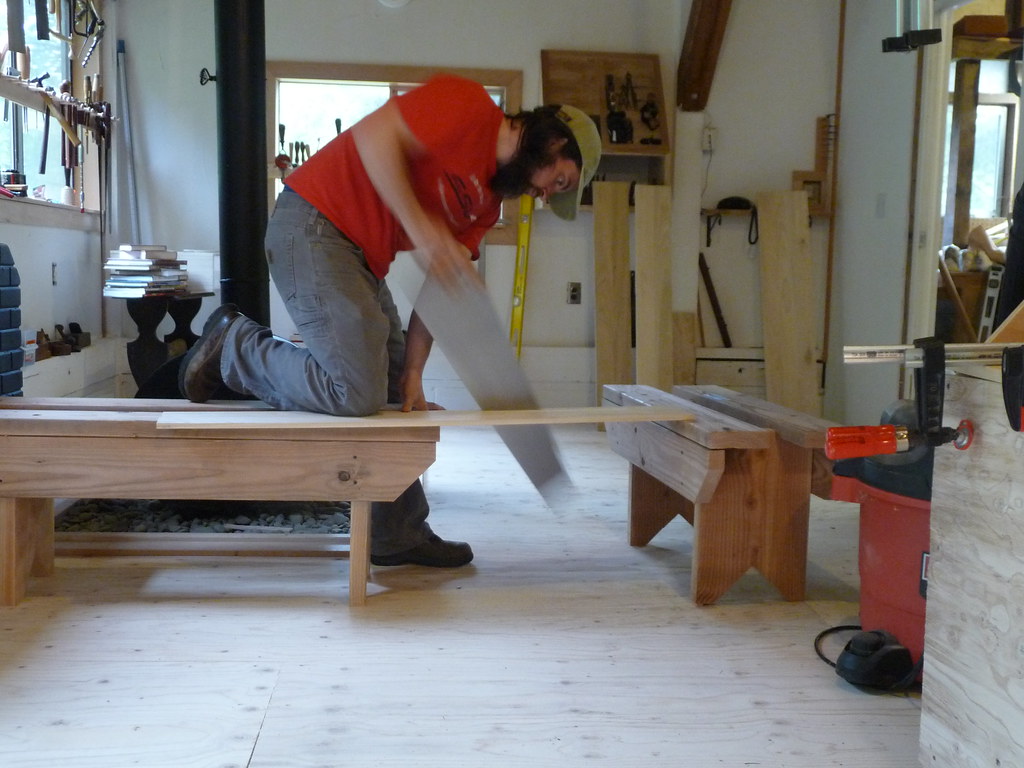
With the board flattened, its edges are trued, and some of that new width glued onto them comes right back off. Its marked to its new width, and the waste is ripped off with a hand saw. I've been trying all kinds of various positions on the sawbenches, they all work equally well so I move around to keep from fatiguing the same muscles. I'm still very impressed with the Wenzloff and Sons panel saw - its not difficult to track the cut line and its relatively fast.
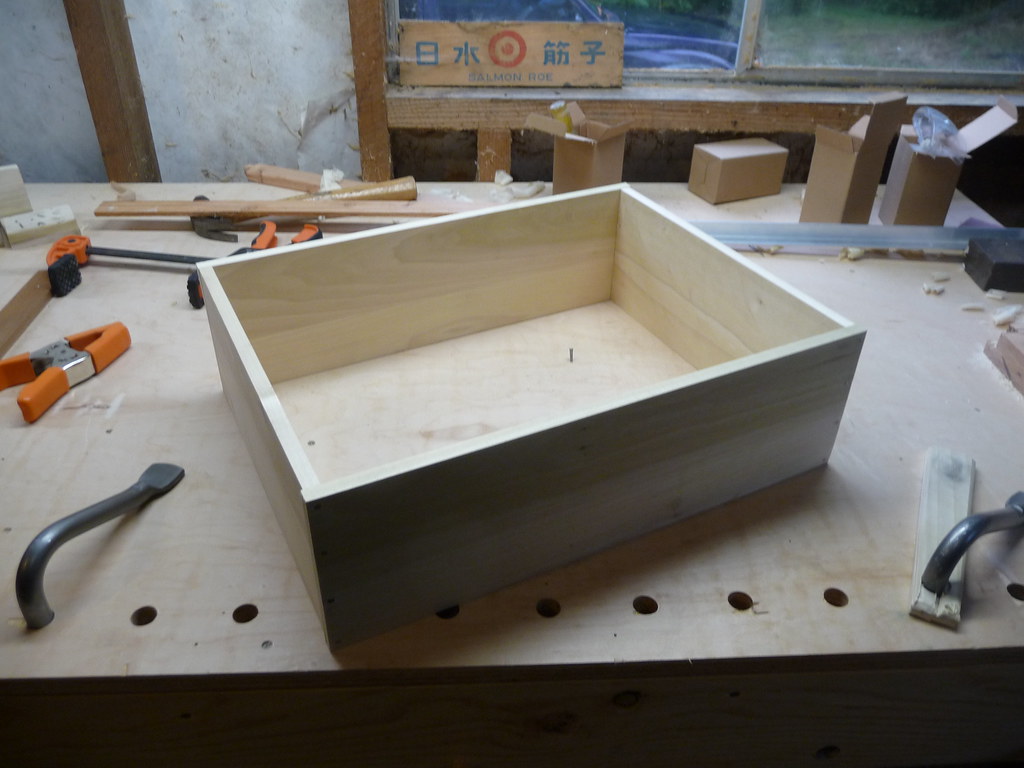
The board is then marked into the seperate pieces for the ends of the box, and cut. A second board is ripped, and both are planed to re-true the edges and ensure they are of the same width. Then, the 2nd board is marked and cut to produce the sides of the boxes. The sides marked to indicate the position of the end boards, and its all nailed together. This process is a bit of work which I failed to photograph. Maybe on box #3. Here's the results of today, the shell for Packing Box #2 is complete. Soon the bottom and lid will be assembled, and the box will be done (but unfinished!).
The glue-up starts off by ensuring the edges of the boards are square and true. I didn't bother to photograph it this time. Next, they receive a bit of glue and are laid side-by side in the clamps:
There they rest a few hours. I like to leave them at least overnight, to be sure the glue has fully cured. This becomes an issue when there are not enough clamps and the boards are needed quickly.
Once the glue is dry, there can be a bit of "squeeze out" remaining. Its visible in this image. A little run down the seam with a chisel removes most of it, and the planing will get rid of the rest. The boards are not exactly in line with each other (one is slightly higher than the other), as can be seen in this photo. This will soon be corrected with the planes:
The now-single board is then traversed with a jack plane, fitted with a curved iron. This allows it to take deep scoops out of the board, quickly bringing it all to the same level, though it leaves a gently undulating pattern which has been likened to Atlantic Ocean waves. They feel great, simultaneously smooth and broadly rippled. They do not show up well in this photo, but a keen eye can see some diagonal lines around their edges:
This process generates tons of curls. Treating 3 boards like this involved sweeping the workbench several times, filling large tubs. The shavings look like some kind of pasta, or maybe I was just hungry:
When complete, it is very difficult to tell where the seam is (unless the differing grain pattern gives it away). I like to check the whole seam with my eyes closed to find tell-tale gaps or ledges. The scallops mostly go away also, using the jointer plane and a bit of the jack with a straighter iron, a sortof improvised smoothing plane. The insides of the box won't get any more attention, so the echos of the ripples will be there for someone to discover. The outside will be smoothed after assembly, ideally bringing them totally smooth to the touch.
With the board flattened, its edges are trued, and some of that new width glued onto them comes right back off. Its marked to its new width, and the waste is ripped off with a hand saw. I've been trying all kinds of various positions on the sawbenches, they all work equally well so I move around to keep from fatiguing the same muscles. I'm still very impressed with the Wenzloff and Sons panel saw - its not difficult to track the cut line and its relatively fast.
The board is then marked into the seperate pieces for the ends of the box, and cut. A second board is ripped, and both are planed to re-true the edges and ensure they are of the same width. Then, the 2nd board is marked and cut to produce the sides of the boxes. The sides marked to indicate the position of the end boards, and its all nailed together. This process is a bit of work which I failed to photograph. Maybe on box #3. Here's the results of today, the shell for Packing Box #2 is complete. Soon the bottom and lid will be assembled, and the box will be done (but unfinished!).
Subscribe to:
Posts (Atom)