Wednesday, December 4, 2013

Tuesday, December 3, 2013

[Review] Cool Tools


I am just old enough to have grown up with the Whole Earth Review/Co-Evolution Quarterly, although many of the copies I was rooting through at the libraries were already a few years old. Nonetheless, these tomes were deeply formative. I am fairly sure that is how I discovered Lloyd Kahn, Eric Sloan, and Zome tools.

This type of writing is sorely missing in today's tech-obsessed publishing world. Even hand-tool woodworkers are constantly clamoring over the newest redesign of an old standard rather than simply delving deep and discovering what in themselves can be improved or optimized.

The Whole Earth Review spirit, on the other hand, would often look backwards towards simpler tools and techniques while judiciously admitting newer innovations as well. A type of responsible futurism, perhaps it could be called. Kevin Kelly, Stewart Brand, Jay Baldwin, and others helped shape the ecotopian visions of a bright green future in the 1970s, and we need that type of vision now more than ever.

Kevin Kelly has kept the spirit alive in his Cool Tools weblog. It is essentially reviews, but they are not as worshippy as other tech/tool sites. They tend to be sober, dry, and straightforward. You will find that  there is a strong element of "good enough" rather than an obsession for the best. It is not uncommon to see reviews stating something like "don't get the premium one, the basic model is just fine and 1/3 the price".

I've subscribed to the Cool Tools newsletter since the beginning. In fact, it used to be called Recommendo. My desires for more and more "cool tools" have continued to fade, but I still scan it, looking for those lifetime quality tools and novel ways of handling problems like carrying plywood alone, cleaning up drywall dust, hacking open products sealed with special "security" bolts, etc.

It was pleasing to see, recently, that Cool Tools has been released in a large book format. Like the original Whole Earth Catalog, it needs to be seen in person to appreciate. It is like sitting with the old Sunday funnies, slowly poring over the colorful illustrations and finding surprises on every page.

It is mentioned here because there is a woodworking section, and several related tools throughout. Full disclaimer - I do have a review published in it and so received a contributor's copy, but I would have certainly purchased it for full price.

The book is also a terrific example of self-publishing. Kelly knew traditional publishing venues would not allow him the type of control he wanted, and so he skipped right over them, using freelancers as needed. He has a writeup on the process at his blog.

As consumerism continues to bother me more than ever, I felt some reluctance to even mention this grown-ups toy catalog. However, after sharing it with some equally cynical (ok, almost) family members who expressed pure delight, I figured I should share it with my public.


Monday, November 4, 2013

NW Adze making with Steve Brown

While assisting with courses at the school, I generally end up coaching students with their tool set up, technique, and use. This weekend, though, I have to admit that other than some grinder basics, I was there just to take care of loose ends. The topics covered in Making Northwest Style Adzes  were largely foreign to me. What a treat, though, to learn something utterly new and fascinating. In just a day, I was able to take a blank of 1099 steel, forge it into a flared shape on an anvil, shape hollows along and across the blade, grind proper bevels, and then the next day convert a tree branch into a handle and mount the blade. I now have a fully-functional carving adze. I suppose next I should learn to carve.

Here is the tool:


The blade is held onto the handle with skein-line, very strong line used to attach fishing nets to floats and that sort of thing. There is a rawhide pad covering part of the line, which was wet when applied so that it will shrink into form-fitting place. This pad protects the line from abrasion in use. I then wrapped the handle with old-school cloth handlebar tape (for bicycles), finished with twine, and then coated in oil and beeswax. I feel a layer of shellac on top of that will provide a little more grip so hope to do that.

The blade needs a final bit of honing on curved stones, and the outiside of it could use some polish to remove the scale from the heat treating and reduce friction. Some quick test chops show that this thing is pretty sharp as it is though!

It would be quite easy to walk away from woodworking and get into blacksmithing. I'll try to hold that urge at bay, for now, and slowly continue to build some metalworking skills as they apply to woodworking.

Steve Brown  is a gifted instructor and a living treasure. His knowledge of NW culture and artistry is vast, and he has the ability to translate and share this lore with ease. All of the students had a great time and were reluctant to leave. Skill levels ranked from utter novices to some master carvers. Three of the students were down from Alaska in order to build more adzes for their six-year project building a longhouse by hand at Glacier Bay!

This class is highly recommended, and it was a total pleasure to be a part of.

Thursday, October 24, 2013

[Workbench] Mechanical Joints

The workbench I am currently building relies heavily upon mechanical joints. In other words, the joints themselves provide the strength, not glue nor screws. The term might be especially useful in this case because I ended up using machines to create bits of them (more below).

Here are some of the legs ready to receive the stretchers:


You can see from the number of cuts and shoulders that the layout was involved. Not to say difficult, but it took a few hours for all the members.

Here's the stretchers and rails, a bit simpler although the lower set are now also rabbeted to hold shelves. I would have cheated and tacked on a ledger for that, but it is not my design:


You can see that some of the joints are cut out, and some have the waste remaining. I did use a bandsaw to speed up the scoring process.

I also used this to trim many of the members:


Is Roubo spinning in his grave? I doubt it. He'd understand I have a deadline to meet. I also used a drill press for the mortises, although my test joints were made entirely by hand and came out a bit neater. Go figure.

P.S. - The first batch of Jim's tools have been photographed and as soon as I have the prices and descriptions written up, they'll be listed here.

Friday, October 11, 2013

Current and coming projects: workbench and anarchist's school box

First of all, thanks for all the interest in the Wenzloff tenon saw and the upcoming listing of Jim Tolpin's tools. Jim is still sorting his tools, so patience will pay off here. Regarding my tenon saw, it has already found a new home with one of the students of the recent Handsaw Essentials courses at the school. I hate to disappoint any readers, but I couldn't pass up the chance to bypass packing and shipping the thing. I will be listing some other tools in coming months, I suspect.

Speaking of the school, I am building another workbench, a prototype for an upcoming class in bench construction. This one will be made of construction-grade douglas fir (like my own Roubo) but will be smaller.

Here's some of the lumber stacked up and ready:


In the interest of speed and in part due to the scale of the work, I will most likely end up using some power tools to create some of the joints. I did, however, crosscut all the members by hand:


On my own time, I have been keepin' it real with pure hand tool projects. If you are familiar with the work I have done through Lost Art Press designs, you'll find this weirdly familiar:


Yes, that is a "school box" a la Joiner and Cabinet Maker, but it has moulding and tills right out of the Anarchist's Tool Chest. This is a pen and pen supply chest for a fountain pen collector. It will have 3 tills to hold about 36 pens, with deep wells on the bottom to store repair tools, ink, and notebooks. It is always deeply satisfying to design a piece with such specific needs and specifications in mind, and then let the layout unfold around those modules and parameters.

I've covered dovetails before, but I thought to snap a photo of my layout kit:


That little steel square is from my Grampa's days as an engineer at Ford. I always love seeing his initials stamped on it. The dividers were his, too. The Tite-Mark gauge, however, is pretty new.

Since these tills are pretty shallow, the joinery is miniature. In this autumn light, it can get hard to see some of the lines, so I have been making use of my magnifying lamp for marking:


Hopefully, next week I will get new glasses and maybe then all of my joinery will miraculously perfect itself. In the meantime, light helps a lot.

Here's 2 of the tailboards ganged up for rapid marking and cutting. The tails are all (in theory) the same size so layout is fast. Since there were only 2 tails, I simply set the divider to find the middle of the shoulders, and used my narrowest chisel (1/8th inch) to determine the gap.


and a pinboard, this is cherry:


Chop 'n' pare as usual:


aaand, we have a frame:


tack on some pine and it's a till:


While the glue dries on the 3rd till, work on the lid:


The chest-box will hopefully be wrapped up soon, and then onto that workbench. This weekend, however, I will be at the school helping with the Handplane Essentials class. Hope to see some of you there!


Friday, September 13, 2013

[Mailbag] Subscribing to the blog, Veritas Inset Vise, Tool Sale, and more

Eventually I should write a formal FAQ, since many of my Qs are indeed rather F. I do try to answer them as thoroughly as possible, so don't hesitate to A.

Here are some recent ones which have come up with some regularity:

Q: How do I subscribe to the blog?

A: It is not as obvious as it should be, but there is a subscribe link at the bottom of the page. Here it is:

http://www.thejoinersapprentice.com/feeds/posts/default

You can put that into a news reader of your choice, and the reader will take care of the rest. That said, you should also just be able to put thejoinersapprentice.com into your reader and it will find the subscribe post. 

What is a news reader, you may ask? If you are not already aware, but do enjoy reading blogs, you have missed out. A news reader is a dedicated program (or website) which will constantly check to see if your favorite blogs have updates or not, and if so, will present them in a tidy fashion. I have always loved Google Reader, but it recently went defunct. I now use Feedly and am more or less happy with it, but I have not looked very far for alternatives. If you have trouble setting it up, let me know what type of computer or device you are using and I can try to lend some specific guidance.

Another option, although I have not tried this service, is to sign up for blog updates via email using it: http://blogtrottr.com/

Q: How much for that Wenzloff tenon saw? When will it be listed?

A: I'm still going through my tools and will list a few at a time along with prices. All I can say is be patient, but thanks for your interest. On that note, Jim Tolpin is also still processing his tools (and having a garage sale tomorrow, Sep 14 if you are anywhere close to Port Townsend). 

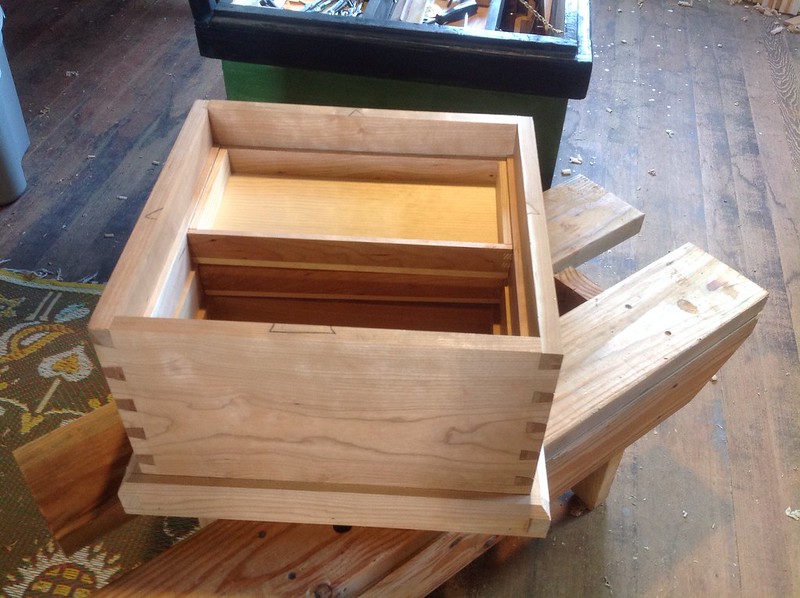
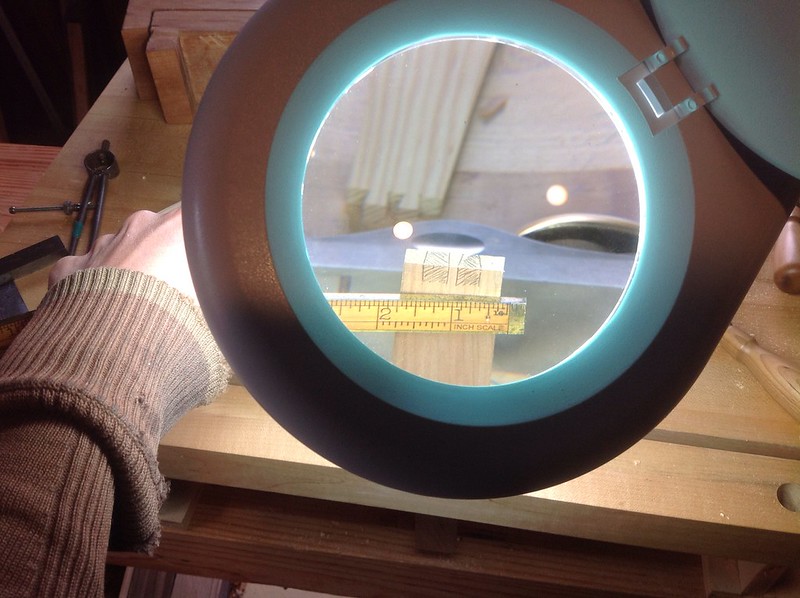
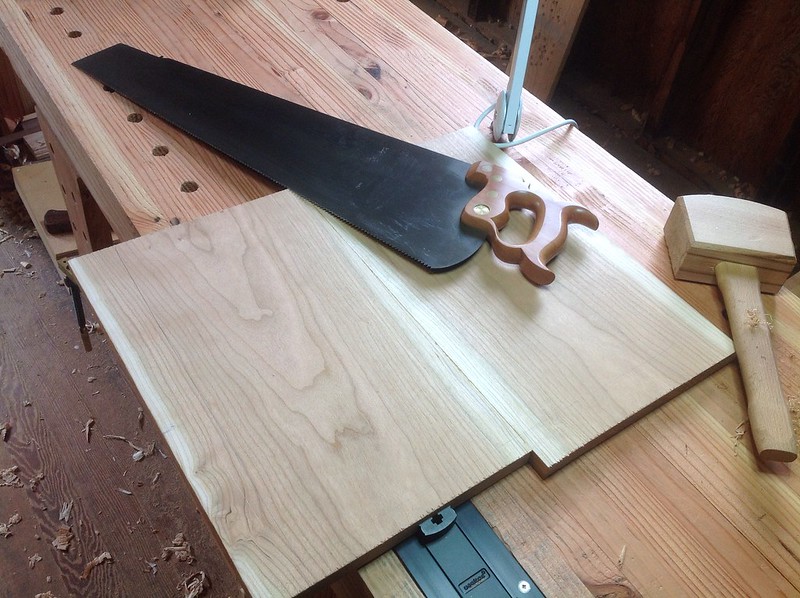
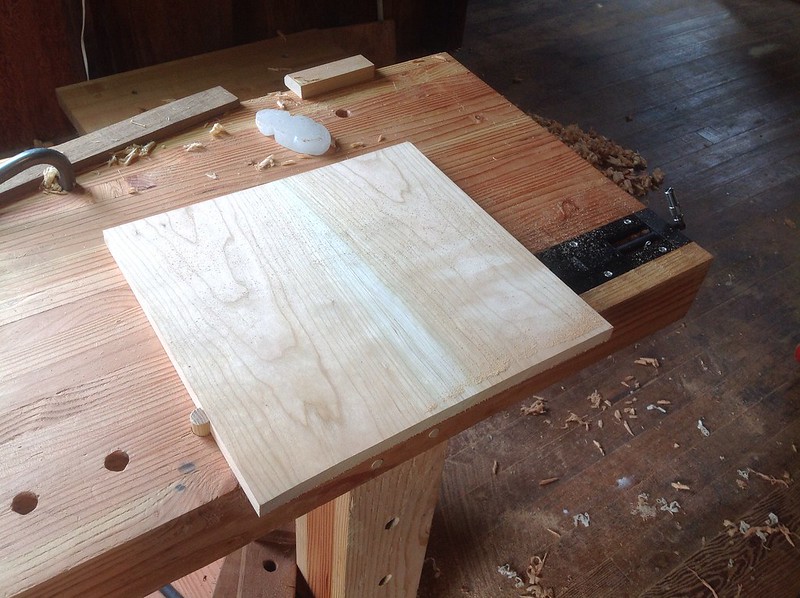
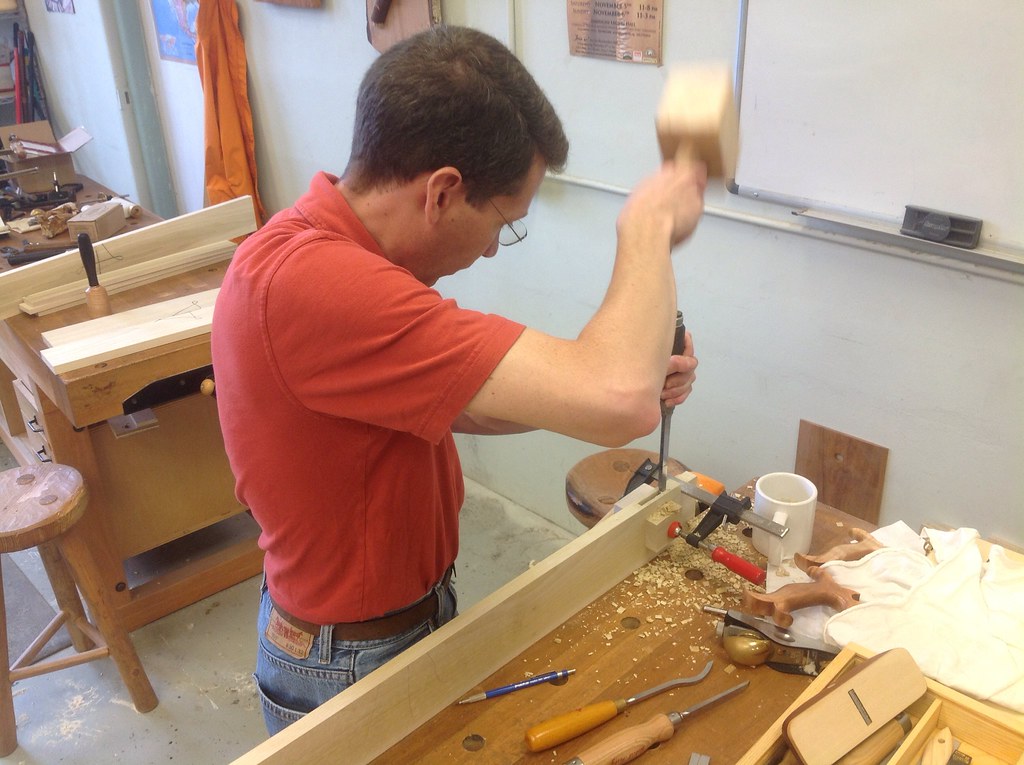
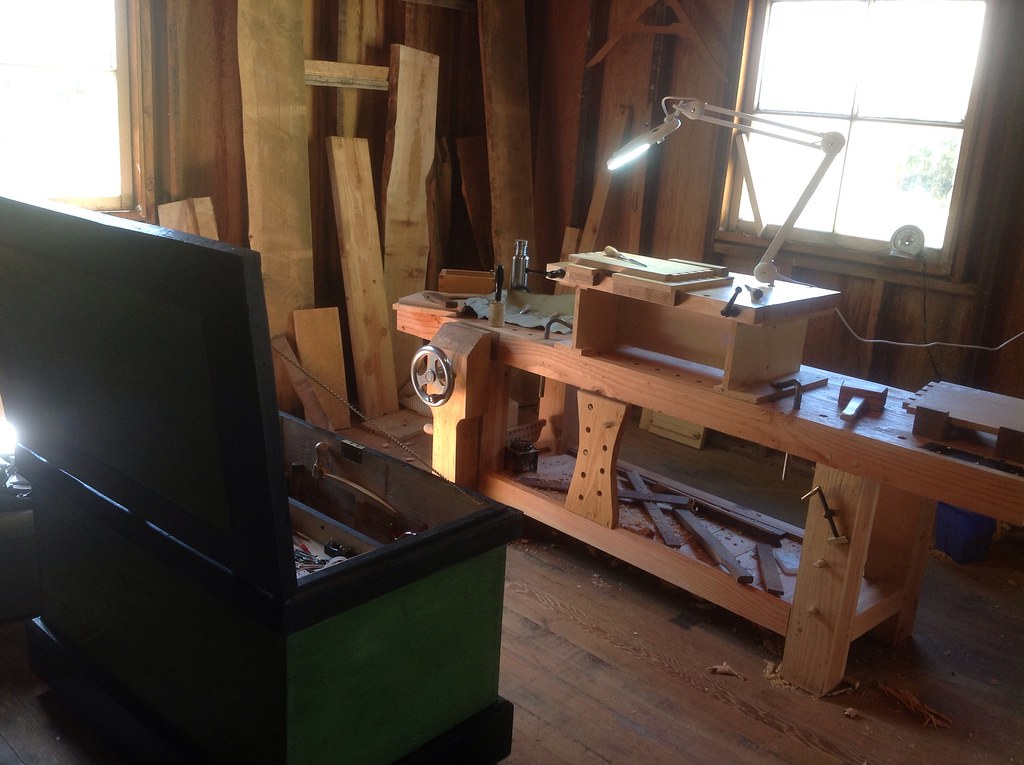
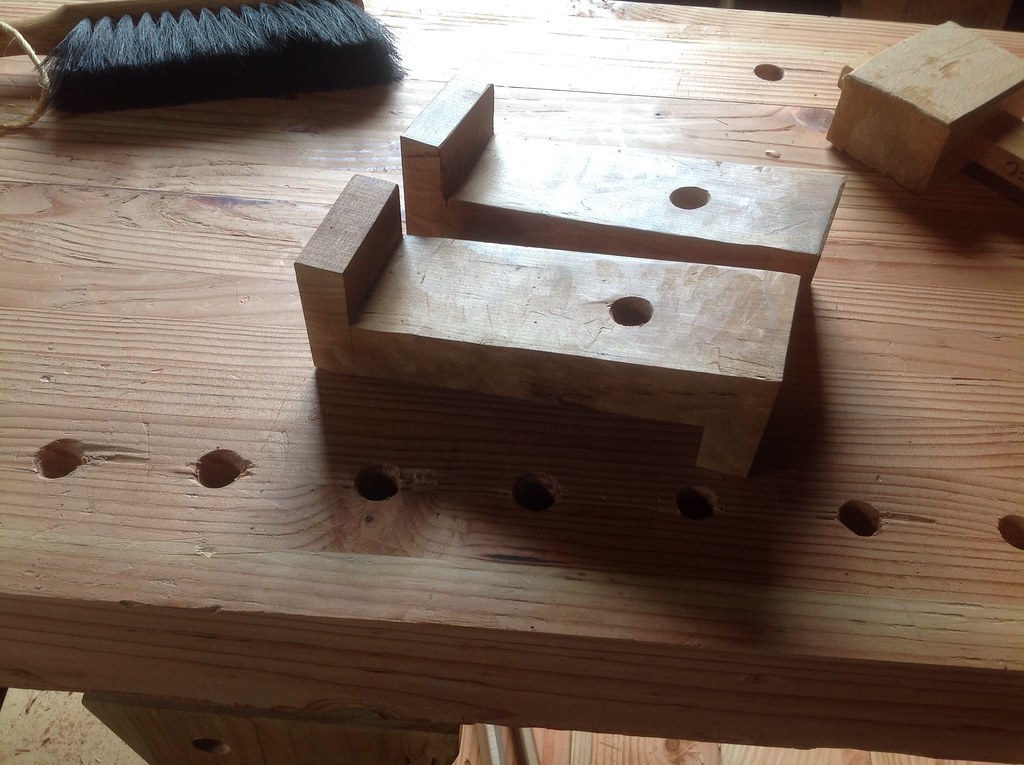
Q: How do you like the Veritas Inset Vise?


A: I like it a great deal. As seen above, I use it on the far side of my bench where it has not yet been in the way of anything. I also have added a long row of dog holes, which is a lot of arguably needless drilling, but it is very convenient as I never have to crank the vise too much to get a pinch. It works very well for the style of work that I do. The main complaints that I and others have are that the dog is too tall for thin stock (easy to fix) and that it is "too slow" (never an issue for me). I worked for a long time without a real vise at all, just planing stops, dog holes, holdfasts, and a Wonder Dog. If you like the Wonder Dog and do not mind the permanent modification of the inset vise, you will like it. It is a very elegant and affordable solution. I have never enjoyed tail vises for workholding, although I do like them for vertical ripping at the bench.

Q: Why do you not post videos?

The short answer is because I do not have a decent camera anymore. The longer is answer is that I hope to and intend to; perhaps as soon as this winter as I have more free time. On that topic, I am curious if readers/viewers would want to see more how to stuff (there is already so much out there), documentations of project builds, or would special topics rarely discussed elsewhere be more appealing? Or just general woodworking entertainment? I do enjoy teaching and translating the tricky concepts into easy-to-grasp examples, and video can be great for this. At the same time, what is really important is that you get to work. If I can make a video on any topic which encourages you to actually practice on your own, I will aspire to make this happen.

Q: What type of ___________ should I buy?

I probably get this most regarding bench chisels, but I get it frequently about all kinds of tools. I do not like to answer these, but I will generally try. Working at the school, I have had an opportunity to see perhaps more varieties of tools than typical, and see those tools worked hard. It is difficult not to form opinions or at least observations of quality, ease of set up, durability, and so forth. That said, as time goes on I understand more and more clearly that a great tool will make a good woodworker better, but even the greatest tool is no substitute for practice and skill which can only come from practice. I would rather see someone spend 100 hours with a hardware store chisel than spend 15 minutes a month with a boutique tool. All that aside, if you have a specific need to fill and your budget is established, I can share my observations.

Q: How can I get started? How do I build a bench when I don't have a bench?

A: I get this a lot. I understand. This is a topic that deserves a whole entry, or perhaps a book. However, I can say this (although you won't like it):

If you want to get good at woodworking, start by doing the dishes.

Seriously. Learn to enjoy the mundane. Take pride in being meticulous. Invent work for yourself. Try to find better ways. Accept zero slop. Hand dry them until they squeak and then do it once more with a fresh towel. Time yourself against the machine. I have never put this to the test, but I have a feeling that as I watch students for a week, and how they learn and progress, I could describe their relationship to their household chores. 

I might get more into this later.

Keep the questions coming, it is always my pleasure to help others find what they are seeking!


Monday, September 9, 2013

Coming Soon: Autumn tool sale!

Just a heads up that soonish, hopefully within a month, I will be listing a large number of tools for sale. Some of these are mine, but mostly this will be on behalf of Jim Tolpin. He is getting serious about going minimal (and I am hoping to stay that way) but his loss can be your gain. Decades of well collected and restored tools. It is going to be a bit of a process to catalog and present them, and I am sure they will go fast. This might be a good time to subscribe to this blog in order to receive the heads up. I will formally announce the sale a few days ahead of time so that those without internet addiction will have a halfway fair chance of being present.

One thing I will go ahead an mention, is that I will be selling my Wenzloff and Sons tenon saw. It has a 4.5" depth of cut and is filed rip at 10 tpi. It is a marvelous saw, but after two years, it is just a bit too large for my small body and the work I do. It is a bit of a custom job, one of the last to go out in the last batches when Mike was still active. Based on the Kenyon Tenon, it has a slightly different tote detail, it has 3 nuts in the tote like the Disstons do, while his image of the Kenyon has only 2. It does have the deep lamb's tongue detail of the Kenyon. Images and more details coming soon, but I wanted to get a heads up out there.


Sunday, September 8, 2013

Anarchy in the PT

This week concluded "Build the Anarchist's Tool Chest" with Christopher Schwarz.

10 students completed the shell, skirts and bottoms of the chests while most of them also finished the frame for the lid. Christopher also build one alongside the students as an example. I was around to help Chris with individual's questions/problems, get the tools set up properly, prepare replacement members when mistakes were made (or the stock kits were deemed rejects), and, of course, clean the bathroom. It was a great group-- isn't it always?-- but this crew was in fact a bit unique. It could just be the type of folks that are attracted to his writing style, but the whole class was as much a barrage of witticisms, horrible puns, and sultry humor as it was woodworking. Well, not really. It was very much about woodworking. But there were jokes. I believe on one or two evenings, some of the participants in the class explored the entertainment options in the area and decompressed with chilled beverages and ocean views.

I only took photos during the mortising process, although Christopher's camera has images from the whole week. Maybe he'll get around to posting some of them.


Chris keeps heady lectures to a minimum, but not because he has nothing to say. There is just so much to do in terms of building. That said, his lectures and demos are completely saturated with utterly useful information. He can get information across at full bandwith - the students were progressing at warp speed through his exercises and explanations.


There was much pounding. Above is Denny, whom I had previously met in the By Hand and Eye course. In the background is Badger, who was also in that one.


The chests become useful long before they are complete.


This is Bill from Seattle. He's taken a few courses at the school already and really has the knack. If you read the Lost Art Press blog, you have already seen his mini and micro layout squares.


Bill also brought in his tool tote which he built in the Joinery Essentials class. It is great to see one being put to use, and he did a beautiful job on it, don't you think?


Check out Badger's Roubo print tool rolls.


Here is what it was all about. It was quite a spectacle to have 11 of these around at once. Every single one came out well and will doubtless be of service for decades (or more) to come.

Sadly for us but great for him, Chris is taking next year off to focus on his research and writing. When his schedule is announced for 2015, though, I would urge any and all to jump on it. Not that they won't anyway.

Now I need to get back to the school to sharpen up the tools for the next class...

Thursday, September 5, 2013

[offtopic] etching and aging

I've always wanted to have a tool or two engraved by Katherine Kennedy. When my daughter, Kestrel, was born, I contacted Katherine to see what it would take to get a Kestrel put onto my smoothing plane as an heirloom. I do not think she asks too much, but the timing was not right for my wallet. Someday, I hope.

Anyway, today I received a gift from my wife who has recently joined the team at Daily Bird Pottery. 

I haven't had reason to mention it here, but aside from my woodworking, I also kindof love entomology, and am especially fascinated by order Mantodea. So I was pretty stoked to come home to this:


I would love to hear from anyone else who has a mug combining handplanes with insects.

The mug was a birthday gift, I just turned 40. It was a nice touch to get carded buying a bottle of wine last night. Being Port Townsend, the cashier then informed me that Virgo has its new moon coming, or something, and that this is a great time to decide what I want to keep and what I want to get rid of. I said "I will get rid of it all!". Except the mug.

This has been a great week in that helping out with Christopher Schwarz's class at the school has been a total blast. Witnessing skills bump up on an hourly basis is such a delight, it makes every difficult step in my journey to learn and share what I have learned worth it many times over. Christopher is an excellent instructor, has an infectious sense of humor, and is deeply generous. Also, he knows stuff about tools and how to use them. With admitted bias, I highly recommend seeing him speak or taking classes with him. On that note, if you are at all local and live under a rock, you have a chance to see him this weekend at the Wooden Boat Festival. You can also stop by the school tomorrow to see the utterly glorious spectacle of 11 "Anarchist's Tool Chests" in their final stages of assembly. I suspect around 7pm tomorrow, there will be a palpable dip in the global beer supply as some tired students rinse the sawdust from their mouths.

Monday, September 2, 2013

Sins and Beezdiks

It is not a good idea to make a blog post without original photography, but here I am. Also, here is a beezdik, an Australian term meaning about 3 thousandths of an inch:


This week I am helping some guy named Christopher Schwarz with his class on building an "Anarchist's Tool Chest" at the Port Townsend School of Woodworking. While he is plently capable of running a class and getting 16 students to get their chests together, it is a lot of fun to take part helping the students realize what sharp truly is, suggesting local restaurants, and providing cheerleading service. Really, their dovetails, go dovetails, nice dovetails, are great! RAH!

There are 12 and a half or so chests being built. There are 10 students, one of them is also making the "travel" version, and Christopher is making one as well. I am not sure, maybe  that is eleven and a half. Anyway, it was 1200 lbs of poplar stock, hand-milled using machines (sideways glance here) by the always amazing Abel Dances. The students showed up, had a quick orientation, and quickly succumbed to Christopher's generously-oiled iron fist approach. Tears were shed, boards were broken (ok, one was broken), curses were uttered (ok, a lot), and a very good time was had by all. I believe everybody had reasonable tailboards done by the end of today, day one of five very long ones.

Back to the beezdik... this is the unit of measure which one should observe when placing the kerf of a cut onto the waste side of the line defining a pin. It is very precise. Puts the metric system to shame. Half a beezdik is even more precise, effectively doubling the snugness of fit.

It is great to see some old friends show up for the class. Some I remember from Jim Tolpin's pilot By Hand and By Eye class at the school, some from Joinery Essentials, and some from Woodworking in America. These dudes are all pretty serious, and the toolkits they are toting are enviable. It is nice to know that at the end of the week they will have some storage spaces to be proud of. More soon, and hopefully with actual photos of actual beezdiks.

Friday, August 23, 2013

Japanese Tool Box

I liked the look of the box that Christopher Schwarz posted about here:

http://blog.lostartpress.com/2013/03/24/japanese-tool-chest-measured-drawings/

And so I made one (two, actually). I think the sketchup model has an error in it, but more on that later. Anyway, here is take one:


I used cedar. In this case, fence boards. I hunted through the whole stack to find the clean ones. Not bad for $2 per 6' board. I let them dry out for eight weeks or so. Still, some were still a bit wet, so had to move carefully. I really like this design. Finger joints are actually harder to cut than dovetails in a way, but I always like learning a new skill. Also, cedar can be a pain. It can also be quite lovely. We move ever onward!

Wednesday, July 17, 2013

All Projects Great and Small

Consistent blog updates are, in many cases, riding shotgun with the devil; that is, the result of idle hands. In many cases, working with wood at length leaves few resources for chronicling it. Anyway, some stuff lately:


A garden gate made of cedar drawbored mortise and tenon frame, with reclaimed oak floorboards, walnut accents, and cedar braces. The walnut is scrap from a Maloof inspired rocking chair class at the woodschool and the oak is leftover from reflooring my home. The glass bit is a microwave carousel plate from a thrift store, with seed-of-life motif applied using beads by my visionary wife. The neighbors seem to like it so far, and it was fun to build.

I have a brief product review for you:


I recently added a long overdue lamp to my mix. I am working in a dark space, despite what those filthy lying glowing windows try to tell you. The lamp I have is fine, meh, whatever. Not great, but it has a nifty magnifier which kindof works, when you get it exactly right. It is from Lee Valley (since I more or less trust their 3rd party sourcing). This is it. I give it a C+ to B-  or "meh" rating. However, the star of this show is also from Lee Valley, the 3/4" lamp bushing. This little jammy sticks into any doghole, assuming you are running 3/4". I hope you are, because then you can use Gramercy holdfasts, Veritas Wonderdogs, and so on. Anyway, I have been constantly running this lamp (and the bushing) all around the shop, with the brace and 3/4" bit in tow. Yeah, it came with a clampy deal, but who wants to move that around (it lives at the sharpening bench) when you can just plug and play? Get one, and thank me later.


What has really been taking a lot of my time and energy, though, is more akin to carpentry than the joinery I typically pursue. A friend and neighbor is building a new shop (for handtool woodworking) and wanted a traditional design, in this case modelled after a cobbler's shop in Colonial Williamsburg. The shop is itself largely built with hand tools, and I am pleased to be on the crew. Here it is just after raising the ridge beam, and just before adding the ceremonial hemlock branch, known as Topping Out.
Tons of fun. More as it progresses. This is also why I have been riding around town with a tool tote on my bike. Nice work if you can get it, so they say.

And on a smaller scale, I have been building another School Box. This one is unique in having walnut trim (as above, I have a little pile of it). Body is alder, bottom is pine, and partition is oak. This one is also unique in that I slightly redesigned it using design principles from Jim Tolpin and George Walker's By Hand and Eye. I actually lent out my copy of Joiner and Cabinetmaker, and so took measurements from an existing box, and softened them into compliance with whole number ratios with my dividers. I am optimistic about the result. I am still using the same techniques and abiding by the order from the customer, but in terms of layout, the box shell and molding are slightly more harmonious than the inch-honoring model. I'll post the finished version soon with an "authentic" version for side by side comparison, but here it is tonight: top attached and hinged, but still needing top molding and a lock:


More soon. Until then, I remain,

thejoinersapprentice(dotcom)

Saturday, June 29, 2013

A Flexible Bench

After years of having workbenches connected to walls, I am enjoying the walkaround freedom and ability to easily work on stuff like this garden gate:


I want to miss having tools hanging on the wall, but I am actually really digging working out of the chest.

Just some datapoints. Everyone is going to have to find what works for them on their own.

Tuesday, June 25, 2013

[Sale] Breaking up with my dovetail saw

EDIT: The saw has been sold. Thanks for the interest and sorry to those who missed out!


Dear Gramercy Tools 9" Dovetail Saw,

This is difficult to write because we really have had some good times together. Great times. There was a time when I could never imagine life without you. For the good of both of us, however, it is time to move on. For you to see other hands, for me to use another saw. It is definitely not you, it is me. My hand is simply too small for your tote. I have always known I had elfin scale features, but I thought we could get beyond it. It seemed to be going ok, until I recently found a tote which actually does fit my hand. It is just not fair to ask you to continue to compromise when we would both be happier with a new situation.

Love always,

The Joiner's Apprentice


Such were the thoughts in my mind recently when I confirmed that I am much happier using a saw with a smaller tote. The Gramercy saw is an amazing tool, the cuts are fine and crisp and it is easy to control. I always end up with a mild fatigue after a session cutting with it, however. Those with normal-sized hands don't seem to have this issue (in fact most folks I have allowed to test the saw love it). This could all work out well for you, if you are one of those blessed normal people. I'm letting my saw go to a new home. It would cost you $190 new (plus shipping) and I am offering it for $145 including shipping in the continental USA. $135 if you want to pick it up in Port Townsend. The saw is in perfect working condition, and has been recently sharpened by hand tool expert Jim Tolpin (I am learning to sharpen saws, but tiny teeth like this are intimidating to me still). Send me an email if you are interested in scoring this saw for almost a third less than it would cost you new. I can even throw in the split nut driver upon request in case you want to ever take it apart.

Read all about it at Tools for Working Wood.

Here are some photos:

It fits perfectly in the divider of the tool tote I built:


The etch indicates this was purchased as a complete saw, not a kit:


I'm already missing it, such a lil sweetheart:


The saw has been sold. Thanks for the interest and sorry to those who missed out!

Thursday, June 20, 2013

Bench Hooks, Sloyd, and Battens

Recently I completed acting as teaching assistant for another round of "Hand Tool Heaven" with Jim Tolpin at the Port Townsend School of Woodworking. This is a class for complete novices, and is a bit ambitious in that it aims to skim the surface of essential joinery skills in just five days. It is always a blast to watch people get it, and the class improves each time. The class is not project based per se, but the students do work on shop appliances and layout tools in order to practice their skills. The bench hooks from Jim's "New Traditional Woodworker" are one of these projects. I've helped many students build these workholders, but realized that although I had been demonstrating the operations on scraps, I had not actually built a set myself. I do already have some fully functional bench hooks which I built a few years ago, but wanted to give Jim's design a try at home. I also wanted to see if I could replicate some of the issues the students were having with learning to create dados smoothly and see if I could come up with some solid advice rather than "keep practicing".

The bench hooks take about 15-20 hours for most students to build, although this includes lots of lecture and practice time. They start with rough-sawn lumber which they crosscut, dimension, and true all by hand. As encouragement to any beginning readers or students, let me say that they do not take long once you have a bit of experience with the operations. Here is the set I created the other day:


I added a cutting notch on the left side, largely to see if I could make one accurately enough to rely upon. It came out perfectly, but I opted to utilize the open notch style I am used to on the right edge, since it allows a broad variety of freehand cutting angles:


I did not opt to add the shooting board track, as I believe these appliances are best kept separate unless for some reason storage space is at a huge premium. Bench hooks are quasi-disposable with much use, and a shooting board should last much, much longer. As you can see, I also did not use the finest lumber here. Good enough for bench hooks, but maybe not for a shooting board I want to last a long time. This was the same ponderosa pine the students were using in the class, with walnut ledgers and backstop.

This all had me thinking about bench hooks, and I decided to try something that I had been thinking about for a long time. Christopher Schwarz calls hooks made from a single plank "Old Testament" and I like that as an adjective a great deal. Here is some 3" thick cherry being utilized for the task:


After squaring it, I laid out a design I had seen in the teacher's guide to Sloyd woodworking by Otto Soloman. I did modify his design for the fun of it, to make the hooks proportionally harmonious. If you are familiar with Jim Tolpin's work, this will not surprise you. I made mine 3" square by 9" long, with the feet and backstop being 1" (being a third of the 3") both in width and depth. Although not strictly necessary, I cut relief kerfs since I did not trust the grain of the cherry:


I then popped out large chips with a chisel, a technique I grow to love more and more each time I use it. I suppose a saw could have been used but this is fast and fun:


I used a jack plane (mentioned in the Sloyd book) to clean up a little, although I also did one hook completely by chisel for the fun of it.

Here is one completed and one in the process:


and all done, complete with hanging hole (which I am unlikely to ever use, but who knows):


This shows how they are used. I believe these are intended as general workholders and not especially for sawing as they have no provision for the blade. I am tempted to make a notch in one, or to make a third with no backstop. They are quite narrow, but when used as a pair, they hold the work very securely. I used them to make some dados and expect I will find them quite handy to have around:


I also tried out something I had seen on The English Woodworker's site:


This is a very quick and easy way to hold work against a dog for traverse planing. Wish I would have known this a long time ago. I think all of my planing battens will now have a bird's mouth. If this function is not evident, please see the link above, or consult this image with the workpiece pulled ahead to show how it was held. Give it a try, and thanks, English Woodworker!