Lots of traffic from Mother Earth News today, which threw me for a loop, until I saw that Lloyd Khan had reposted a letter I sent him. It wasn't written as a standalone blog post, and is not all that clear upon re-reading, so let me welcome all of you with a little summary of what this is about:
Woodworking has interested me since I first encountered it as a kid. My grandfather and great uncle both had awesome shops. My father had the interest, but we never had a good shop space available. I'd mostly shelved my interest or reduced it to reading and watching Roy Underhill until we moved out to Coastal Oregon and finally had some space available in an outbuilding.
I then started taking my shop design seriously, and noticed a common phenomenon: the more complex your tools are, the more supporting accessories you need, the more problems need solutions (noise, dust collection, etc) and the snowball rapidly gets out of control. There were two pivotal moments for me: the first was when thinking out loud about jointers (the machine) to a friend, he said "why not spend that money on a jointer plane (the hand tool) instead?" and the second was an episode of The Woodwright's Shop, which is referenced in Lloyd's blog post . You can view that episode on the PBS site. I started to read all I could by Roy Underhill and Chris Schwarz, and the rest is history. Literally. I started reading woodworking history. Its a slippery slope, like all good things.
To save you a lot of trouble, here's my digest: As the Industrial Revolution gave way to the Great Depression, and then the Great Rebuilding of the post WWII era, people forgot how to make items from wood without electric tools. There have always been some old timers, duck decoy carvers, traditional chairmakers, and museum restoration experts, but much of the common knowledge is gone forever. It seems to have reached a low spot in the 80s and 90s, but for a complex mix of reasons, there has been a revival. Old tools that were literally a dime a dozen are now quite hard to come by. Collectors and users have both sucked the market dry. There is a thriving business now for artisinal toolmakers who make reproductions of historically accurate tools or (to my thinking, even better) improvements on them.
This is where I come in. I wanted to be part of this, and I wanted to make sure that this craft remains possible for my daughter in case she decides it's something more than quaint. I'd also like to take full advantage of the fact that my family lives in a forest, and do something with the wood which loggers leave behind as waste. These all conspired to hatch the Joiner's Apprentice experience, which is probably best understood by looking at my Kickstarter project page.
Needless to say, the fundraising went very well, and I have been having a blast digging in and working on the projects that Thomas the Apprentice did in 1839. I've had lots of surprises, difficulties, epiphanies, and revelations. I look forward to more of all. This blog will hopefully convey the best and worst of these.
So thanks for taking a look, and if you have any questions or comments, please let me know. I will talk endlessly about this stuff to all who are interested, but am not used to meeting people who are.
With that, I remain your loyal apprentice.
rob
Tuesday, September 27, 2011
Packing Box Done (but Unfinished)
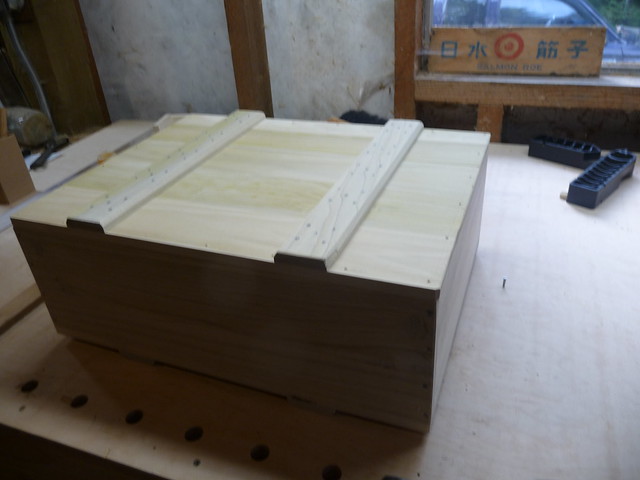
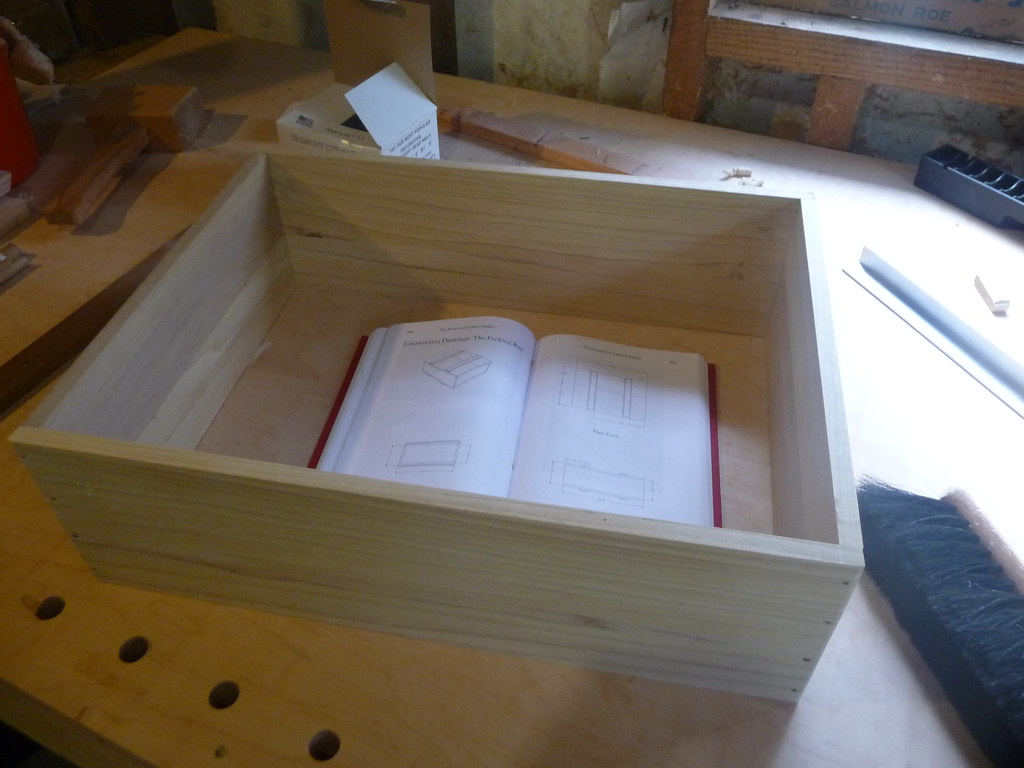
The first packing box is complete! I do intend to add an oil finish to it, so it is "unfinished", yet its structure is complete. Its far from perfect, but it came out rather well.
Here's an image of the packing box from the book, followed by how mine came out:

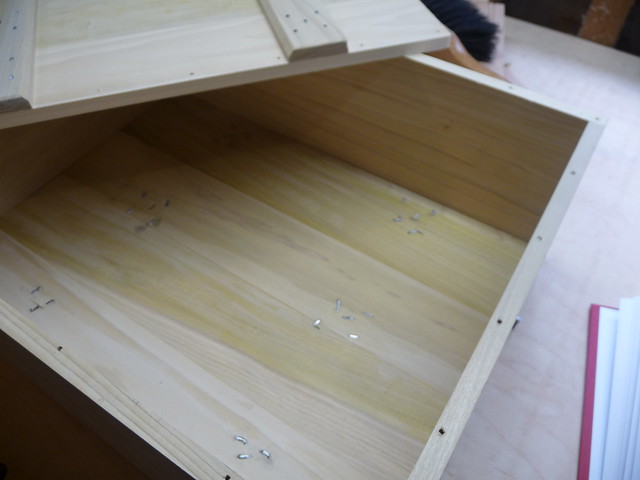
Here you can see the clinched nails on the bottom's top, I tried to hammer them as smooth as possible but one may not want to put the most delicate of items in here without a liner. I'll do a post on clinching when I make box #2:
Here it is loaded up. It is actually quite ideal for books because it matches my golden moving tip: Don't put more books in a box than you actually want to carry. Its easy to pick a huge box and cram it so full that its ridiculous to lift.

Box closed. Its intended to be nailed shut, and true to the book, I drilled pilot holes for that. Modern folks would probably want hinges and a hasp added.
I have 2 more of these to make, plus a possible 3rd one which will be sized according to the scraps. I hope to add a little more detail with the different lessons learned and the basic operations involved with each iteration, so stay tuned and if you have questions about how/why, please leave them in the comments.
Here's an image of the packing box from the book, followed by how mine came out:

Here you can see the clinched nails on the bottom's top, I tried to hammer them as smooth as possible but one may not want to put the most delicate of items in here without a liner. I'll do a post on clinching when I make box #2:
Here it is loaded up. It is actually quite ideal for books because it matches my golden moving tip: Don't put more books in a box than you actually want to carry. Its easy to pick a huge box and cram it so full that its ridiculous to lift.
Box closed. Its intended to be nailed shut, and true to the book, I drilled pilot holes for that. Modern folks would probably want hinges and a hasp added.
I have 2 more of these to make, plus a possible 3rd one which will be sized according to the scraps. I hope to add a little more detail with the different lessons learned and the basic operations involved with each iteration, so stay tuned and if you have questions about how/why, please leave them in the comments.
Sunday, September 25, 2011
Action Shots
A smattering of visuals to hopefully convey the nature of several operations. Without further ado:
This is the Disston D12 saw that was rescued from a garage sale for $1. Thats right. It needed a kink hammered out, and a sharpening, but now its comparable to saws that sell for $200. I had to use it to crosscut the 10" wide glued-up boards because my bench hooks are only about 8" deep, and they are squirrelly enough as it is. They work best in conjunction with a holdfast, but this board was wide enough to obscure the dogholes, so D12 it was. This saw is fast. I highly recommend Bob Rozaieski as sawsmith if you are in need of servicing a similarly neglected antique.

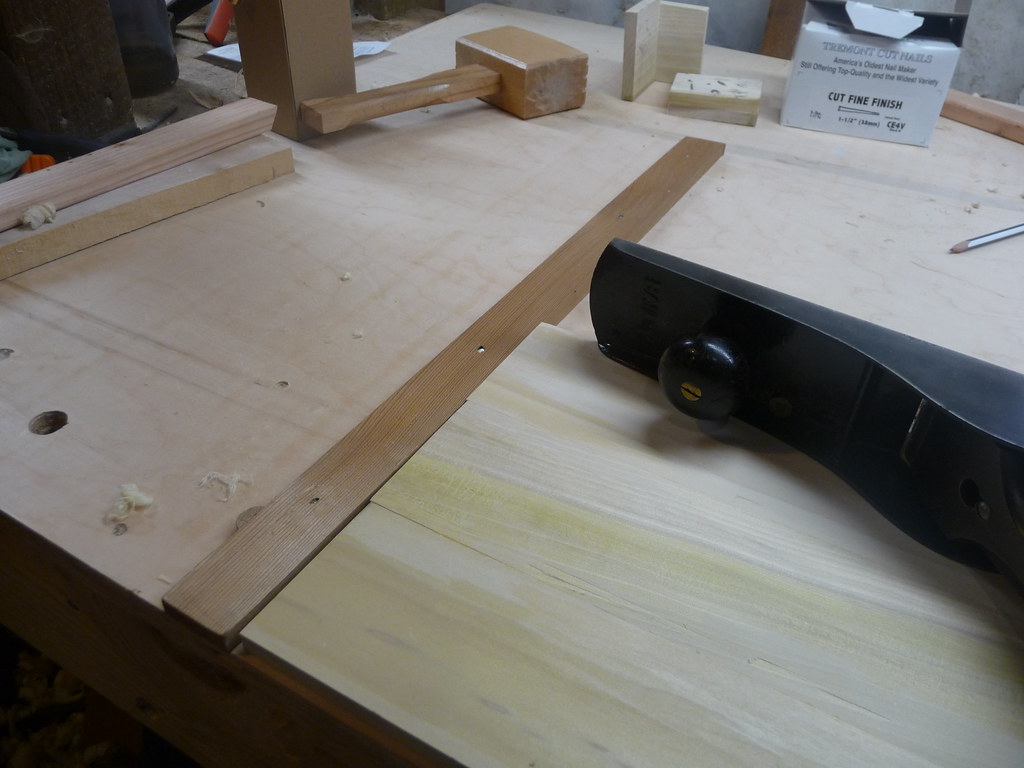
With the board crosscut to final length, here its seen set up for edge truing. I screwed a quick and dirty planing stop to the front face of the bench. Keep in mind, this is my temporary workbench until I build a new one, so holes in it and so forth don't bother me at all. This worked well enough. Two holdfasts helped support the board and keep it from going anywhere.
Lets see what we're up against... See that triangular sliver of light at the right edge of the board? Thats showing that the edge is not square. A few passes with the jointer plane will solve that.
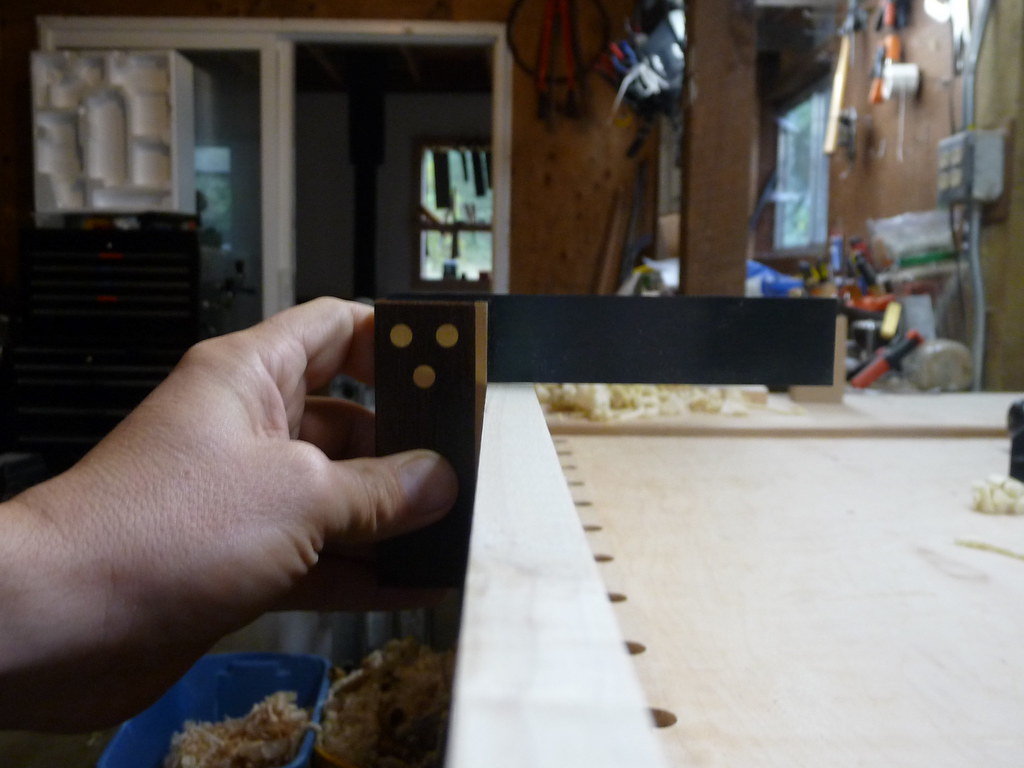
Now onto the final surfacing of the face of the board. This will be the "top" of the bottom of the box... difficult to plane once its in place. The planing stop is, again, just a thin strip screwed to the bench. I think this one actually nailed. When it happens to be in the way, a prybar and a little cussin' ought to take care of it.
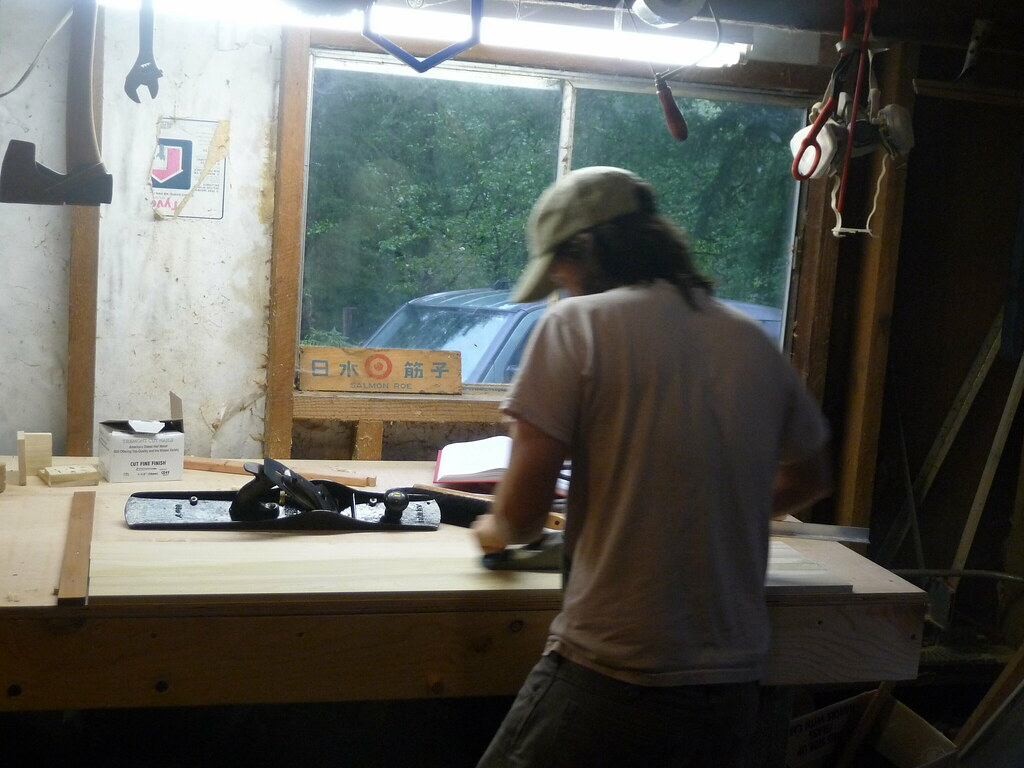
An action shot of planing. This shows clearly that this bench is much too tall for me, but as they say: "one does what one finds oneself needing to do". Believe me, I am eager to get the new bench done!
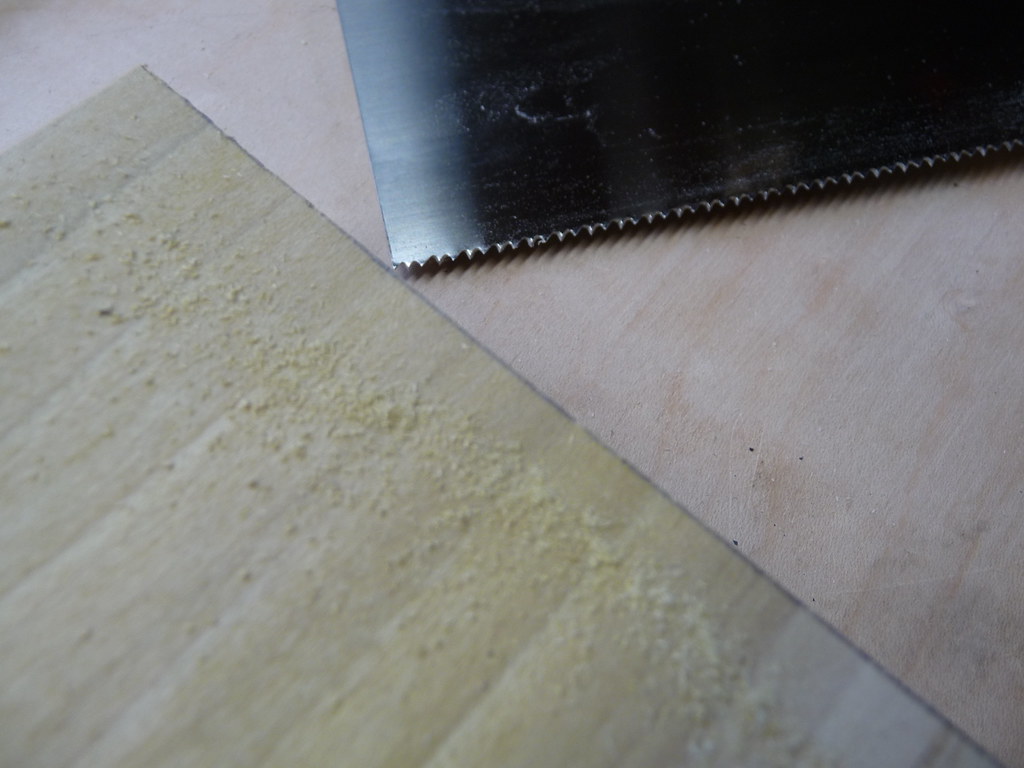
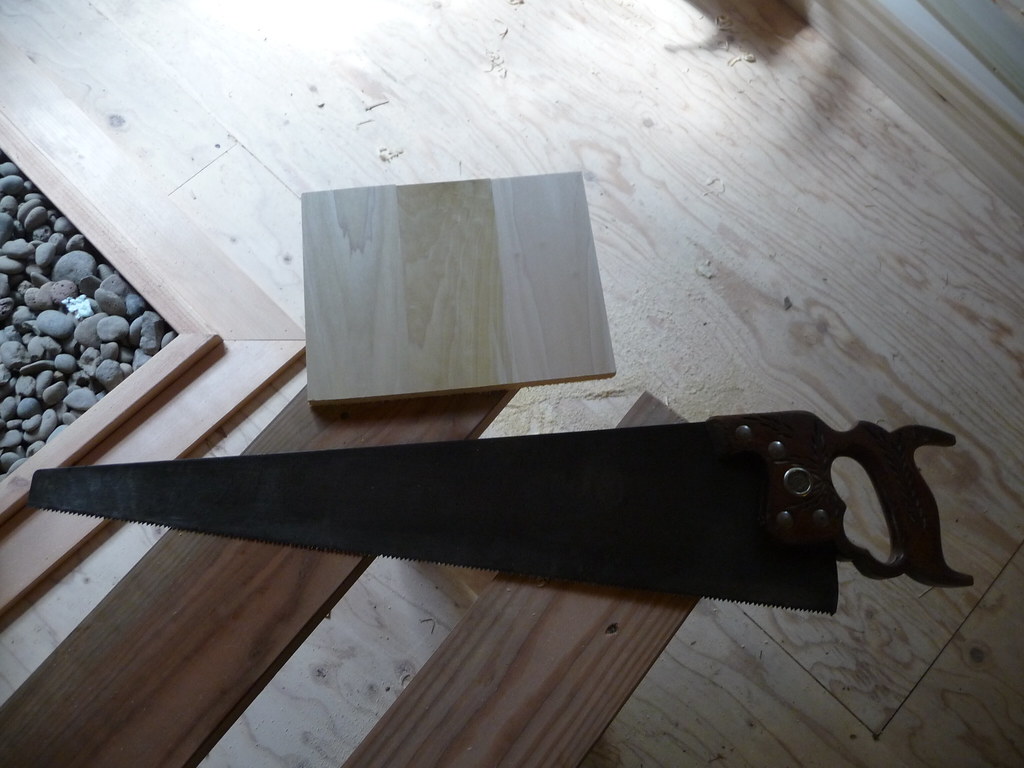
I'm getting much better at crosscutting with the sash saw and bench hooks, pleased to see a pencil line split in half.

Here the lines for chamfering the corners of the "cross-strengthener" battens are marked out, and the planing has started. It would be nice to have a dedicated chamfer plane, or a block plane with a chamfering guide, but winging it is sortof fun.
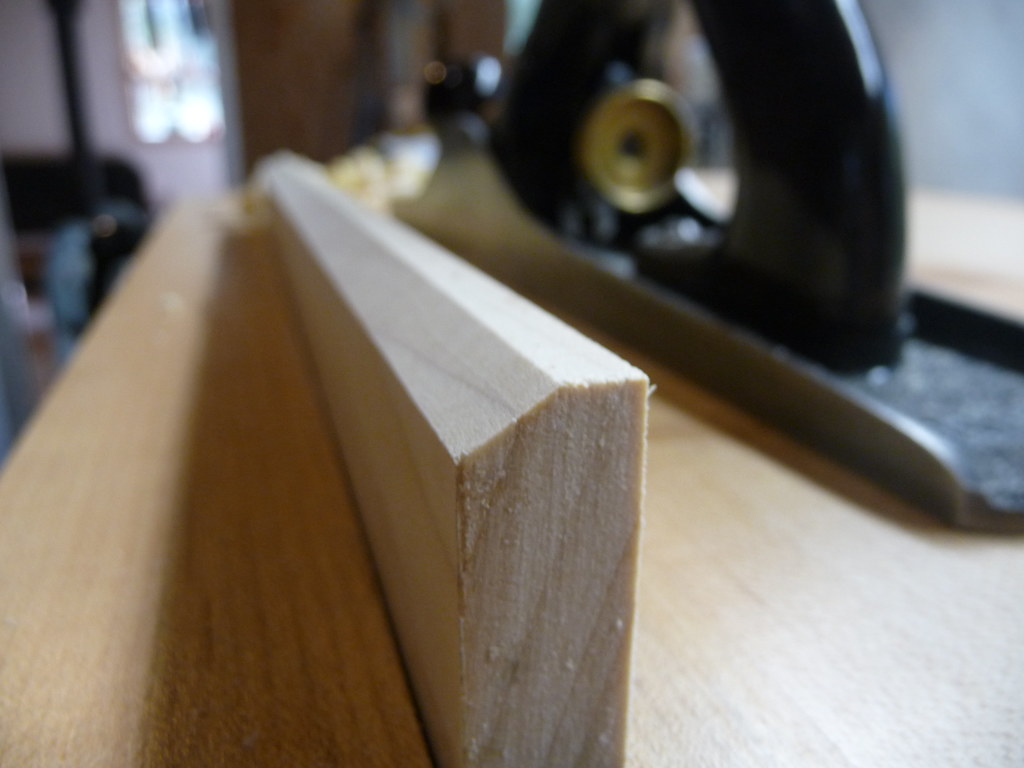
The chamfer is complete. Close enough for me, at least this time. Its actually not spot-on, 45 degrees is not as built-in to the human hand and mind as 90 and 180 are.

The 2 boards which come together to make the bottom and lid for the packing boxes are not glued, they are held together with nailed-on "cross-strengthener" battens. To hold them together while the batten is nailed, nails are put directly into the workbench, wedging them together. It's actually rather liberating to use a workbench like this instead of treating it like a sacred relic, which I may be tempted to do once I complete my dream bench this fall.
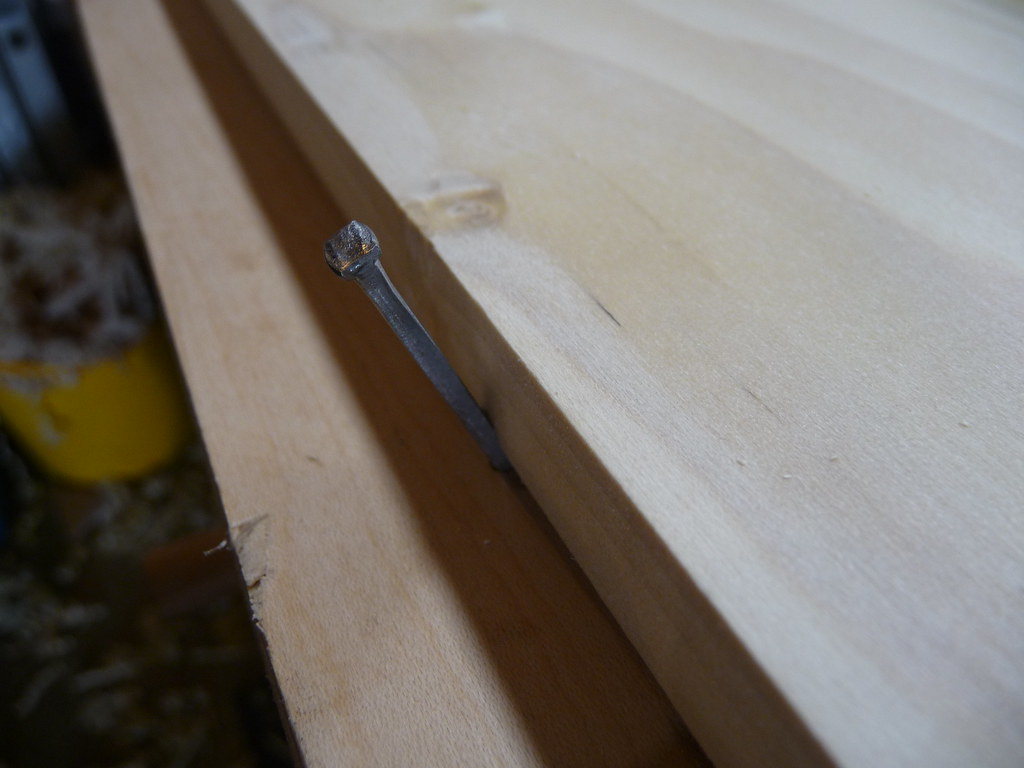
Just a detail of a cut nail holding the board in place.

And using a gimlet to make pilot holes for a change of pace. This is the first batten being attached. Soon will come clinching the nails on the backside, and the stuff-holding-portion box will be complete! Then onto the lid, a bit of linseed oil, and it will be complete!
This is the Disston D12 saw that was rescued from a garage sale for $1. Thats right. It needed a kink hammered out, and a sharpening, but now its comparable to saws that sell for $200. I had to use it to crosscut the 10" wide glued-up boards because my bench hooks are only about 8" deep, and they are squirrelly enough as it is. They work best in conjunction with a holdfast, but this board was wide enough to obscure the dogholes, so D12 it was. This saw is fast. I highly recommend Bob Rozaieski as sawsmith if you are in need of servicing a similarly neglected antique.
With the board crosscut to final length, here its seen set up for edge truing. I screwed a quick and dirty planing stop to the front face of the bench. Keep in mind, this is my temporary workbench until I build a new one, so holes in it and so forth don't bother me at all. This worked well enough. Two holdfasts helped support the board and keep it from going anywhere.
That's more like it!
Here the lines for chamfering the corners of the "cross-strengthener" battens are marked out, and the planing has started. It would be nice to have a dedicated chamfer plane, or a block plane with a chamfering guide, but winging it is sortof fun.
Saturday, September 24, 2011
Thomas's First Day
It is not entirely accurate to say that today was the first day on the project. However, since the project lumber was cut for the first time, and real headway was made on one of them, it feels like the first real day on the job. Perhaps sadly, I spent more time working than documenting it, but this is one of three packing boxes so I will focus on some of the details on the next ones.
I've spent the past few days gluing up the panels to replicate 10" deal planks, scraping off the glue, and planing their edges square and true. This is worth an entry on its own, but again I was too busy doing and haven't photographed it yet. You readers will be better served, anyway, when I have more experience and can photograph "doing it right" rather than the process of fumbling through learning.
In any case, I certainly know a great deal more about squaring and truing boards than I did a few days ago. Its mildly exciting to think that I will just get better and better at it, there are quite a few more to do.
Only one of the glue-ups came out less perfect than I had hoped, with a visible gap. Its minor, but its there, on one end of the board. Hopefully, I will segregate that portion to the scrap pile. It was also challenging to match the grain and coloring of the board to look well-paired, but some of the high-contrast pairings have their own appeal.
With the boards artificially enwidened, it was then, ironically, time to cut them down a little! Today involved taking 7" boards and bringing them down to 6". As the cut was 4 feet long, this was a job for the panel rip saw.
After marking the line, the next job was to secure the board to sawbench:
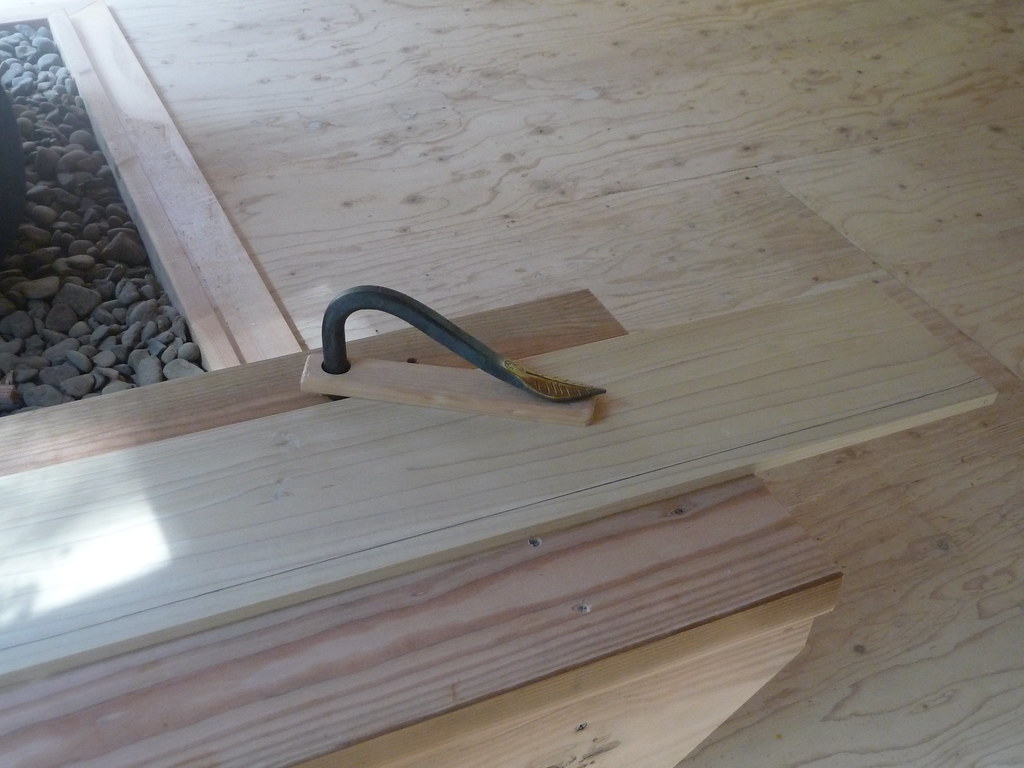
You can see there a holdfast jammed down on the plank, with the cut line cented over the "ripping channel" in the sawbench.
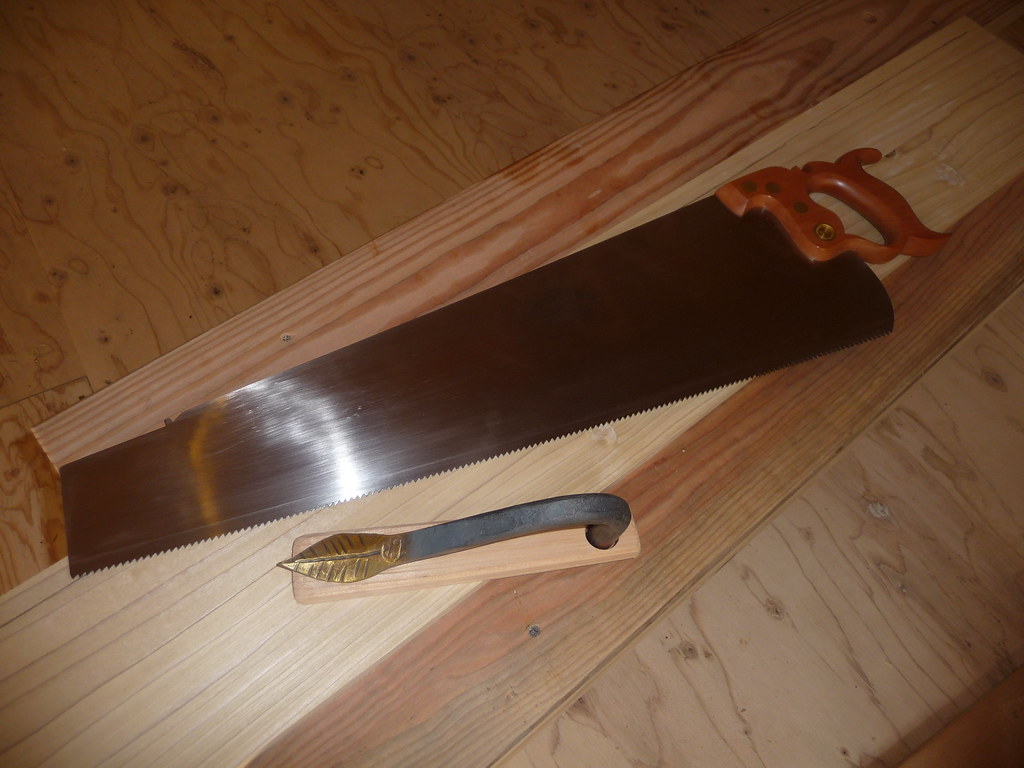
The saw itself is from Mike Wenzloff, a near neighbor of mine (when you live in a National Forest in Coastal Oregon, 3 hours away is still considered a neighbor). Its based on a 100 year old design, and is a real pleasure to hold, use, and even look at. Ok I admit I am somewhat biased, but he really does do great work and the tote (handle) is several times more comfortable than the Stanley ripsaw I have been suffering.
The ripping went just fine. The one minor hangup is perhaps my own fault, or that of my body. Since I am somewhat short, my sawbench (appropriately designed to be knee-cap high) is only 20" tall. The saw is a bit longer than that, so a full stroke runs the risk of ramming the toe of the saw into the floor, which could horribly damage it. Because of this, I had to be a bit ginger. I am debating putting a piece of tape or something on the sawblade to serve as a depth-stop. The real answer is to get some smaller panel saws, but that is low on my list of things to spend $1000 on. Keeping the angle shallow works well, but I like the more aggressive vertical stroke once the sawline is established.
After the boards were ripped, it was time to clean up the cuts and square the edges with the jointer plane. This went well and produces silky smooth edges.
The boards were then crosscut into 2 lengths, using sawhooks on the bench, and a sash saw. I'll hope to document this process at some point. The ends of the box had to be precisely cut, and identical. I planed them to get them exact. Then, the side boards were cut, but this did not have to be as accurate as they are trimmed once the box is assembled.
Assembly presented its own logistic problems. The first corner was simple to clamp and nail, but the others were not so easy. The book simply mentions nailing them, with little mention of how. Its possible that any 14 year old should already know how to nail a box together, and of course I had my own ideas, but I know there are some best practices. I might have discovered some of them, at least for my workbench. Let's just say that 4 holdfasts are barely enough for some of the jiggery I had to employ. Eventually though, I got the pilot holes drilled (only broke one bit) and was able to get the nails driven home in a dovetail configuration without too much trouble. I did stop to grind one of my nailsets to match the shape of the cut nail heads. This made it much easier to sink them home, avoiding "French marks", which sounds to me like a British slur for the hammer-dents seen on much home-made furniture. I have a feeling French joiners don't leave a lot of French marks on their work, but so it goes.
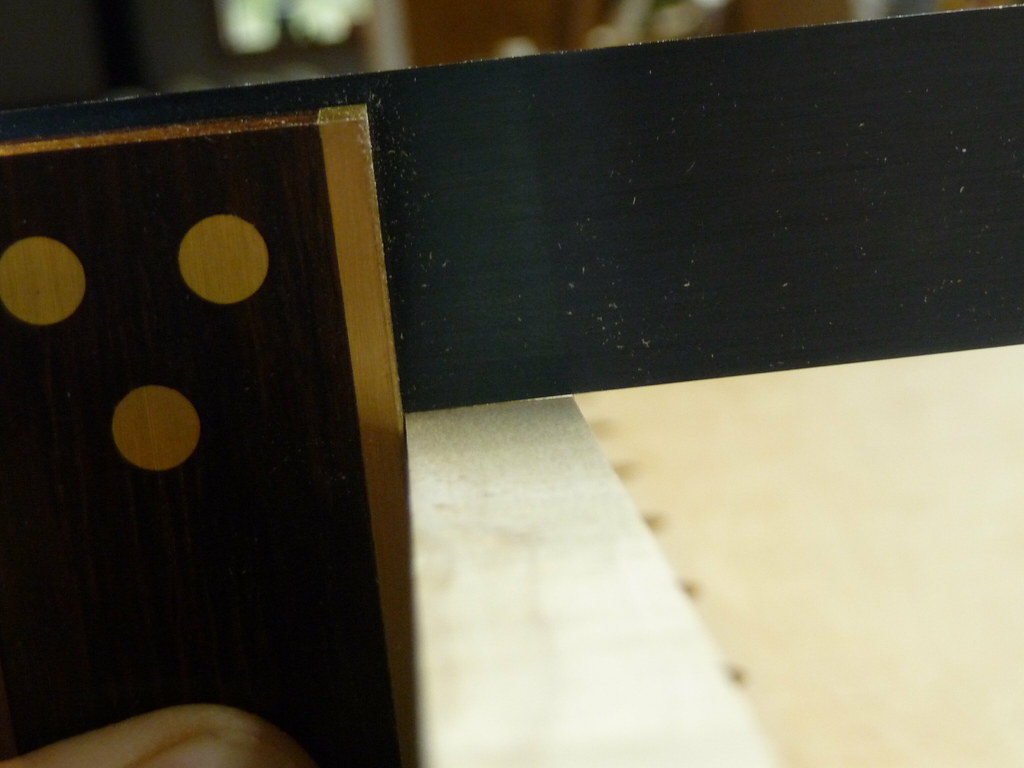
Once the shell was together, the slightly overlapping ends had to be trimmed. This went well, and the box shell emerges square, smooth, and rigid.
I've spent the past few days gluing up the panels to replicate 10" deal planks, scraping off the glue, and planing their edges square and true. This is worth an entry on its own, but again I was too busy doing and haven't photographed it yet. You readers will be better served, anyway, when I have more experience and can photograph "doing it right" rather than the process of fumbling through learning.
In any case, I certainly know a great deal more about squaring and truing boards than I did a few days ago. Its mildly exciting to think that I will just get better and better at it, there are quite a few more to do.
Only one of the glue-ups came out less perfect than I had hoped, with a visible gap. Its minor, but its there, on one end of the board. Hopefully, I will segregate that portion to the scrap pile. It was also challenging to match the grain and coloring of the board to look well-paired, but some of the high-contrast pairings have their own appeal.
With the boards artificially enwidened, it was then, ironically, time to cut them down a little! Today involved taking 7" boards and bringing them down to 6". As the cut was 4 feet long, this was a job for the panel rip saw.
After marking the line, the next job was to secure the board to sawbench:
You can see there a holdfast jammed down on the plank, with the cut line cented over the "ripping channel" in the sawbench.
The saw itself is from Mike Wenzloff, a near neighbor of mine (when you live in a National Forest in Coastal Oregon, 3 hours away is still considered a neighbor). Its based on a 100 year old design, and is a real pleasure to hold, use, and even look at. Ok I admit I am somewhat biased, but he really does do great work and the tote (handle) is several times more comfortable than the Stanley ripsaw I have been suffering.
The ripping went just fine. The one minor hangup is perhaps my own fault, or that of my body. Since I am somewhat short, my sawbench (appropriately designed to be knee-cap high) is only 20" tall. The saw is a bit longer than that, so a full stroke runs the risk of ramming the toe of the saw into the floor, which could horribly damage it. Because of this, I had to be a bit ginger. I am debating putting a piece of tape or something on the sawblade to serve as a depth-stop. The real answer is to get some smaller panel saws, but that is low on my list of things to spend $1000 on. Keeping the angle shallow works well, but I like the more aggressive vertical stroke once the sawline is established.
After the boards were ripped, it was time to clean up the cuts and square the edges with the jointer plane. This went well and produces silky smooth edges.
The boards were then crosscut into 2 lengths, using sawhooks on the bench, and a sash saw. I'll hope to document this process at some point. The ends of the box had to be precisely cut, and identical. I planed them to get them exact. Then, the side boards were cut, but this did not have to be as accurate as they are trimmed once the box is assembled.
Assembly presented its own logistic problems. The first corner was simple to clamp and nail, but the others were not so easy. The book simply mentions nailing them, with little mention of how. Its possible that any 14 year old should already know how to nail a box together, and of course I had my own ideas, but I know there are some best practices. I might have discovered some of them, at least for my workbench. Let's just say that 4 holdfasts are barely enough for some of the jiggery I had to employ. Eventually though, I got the pilot holes drilled (only broke one bit) and was able to get the nails driven home in a dovetail configuration without too much trouble. I did stop to grind one of my nailsets to match the shape of the cut nail heads. This made it much easier to sink them home, avoiding "French marks", which sounds to me like a British slur for the hammer-dents seen on much home-made furniture. I have a feeling French joiners don't leave a lot of French marks on their work, but so it goes.
Once the shell was together, the slightly overlapping ends had to be trimmed. This went well, and the box shell emerges square, smooth, and rigid.
If you look closely, you can see the plan illustrations of the box in the book there.
Next up: making the bottom. And the top. And then making 2 more boxes. Maybe I'll stop to take a few more pics along the way.
Friday, September 23, 2011
Held Fast
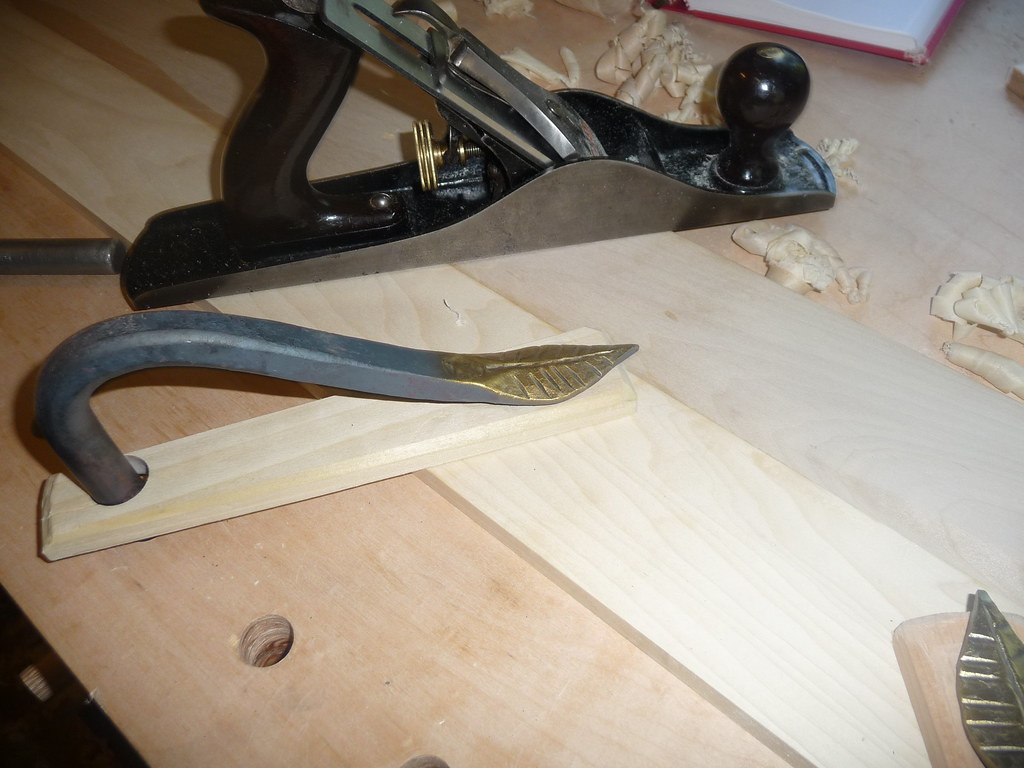
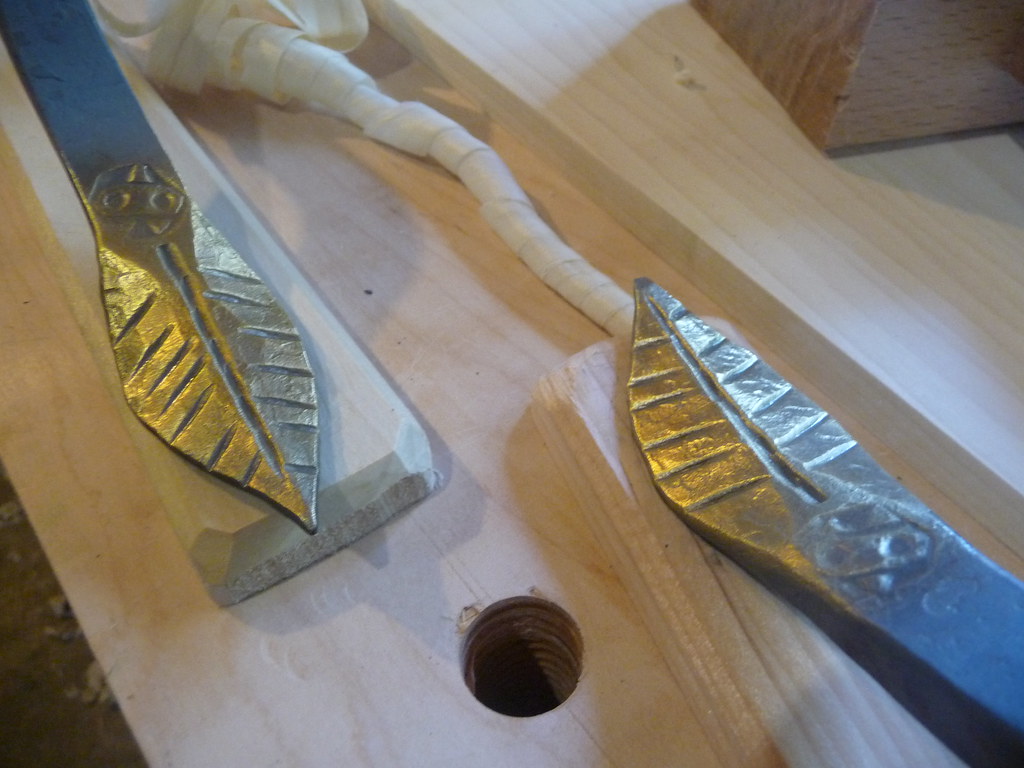
While my holdfasts from Gramercy have worked pretty well (though they needed a lot of sanding to get that way), these from Phil Koontz recently arrived and are amazing. Not only beautiful, but just the right amount of stickiness. They visibly leap up out of their holes when tapped, and bite down with plenty of force. Its so wonderful to meet a perfect tool!
Wednesday, September 21, 2011
The Deal with Deal

In "The Joiner and Cabinetmaker", the projects are built using a woody substance referred to as "deal". There is not much agreement on the exact definition, but it is more or less "pine boards". In the book, Thomas is able to find half-inch deal which is sawn so nicely that it is essentially ready to use as-is. This might come as a surprise to modern folks who envision such archaic woodworkers going out to select a tree to chop down as the first step in a project. However, pre-milled wood has long been common. To saw and mill a log into furniture-grade lumber would take a monumental expenditure of both time and labor. Specialization is nothing new, so even in Colonial America the sawyers ("saw-ers") and cabinetmakers were not the same people. While certainly some rustic furnituremakers were growing and cutting their own lumber, in general professional tradespeople were getting their wood from the Home Depot of the day. Therefore, Thomas had a stash of "nicely sawn" pine boards available to him, already cut to one half-inch thick, and crudely surfaced.
The modern version of obtaining "deal" is to simply go to a lumberyard and buy lumber already milled on 2, if not 4, of its sides. This is not exactly ready to use as-is, but it is mighty close. One can save a little bit of money by finding lumber in the rough, which needs to be jointed and planed before use, but Thomas was able to skip this step for the most part.
This gives the modern woodworker aiming to follow in Thomas's footsteps a bit of leeway. While it would be fun to take rough lumber and completely surface it by hand (and future projects will involve this), the Packing Boxes started with "half inch deal" and so that is what I have been seeking.
The problem, however, is that very few furniture makers are doing this type of thing nowadays. This is in fact the type of wood using for drawer bottoms, but thin boards have a terrible tendency to cup or warp, and so in general, plywood is the chosen lumber for this application. The alternating grain directions of the sandwich-like layers (plys) keep the warping at bay. Indeed, I was at a lumberyard just this week which specializes in cabinetry wood, and the proprietor was utterly amazed that I wanted to buy such thin wood, even after I explained my project.
The end result is that, at least in Coastal Oregon, 9" wide boards of deal at such a small thickness are unavailable. I've called shops from Washington to California, willing to drive a day to get them. No luck. Unless I want to special order wood from New England, or pay to have nice, thick boards wastefully resawn to my narrow requirement (at great expense - and believe me, lumber is already very expensive), I am out of luck. However, I was able to secure a quantity of 3.5" wide boards at 1/2" thick. These, I will edge-glue together into larger planks, emulating the wood which Thomas would have found. This involves a bit of extra work for me, but that is ok. If I wanted to avoid work, I wouldn't do this project (or I would limply complete it using plywood).
Gluing boards together to make wider ones is nothing new, in fact its very common. Thomas does it himself, for the schoolbox and chest of drawers. However, one of the aspects of the packing box which is so interesting is that the top and bottom boards are not glued, they are nailed together using "cross-strengtheners" or battens. They could easily be glued, but according to the storyline, Thomas has no time to do this. I take this limitation-- no glue --as one of the main lessons of the project, and so I will still aim to abide by it. This is where it gets convoluted.
I will be edge-gluing boards to get wider ones, but I will not glue them wide enough to be complete. I will glue them just shy of where they need to be, so that an extra strip must still be nailed on. Yes, this is ridiculous by any measure other than that of accuracy by the storyline and harvesting of potential experience, which is what this project is all about.
The gluing operation is not as simple as it sounds. The boards are machine-milled and, in theory, pretty flat. However, a quick check with a straightedge shows a fair bit of tell-tale light peeking through. They are not straight. So every single adjoining edge is going to have to be checked, planed, and rechecked by hand before gluing. This is just to get to square zero of the project.
Silver lining: I should be pretty good at truing boards and gluing up small panels by the end of this exercise. This is a bonus experience not built into the project as designed. Its like free homework! There are some 30 boards (thats 60 edges) involved, which is a lot of planing. I have my planes sharpened and honed, oiled and waiting. There will probably be caffeine involved.
Yes, this is absurd. Yes, it will be fun. Yes, I will do it.
Plain Place for Planes
When oh when will the actual construction of The Joiner and Cabinet Maker's projects begin? Short answer: tomorrow. Longer answer: I've been waiting for many tools and materials, as well as finishing the space. It is still not finished. It may never be finished. However, I have the core tools assembled, and as of today, I have lumber and nails enough to build the packing boxes. I've practiced clinching the nails (more on that soon) and so should be able to take some time to formally start on the boxes tomorrow.
A traditional project can't just use any nails from the hardware store, and so I got ahold of some of these:

In the meantime, I am chomping at the bit to make a toolchest, but that will not happen until these projects are complete. It was driving me crazy not to have a place to keep the planes, so I whipped together a till. Its no work of art, and its a little depressing that it is made of plywood, but it is more important to me to use up shop scraps than it is to maintain some artificial sense of appropriateness for a temporary fixture. My goal is to have the planes living in a chest within several months, at which point this till will somehow move into the main area of the garage to store something else. It might look a bit spartan for a typical tool-collector, but I am aiming to abide by keeping only 3 bench planes: a jack, a jointer, and a smoother (not in hand yet). You can already see here a small and large router plane, a plow, and a skew rabbet, and a shoulder plane along with a handful of wooden rabbet, dado, and moulding planes. I'm aiming to keep that collection small as well. No complaints from me, though, if anyone has a half-set of hollows and rounds they no longer need.
Here's the till in its current home, hung on a french cleat:
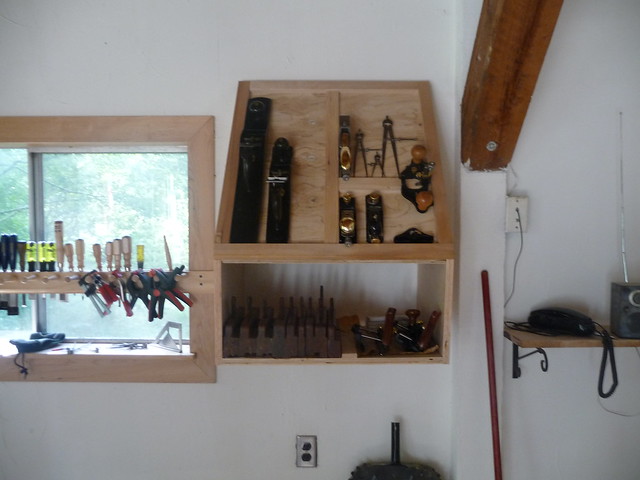
and a little more detail visible:

A traditional project can't just use any nails from the hardware store, and so I got ahold of some of these:
In the meantime, I am chomping at the bit to make a toolchest, but that will not happen until these projects are complete. It was driving me crazy not to have a place to keep the planes, so I whipped together a till. Its no work of art, and its a little depressing that it is made of plywood, but it is more important to me to use up shop scraps than it is to maintain some artificial sense of appropriateness for a temporary fixture. My goal is to have the planes living in a chest within several months, at which point this till will somehow move into the main area of the garage to store something else. It might look a bit spartan for a typical tool-collector, but I am aiming to abide by keeping only 3 bench planes: a jack, a jointer, and a smoother (not in hand yet). You can already see here a small and large router plane, a plow, and a skew rabbet, and a shoulder plane along with a handful of wooden rabbet, dado, and moulding planes. I'm aiming to keep that collection small as well. No complaints from me, though, if anyone has a half-set of hollows and rounds they no longer need.
Here's the till in its current home, hung on a french cleat:
and a little more detail visible:
Monday, September 19, 2011
Enhancing the sawbenches
Did some quick enhancements to the sawbenches over the weekend. Namely, added 2 dogholes to each in case I want to use holdfasts to secure work to them. They are just thick enough (1 3/4") to provide enough friction for great clamping action. I also used the router plane to etch a shallow mortise for a dowel plate. This was great fun, its a fantastic tool. The slightly too-wide edges of the mortise visible in the photo are the result of my sloppy chisel work, no fault of the router plane. The router plane, while a bit laborious, worked perfectly and left a needlessly ready-for-finish smooth floor on the mortise. I carefully outlined the plate using a marking knife, but the very wide chisel I was using is also a bit thick, and had a tendency to wedge itself over the knife line when struck. This is one of those things I knew would happen, and tried to compensate for it, but did not compensate enough. This is how I learn! Better on a sawbench than on a piece of fine work...

Wednesday, September 14, 2011
The Joiner's Apprentice's Apprentice
Recently my timeworn cap from Fungi Perfecti crossed the line into too nasty to consider wearing any longer. And so, today, a new one from Lost Art Press arrived and I quickly put it on to make sure it fit ok. I forgot I was wearing it, until Kestrel awoke from her nap. She said "hat!" and snagged it and quickly put it on. I like her style.

Thursday, September 8, 2011
The Planes of Baltimore
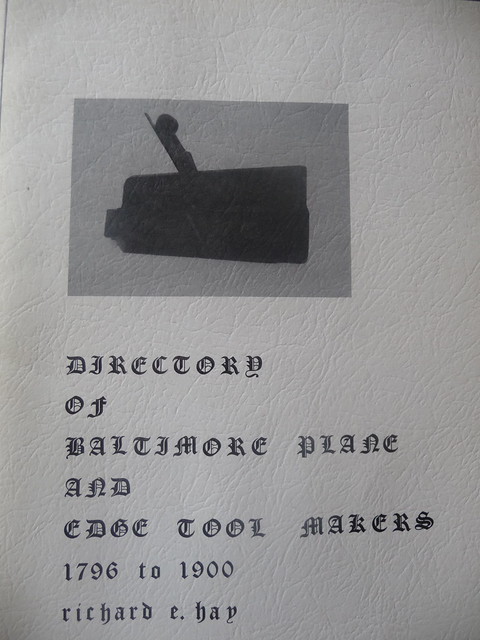
A generous family in Maryland has rescued a long-neglected collection of Baltimore planes and sent them for me to put to use. Not only did I recieve the planes, but also a booklet full of interesting information about the plane and toolmaking trade in Baltimore.
Here are some of the molding planes in profile:
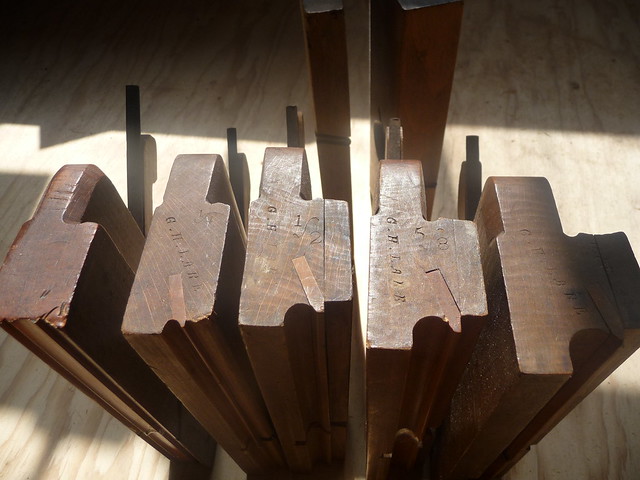
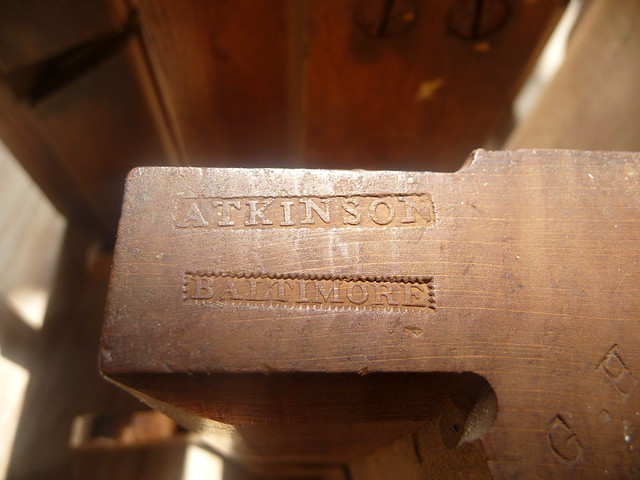
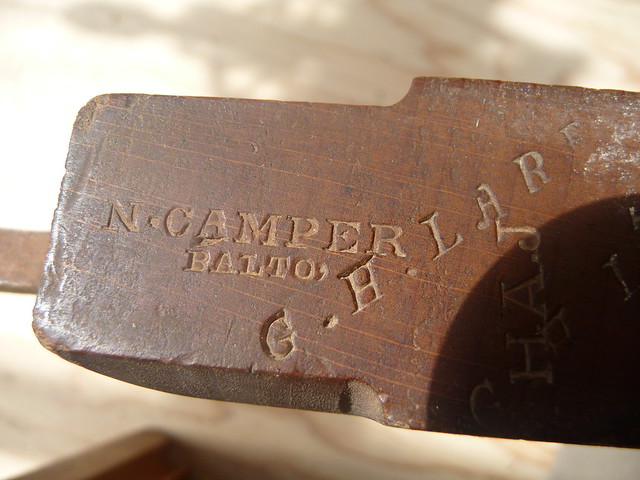
And some of the maker's marks:

From the Directory:
Atkinson was active 1836-1838. Robert W. Maccubbin sold his planes from 1840-1977. Napolean Camper was a "plane maker, plane manufacturer, took maker & tool store. Wife ran a fancy store at same address". He was on Exeter from 1851 to 1853, then moved to Lexington until 1874, at which point he relocated to Mercer.
The Directory is full of interesting tidbits about what makes Baltimore planes unique, but also information about how the shops all seemed to cooperate with each other. They shared not only designs for planes (and most likely patterns) but even shared workshop space on occasion.
Huge thanks to my Maryland friends for sharing this haul with me, and I look forward to putting them all to good use. I still need to clean and sharpen them, but they certainly have lots of usable life left in them.
Here are some of the molding planes in profile:
And some of the maker's marks:
From the Directory:
Atkinson was active 1836-1838. Robert W. Maccubbin sold his planes from 1840-1977. Napolean Camper was a "plane maker, plane manufacturer, took maker & tool store. Wife ran a fancy store at same address". He was on Exeter from 1851 to 1853, then moved to Lexington until 1874, at which point he relocated to Mercer.
The Directory is full of interesting tidbits about what makes Baltimore planes unique, but also information about how the shops all seemed to cooperate with each other. They shared not only designs for planes (and most likely patterns) but even shared workshop space on occasion.
Huge thanks to my Maryland friends for sharing this haul with me, and I look forward to putting them all to good use. I still need to clean and sharpen them, but they certainly have lots of usable life left in them.
An Apprentice's First Tool
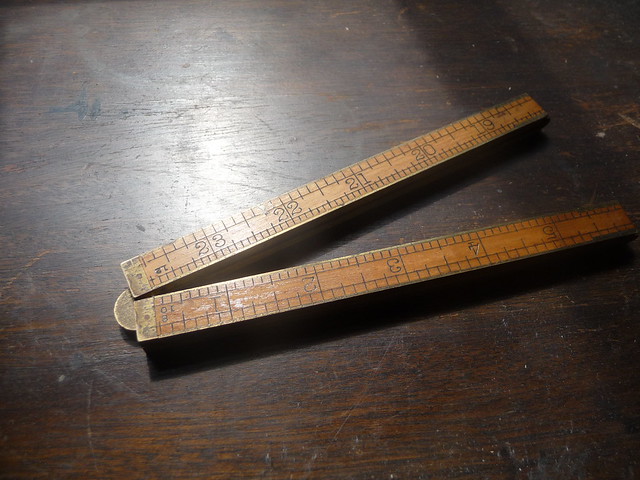
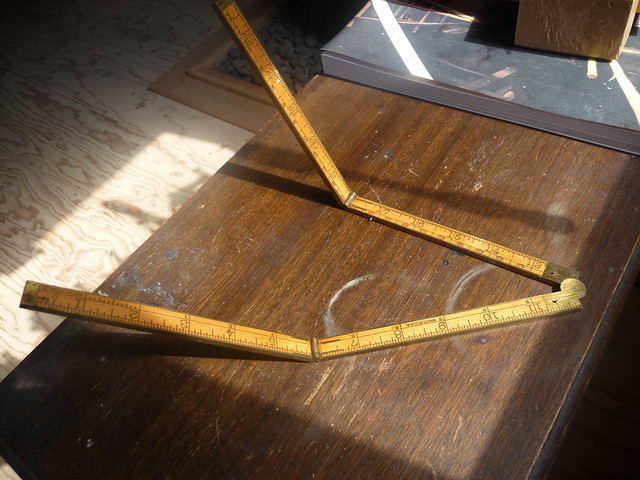
In the Joiner and Cabinet Maker, our hero Thomas eventually starts earning a little money from his efforts:
...He feels quite a rich man. "Oh, what a many nice little presents I can make to my brothers and sisters; and then, I can now begin at once to buy tools for myself, and hope to have a pretty good set when I am out of my time." His first purchase is a two-foot ruler for his pocket, for which he has long been saving up such little money as he could get..."
- The Joiner and Cabinet Maker, p. 104
And so I have also set out to secure a two-foot ruler for myself. With the help of the superbly friendly Joshua Clark, I have found my rule. The edges are bound in brass to keep it straight, the alignment pins are all present, and the lines are still crisp and clear. Its an ingenious design, strangely compelling to open and close. They sure do not make them like they used to.
Subscribe to:
Comments (Atom)