I did not fully document the construction of the lid, but it is also not very exciting although mortising is always fun. My lid (like the whole shell) is made entirely of Douglas Fir. I wanted to use something a little more special for the panel, such as cherry, but as the whole chest is looking rather "rustic" due to the mildly cantankerous nature of the fir, I decided to just roll with this as a learning experience and not worry too much about beauty. "I'm going to paint it, anyway" I kept telling myself every time a corner or gouge splintered and popped out.
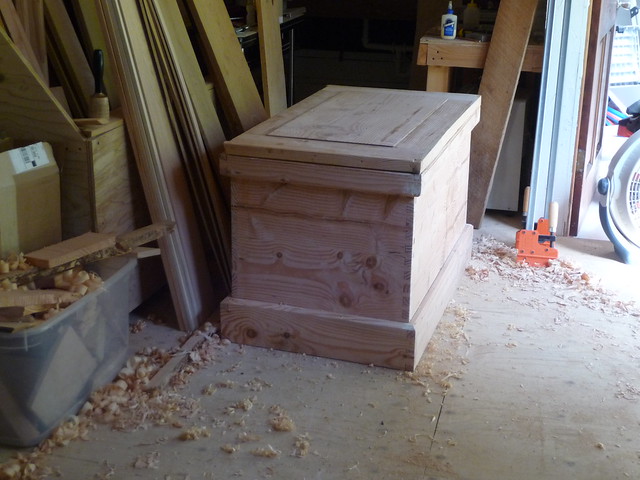
It is pretty heavy. With some trepidation I almost look forward to weighing it. Still, the price was right on the lumber (free) and it is as local as it gets... the donor tree grew across the street. This is also why I am tolerating the slightly wretched nature of the wood. Plenty of knots an reversing grain. "I'm going to paint it, anyway". The Anarchist's Tool Chest implores us to use clear wood, as the knots will pop out over time, but the same book asks us to disobey it, so I did. This is probably not one of the areas it is smart to disobey, but there you have it.
The hinge mortises were not too hard, I am getting better and faster at it. Actually installing the lid, though, was a bit of a dance. And by dance, I mean if I had shot video of it, and played it back at double speed with Yakkity Sax (aka the Benny Hill theme) it probably would have been amusing. It is not really a one-person job, or if it is, I lack the clever tricks to have it go smoothly. I ended up actually standing inside the chest, supporting much of the lid on various body parts while driving in the screws. Eventually it worked.
The lid was only a hair tight. A few sweeps of a shoulder plane on the dust seal had it satisfyingly close. I might take off a few more shavings in a couple days to anticipate movement over time, but for now it is about piston-perfect (probably not ideal in this case) and I want to relish that for a bit.
Interior tills remain, and of course I cannot wait to paint this thing and hide how gnarly the wood is. I am of course also looking forward to actually using it. While building it is fun, and I suppose counts as woodworking, this has really been a detour on my planned path.
Here's where it is today:
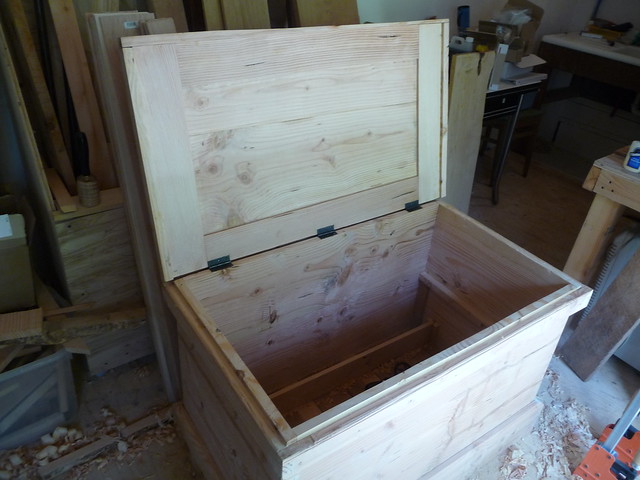

You can probably see why I am keen to paint it, including the inside of the lid. However, I do have faith that this thing is Very Strong, and it is so much more satisfying to have built it from scratch than to purchase metal drawers from Sears (can't afford Snap-On). I might want to build another, nicer one some day but I suppose that will be a desire, not a need. I feel like this is going to serve my actual needs for longer than I will have such needs.
Despite the wood, it looks awesome to me. A coat of paint and I think you will learn to love it over time. At least you won't be overly precious about using and working out of it. Good work.
ReplyDeleteThat looks gorgeous, Rob!
ReplyDeleteThanks for checking it out, was certainly fun to build although I am itching to get back to the "real" projects at hand!
ReplyDeletedone paint it! the gnarlyness of the wood is awesome and all it needs is some stain.
ReplyDeletedon't*
ReplyDelete