A pair of sawbenches has been added to the shop. These are based on a simple design from Dan's Shop. I had some 2x6 in the barn, so after a bit of scrubbing and scraping the grime off, it was not too difficult to cut and assemble them. The worst part of it was using the dado stack on the tablesaw. The more I use hand tools, the more I dislike the power tools. Why didn't I make these by hand? Well, sawbenches are one of those things that are simple to make, if you already have them. I do intend to make a more historically accurate (and attractive) design someday, but these are robust and quite practical.
For those unaware: a typical sawhorse is far too tall to actually use a handsaw on. This ergonomic reality is a reason so many people are turned off of handsaws. Proper sawing technique involves securing the board to the sawbench with one knee while standing on the other foot. I made these benches exactly at my kneecap height, meaning they might be too low for you. That is what makes handmade furniture so wonderful though - its custom fit. These have a long gap down the middle for ripping a board, and they are the same height so that they can be used with other boards to make impromptu tables or to support large pieces at the bench. Very flexible shop furniture. Plus, they work pretty well as normal benches, for warming hands by the stove.
I also filled in the concrete area under the stove with river rocks. Still need to mount and paint the firebrick reflector and do a little bit more trim in the room. I'm also starting to design the sharpening station which will live adjacent to the sink. The benches will make all of that easier!
Tuesday, August 30, 2011
Sunday, August 28, 2011
Floored!
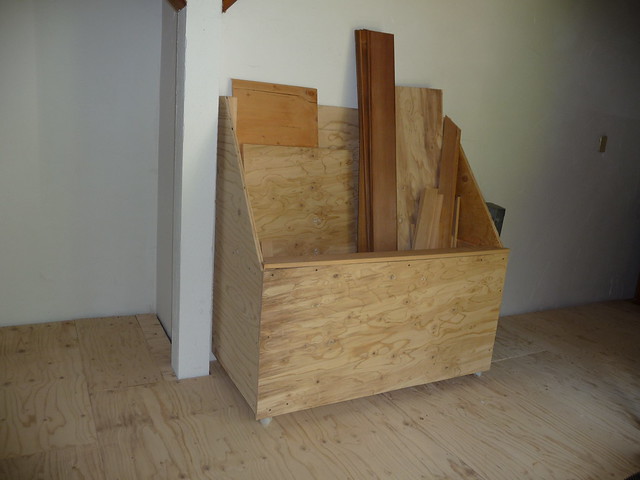
There is finally a floor to stand on! I amazed myself at calculating the number of T&G sheets needed fairly accurately, although I did have a handful of awkward scraps leftover. In trying to figure out what to do with them, it occurred to me that I needed a place to put scraps, so slapped together a rolling cutoff bin. I believe looking at Jim Tolpin's book before bed last night was the inspiration, so please divert your lavish praise in his direction.
Here's the bin:
And here's the floor:
I was initially looking into some "mill-outs" (boards with too many knotholes to be sold for homes) of Douglas Fir flooring for the shop. We live (literally) in a Douglas Fir forest, so that seemed appropriate. However, I am not unhappy with how the plywood looks and feels. I think with a coat of sealer, it will do just fine. If anything, I will put "flooring" on the ceiling. I was leaning heavily in favor of real flooring, but after seeing that plywood, nasty as it is, is good enough for not only Jim Tolpin's shop but also the teaching center at Lie-Nielsen, I decided to stay reasonable and save my materials budget for tools and wood. Thats what this room is all about, right?
I also cobbled together some Schwarzian window racks for tool storage while working. This is the corner where the workbench will ultimately live. I plan to build and store the tools in a chest, but these racks will be used during a work session to keep everything within quick reach.
And if you are still with me at this point, you're an interested enough reader for this announcement: Soon, I will be posting some very basic woodworking information. Unlike many woodworking blogs, this one has a readership of non-woodworking folks. People have been asking me questions like "What is a rabbet?" and "What's the difference between a brace and a drill?". If you're an advanced woodworker, you may find it a bit dull around here, although I certainly welcome you to stick around, and comment on the posts if I lack lucid exposition or have some facts wrong.
For those of you who are not woodworkers, but are interested in the project, I welcome you warmly and ask that you keep the great questions coming. I'd really like to turn this project into a community which will help in some small way to keep traditional woodworking alive.
More soon...
Thursday, August 18, 2011
Shop Update
I've been asked about the progress on the new shop space. Its coming along... its a lot of work and I have to do it in too-small doses of time. However, it is starting to look like a habitable space to me! I really should have taken more photos of it in its native state; an odd assortment of people had been living in it for years, leaving behind deep layers of filth, food packages, drug paraphernalia, moldy magazines, and all kinds of junk. Its been 2 slow years in cleaning it out, ripping out the shoddy built-in countertops and plumbing, replacing the PVC pipes with Pex, derusting and painting the stove, and more that I am probably forgetting. Now it has insulation, drywall, primer, paint, and a start on the floor. I got one window trimmed, the perimeter of the floor cemented into place, and about 1/3 of the floor joists laid down.
Here's how its looking:
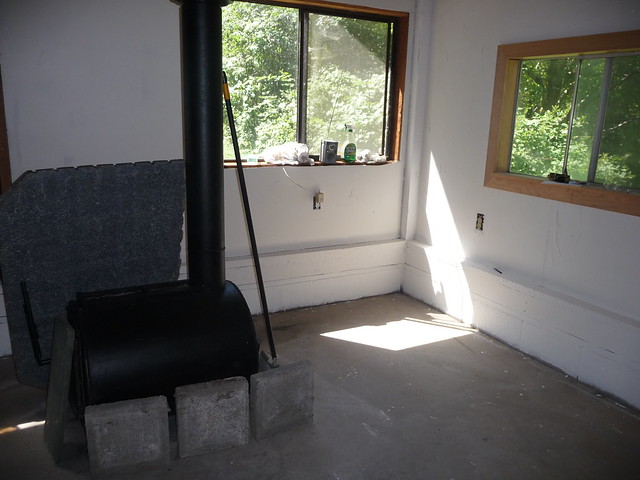
This shows the same corner, with the woodstove. I wouldn't have put it there, but I'm not going to move it.
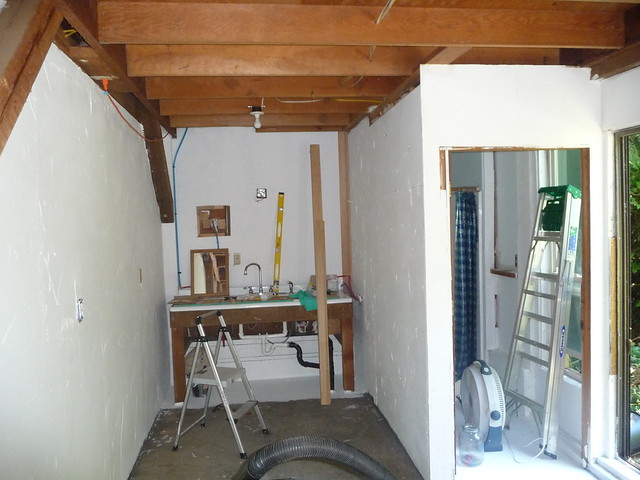
This shows the sink, which will be the sharpening area. I keep the bench grinder in the adjacent room, but I don't think that will be a problem. When I find a hand-powered grinder, it will go near the sink. Not sure yet what kind of shelves or bench will go in this area. You can also see the shower in the small room to the right. Everyone asks, "Is there a toilet?"
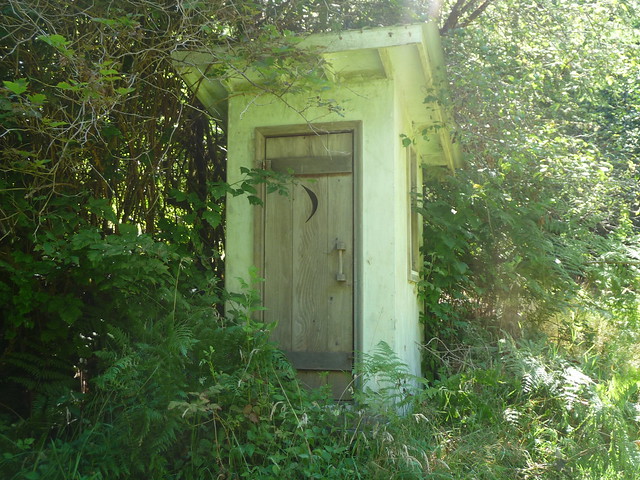
Of course there is! I just need to mow a path to it... Soon come!
Hopefully the next update will involve the floor being completed or nearly so. Thanks for visiting!
Here's how its looking:
This is the corner where the workbench will ultimately be (best light). It has a nice forest view, and a view of the driveway which is good for spotting visitors.
This shows the sink, which will be the sharpening area. I keep the bench grinder in the adjacent room, but I don't think that will be a problem. When I find a hand-powered grinder, it will go near the sink. Not sure yet what kind of shelves or bench will go in this area. You can also see the shower in the small room to the right. Everyone asks, "Is there a toilet?"
Of course there is! I just need to mow a path to it... Soon come!
Hopefully the next update will involve the floor being completed or nearly so. Thanks for visiting!
Wednesday, August 17, 2011
The Perfect Edge
Yes, another mini-book review! The Perfect Edge by Ron Hock is just too good not to mention. It's beautifully published, and goes into more detail than any mortal woodworker needs to know about the sharpening process as it relates to edge tools. Ron Hock has become obsessive about mastering the perfect edge over the decades, yet he is able to distill this information into an enjoyable read.
Metal has always baffled me; how can it become softer when heated, and then become harder when heated? Why does it get softer when you bend it, but then get brittle and break when you bend it? Within a single chapter, Mr. Hock explains more than I ever knew about metallurgy all at once. I really feel like I learned more in about an hour's reading than I had ever learned in my life about what steel is and how it works. This chapter alone is worth the price of admission unless you happen to already be a master metalworker.
While telling you all you need to know to obtain an obsessively perfect edge, the book also gently lets you know how to determine "good enough" for your needs, and reminds you that the important part is to get back to working with wood... that's why you're sharpening in the first place, isn't it?
I picked this up on a recommendation from Chris Schwarz when I asked him for a good metallurgy introduction. His suggestion was spot-on and it bears repeating, so go ahead and pick this one up if you haven't already!
Monday, August 15, 2011
The New Traditional Woodworker
I've recently been reading (and enjoying) Jim Tolpin's The New Traditional Woodworker. Woodworkers are most likely already familiar with him, but if not, check out his work. I can't get enough of his Gypsy Vardos, and wish he would write a book on those... but thats another story.
This book explains why one may want to consider working with hand tools. No surprises here. Its safer, quieter, more fun, and almost as fast as using power tools. He does also mention (also not a surprise) that it can make a lot of sense to hold onto your planer, jointer, and band saw in order to quickly prep large pieces for hand tooling. He then jumps into some great concepts and principles for shop setup and organization, and then steps through a handful of detailed plans for shop appliances. These writeups are carefully detailed to teach woodworking concepts, not just get the project done. I have not built any of them yet, but by reading through them, it is clear that it would be difficult to complete the projects without learning a great deal.
The photography in this book is excellent. Its a real treat to get such clear images of someone else's shop. Its really like stepping into their mind. Little details like the fact that Mr. Tolpin builds radio controlled dunebuggies are as interesting to me as how he has his chisels organized. Don't get me wrong, that is interesting, too!
I might consider Wearing's "Woodworking Essentials" more mandatory for a serious student, but this book is a fantastic overview for someone considering testing the handtool waters, and its inexpensive enough that passionate enthusiasts who already think they know it all will want to grab it as well.
I can't come up with any criticisms other than I wish it were longer. It's plenty meaty as-is, its just one of those great books you wish would go on and on.
Thursday, August 11, 2011
Seeking wood reference suggestions
I'm looking for a good guide to various wood species and their characteristics as they pertain to furniture work, especially.
Understanding Wood has looked informative as I have flipped through it in the bookstore, but lacks comprehensive species data. The wood reference set from Lie Nielson also looks interesting, but lacks some of the commentary I would like to absorb. Chris Schwarz seems to enjoy the set.
Feel free to also post comments here summarizing your favorite species, why, and how you use them. List those you hate, too!
Certainly experience with the various local trees is the very best way to build knowledge, but I always enjoy reading what those who have gone before have already discovered.
 |
| link to amazon |
Understanding Wood has looked informative as I have flipped through it in the bookstore, but lacks comprehensive species data. The wood reference set from Lie Nielson also looks interesting, but lacks some of the commentary I would like to absorb. Chris Schwarz seems to enjoy the set.
Feel free to also post comments here summarizing your favorite species, why, and how you use them. List those you hate, too!
Certainly experience with the various local trees is the very best way to build knowledge, but I always enjoy reading what those who have gone before have already discovered.
Wednesday, August 10, 2011
Such gifts!
Been a very busy couple days... I've been painting the shop (almost done!) as well as continuing on the Stopgap bench. Dog holes are about complete, and I've created about ten dogs from oak dowels.
In most exciting news, a supportive benefactor sent me an amazing package, containing a Bad Axe carcase saw, a Knew Concepts fretsaw, and a Ray Iles mortise chisel. I am astonished at the generosity and promise to put these to most excellent use!
You can see them below, atop bench hooks I made of oak.
Saturday, August 6, 2011
Bottomless Gratitude
I am truly humbled at what has happened regarding this project. When I first read the suggestion in "the Joiner and Cabinet Maker" to go ahead and build the three projects in order to achieve a grasp of the basic skills required to continue with a vocation as a joiner, I agreed that I would. I then, of course, stressed about how I could possibly put together a workshop based on my meager holdings.
I've wasted lots of money on "tool shaped objects" with little or no resale value, and honestly, the power tools I do have I will continue to use for the farm and house-based carpentry that I have to do on a daily basis. I just can't sell my mitre-saw, I use it constantly for everything from chicken coops to bamboo gutters to slicing 4x4 posts into shop furniture. I realize it is not a suitable tool for fine furniture, and that is where this project comes in.
Asking for help is not something I do lightly, and I labored long over the decision to launch the kickstarter campaign. It was my ambition from the start to ask not for donations or handouts, but to take advance orders on real goods. I am pleased to report that the vast bulk of my campaign was met not through the small thank-you gifts, but through actual sales of the project items.
I have a lot of work ahead of me, and this is truly invigorating. It is one thing to work through a few projects that sound interesting, but quite another to have a long list of customers awaiting their pre-paid work. I actually thrive under this kind of pressure. I will not enter into shoddy or hasty work, but I will also be compelled to slog through the difficult bits for the sake of all of you, my collective Master.
I have some exciting updates coming up regarding the shop's completion and some other news, so stay tuned if you are a member of this project or merely interested in watching the show.
And again THANK YOU
Tuesday, August 2, 2011
Welcome to 1839!
Many of you visitors are likely here from the kickstarter campaign. While I will be posting project updates there, this will also be a general record of my experience working through the 1839 book, "The Joiner and Cabinetmaker". I'll be building the three projects detailed in the book using historically correctish tools and techniques. Huge thanks to Chris Schwarz and Joel Moskowitz for not only republishing the book and adding their own incredible volumes of information, but also for their personal support while putting this together. Anyone interested in traditional woodworking needs to visit lostartpress.com as well as toolsforworkingwood.com if they have not already.
I'm still in the process of completing construction on my shop space and securing the minimal toolkit needed to complete the projects. In the event that the kickstarter campaign fails, I will press onward with what I have, though progress might be slower.
I look forward to sharing the experience with you, and welcome to the shop!
Subscribe to:
Comments (Atom)


