This is difficult to say and I should have said it sooner, but this is just not working out. It's not you, it's me. Well, it's us. I have such fond memories of the 2x4s you provided for the chicken coop, for the wall downstairs, and I love the floorboards you put in the living room. As I grow, however, and my needs have changed, you are not changing with me. You are just not a fine furniture lumber. Despite my tenderest caresses with a chisel, you still insist on splintering. When I plane exactly properly, you are willing to provide a glass-like surface, and I appreciate that, but these are only on our good days. More often than not, you let fly with huge splinters and sometimes you even assault me with them. I think we can still be friends, and I will still call you for 2x4s. In fact, I want to build a workbench with you. However, I need to be level with you and tell you that for furniture, I am feeling like I am much more compatible with Alder and Cherry.
Love,
the Joiner's Apprentice
Such were my thoughts as I began preparing the boards for my tool chest to be. In this article on choosing wood for a tool chest, it is suggested that we look up and around to see what the local trees are. No Eastern Pine around here:

As you can see from that view out my living room window, there is a smattering of alder, cedar, and some various fruit trees, but the ridges are almost entirely populated with Douglas Fir. It's big business here... one of the only businesses in fact. As above, I like doug fir for construction. It's strong, affordable, and easy enough to work with conventional construction tools. I have a pile of it, milled with a chainsaw, that I obtained from a neighbor's fallen tree. It seemed like the ideal regional lumber for my tool chest.
I've also been using it for the bottoms and partitions of the School Boxes. I was originally thinking of making boxes with it, but I am not so sure, unless they will be painted. I know some vertical-grain DF is used in the furniture trade, but perhaps my skills are not up to it yet. It's a bit ornery. It splinters easily, rarely planes smoothly (but when it does, it does) and it is just not all that attractive. Nonetheless, it's what is around, and so the chest will be composed of it.
This is the largest-scale hand-tool project I have tried yet. It is already straining my stopgap workbench. In fact, I was planning to build a new workbench before the tool chest, because of this. However, the need to have a good container for my tools is nagging me constantly and so I am making do. The current bench is technically large enough, but just barely. You can see here how the panels take up much of it:
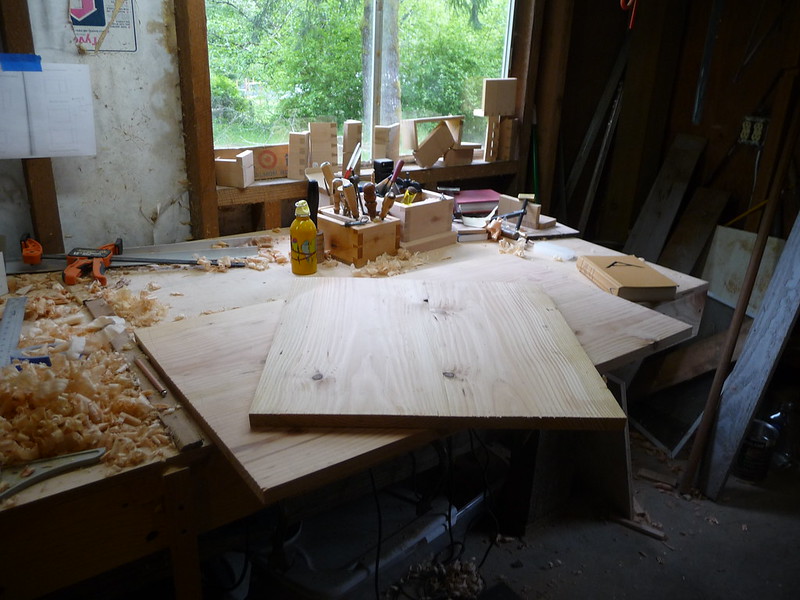
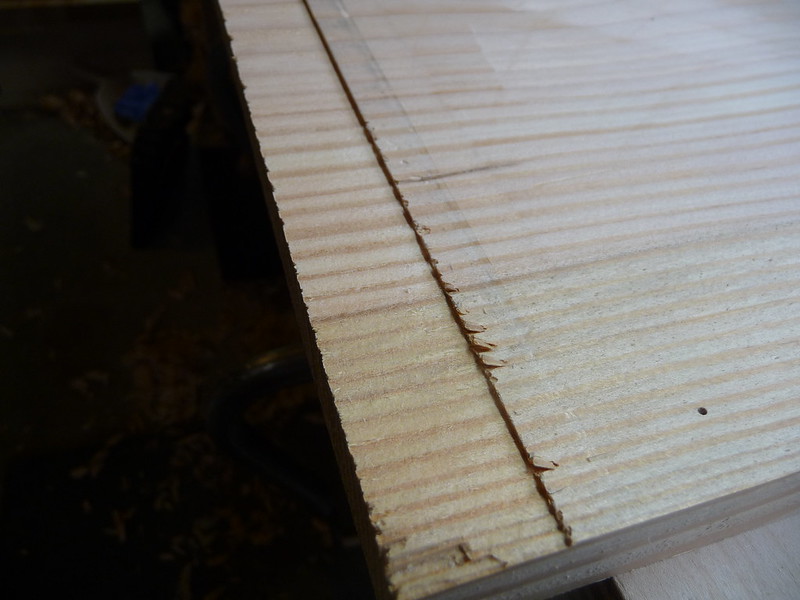
There is a little more room to the left, but a silly post is in the way, making planing with the long jointer difficult. Anyway, it is still possible so I did go ahead and flatten, joint, glue up, cut, and size the 4 panels for the chest's shell. One issue I had not thought about was marking the far edge after the reference edge has been established. With a smaller board, I would simply use a marking or panel gauge. However, my panel gauge is only 18" long and these boards are about 23" tall. I thought about measuring at each end and snapping a chalk line, but instead I used a drafting T-square and gingerly ran a pencil held tightly to the ruler. I spot-measured in several places and it seems I did a decent enough job. Squaring the boards was another trick, as they are far too big for a shooting board. I made do with the boards up on spacers and little work with a plane on its side but all in all I am relying on my saw cut and it seems square enough. I am doing the best work I can, but also remaining relaxed since this is somewhat ugly wood and I am planning to paint it.
That brings up another point: it is suggested to avoid knots, even tight ones, as they are likely to loosen and pop out over time. The lumber I have has lots of small tight knots. There was no section wholly clear of knots, and I did not want to go purchase lumber for this, so I am making do. Over the hopeful decades I have the chest, I will closely monitor it and epoxy the knots back in or replace them with Dutchmen if they ever pop out. Maybe someday I will have access to clear nice lumber and make a new chest. In the meantime, tight knots it is.
I started to prepare for dovetailing by milling a 1/16th" rabbet on the inside of the tailboard. This will make aligning the joint simpler, and also help pull the board into shape if it is slightly bowed. The glue-ups went well and the boards seem reasonably flat but this is nice insurance.
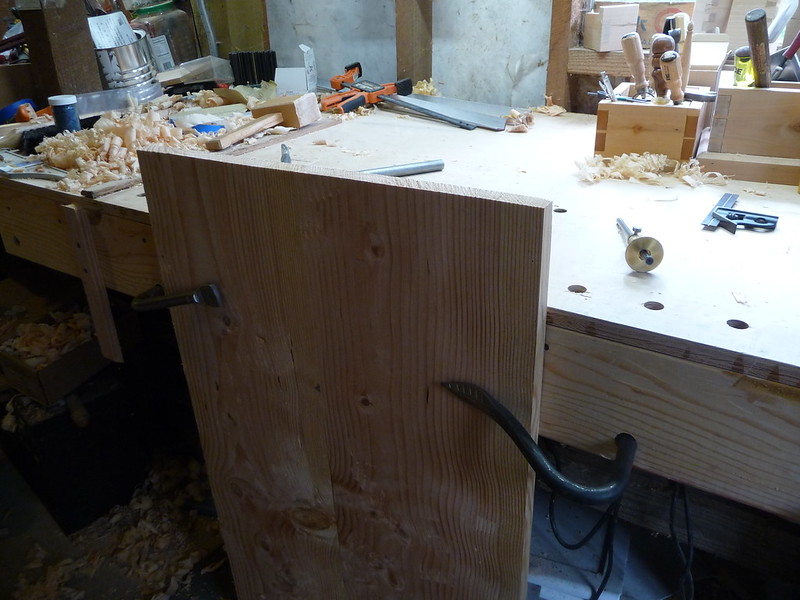
I usually use my bench-on-bench to hold boards for dovetailing, but this board is way too large for it, so I simply held it in place with holdfasts:
The dovetails (13 of them) are marked normally:

and then cut. I started clearing out the waste with a coping saw, and this is as far as I got before parental duty interrupted. It is starting to look like a tool chest! Well, at least to me. I mean, not really, but it is nice to see it forming rather than sitting as they were: live-edge planks taunting me every time I am in the shop.
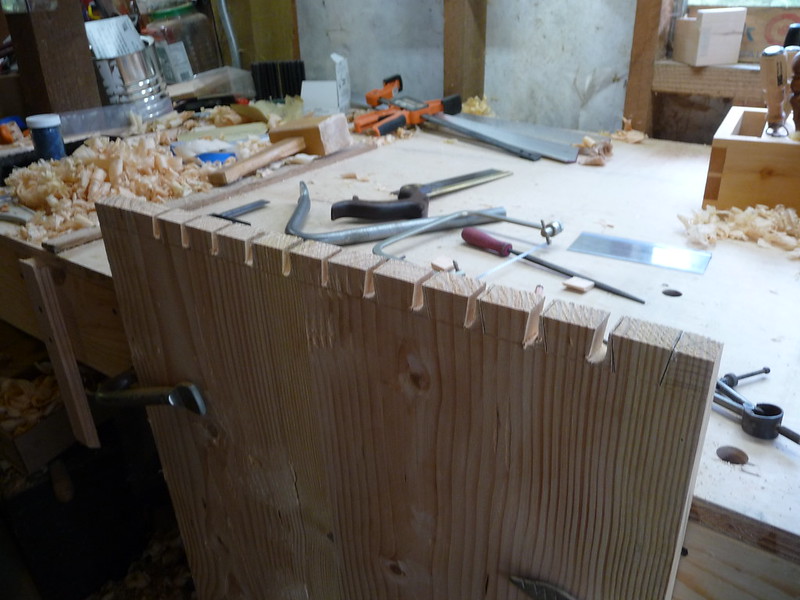
Just as I felt like I was getting tolerably fast with dovetails, I now more than double my portions. My boxes usually have 5 or 6 per edge, now I am up to 13. Thats 52 tails for the chest, compared to 20 for a small box. It should be a very solid box when complete!
some of the white (port Oreford? ) cedar and spruce would be a nice substitute for white pine
ReplyDeleteHi Rob,
ReplyDeleteLooking good. Yes, Douglas-fir can be rather challenging, especially when dovetailing. Realizing it's a little late for this particular project, but did you consider an alternate construction method for the tool chest? At the risk of heresy, I would think that a frame and panel design might alleviate some of the frustations with the splintery end grain of all those dovetails. Dovetailed chests are remarkably strong, and 300 years ago when they were carted all over the place they needed to be. But how many that we build today are going to leave our shops? I have some wide Douglas-fir currently drying that I have tagged for my own tool chest, and I'm still deciding on how I want to build it. I'm looking forward to see yours come to life. Good luck!
-Eric
Mike- I am hoping to use Port Orford cedar for the interior trays, if I can afford it. This chest is all about pragmatism and making use of the pile of DF I have. I recently made a small box with a PO tray and love the aroma. I am also planning to use cedar boards for the bottom of this chest.
ReplyDeleteEric- I actually don't have a problem dovetailing with DF, at least not functionally. It just doesn't look that great. I find the growth rings too contrasty both visually and in a tactile sense. It doesn't take grooves crisply (at least at my skill level) and it is hard to do rounded mouldings with it. It is just fine for a box like this, though, especially since it will be painted. I don't really dislike DF; this post was largely tongue in cheek, but it is true that I will not be spending a lot of time learning to work DF in a fine sense. At least not now. I still feel it is a fantastic PacNW workhorse, and this chest will reflect that. I was originally thinking of building the Chest of Drawers for Joiner and Cabinetmaker with DF, but now am thinking that will not be the case (pun intended). I am much more partial to alder. I will still hold DF in high regard for shop fixtures, and am planning to make my workbench of it soon. It is also what my sawbenches are made of.
As to frame and panel toolchests, did you see the one at literaryworkshop.wordpress.com ? Amazing work... I don't have any pecan trees though.
I do envy your 24" wide DF boards, although jointing these was really no problem. I got a little bit of tearout when planing the seams but that is more because I have some knots and reversing grain than because it is DF.
Thanks for reading!
Rob,
DeleteYeah, I did see Steve's toolchest - beautiful. I agree with everything you said about DF. Great building material and for things around the workshop. I do like CVG mouldings in trimwork as well. But flat grain fir probably isn't attractive (or hard) enough for most furniture pieces. In one of Krenov's books I saw that he made a beautiful cabinet out of DF, but, well, that was Krenov. If you were wanting to stay local with your chest of drawers, alder would be good a choice, or perhaps big leaf maple if you were feeling really confident.
-Eric
Rob,
ReplyDeleteI just built my tool chest from DF. It worked out well. You can see it in my last video , if you have time or want to watch my video.
either way, DF is a great wood in my book for utility things. I like it for workbenches, sawbenches, tool chests, and any appliance in the shop. I have even made some furniture from it. But, like you said, it is hard to work with. If you come across any really hard grain, just put mineral spirits on it and then plane it. It will cut much better. And because of the splintering of the fine grain DF, I decided to finish the inside of my chest with danish oil. This helps stop the splintering. I really don't want a splinter every time I open my tool chest.
Hope it turns out great, I am sure it will.
Bill @ www.billyslittlebench.com
I use DF for a lot of stuff around my shop, and I hear you about splintering, cracking, tearout, etc. I just do my best to work with it - I now use fine toothed japanese pullsaws for my dovetail work in DF, and it works great. And sharp chisels for chopping. I just built a cabinet for my braces with it, and I like the way it looks for shop stuff. I've also turned tool handles that look pretty decent, and the tight grained ones look really nice.
ReplyDeleteGood progress on the chest!