This has been a truly wonderful project, and I have to agree with co-author Chris Schwarz that it should not be skipped no matter how simple it seems. There are many lessons hidden in this simple-seeming project. Unless one is already a hand-tool expert, this is just a partial list of the skills to be learned:
- Edge jointing boards
- Chamfering by hand
- Precision marking and measuring
- Planing to thickness
- Squaring edges without a shooting board
- Clinching nails
- Trimming end-grain
- Use of battens in place of glue
- Division of space without measuring
and much more!
I feel like I would need to make 5 or 10 to feel like this box is mastered, but making 3 of them has certainly boosted my skills to the level where I am comfortable plunging onward. I was hoping to have enough scrap to create one for myself (these are all going to new homes) but alas... However, I will be making a similar box soon using a myriad of materials. More on that as it happens. This box looks brutally rustic, but it actually is quite pleasant to behold. Very smooth, very solid feeling, and the geometry is satisfying. It would look great to have stacks of them full of tools, nails, etc in any shop. While I am moving on to other projects, I doubt these will be the last I will make. Its a great design.
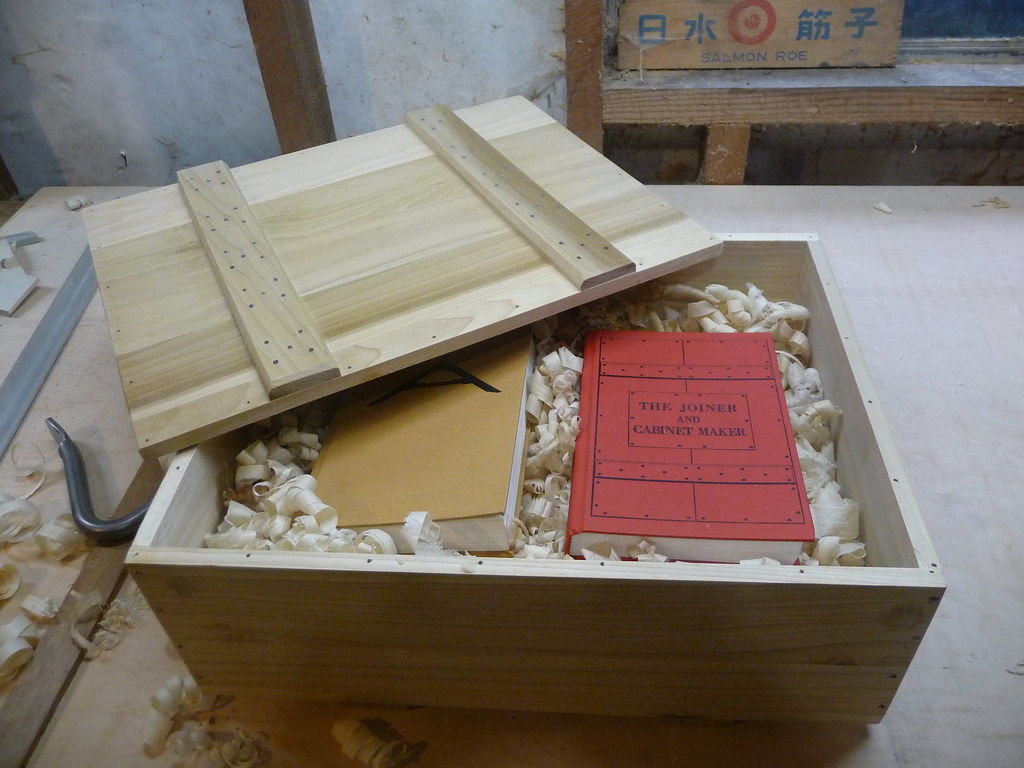
Here's how they came out:
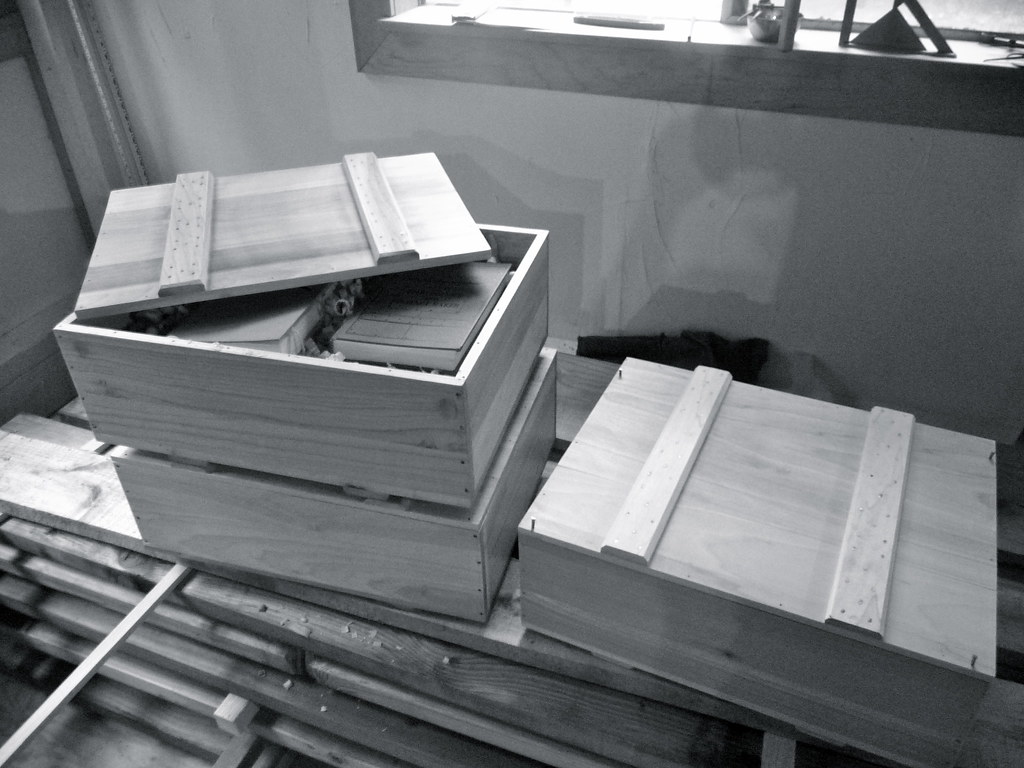
and packed as they might be for Mr. Green:
I do have some lingering questions, although I have ended up answering most of them myself already. What remains:
1) What are the appropriate nails for the cross-strengtheners? I had a lot of trouble with clinching 4d fine finish nails. I believe brads would be adequate, and that I use a LOT of overkill.
1a) Given the difficulty I had with the clinching (and sinking the clinched portion), isn't the interior a little too rough for books? I would put a lining panel into the box if I were to put delicate items in there. This is most likely because I used poplar instead of pine as specified. I could not sink the clinched portion of the nails completely no matter how much force I used.
2) In the text, the overhang of the bottom and lid which are trimmed to fit is never specified. How much is too much? I played with various sizes, and settled on 1/8" on all sides. This is no problem for the long grain, but is quite a bit for the end grain, which is a bit of a chore to trim without spelching (even with a preventative bevel cut).
3) Is use of alcohol or other moistening agent to trim edge grain traditional? I do not recall it in the text. Perhaps men were just made of sterner stuff back then, but trimming end grain even with a razor-sharp plane is no joke. The block plane made this easiest, but the added mass of the fore plane was most effective. Even with a relieving bevel, blow-out (spelching) was difficult to avoid.
4) How should the carcass be held while initially nailing it? This is glossed over in the text. I used a few types of clamping and jerry-rigging. All worked, none were wholly satisfying. This is perhaps so simple that it is taken for granted, but I found working with a 3/4 complete carcass to be rather awkward.
5) This is really only supposed to take 5 hours? Maybe I will get there some day, or maybe I took too much time to enjoy myself. I did not track the time, but it was a lot more than 5 hours per box. At the same time, I added extra steps such as gluing up the panels and planing them into shape, as well as adding much more smoothing inside and out than the text calls for. I felt this was important to meet modern standards of quality, and to bring the boxes to something close to "furniture grade". I am going to guess that even 10 hours per box is a conservative estimate. This obviously makes a rustic box like this unaffordable for its intended use and rough appearance, but this is one of the rubs of hand-made woodcraft. Even working at minimum wage, a box like this would be $60 or so. I suspect you could buy a similar crate made in Asia at a import shop for $15. It will be a long time before our economy adjusts to this and makes locally-made items more appealing.
Nicely done. I love your packing material!
ReplyDeleteI don't have much experience cinching nails, but I ran across an article in Wooden Boat magazine that included cinching when building canoes. Their store sells this tool (http://www.woodenboatstore.com/Clinching-Iron/productinfo/835-017/) although your cut nails might be too much for it.
ReplyDeleteBy the way, great blog!
PaulReegs
Thanks for the info, Paul. After expert consultation, I have determined that its a combination of using nails a bit too heavy for the hard wood I am using, just as I suspected. The 4d fine finish nails would be appropriate in soft pine.
ReplyDeleteThis is a great project, Rob!
ReplyDeleteThrowing some ideas for your questions:
2) How are you trimming the end grain to fit? I'd leave each end between 1/4" or 1/2" long, then mark the correct size upon the case. You can knife the outside surfaces so they don't splinter when you saw them. You don't / can't knife the inside surface (I assume it is already nailed to the case), but if you saw from the outside toward that inside surface, it won't splinter as the case holds it together.
3) Hey, wetting the end grain sounds like a good idea! To avoid splintering, knife all around before planing. To avoid splitting the end, plane from both sides toward the center, never a full stroke.
4) One method: Lay one board flat on a workbench / table / whatever. You'll need some sort of stop on the bench so the board doesn't get pushed - this can be a nail or screw set on the bench, or even another board set against a wall. You can then hold the second board vertical against the free end of the flat board, using your chin to keep it from moving too much, and nail it there.
Another method: use a handscrew to hold one board on its side, also stopped against something on the bench, and nail the L from one side.
If you cut a shallow rabbet on the ends of two boards, and the rabbet is as wide as the board's width, it will make it much easier to align the boards for nailing.