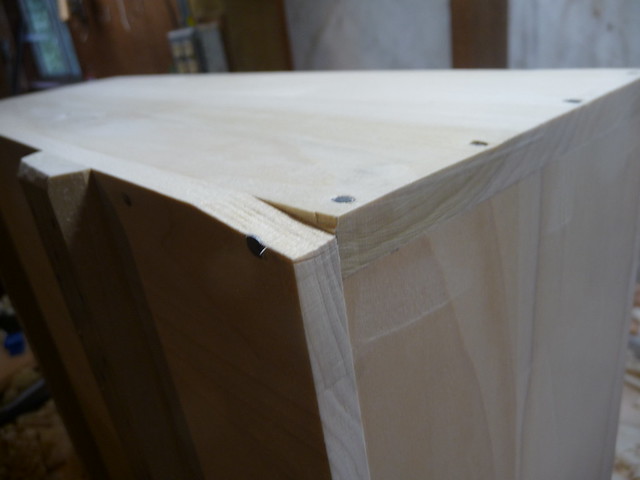
After realizing it just would not do, I used a rasp to flatten the slope, cut a wedge of new wood, grain-matching as best I could, glued it into place and let it dry. Then I moistened it with denatured alcohol and planed it flush as much as possible. The end result is visible, if you know what to look for, but I dare say passable for casual observers, especially since this is the bottom of the box.

I think it will be even better once oil finish is applied.
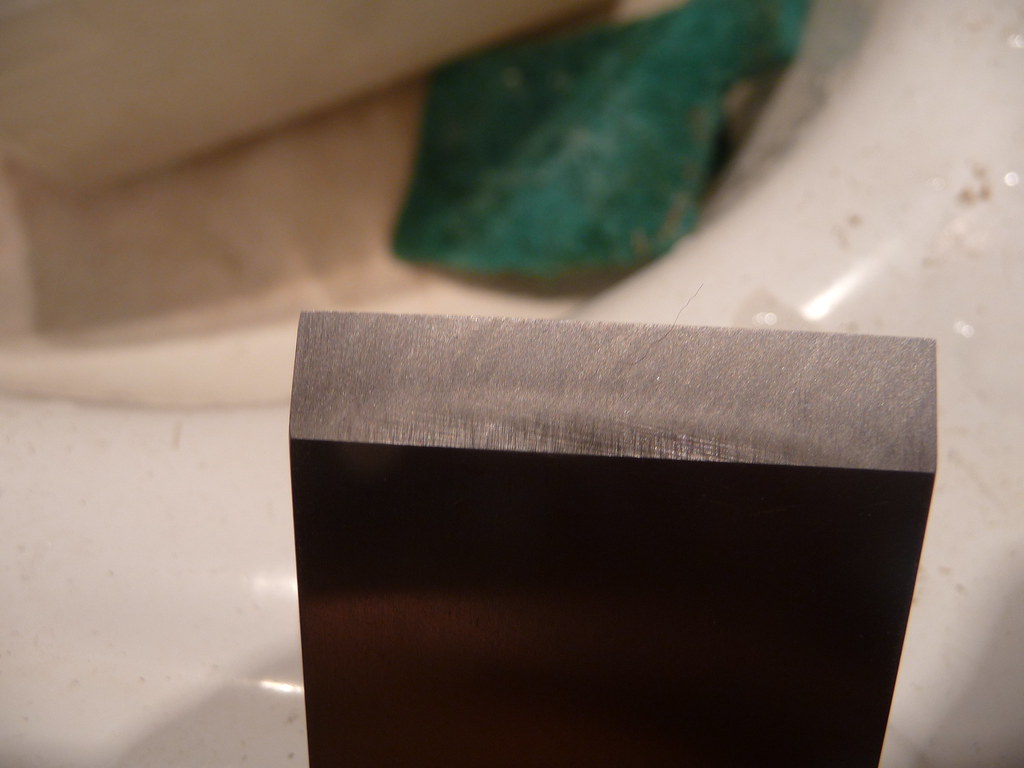
That was the first order of business for the day in the shop. After that, it was setting up more glue-up boards for box #3, the final Packing Box. While they dried, I sharpened. Unfortunately, upon examining the block plane iron, I noticed a nasty nick (perhaps from working around the nail where that wedge was placed)
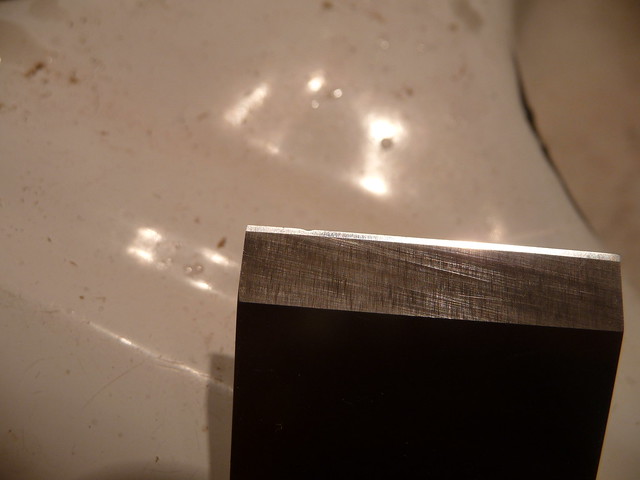
Its just barely visible in the left 3rd of that image as a little dip on the tip. Its much more visible as a track it leaves in the wood upon usage.
I should back up a moment to show the sharpening station I put into the shop. Fortunately, running water is right there, which steered me towards water stones as a sharpening system. Its easy to rinse them in the sink, prepare the tub for soaking, and rinse the slurry down the drain. I don't have hot water (yet) which will become annoying in the midst of winter, but for now this works quite well. I did install a little strip of halogen lights which help a great deal. More will be better, of course. I also need some shelves on the sharpening wall, all in good time.
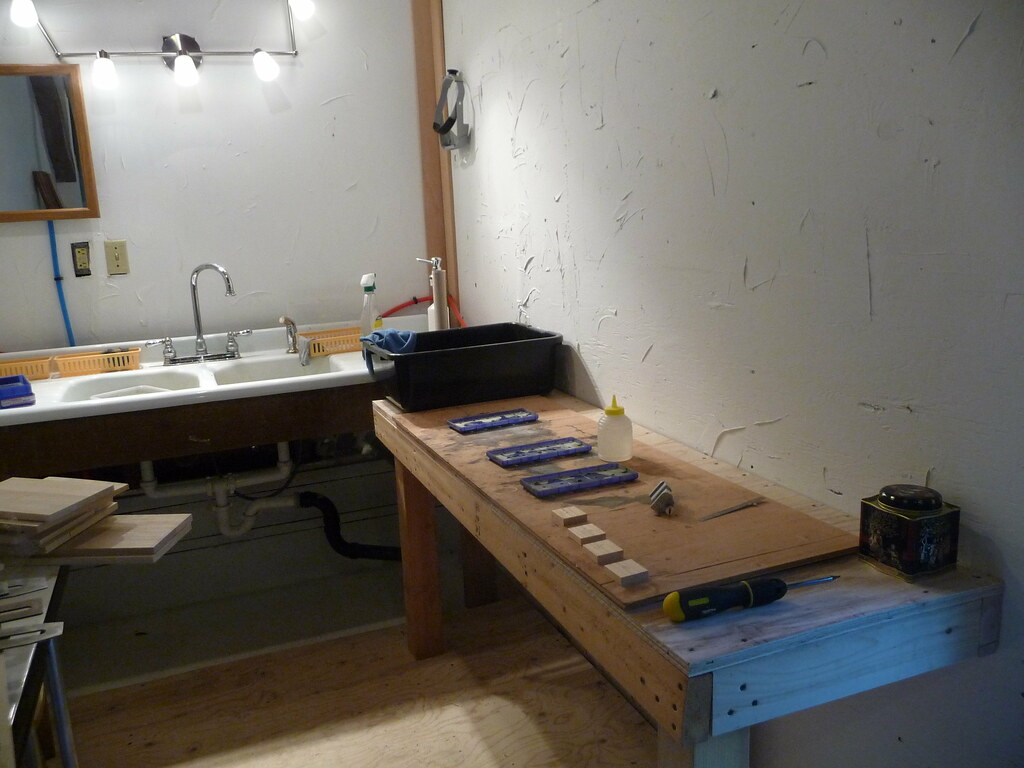
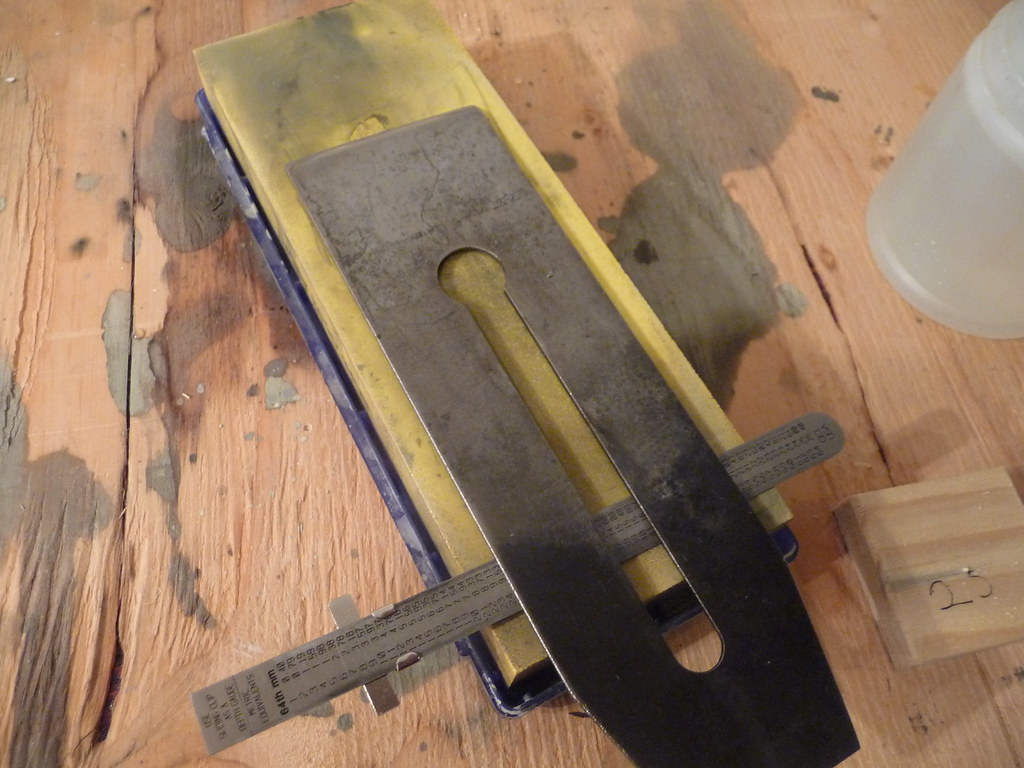
Other than just being a "table", which is really all it is, the sharpening station is somewhat unique in that I have a temporary piece of plywood (visible) to deal with the somewhat nasty spills that the stones emit. I plan to replace it with waterproof cafeteria trays, but for now it does well. You can also note a series of blocks on the right side:
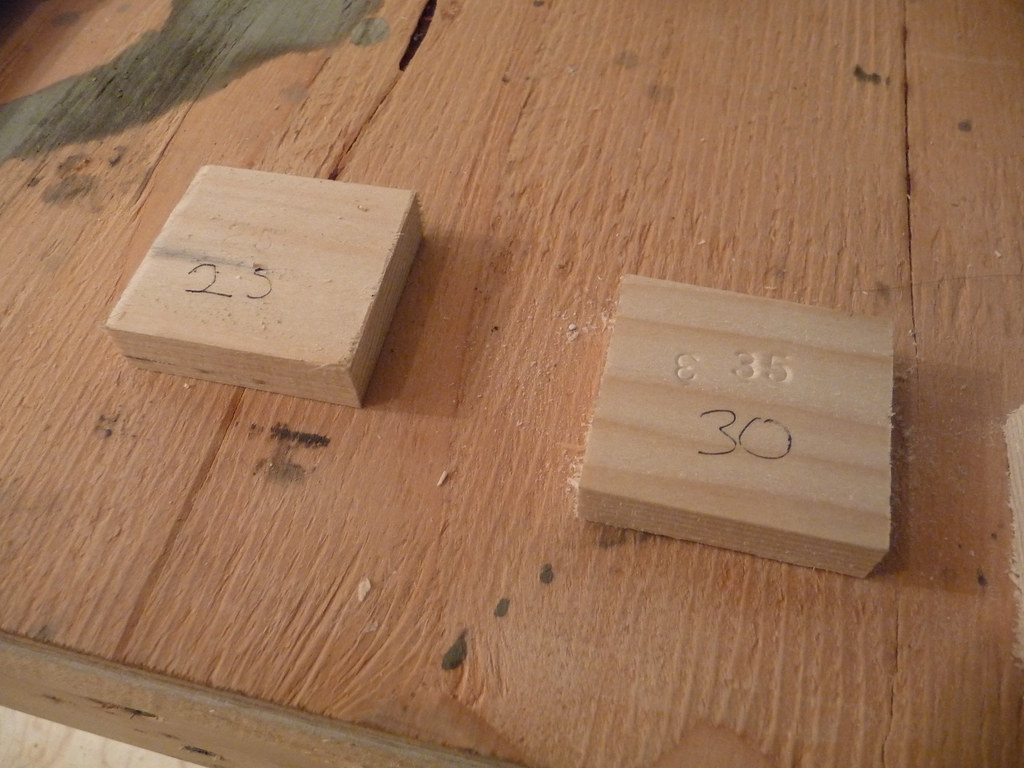
These are set up to help plane irons into a sharpening jig at the right position upon each sharpening, like this:

This one, for example, will yield a sharpening angle of 25 degrees, which is the initial bevel of a bench plane.
It bears mentioning that I did start off learning to "freehand" sharpen, without a jig. I still believe this is a valid skill, and it is not all that hard to do. However, I want repeatability and speed, and the simple "Eclipse" style jig I am using is all about that. It does not work for skewed irons, very narrow irons, or any other oddball items, but for my bench planes it is working very well, and I have to confess I enjoy the crisp angles it delivers compared to the ugly yet acceptable bevels my freehand approach was providing. I am committing myself to sticking with this system until I have mastered it enough that I find flaws in it.
So, the angle in the iron set with the block above works out like this:

Set at the appropriate angle, it is, at the risk of over-simplification, rubbed over various grits of stone.
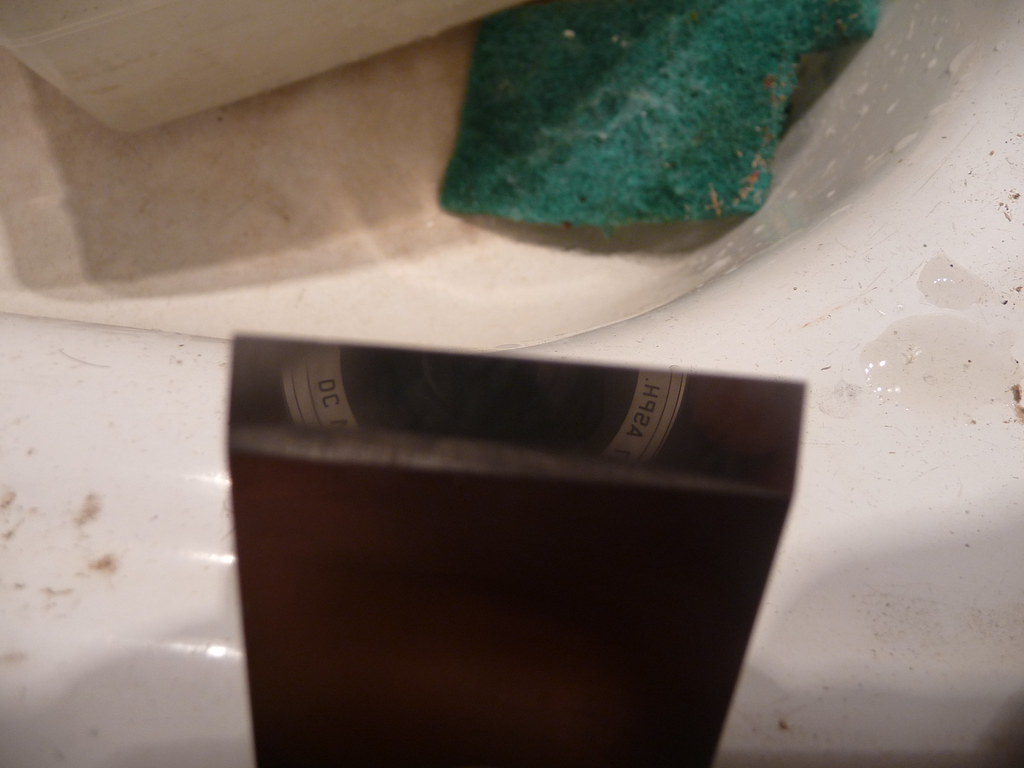
Remember that nick in the iron? After a few minutes on the rough stone, the nick is pretty much gone:
But, it is now very rough. And it needs to be smooth. So it goes from one stone to another, up to 8000, which is the finest stone I have.
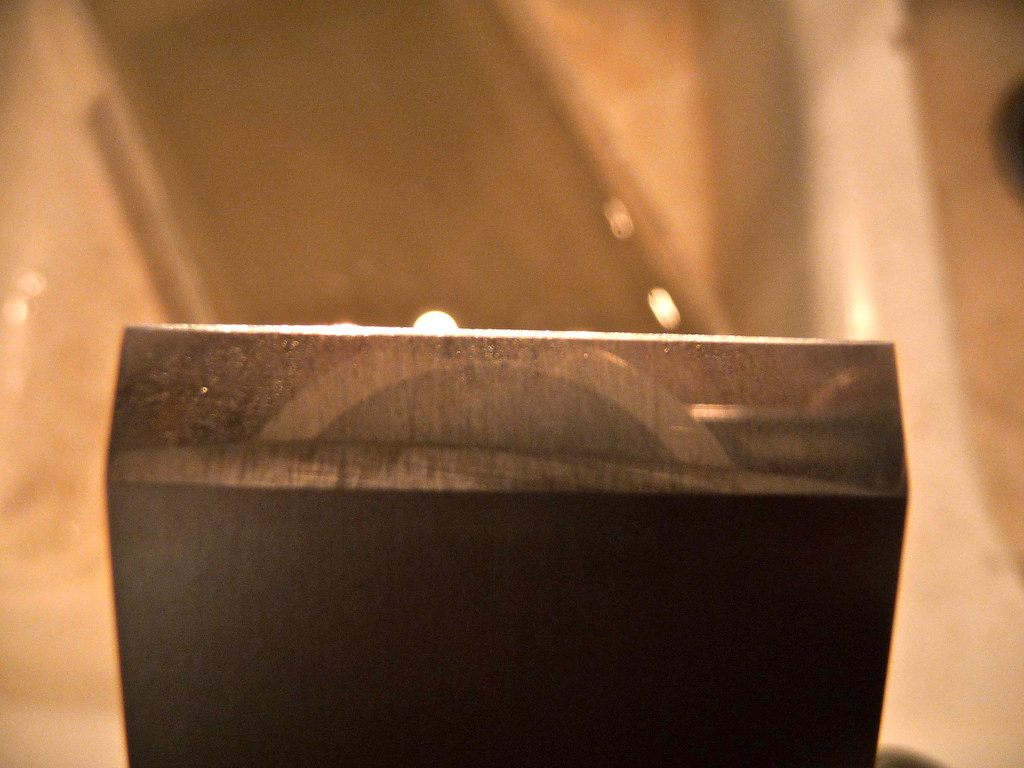
At that point, its pretty close to a mirror (as can be seen by the camera lens reflection):
Its easy to think that its done at that point, but what I do is then put a "microbevel" on it, which is a slightly steeper angle just at the tip. This will be the area where it wears down, and a few quick swipes on the 8000 stone will refresh it. This is what I would have done today, if it were not for that pesky nick.
The back face is also flattened, using what is known as the "ruler trick". By elevating the back of the plane iron a tiny bit (the thickness of a very small steel ruler), only the very tip is ground, allowing the flattening to be focussed where it counts - at the intersection with the cutting edge.
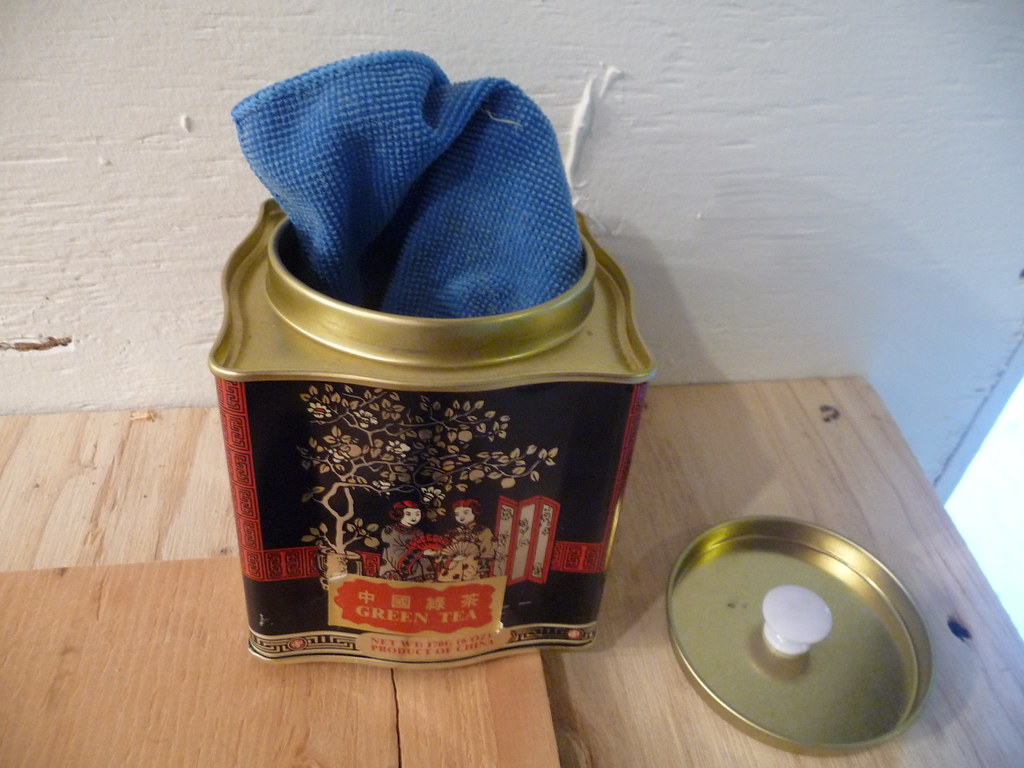
After testing sharpness (I forgot to take a pic of my bald forearm, subject of many test shaves), the iron is wiped down with jajoba oil. This is stored in this fancy tea container, and dispensed via a microfiber "woobie" cloth:
This process was repeated for all 3 bench plane irons, 2 extra irons, and 2 chisels. That took up most of the shop time for the day, although I did also start on a special project, somewhat unrelated to the Joiner Etc projects, but quite tangential. More soon.
Looks good.
ReplyDeleteHow did you come up with the lengths/angles for your stops?
Badger - The honing guide itself (an Eclipse style clone from LN) came with suggested distances, and these are also published all over the web. The most important thing is, though, not that its 35 degrees or 34 degrees, but that its the same each time. So I started out duly measuring "38mm" or whatever, but then realized that just taking the 15 minutes to install the stops would make the same bevel every time. Thats what counts. There is a range of "good enough" bevels for most tools, but honing to the same angle every time is really valuable, especially with the micro-bevel technique. In this case, given that the stones are already soaked, it takes less than a minute to take a grumpy, clunky hone into razor sharp territory. Really, 5 swipes on the 8000 and its fresh as ever.
ReplyDeleteThis aspect of woodworking, which I think unanimously the pros agree on as the most important, has been one of the most rewarding, simplest, and trippiest to get a handle on.
Thanks. I have the guide, but I don't remember it coming with any of that information unfortunately.
ReplyDeleteI'll do a search for it, and see what I can find.
I agree, getting this part right is a major difference maker in woodworking. So far I'm close, but I'm hoping to move over the hump soon.
I'll post a scan of what mine came with, but can't guarantee it will work for yours. If you have an angle you know you like, its not too hard to set it up in your guide, then just glue the stop-block where the edge of that tool sits.
ReplyDeleteHere's the LN info:
ReplyDeletehttp://www.lie-nielsen.com/pdf/AngleSettingJig.pdf
I can scan the label which came with my guide later on.