I used a relatively thick piece of alder (3/4") because I thought that larger joint components would be easier to manage. The "modern complication" of using a coping saw to remove the bulk of the socket waste was also forgone for the sake of simplicity. This might have been a mistake, as the chiseling seemed to take a very long time. I did not time this, but I believe this test joint took over 2 hours.
The end results are not great, but the joint did go together and is very, very strong without any glue. I am confident I will improve and will do as many of these test joints as I can in coming weeks, if not actually 30 of them.
I've learned enough just today to have my head swimming with geometry, chisel methodology, and the kind of tired muscles (and eyes) that only come from a long day. My shop lighting is turning out woefully inadequate for after-dark work. Viewing the baseline was very difficult, and the harsh shadows which develop once the ambient sun goes away will not be tolerable in the long term. Luckily we have very long days here in the spring and summer, and I have not been doing much at night this winter. In the future, though, this will need to be addressed.
Here's a couple images from the sample joint:

This shows the tails cut but not yet chopped.

Now the tails are chopped out, so that the pins could be marked for cutting.
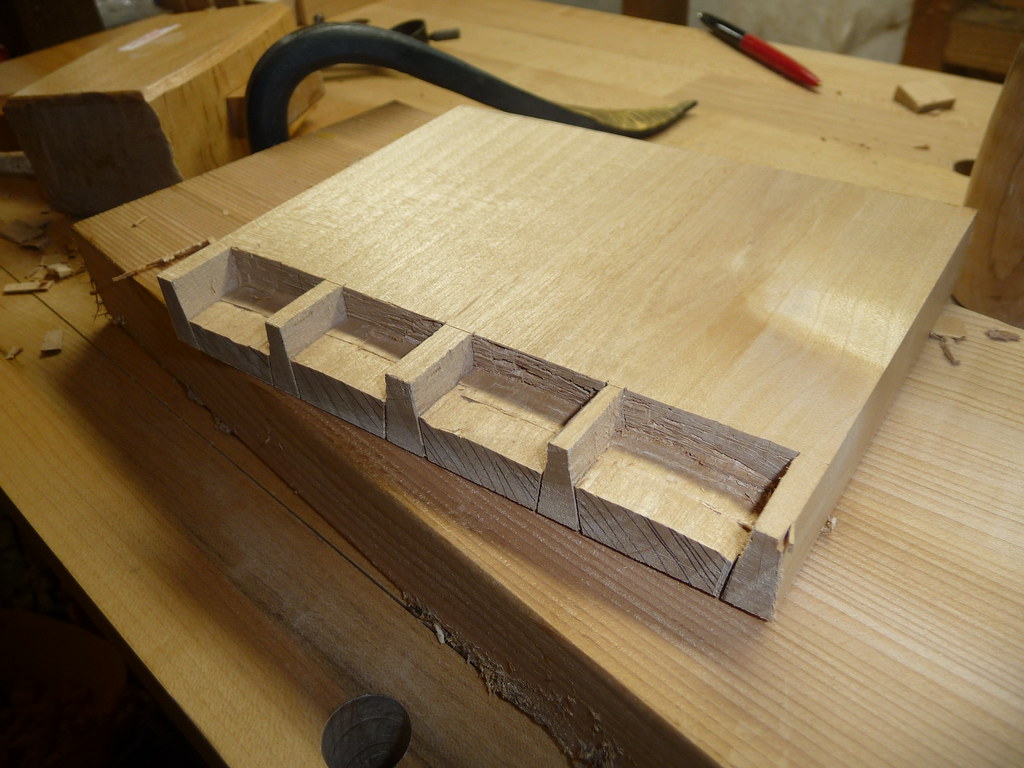
I chopped half of the sockets and then flipped the board to do the other side from the other direction, in order to avoid tearout. This chisel work took much longer than the sawing, and possibly longer than the layout (which took a long time to wrap my head around).
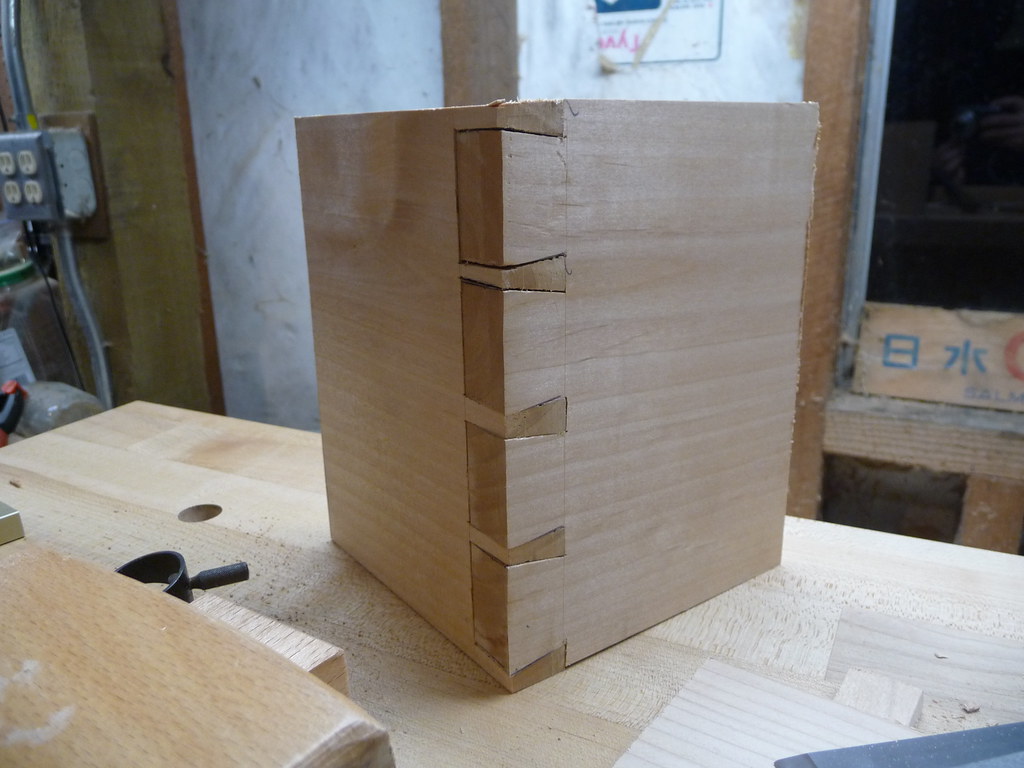
And a completed joint. The gaps are cringeworthy and yet the thing is very solid. I did not glue it but it seems that it doesn't need it! I will probably work with thinner hemlock stock now that I have a handle on the process and don't want to burn up too much of my alder to practice.
Learning the layout techniques took much longer than I had thought. I am familiar with 4 or 5 methods, so had to choose one and roll with it. I ended up using the system that Rob Cosman suggests. I chose the width of the half pins, and then used dividers to space the tails (plus tail padding) between them. Straightforward enough for me and I will stick with it until I have a better command of the sawing and chopping skills needed to make tight joints.
Much respect to those who already have dovetails mastered and make it look so trivial!
My second joint looked almost exactly like yours. On my *first*, I chopped the tails and left the waste.
ReplyDeleteTherefore, you're learning twice as fast as I am.
Ha ha .. Glad it's not just me.
ReplyDeleteI often think 'I must be doing this wrong, everything seems to take so long'. But I am noticing an overall improvement with my skills. Im sure you said it somewhere - its the journey not the destination.
I already have some ideas about how to speed it up a little... and I will start to saw off more of the waste. I wanted to try it "the old fashioned way" but I am also open to sensible improvements!
ReplyDeleteI think also now the layout will take about 10% of the time. I hope to squeeze in another one today but we'll see if the napping daughter lets me!
Wow, I miss a few posts on your blog and when I come back I find that you've been doing almost exactly what I've been doing :0) Went down to the shop last night, didn't have a project to work on, but finally took Chris Schwarz's advice: clamped a board to the front of my bench, drew a ton of vertical lines on it, and practiced cutting. I'd been avoiding because it sounded like drudgery, but I got pretty into it. Not a bad time at all. I tried it with several different saws and it was very informative, comparing the various kerfs, the tearout, and my accuracy with each one.
ReplyDeleteAlso, I intend to start that Dovetail A Day improvement program very soon...
First dovetails usually seem to be rather humbling to their makers. I'd say you did just fine. My first set took me 2 days! If you want to chisel out the waste, you will want to watch "dovetail a drawer" by Frank Klauz (is that how you spell it?). He would have some very helpful pointers for you.
ReplyDeleteAs for minimizing wasted material, try using longer material if you have it, and just cut the joint off. Each time you will just have to dress the wood a little before cutting the next joint.
And on "cutting" dovetails. What a miss representation of facts. "Chopping" dovetails would be much more accurate!
I agree that cutting out the waste with a jewelers saw will drastically speed up the process.
ReplyDelete