The title here is an allusion to a book I am pretty excited about reading (Make a Joint Stool from a Tree: An Introduction to 17th-century Joinery), but is also maybe an appropriate description for the tasks of today. Many woodworkers are used to going to a lumberyard or home center and buying some boards neat and square and ready to go. I've made shelves of this kind of material several times myself. I've even seen these shrinkwrapped. However, both as a nod to wanting to do things as Thomas did, and also because the lumber I have on hand is very rough, I had to cut, flatten, true, joint, glue, and thickness the boards all by hand. I won't go into much detail about the planing process, but you can read more about it if you are interested in this post about preparing rough stock.
I left off last time with a very rough board from a local alder tree cut into 1"+ boards with a chainsaw. I cut it into 2 manageable pieces (each will provide 2 smaller boards), jointed the edges, and glued them together.
"When Thomas comes to his work the next day, he finds the glue firmly set in all the joints that he had put together. He first scrapes off with a broad chisel such glue as has worked out from between the edges, and puts back into the glue-kettle any that comes off quite clean and free from chips."
-- the Joiner and Cabinet Maker, 1839
And here is the jointed, glued, and dried board:

Thomas was using hot hide glue in his shop. I am also opting to use hide glue for a number of reasons, but I am compromising authenticity and using a modern "liquid" hide glue. It has many of the same advantages and is much more convenient. The glue dries to a tacky, flexible material somewhat like rubber cement. It is easy to scrape off, and is gentle on tools, where some modern glues dry hard as a rock and can damage steel edge tools like chisels and planes. I did not put my scraped glue back into the pot, as Thomas did, but I do like that example of thrift. The strength of hide glue is impressive; I was unable to snap apart a joint by hand. It is said that the wood will likely split before the joint will come apart, and I believe it.
I then ripped the bark edge off of the boards. I would have preferred to flatten the board and save the ripping for later, but planing the bark seemed like an unwise way to work. Instead, I estimated where the final edge would be and added on a bit of room for error.
Here's the board with the bark edge removed and grossly trimmed to width:

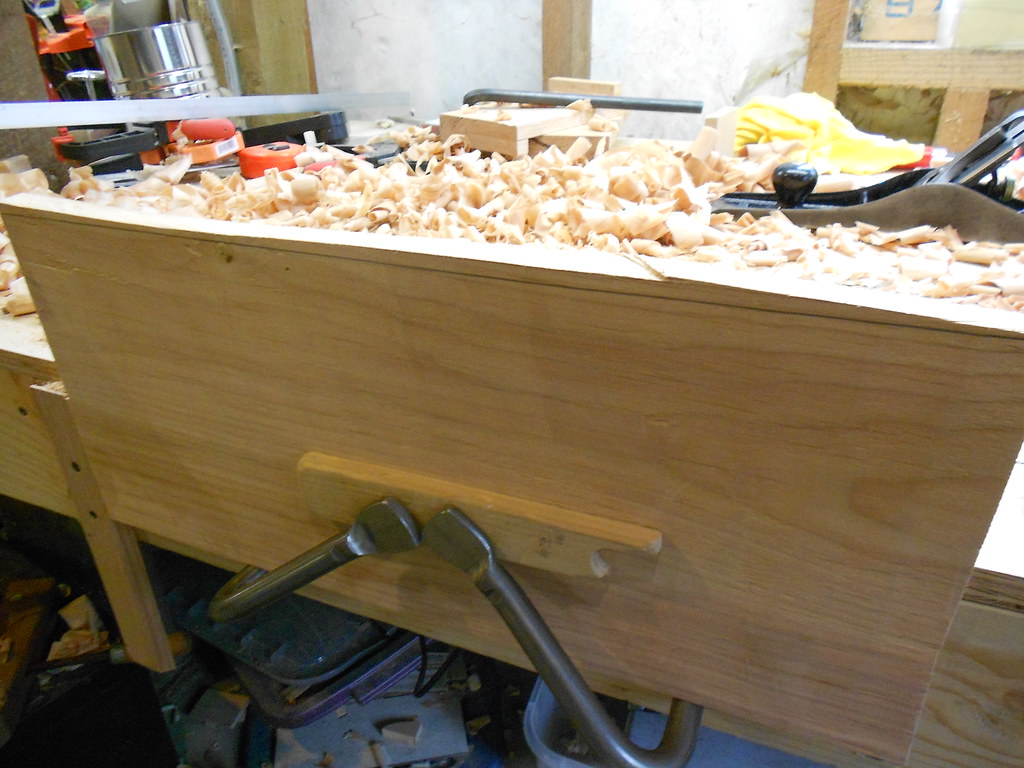
The difference in thickness of the boards looks pretty dramatic there, and it was, perhaps 1/4" at its highest. This is no problem for the jack plane though. Its cambered (curved) edge allows huge chunks to be taken out with each stroke, and it really only takes a couple minutes to go from that glue-together monstrosity to a board which is rather flat, if not smooth. It does leave a wavy texture behind, but that will be address with a jointer plane. Here it is after the work with the jack plane:

There is still a difference in board color which reveals the joint. However, it feels pretty good to the touch and is a decent joint, color mis-matching aside. One could argue that the contrasting color is a design element, but I will not be so bold.
The board was then flattened normally using the try plane (or jointer plane), which in my case is a Stanley #7, over 100 years old. It does have an aftermarket iron in it which makes a nice noticable difference, much thanks to Ron Hock for creating these for us.
I did want to point out how magical hand planes can be. My rough cut to remove the bark was really terrible when you look at the pencil line which is the final width of the board. Notice the rather large expanse of wood left above it. By paying attention to where the high spots were and focussing on them, it did not take long to work down to the line. It can, in fact, be surprisingly quick so that if attention wanders, its easy to very quickly go past the line. For the curious, the sad state of this board was a result of my original rip cut wandering from the line, so I flipped it and tried from the other direction. The intersection wasn't pretty. At any rate, the plane zipped this waste off easily, and it is actually fun.
Less fun, however, are lengthy sessions of thicknessing using a hand plane. While the jack plane can quickly remove rather thick shavings (perhaps up to 1/16" of an inch) it is still painstaking to reduce a large board by a great degree. Ideally, the boards would be sawn to close to desired thickness, and the mere act of flattening and truing the boards would bring it to target thickness. The problem with my boards are that they were cut with a pronounced wedge shape, being 1/2" thicker at one end than the other. As I would like all 4 walls of the box to be of equal thickness, I had to find the thinnest spot and make that be the target. This left me with some steep hills to plane off, and wishing that Thomas could travel forward in time and use the shop's planer machine. I remained true to the spirit of this experience, but I did make flirty eye contact with my planer a couple times.
While a planing machine has a built-in stop which can be set for desired thickness, there is no such thing in the hand tool world. What there is, though, is pretty cool. I set a cutting gauge to the thinnest part of the board, and cut this setting onto the edge of the board on all four sides. I then traced over that with a pencil for visibility, but the gauge has another way of communicating:
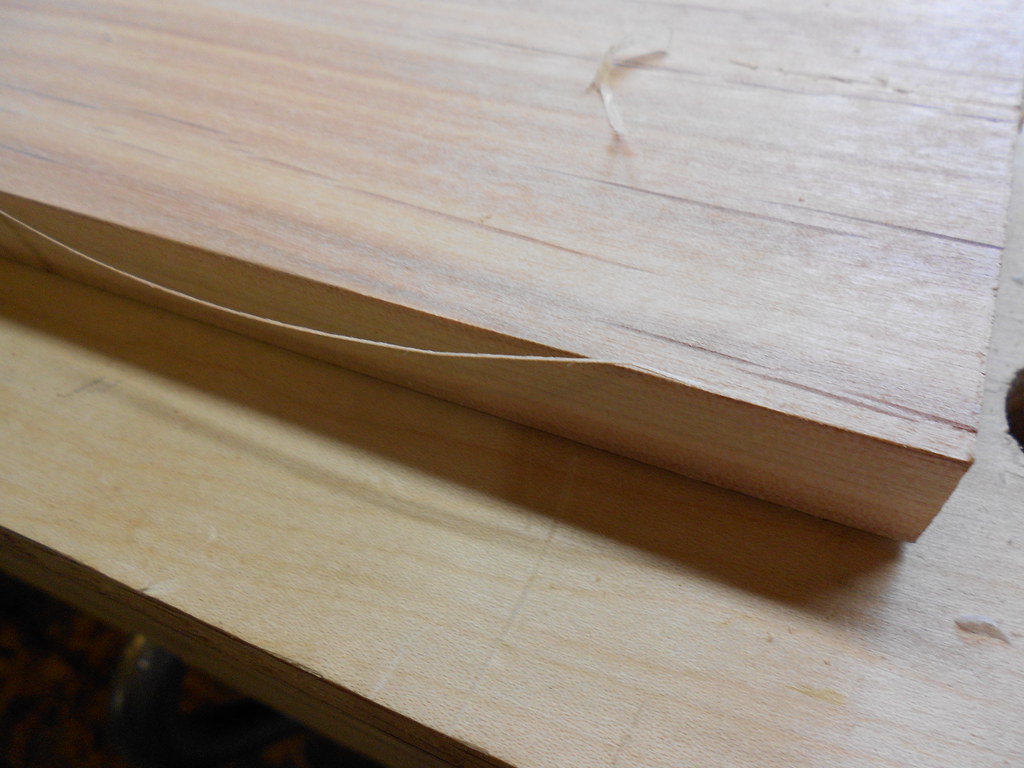
When the plane's edge actually reaches the gauges line (which is much like a knife line) something like the above usually happens. Sometimes a shaving with a ragged edge will appear just before this point, like a warning. Then the thin bit of wood above the cut-line strings off like this. One or two more strokes, and the knifeline is gone, and your target is reached. I love this stuff!
It was then time to cut out the individual boards (panels?) for the box.
"To cut across a piece of wood so wide as this, where accuracy is required, a sash-saw is used; that is, a saw with a thinner blane and finer teeth than that which Thomas used for cutting out his wood roughly; it is also strengthened by a piece of iron or brass at the back. It takes its name from being much employed in the making of window-frames or sashes."
-- the Joiner and Cabinet Maker, 1839
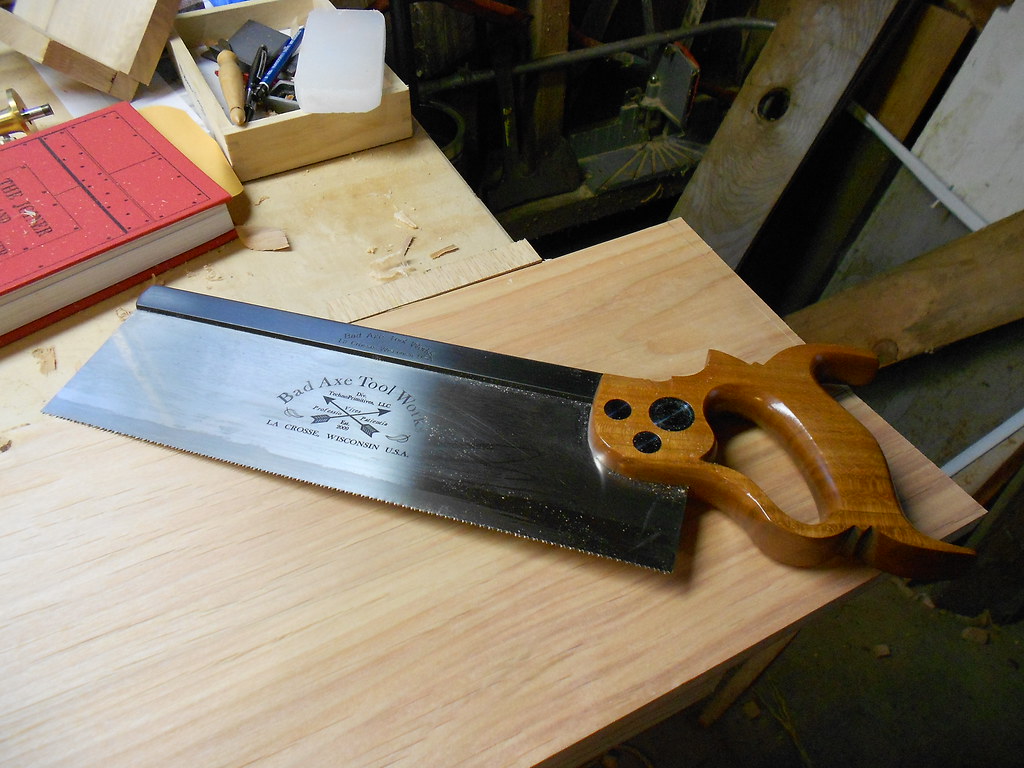
I do not technically have a sash saw, which is a rip saw 14" long and with 4" of depth. It is suggested that saws hand-filed in a rip configuration, that is, for splitting a board down its length, have just enough accidental fleam (angling of the tooth filing away from perpendicular) to also cross-cut nicely enough. Many joiners will have dedicated crosscut and rip backsaws, but Thomas has only the one sash saw. If you are looking for a sash saw, Gramercy makes some that are very highly regarded. However, I already have a 12" "carcase" saw which is very similar and in fact similar enough that the expense of a slightly larger saw is not warranted for this use. Mine is a "hybrid" tooth pattern, which means it is similar to Thomas's saw with some intentional "accidental" fleam, allowing it to crosscut and ripcut admirably. It does crosscut very well and is a joy to use. Today my "sash saw" was this Bad Axe carcase saw:
This board is about as wide of one as I would want to cut with this saw. It worked out just fine, and in fact I was able to split the cutting line without much trouble. It was, however, noticeably more difficult than the narrower boards I am typically cutting.
To mark my cut, I used a large try-square and drew a marking knife along its edge. As my eyesight is not that of a 14-year-old any longer, I almost always then drag a .3mm pencil point down the cutline, leaving a nice crisp mark:
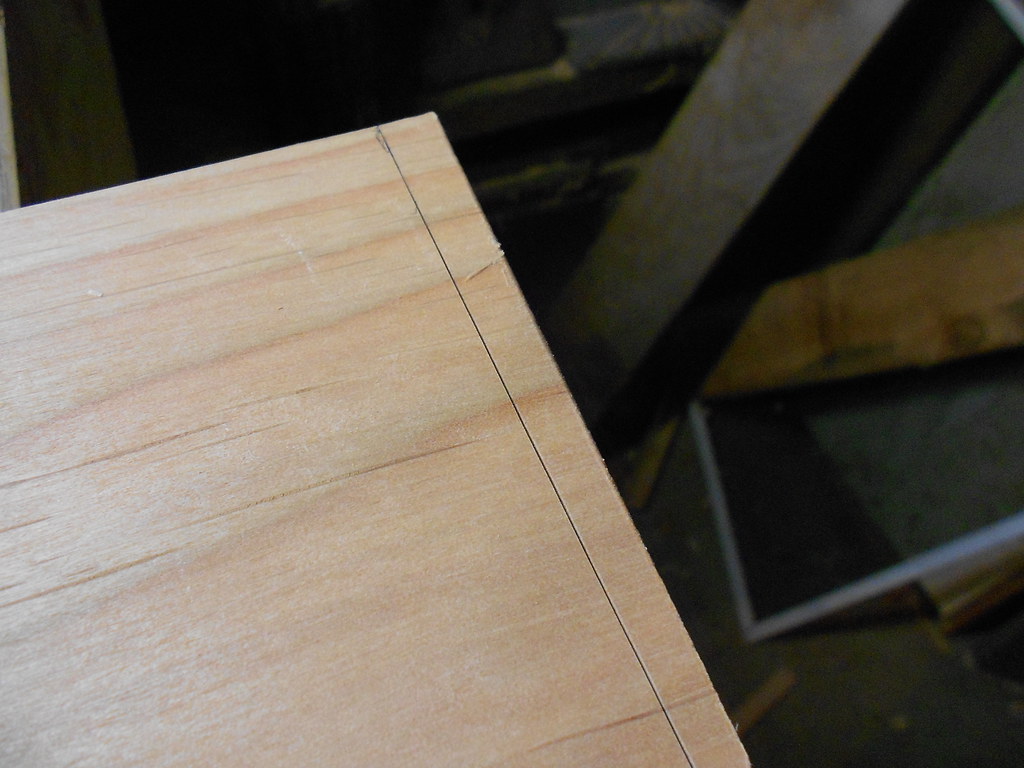
As I mentioned above, with this nice sharp carcase saw it is not very difficult to follow the line and make a cut which hardly needs any correction, if any. I did shoot all the saw-cut edges of the boards to ensure square:
"For squaring a corner also, much assistance is gained by a contrivance which every joiner has ready for the purpose. It consists of a board that may be fixed on the bench when wanted, and which is furnished with a cross piece standing up about an inch all across it, and set exactly square to its edge. It is sometimes called a shooting-board, as the plane is shot rapidly along the edge that is to be planed. "
-- The Joiner and Cabinet Maker, 1839
This is where I will reveal a gem from my deep stash of "duh" moments. I have been a fan of rubbing parrafin wax on the soles (bottoms) of my metal planes since the beginning. It makes a noticeable difference in how easy it is to push the plane, and I always have a chunk of it next to me while working. It needs to be refreshed quite frequently. With that in mind, I waxed the side of my plane for shooting. This works, but it is a little messy. Sawdust etc sticks to the waxy side and is difficult to remove. The smarter thing to do is to wax the track of the shooting board itself. You probably already knew that.
At some length, I had my four boards cut out, squared, and sized relative to each other.

While I have been aware of the School Box for a long time, and studied photos, video, and written descriptions of it, I was still a little surprised at how big it is. Sixteen inches wide is, to me, larger than it sounds. With that in mind, I wanted to get a sneak peek at how this box will shape up:

It will hold a few books and then some! I am pleased with the progress, yet also am realizing that the board I have chosen will be a bit of a challenge to really smooth nicely. It has a couple minor knots and areas where the grain reverses like crazy. They did not get in the way of the flattening, but I think smoothing is going to take a little work. A card scraper will probably be required, and the box will never look as great as it could have if I had taken only the clearest areas of the board. However, I still believe this one will finish handsomely, and making use of the entire board leaves me feeling better than scrapping some of the board and moving onto another would have. I also feel the wood I have selected is more than nice enough for this first attempt. Perhaps down the line I will get much pickier and even make attempts to exploit grain pattern into a cohesive intentional design.
Next time, the boards will be marked and cut for dovetails, and the shell of the box assembled!
This comment has been removed by a blog administrator.
ReplyDelete