Wednesday, February 29, 2012

A Most Important Tool


"To begin with, however, he finds Sam's bench so covered over with tools and shavings, that he really cannot lay the board upon it; not that Sam has been doing any very great quantity of work, but that he very much dislikes the trouble of putting away his tools and sweeping the shavings off the bench: but by this slovenliness he makes himself moure trouble after all,  for he can hardly ever find the tool that he wants: just when he has got the side of a box nicely placed to fit over the end, the brad-awl is missing which he needs to bore a hole, and five minutes are lost in searching fot it, if, indeed, he does not rather bang in the nail to make a hole for itself, without caring whether it split the wood or not. The tidy workman clears his bench every day when he leaves his work; his tools being all put by, he sees whether each is in its place, and if any are missing he recollects at once whether he has lent them to any one, or left them anywhere where he has been using them, or knows whether he had better look for them among the shavings."


-- The Joiner and Cabinet Maker, 1839

First of all, I hope you enjoy the wonderously long nest of clauses the author of the above employs constantly throughout the text.  I really do, mind-bending as the grammar can be. More important than the writing style is that early on in the text the importance of cleanliness is pointed out in graphic detail, and this truly is a foundational skill for a craft as messy as woodworking can be. I purchased a brush like the one above long ago, mostly for sweeping the mountains of sawdust off of my tablesaw and mitresaw. However, it is proving its worth even moreso to clear the incredible volumes of shavings off the bench. As with any good tool, it acts as an extension of the arm, and with an almost psychic ability, it is easy to tell the brush to flick the shavings off while leaving behind heavier tools and pieces of scrap wood. When doing an operation as shaving-intensive as thicknessing wood, it is likely to need to sweep shavings every ten minutes or so, filling huge tubs . Some woodworkers will put these onto a garden bed as mulch, some put them into the trash. I find them far too valuable to do either. Mine get my woodstoves started with very little effort. They ignite readily, burn cleanly, and as they are generally harder woods, they pack a punch when it comes to getting the stove hot and the kindling lit. This workshop appliance is not given much credit in most discussions of outfitting a shop, but I might say it should be the first "tool" purchased. 


Tuesday, February 28, 2012

[Schoolbox] Making Boards from a Tree


The title here is an allusion to a book I am pretty excited about reading (Make a Joint Stool from a Tree: An Introduction to 17th-century Joinery), but is also maybe an appropriate description for the tasks of today. Many woodworkers are used to going to a lumberyard or home center and buying some boards neat and square and ready to go. I've made shelves of this kind of material several times myself. I've even seen these shrinkwrapped. However, both as a nod to wanting to do things as Thomas did, and also because the lumber I have on hand is very rough, I had to cut, flatten, true, joint, glue, and thickness the boards all by hand. I won't go into much detail about the planing process, but you can read more about it if you are interested in this post about preparing rough stock.

I left off last time with a very rough board from a local alder tree cut into 1"+ boards with a chainsaw. I cut it into 2 manageable pieces (each will provide 2 smaller boards), jointed the edges, and glued them together.

"When Thomas comes to his work the next day, he finds the glue firmly set in all the joints that he had put together. He first scrapes off with a broad chisel such glue as has worked out from between the edges, and puts back into the glue-kettle any that comes off quite clean and free from chips."


-- the Joiner and Cabinet Maker, 1839

And here is the jointed, glued, and dried board:


Thomas was using hot hide glue in his shop. I am also opting to use hide glue for a number of reasons, but I am compromising authenticity and using a modern "liquid" hide glue. It has many of the same advantages and is much more convenient. The glue dries to a tacky, flexible material somewhat like rubber cement. It is easy to scrape off, and is gentle on tools, where some modern glues dry hard as a rock and can damage steel edge tools like chisels and planes. I did not put my scraped glue back into the pot, as Thomas did, but I do like that example of thrift. The strength of hide glue is impressive; I was unable to snap apart a joint by hand. It is said that the wood will likely split before the joint will come apart, and I believe it.

I then ripped the bark edge off of the boards. I would have preferred to flatten the board and save the ripping for later, but planing the bark seemed like an unwise way to work. Instead, I estimated where the final edge would be and added on a bit of room for error.

Here's the board with the bark edge removed and grossly trimmed to width:


The difference in thickness of the boards looks pretty dramatic there, and it was, perhaps 1/4" at its highest. This is no problem for the jack plane though. Its cambered (curved) edge allows huge chunks to be taken out with each stroke, and it really only takes a couple minutes to go from that glue-together monstrosity to a board which is rather flat, if not smooth. It does leave a wavy texture behind, but that will be address with a jointer plane. Here it is after the work with the jack plane:


There is still a difference in board color which reveals the joint. However, it feels pretty good to the touch and is a decent joint, color mis-matching aside. One could argue that the contrasting color is a design element, but I will not be so bold.

The board was then flattened normally using the try plane (or jointer plane), which in my case is a Stanley #7, over 100 years old. It does have an aftermarket iron in it which makes a nice noticable difference, much thanks to Ron Hock for creating these for us.

I did want to point out how magical hand planes can be. My rough cut to remove the bark was really terrible when you look at the pencil line which is the final width of the board. Notice the rather large expanse of wood left above it. By paying attention to where the high spots were and focussing on them, it did not take long to work down to the line. It can, in fact, be surprisingly quick so that if attention wanders, its easy to very quickly go past the line. For the curious, the sad state of this board was a result of my original rip cut wandering from the line, so I flipped it and tried from the other direction. The intersection wasn't pretty. At any rate, the plane zipped this waste off easily, and it is actually fun.


Less fun, however, are lengthy sessions of thicknessing using a hand plane. While the jack plane can quickly remove rather thick shavings (perhaps up to 1/16" of an inch) it is still painstaking to reduce a large board by a great degree. Ideally, the boards would be sawn to close to desired thickness, and the mere act of flattening and truing the boards would bring it to target thickness. The problem with my boards are that they were cut with a pronounced wedge shape, being 1/2" thicker at one end than the other. As I would like all 4 walls of the box to be of equal thickness, I had to find the thinnest spot and make that be the target. This left me with some steep hills to plane off, and wishing that Thomas could travel forward in time and use the shop's planer machine. I remained true to the spirit of this experience, but I did make flirty eye contact with my planer a couple times.

While a planing machine has a built-in stop which can be set for desired thickness, there is no such thing in the hand tool world. What there is, though, is pretty cool. I set a cutting gauge to the thinnest part of the board, and cut this setting onto the edge of the board on all four sides. I then traced over that with a pencil for visibility, but the gauge has another way of communicating:


When the plane's edge actually reaches the gauges line (which is much like a knife line) something like the above usually happens.  Sometimes a shaving with a ragged edge will appear just before this point, like a warning. Then the thin bit of wood above the cut-line strings off like this. One or two more strokes, and the knifeline is gone, and your target is reached. I love this stuff!

It was then time to cut out the individual boards (panels?) for the box.

"To cut across a piece of wood so wide as this, where accuracy is required, a sash-saw is used; that is, a saw with a thinner blane and finer teeth than that which Thomas used for cutting out his wood roughly; it is also strengthened by a piece of iron or brass at the back. It takes its name from being much employed in the making of window-frames or sashes."
-- the Joiner and Cabinet Maker, 1839

I do not technically have a sash saw, which is a rip saw 14" long and with 4" of depth. It is suggested that saws hand-filed in a rip configuration, that is, for splitting a board down its length, have just enough accidental fleam (angling of the tooth filing away from perpendicular) to also cross-cut nicely enough. Many joiners will have dedicated crosscut and rip backsaws, but Thomas has only the one sash saw. If you are looking for a sash saw, Gramercy makes some that are very highly regarded. However, I already have a 12" "carcase" saw which is very similar and in fact similar enough that the expense of a slightly larger saw is not warranted for this use. Mine is a "hybrid" tooth pattern, which means it is similar to Thomas's saw with some intentional "accidental" fleam, allowing it to crosscut and ripcut admirably. It does crosscut very well and is a joy to use. Today my "sash saw" was this Bad Axe carcase saw:


This board is about as wide of one as I would want to cut with this saw. It worked out just fine, and in fact I was able to split the cutting line without much trouble. It was, however, noticeably more difficult than the narrower boards I am typically cutting.


To mark my cut, I used a large try-square and drew a marking knife along its edge. As my eyesight is not that of a 14-year-old any longer, I almost always then drag a .3mm pencil point down the cutline, leaving a nice crisp mark:


As I mentioned above, with this nice sharp carcase saw it is not very difficult to follow the line and make a cut which hardly needs any correction, if any. I did shoot all the saw-cut edges of the boards to ensure square:


"For squaring a corner also, much assistance is gained by a contrivance which every joiner has ready for the purpose. It consists of a board that may be fixed on the bench when wanted, and which is furnished with a cross piece standing up about an inch all across it, and set exactly square to its edge. It is sometimes called a shooting-board, as the plane is shot rapidly along the edge that is to be planed. "


-- The Joiner and Cabinet Maker, 1839

This is where I will reveal a gem from my deep stash of "duh" moments. I have been a fan of rubbing parrafin wax on the soles (bottoms) of my metal planes since the beginning. It makes a noticeable difference in how easy it is to push the plane, and I always have a chunk of it next to me while working. It needs to be refreshed quite frequently. With that in mind, I waxed the side of my plane for shooting. This works, but it is a little messy. Sawdust etc sticks to the waxy side and is difficult to remove. The smarter thing to do is to wax the track of the shooting board itself. You probably already knew that.


At some length, I had my four boards cut out, squared, and sized relative to each other.


While I have been aware of the School Box for a long time, and studied photos, video, and written descriptions of it, I was still a little surprised at how big it is. Sixteen inches wide is, to me, larger than it sounds. With that in mind, I wanted to get a sneak peek at how this box will shape up:


It will hold a few books and then some! I am pleased with the progress, yet also am realizing that the board I have chosen will be a bit of a challenge to really smooth nicely. It has a couple minor knots and areas where the grain reverses like crazy. They did not get in the way of the flattening, but I think smoothing is going to take a little work. A card scraper will probably be required, and the box will never look as great as it could have if I had taken only the clearest areas of the board. However, I still believe this one will finish handsomely, and making use of the entire board leaves me feeling better than scrapping some of the board and moving onto another would have. I also feel the wood I have selected is more than nice enough for this first attempt. Perhaps down the line I will get much pickier and even make attempts to exploit grain pattern into a cohesive intentional design.


Next time, the boards will be marked and cut for dovetails, and the shell of the box assembled!

Thursday, February 23, 2012

[Schoolbox] Official Kickoff


"After going on in this kind of way for a long time, Thomas has a very much nicer job than ever he has had yet given him to do one day for Master John, for whom we remember he once fitted up a rabbit-hutch. Master John is now going to school at some distance from home; and he wants a box to take with him to keep his books and playthings in. It must be made strong, as it has to travel; but it must also be near, as it will stand in the school-room, and smooth, that the things put into it may not be injured. Mr. Jackson comes up to the bench at which Thomas is working one morning, and desires to see the last dovetail that he has made, for he has seen him now and then practicing."


-- This and all of the following quotes are from The Joiner and Cabinet Maker, 1839

That brings us to where I left off before the recent travelogue posts. I had just concluded Dovetail Month, which was not actually 31 days in a row of making dovetails, but making them whenever possible until I felt I had them under control, and this indeed happened around joint number 30. I still have a long way to go, but believe I am ready to make a very simple box, such as 14-year-old Thomas was asked to.

Here is my last dovetail:


"Well, really it is not a bad joint," says he, when Thomas has shewn it to him, "and I am very glad to see it, for I think you will be able to make the school-box for Master John..."

And so without further ado, today begins the Schoolbox phase of the Joiner's Apprenticeship. Several of these boxes will be made; I will attempt to detail the first one fairly thoroughly from start to finish, and subsequent boxes will be built in silence although I may stop to focus in detail on a particular operation, tangent, or phase of construction. I will likely also interrupt the boxes to build a new workbench, as well as some other small projects. When possible, they will also be documented here.

As for the box, here are the specs:

"It must be made of three-quarter-inch deal*, and firmly dovetailed at the corners; it must be planed smooth inside and out; it will have a moveable partition inside, for which Master John will give you the exact orders; it will want a good stout lock and hinges; and the outside dimensions will be fifteen inches long, ten wide, and ten deep without the lid. In looking out the wood, you will take care to choose a nice clean board, as I should like to see you turn out a really good-looking box for Master John to take with him."

*See also: "The Deal with Deal"

I've had to make an executive decision to deviate from authenticity when it comes to the woods used in the book. "Deal" was a generic term for a range of sizes of boards from any number of softwood species relatively common and cheap in Thomas's time. It was perhaps Pine from the Baltic region, imported into Britain. There are two considerations in sourcing my own deal: 1) It should be cheap and readily available and 2) it should have characteristics suitable to the type of work being done. If I lived in the Northeast, Eastern White Pine would be the wood of choice. Descibed as "creamy and hand-tool friendly", I tried hard to get ahold of some. Even if I only used it once, as a control group, I wanted to know what a good pine was like to work; the pine we get out here is pretty nasty. I looked around and found the local equivalent for cheap and common to be Douglas Fir and Hemlock.

I am familiar with both, as Douglas Fir is the ubiquitous construction lumber here (think 2x4s), and Hemlock is a common material for trim. It is relatively attractive, a bit more dense and easy to work the Douglas Fir, and middle-to-low in price. Douglas Fir is just too splintery. It can be worked, and I will be using it for my workbench and future furniture. I am considering it for the interior pieces of the chest of drawers. However, it is no fun to dovetail and might be better left for an Apprentice with more skill than I.

Hemlock, then, was what I had planned to use as deal for the duration of the Joiner's Apprentice project. It was for that reason that I started my dovetail lessons on Hemlock boards. The Hemlock I have is workable, though challenging. It has a bad tendency to chip out while paring, leaving foam-like perforated surfaces instead of the glassy smooth texture I want. I may still use it in the future, but so far I am feeling that the best choice for these boxes is a hardwood.

I have tried working with some local hardwoods, Maple and Alder. Maple is very challenging to work with due to its hardness, but results can be exquisite. It is unfortunately too rare and expensive to serve as a learning wood, and I feel it would be sinfully wasted on projects such as these.

Alder is a hardwood, and so is certainly not "deal". However, it is a weed-like tree in this region, growing anyplace it is allowed (and there is enough groundwater). It is perhaps more often used for firewood than for lumber here, and is not common in lumberyards. It is, however, common to find it milled by those with home mills, since they certainly have many alder trees on their land. I have been fortunate to come by two neighbors with alder boards for me to use. I find it enjoyable, very strong, and attractive. Jim Tolpin calls it "poor man's cherry" and I think that is valid. It can develop chatoyancey, a type of depth and shininess in some woods, and considered very desirable. Therefore, as Alder is the best wood I have available which is nicely workable and affordable, it is my default "deal" for this project.


The author continues to explain how the box should be made:


"As the box will be about nine and a half inches deep inside, and the wood is barely nine inches wide, it will be necessary to make each side and end of two pieces jointed together. A narrow strip only would be necessary, but it will be better to join a piece of two inches wide to the width of the board, by which means the joint will be stronger, as we shall see afterwards. This joint is made just as those were in the top and bottom of the packing-box, except that when the edges have been planed quite square and strait so as to fit nicely, they will have to be glued."

Perhaps furthering my hunch that alder is the right deal for me, the boards I have selected are indeed just about this size. I did have to rip the live bark edges off, which although not unpleasant, is tiring work. In fact, I will confess that when I realized I would be making 4 or so rip cuts, I thought about how easy it would be to set up the table saw. However, I am not doing this to make boxes as quickly as possible, I am doing this to learn to use hand tools.  I would learn nothing about ripsawing by running the boards through a table saw. Still, I had that moment of wanting to justify it, since Thomas's boards came from a saw mill and no doubt had the bark removed and were probably rather square, too.

Like Thomas's wood, mine is rough. It was cut with a chainsaw mill, where Thomas's was likely cut with an enormous handsaw of some sort, perhaps a pit saw. Mine might be rougher than his was, but in any case my lumber serves as a rather authentic example of what Thomas would have been working with, albeit not "deal" as discussed above.


To get an idea of what I was working with, I used a plane to quickly rub off some of the roughness on the face of a board. The board's own weight and inertia were sufficient that I did not have to hold it down or move it onto a bench, I could just plane it right where it was on the stack (witness the shavings in the image above). While the board has a couple minor knots here and there, it is indeed rather nicely grained overall. There are a couple spots where the grain goes a little crazy because branches were nearby as the board was cut. Aside from some difficulties in working these areas, I believe this will add some beauty and interest to the boards. If they end up being an enormous hassle to work around, a lesson will have been learned.

Ignoring the fact that I need a long, continuous strip for the box's molding, I went ahead and crosscut the board first. I'll deal with the molding later (from another board). I needed to knock the board down into manageable pieces because I do not have a full-sized bench yet and I figured it would be simpler to plane relatively small boards rather than a 9-foot slice of a tree.


My coarse crosscut saw (an ancient Disston) would have been the right tool for this job, but I have been wanting to get familiar with my tidy little fine crosscut saw (from Matt at thesawblog.com). It has a delicious osage-orange tote which is just right for my 3/4 scale hands, and is the perfect length for my 3/4 size body; no danger of the saw's toe (tip) hitting the floor as I saw. As it is a fine-toothed saw, it may cut more slowly, but very nicely. It is by no means slow, however! It screamed right through the board with very little effort, and it leaves a very smooth surface behind indeed.

One end of the board was checked, or split. I suppose my neighbor should have painted or waxed the ends before storing, but as a beggar, I will not dare to be choosey. I kept the "good little pieces" for some future use. I then roughly measured the board and marked it to be cut into 3 pieces; one for the 2 ends, one for the two sides, and one for the 2 extra strips which will be joined to the other boards. I will take the top, bottom, partition, and molding from another board.

I then needed to rip off the bark edges where the joints would be.  I did leave it on the unjointed edges, as they will need to be trimmed anyway and I do not yet know how much, so ripping now could create extra work as the excess will just have to be ripped again later. For the ripping operation, I use a Wenzloff and Sons saw modeled after a Harvey Peace design.  This is a beautiful saw, pleasant to hold and works well. It is slightly long for me, but worth the care I must take to avoid hitting the toe on the floor. Here's a shot of it just to show how it is a bit larger than the fine crosscut saw:


Putting one of the boards on the saw bench, I ripped it down the middle to create the two strips to be jointed to the side and ends.  I then ripped the bark off of the faces to be jointed. This left me with four boards, which will be glued into two board, which will then be cut into four boards.  Follow me?  No need, it will become clear if you care.


The final harvest, laid out as it will be jointed.  Each of these will, once glued, be cut in half to create the two ends and the two sides of the box:


I just covered planing rough stock in my dovetail box post and so I will not go into detail.  It went well and I learned a little bit more about reading shavings from my jointer plane. I suspect this will never stop happening; from the sounds of the planes to the vibrations in the hand to the thickness, spiraling and width of the shavings, planes are very communicative tools. Verbose, even.


Eventually I had all four edges smooth and straight. As the faces of the boards were still rough, I could not verify they were square to them, but I did try. It doesn't really matter anyway, as long as they are reasonably square, because both faces will be planed down after jointing, and even a joint shaped like a ^ has a straight board in it somewhere. I aspire to perfection, but in this case what is important is that I get my 11" out of this 14" or so board, and that is a fair bit of slack.


Here you can see an early test fit, and if you look closely you can see a small gap on the right edge.  You can learn a lot placing one board atop the other, and seeing if it will rock, spin, or stick. After some adjustment, I achieved a pretty good fit. I applied liquid hide glue, which had been warming all along in a bath of hot water, and clamped the boards. With "real" hide glue, no clamp is required, but I am not there yet. I am using modern "liquid" stuff which is a bit of a compromise, but I need to focus on the woodcraft right now, not my skills in tending a pot of boiling horse-hoof and attending to the various cups, brushes, and other paraphernalia traditional gluing requires.  Someday, maybe!

Again the book aligns with my own experience quite nicely (except I might have to wait longer than tomorrow morning):

"Having thus jointed the four pieces for sides and ends, Thomas must leave the glue to set before he does anything else to them; and as it is already afternoon, he waits until the next morning." 

Next time, I will clean the glue and flatten the boards, hopefully bringing them into shape so that they may be joined via dovetail.  Thanks for joining me on the road to the schoolboxes!

Tuesday, February 21, 2012

By Hand and By Eye Wrap-Up

On a sad note, I have lost my camera.  I did take a bunch of photos of the area, only a couple of the school and the class since honestly it was just a lot of talking and drawing.  The below image is from the school website, just to show how nice the space is.

Over the weekend, I took a trip up to the Port Townsend School of Woodworking and Preservation Trades.  In a word, it was fantastic.  For more details, keep reading.

The trip (and I use that word in a few senses) unlocked an incredibly dense set of unfolding ideas, but I am able to roughly group them into 3 categories: the location, the school + staff, and the course material itself.  I already wrote a bit about my impressions of the town, and my other bits of exploration only backed that up.  It is an incredibly fertile location for artists, craftspeople, appreciators of nature, and outdoor athletes to find their happy place.  I could wax poetic about Port Townsend, and the Pacific Northwest in general (including my current home in Oregon), but I will get to the more nuts-and-bolts ideas I had regarding the school and its classes.


Just as I feel the town is an inspiring place to live, visit, or just be as a creator/appreciator of art and handiwork, so is the school a massive geyser of stimulating illumination regarding woodworking.  The building itself is impressive; from the tools and benches themselves to its own infrastructure and features, it just has that kind of feng shui that can make woodworking feel enjoyable, or even mandatory.  The very high ceilings provide an almost cathedral-like sense, reminding me of some of Roubo's shop images.


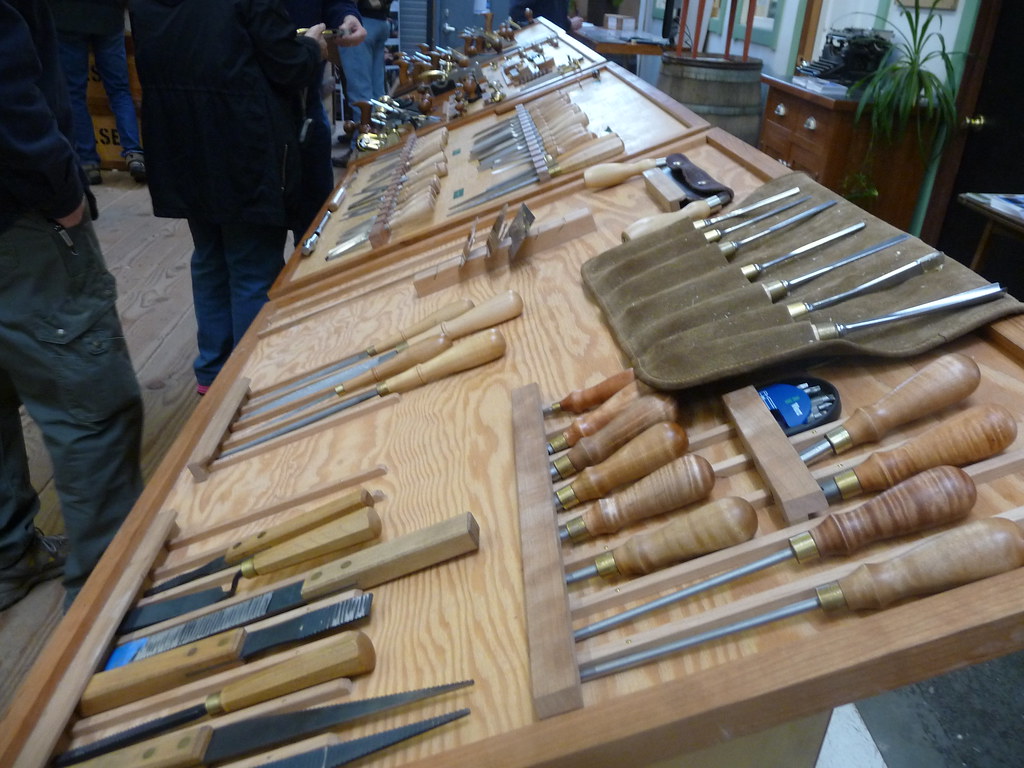
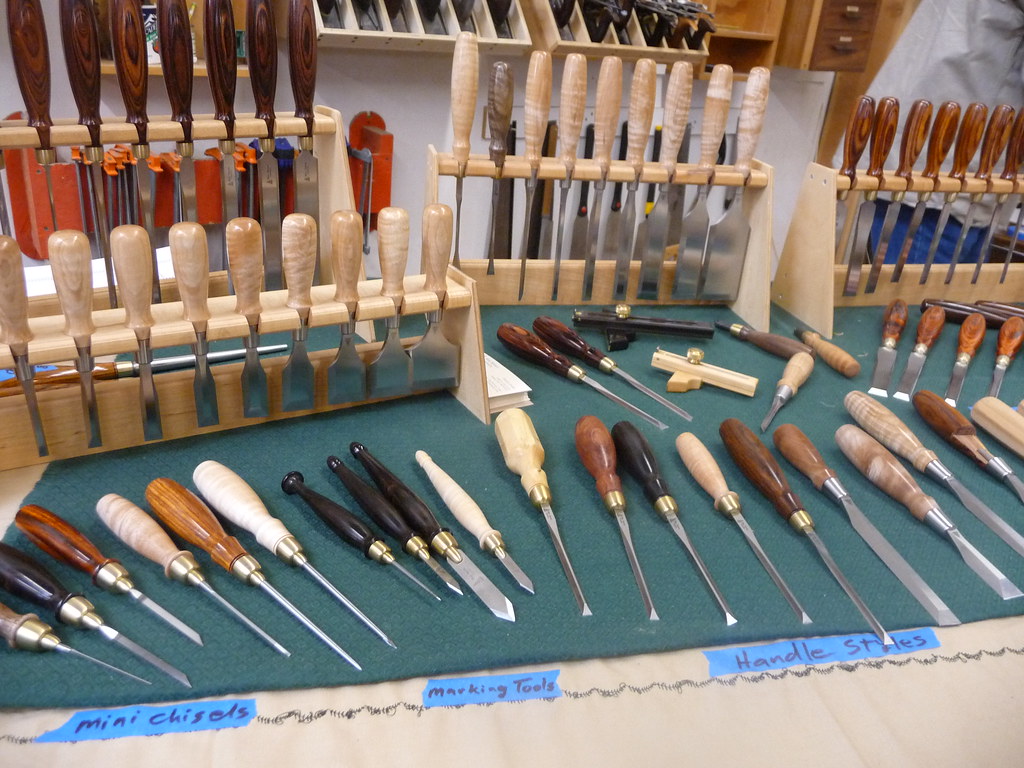
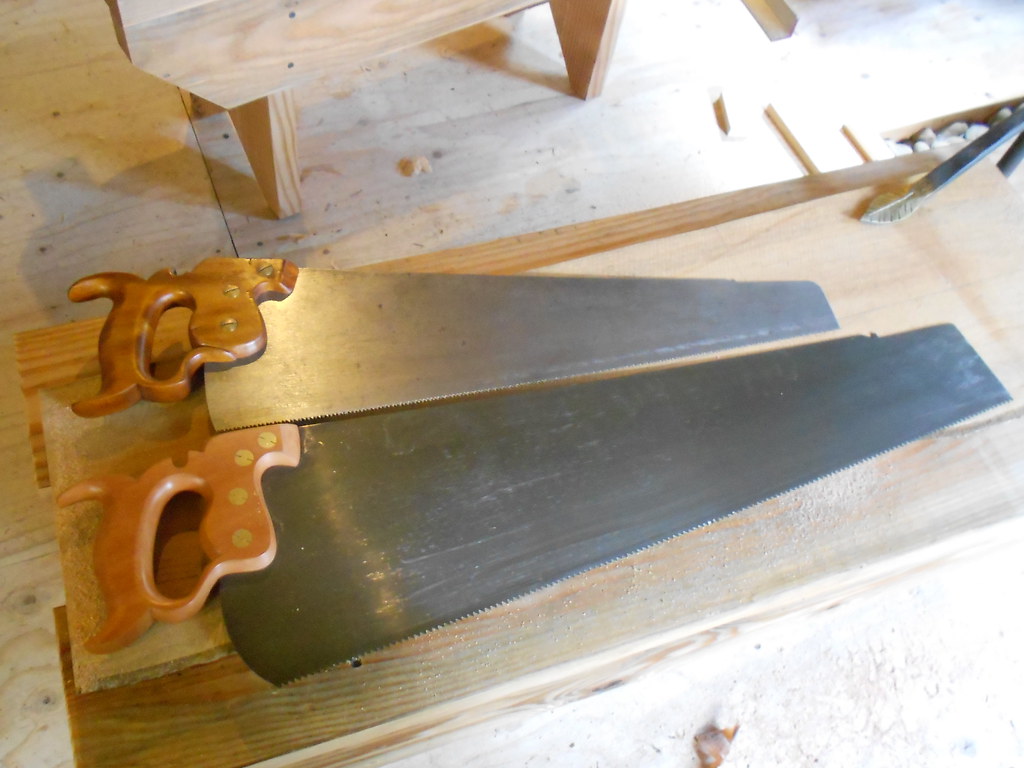
The space is clean, well-lit, and very well appointed.  Every bench has a small storage unit beneath it stocked with essential tools of high quality.  Marking and measuring, saws, chisels, block planes, and more are all right there for each student to have as their own for the duration of the course.  The walls are then loaded with a lust-inducing array of saws, spokeshaves, planes (both bench and specialty) and more.  The tools are all high-quality- a mix of vintage and new-, and expertly maintained by the staff so they are always sharp and ready to use.  Sawbenches are also in abundant supply, and of various forms so that one may select a bench best fit to one's body size, or to perhaps aid in choosing a design if a bench needs to be built.  Similarly, the spectrum of tools from different makers and eras allow one to try several varieties before deciding which they would most like to purchase.

Tools were not the only useful aids in learning to be had as part of the space, however.  Since the building was created in an era which still utilized high degrees of craftsmanship, one can find lessons encoded in the windowsills, the stonework, and in the surrounding buildings.  Another example was that while we were discussing how crown moulding angles up and into the room, lending an illusion of support to the ceiling, a sketch of a tree was provided on the white board.  I immediately noticed that by looking out the window behind the instructor, a fat alder tree was perched right there, showing the exact phenomenon being described.  This is quite a contrast from the last school I visited, which had not a single window. It was quite easy to imagine how enjoyable immersion in this school would be.  I was the only student visiting for the first time; the rest were frequent fliers.  I would, of course, like to join their ranks as regulars!

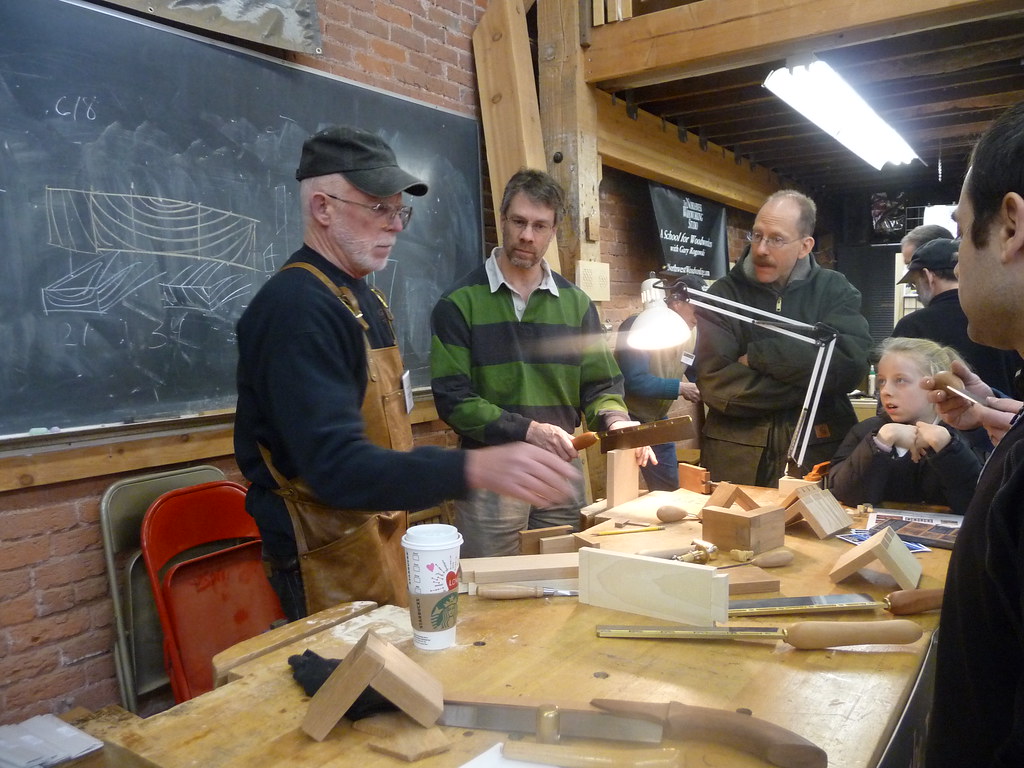
This brings us to the staff: very knowledgable, approachable, engaging, and charming, all of them.  Tim Lawson, the executive director, was involved in much of the course.  Take a look at some of Tim's amazing creations on his website, http://timlawson.net/

Co-founder Jim Tolpin, who's books I have long admired, was just as inspiring as I had expected, and perhaps moreso.  He was deeply witty, wise, and in command of teaching skills that could make him a student's favorite professor.  His ability to contextualize very abstract concepts was I dare-say mind-blowing, and that was quite important as this was a mostly theoretical class with almost no woodworking per se.

That would make this a good time to say a bit about the course itself.  I do not want to go over all that much of the material, in part because I will not do it justice.  I am still integrating it, and need to spend much time playing with the ideas we learned.  I also would rather anyone interested in these ideas either take the course, or wait for Jim's upcoming book on the topics which I am burning to read.  However, I will offer a few squirts of the essence of the course in order to try to convey exactly what the heck I am talking about.

Called "By Hand and By Eye", it was a jam-packed fractal idea-fest revolving around the notion that stupendously complex objects and structures have been made by humans for countless thousands of years without CAD, calculators, or even much arithmetic at all.  The "By Hand" part has many meanings; a huge part of the school's focus is on hand-tool woodworking.  While there is an impressive machine room, and much is done with these machines, there is certainly a hand-tool bias.  As such, many of the concepts we explored were through the hand-tool lens.  This is of course mandatory when studying antiques and old buildings.  It carries a hint of another meaning, as well.  The human body has long been one of the main measuring tools in construction.  Buildings need to be sized to fit people; doorway dimensions, doorknob placement, height of steps and their railings, width of hallways, and on and on are all extrapolated from a typical human body (and yes, we did discuss what typical might mean, and the difficulties in one-size-fits-all solutions).  Nonetheless, the hand is a core tool for carpenters when determining dimensions for an object:

"And he [Hiram] made a molten sea, ten cubits from the one rim to the other it was round all about, and...a line of thirty cubits did compass it round about....And it was a hand breadth thick...." 


— First Kings, chapter 7, verses 23 and 26 (emphasis mine)

Another literal example of design being informed by a hand is that a credenza height is set to be where one can most comfortably set down and pick up a steaming pot of soup.  By hand indeed!

The "By Eye" portion of the title refers to the idea that while there are scores of useful rules of thumb, none of them matter unless the results look good.  Once acceptable structural integrity is achieved, and this is usually possible with a great range of sizes, angles, and sloppiness, the work is not a success if it doesn't look right.  It is not difficult to train the eye, or the parts of the mind dealing with visual information, to detect parallel, plumb, straight, and true.  It is also possible to start to notice specific ratios of length to width, such as knowing if a sign is 5:7 or 3:5 at a glance.  It is also possible to become sensitive to ratios which don't please the eye, despite the structure being solid and square.  Notice that window panes are generally a vertical rectangle.  Horizontal rectangles are unpleasant.  I suspect this is a mirror of the shape of the human body, which is nearly always taller than it is wide.  A vertical window pane looks as if we can fly out of it, like a doorway, where a horizontal one looks like we would have to flatten ourselves like a rat to squeeze under it.

It was suggested that early constructions were often an attempt to build interface between man and the cosmos, and you can assign whatever floats your boat for cosmos.  God, nature, the human-created artificial matrix, whatever.  The fact rings true: when we build our surroundings (such as the room you are most likely in right now), and interact with the world outside our bodies (such as the chair you are probably sitting in), you are having your experience mediated by an object that was designed by a human.  Hopefully, the room you are in and the chair you are on were designed by someone familiar with the concepts this class was about.

From there, we explored many of these rules of thumb, and ways to use them in our design of woodworking projects.  We studied commonly pleasing ratios, and designed a table using them.  Depending on the purpose of a table, it can often look quite nice when it its height is 2/3rds of its width, or similarly pleasant yet different at a 5:7 ratio.  In general, whole-number ratios look good, and can look especially good when repeated throughout an object.


In traditional Western education, much was based on Greek studies, such as learning to identify and draft various types of columns.  The poor students, and even instructors, were not wholly aware of why this was important.  They were, without knowing about it, becoming familiar with proportional systems discovered, mapped, and encoded long, long ago.  During the discussion about classical education, I actually became a bit angry that my modernized education was so light on traditional aesthetic studies.  Of course, I would have wanted an instructor like Jim or Tim to explain why this stuff was important, but that gives me hope that these ideas can in fact be re-integrated into basic education.  I know my daughter is going to grow up knowing a lot more about classical orders than I did!

The course touched on dozens or maybe even hundreds of "rabbit holes" which were tempting to spend an eternity travelling down, but the rather small class size made sure we all had time to bring up our own observations and interests, and could peer into these tunnels without being tortuously dragged down someone else's road.  Several concepts for articles if not books were easy to pluck from some of the thinking out loud we all did.

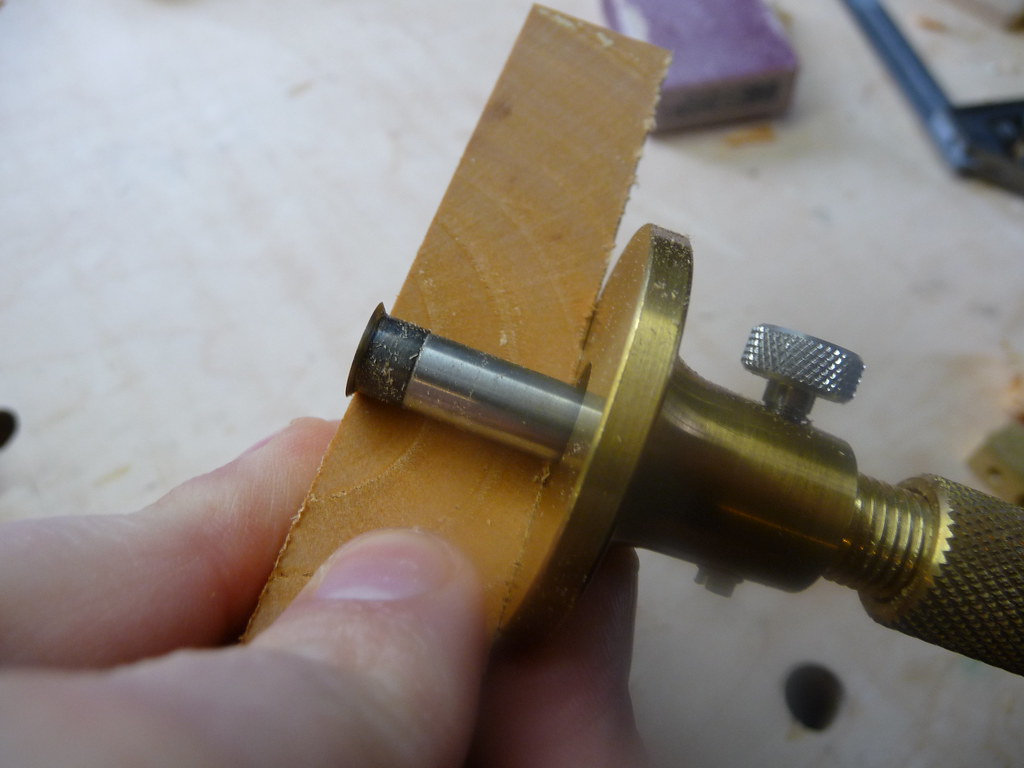
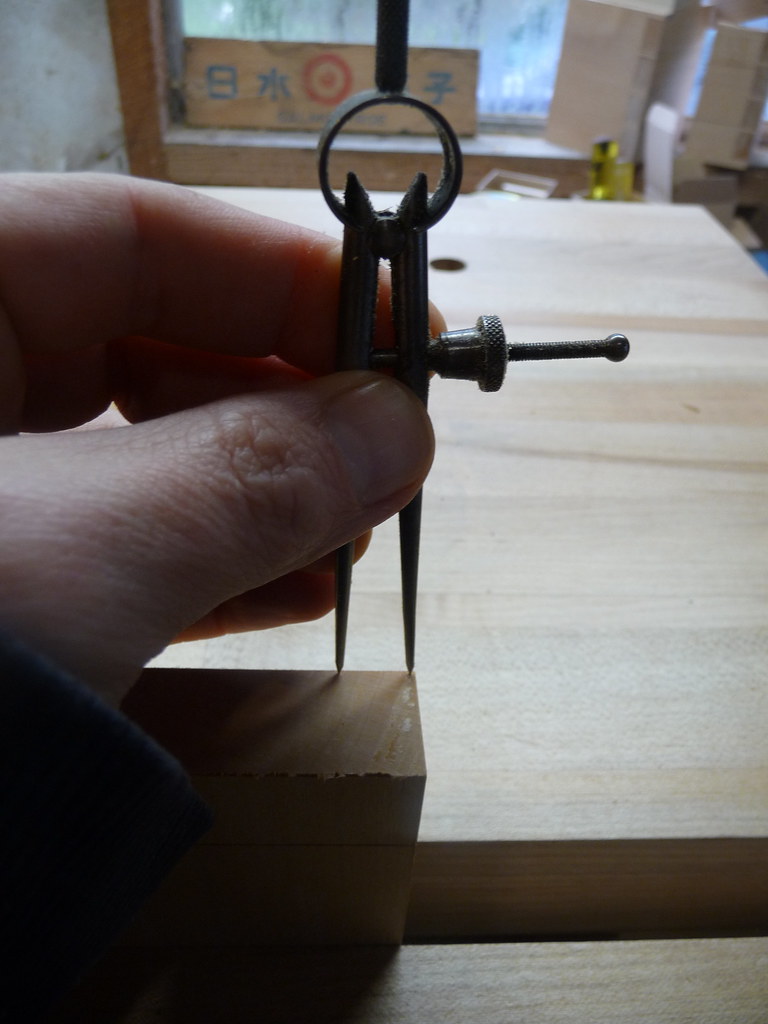
Our hands-on layout and design exercises were carried out using compasses, dividers, and straight edges.  After warming up with some geometry exercises (again no arithmetic, just erecting right angles, plotting polygons and elipses, etc), we designed our tables, a chest of drawers with diminishing drawer dimensions, and then explored other design challenges as well as the methodologies used to generate ideas and then refine them.  Group critiques of our designs were informative and fun.  A couple of the proposed designs seemed like they actually might be built.  Mine, however, were purely exercises although I feel way more confident in my ability to design a table or chest of drawers from absolute scratch instead of seeking out plans.

I would again implore anyone interested in these topics to attend the workshop, or at least read the upcoming book, but for those less interested, here are just a couple of the secrets we unlocked:

- The bottom rail of a door is usually a bit taller than the on on top.  Why?  How much taller?

- Drawer pulls are not vertically centered.  Why not?  How far off center should they be?

- Hanging cabinets will have different proportions than floor cabinets, but not for structural reasons.  Why?

- How can the shape of very early aircraft be rapidly drafted with only a pair of dividers?

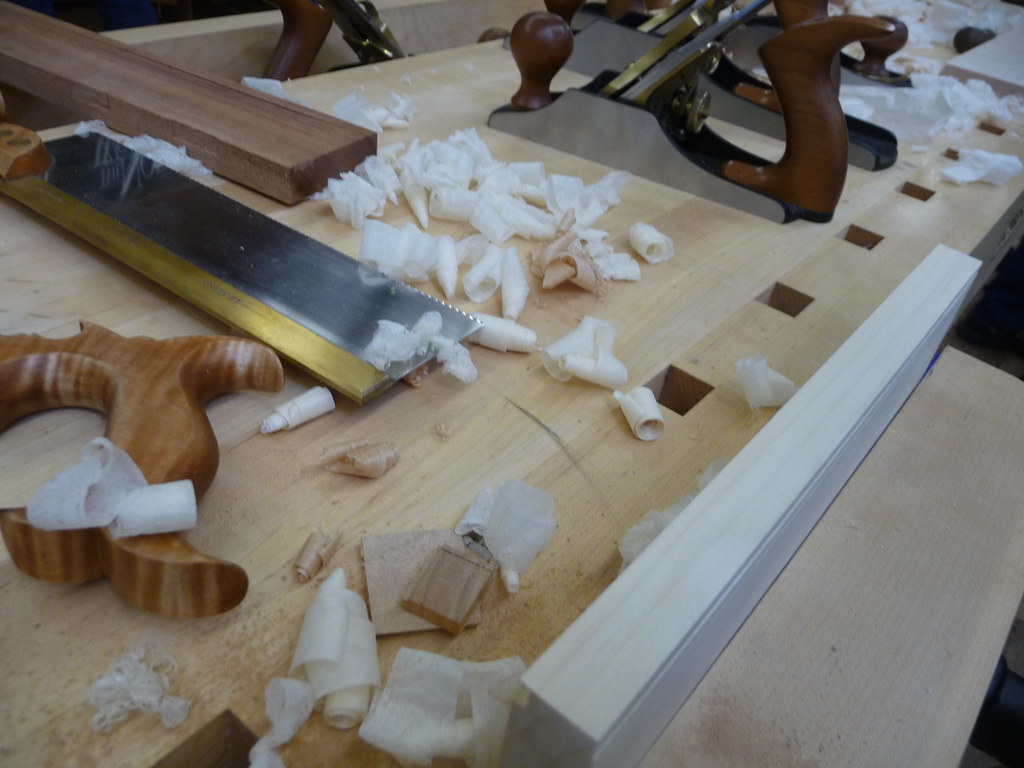
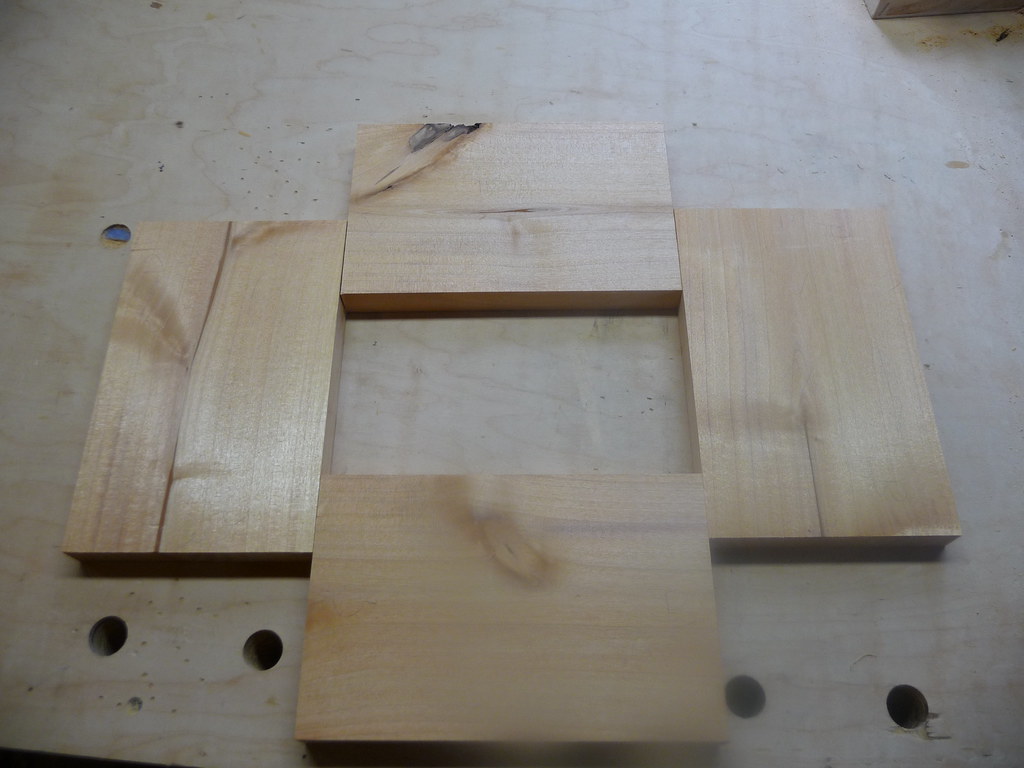
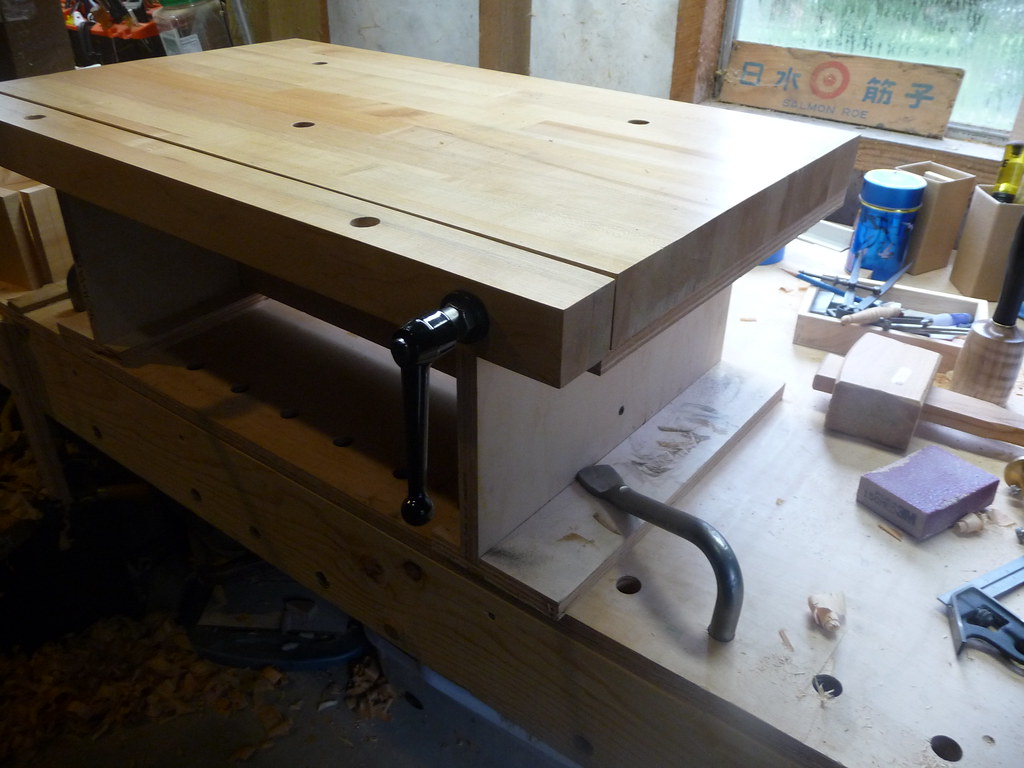
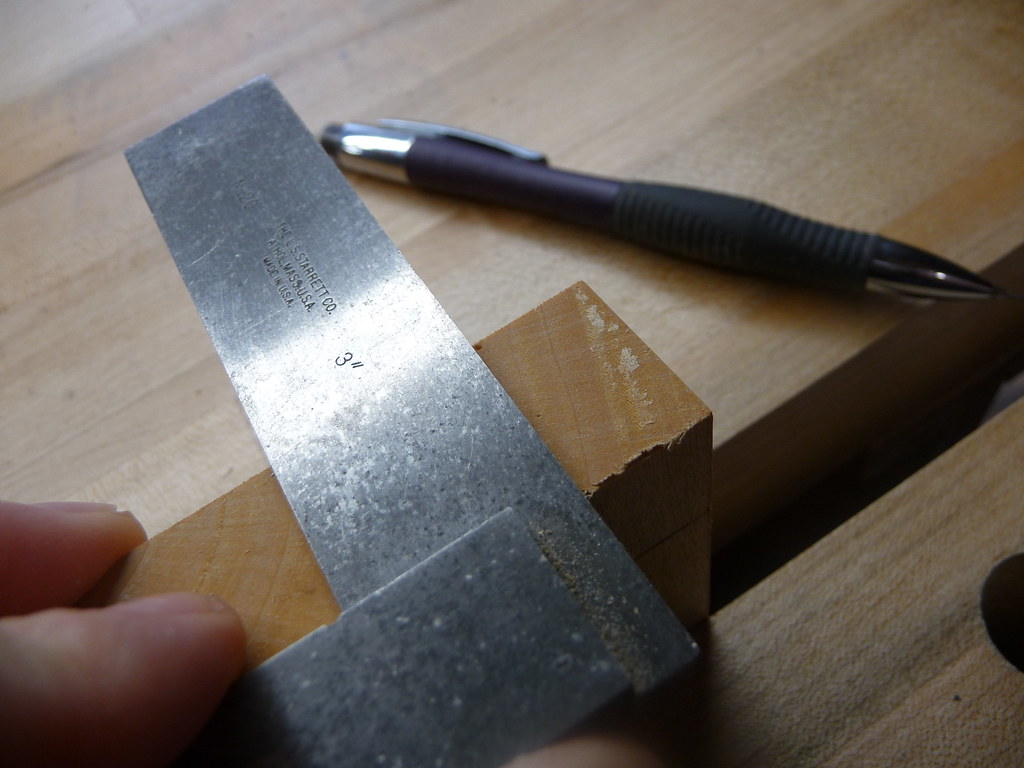
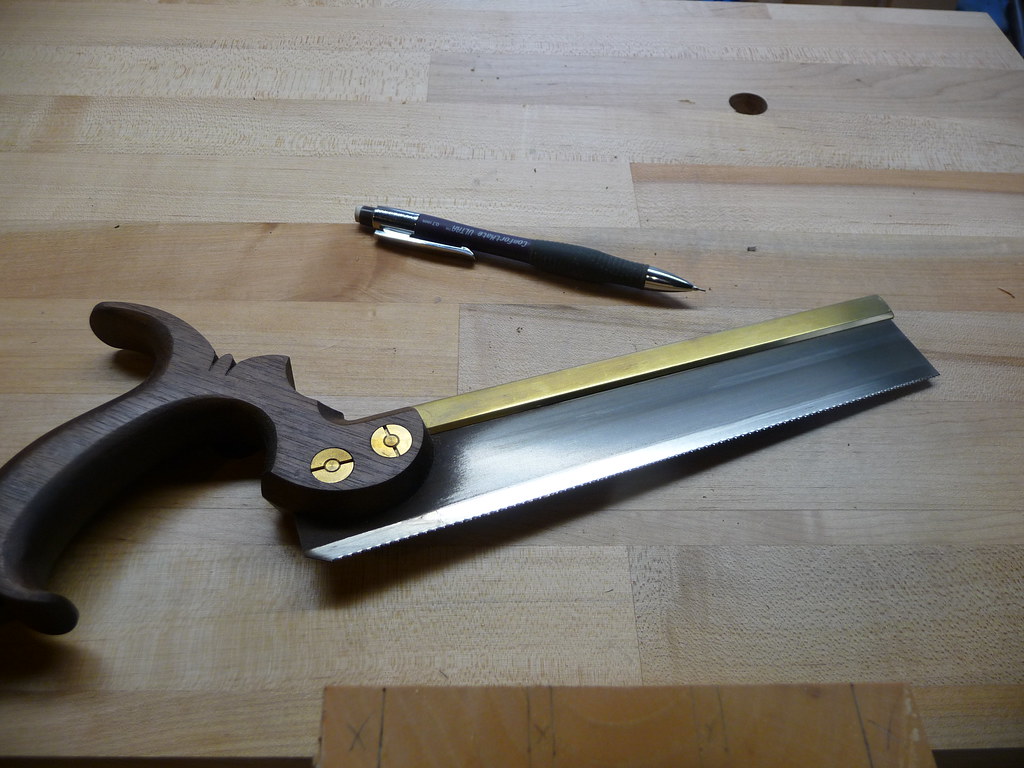
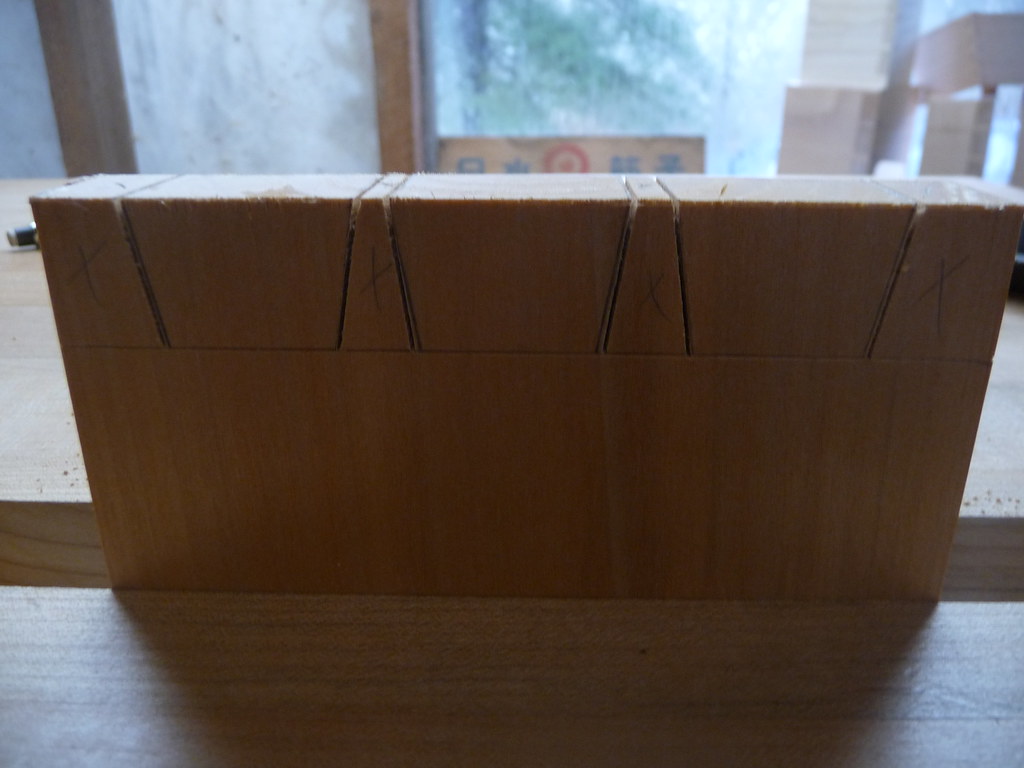
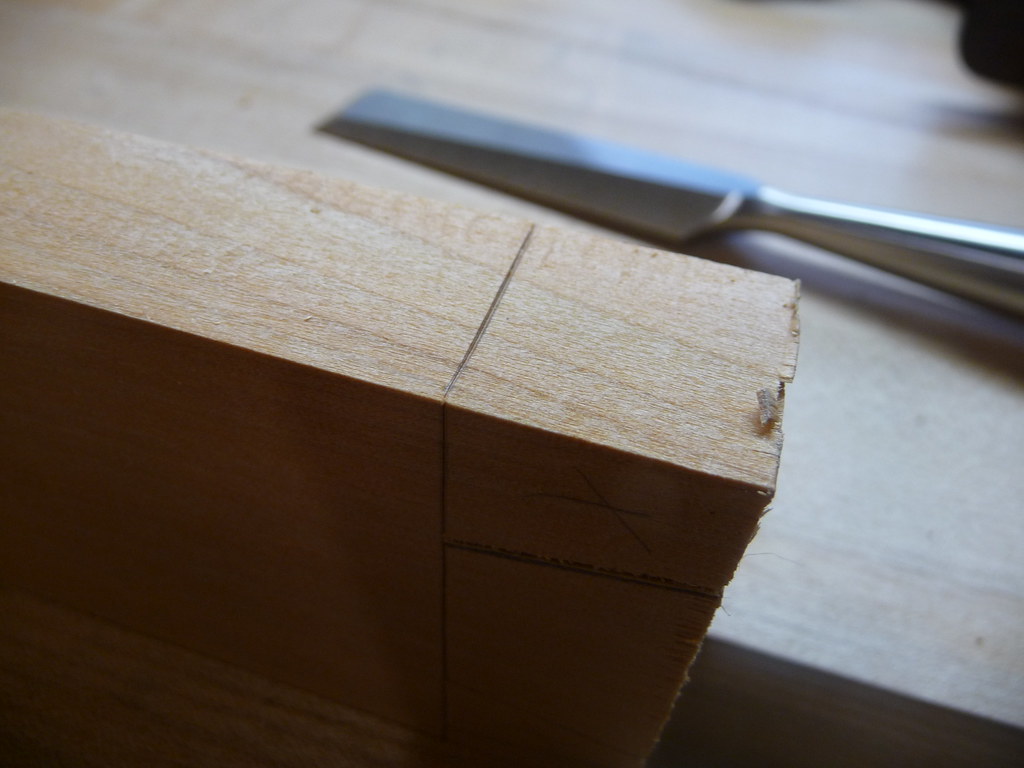
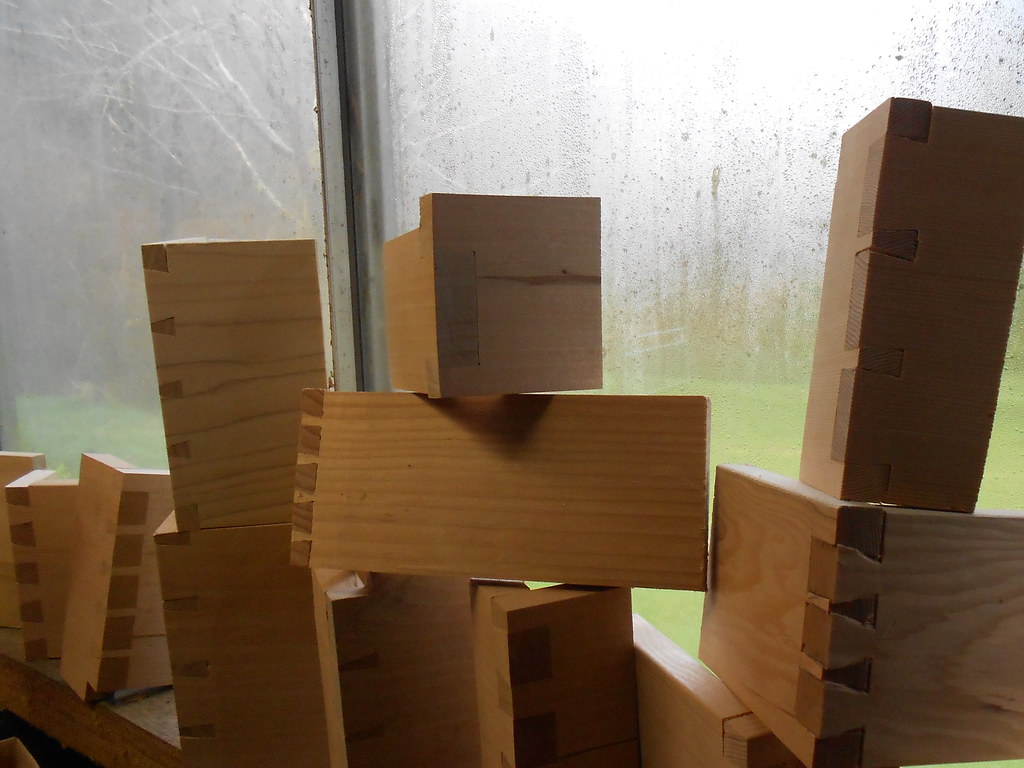
I could go on and on about this richly rewarding course, but there is no need for me to re-invent the wheel.  I do want to mention that above I said we did "almost no" actual woodworking.  We did each build a sector made of wood, which involved traditional marking and measuring operations, as well as a hint of planing and drilling.  We were then taught to use this deceptively simple and amazingly powerful tool to determine proportions, adjust scale, and more.

As the group design critiques were useful, I would also like to critique this course, or the school in general, but honestly I would have to struggle to do so.  It would be nice if the concrete floors of the shop were covered with wood, a very welcome change I did in my own shop.  The benches all had pads, though, so I suffered no discomfort at all, and this is really reaching for a criticism.  As for the course itself, it was all it advertised and more.  Any miniscule troubles I had with it were due to my own issues (and I did undergo a bit of self-discovery throughout it) and were welcome if not expected components of the course.  Lets just say that I enjoy being taken out of my comfort zones, being challenged, and having my mind blown open.

Many thanks to the school staff for creating this course and sharing it with us!  I can't wait to get back.


Friday, February 17, 2012

[offtopic] Towards Pt Townsend


I'm familiar with driving in the rain.  I live in a National Forest which is not technically a rainforest, but it should be.  It seems to rain more than half of the year, and nonstop from about November through May.  Anyway, I am fairly used to that, but one fact remains: I hate driving in the rain behind trucks.  Especially logging trucks, which for some reason shed more spray than most others.

Windshield wipers on the highest speed could still not peel the glaze spraying back from the trucks.  Meanwhile, I was listening to the radio about logging in Oregon, and how the state would need to increase timber harvest by 2000% (yes two THOUSAND percent) to reach financial goals.  Republicans have introduced a bill to allow this to happen, which, as someone who can see clearcuts from my road, makes my stomach sink.  An alternate bill will at least protect trees that are over 125 years old... Yay?


It might seem odd to critique mega-logging (my craft depends on wood-- dead trees) while also being an advocate for the living trees, but woodcraft is not to blame for declining health of forests; it is a drop in the bucket compared to overseas consumption, quick stick-framed homebuilding, and paper production.  I do not mean to get political on this blog but these are the thoughts while driving through some of the best forests in the nation, if not world.  It has at any rate increased my resolve to continue my focus on using the most local wood possible.


How else dose a lonely traveller pass the 7 hours it takes to get from here to there?  Well one game I played was trying to pick my favorite of the rivers I crossed: 1st place was a tie between Duckabush and Dosewallips.  Elsewhere on the Olympic Penninsula, one may enjoy the also fun-to-say Queets, Quillayute, Bogachiel and Humptulips.

The rain was absolutely relentless until Port Townsend was about 10 miles away.  At that moment, almost instantly, the sun broke through the clouds and a glorious rainbow appeared, pointing right at the town.  As I rolled in and arrived, everything was dripping dry and the sun was blazing.  My hotel is right on the waterfront, and while my room promised "NO VIEW" in the description, its actually quite a nice view of the marina out my window.  An Indian restaurant across the street secured the fact that I chose the right lodging.  I was also pleased to see a health food store right around the corner.


Port Townsend is a beautiful, charming little city.  Its downtown has wonderful brick storefronts and remnants of old painted signs.  This is no big deal for those  in the rustbelt or East, but out here we are lucky to see buildings built after 1960, especially when so far away from a large city.  There are numerous galleries, pubs, cafes, bicyclists, and people who look healthy.  I feel like I have learned to spot the goodness of a town pretty quickly, and this one jumps out as being akin to Bellingham (WA), Missoula (MT), or Santa Cruz (CA) as far as offering good livin' goes.  One of my factors I will share: there is a high T3 index here.  For the uninitiated, this means that there are several Volkswagen Vanagons rolling around.  These relics are not as old as the more famous air-cooled "bus" vehicles of the 60s, but they are often highly correlated with folks who love the outdoors, dogs, crafts, sailing, travel, and adventure.  In a town where you can see one Vanagon and barely have to wait until the next one is within view, you are almost certain to also find good food, good breweries, and good people.

Speaking of good food, the co-op was great.  I no longer have to worry about my lunch for the next 2 days.


I made a quick dash to Fort Worden in order to make sure I can find the school in the morning.  Its conveniently located and in an utterly gorgeous setting.  It reminds me a bit of Seattle's Discovery Park, but smaller and nicer. Old officer houses are set in a stately manner onto the hilltop, and the beach is spectacular.  The woodworking school itself is a dream: an old power-plant, it looks like a bunker with extremely ample doors for loading large materials.  I did not go inside, but I could see clearly: it is well-lit, with a huge wall of hand tools.  The founders of this school have every reason to be proud, and I cannot wait to go see it up close tomorrow.

note: I didn't take any of the photos in this entry.  They are all Creative Commons licensed images from the net, chosen because they do share the visual nature of my experience.  I will take lots of photos tomorrow and post them as I can!

Tuesday, February 14, 2012

Northwards


This weekend I am mighty pleased to be heading up to Port Townsend, Wa for a workshop at the Port Townsend School of Woodworking.  The workshop is called By Hand and By Eye, and is led by Jim Tolpin.  I love his books and especially his Gyspy Vardos, so this is a very appealing course.  The content is centered around designing with ratios and proportion - not a ruler.  This is one of the more compelling areas of woodworking for me; I love story sticks, dividers, compasses, sectors, calipers, and other methods of imposing a certain dimension on an item without using a ruler.  I don't mind rulers, and have a little fascination with them as well, but this kind of geometry actually makes me excited.

If any of you will be there, let me know!  I hope to return to this school for other classes, so it will be great to check it out in person.  Also, if any of you have been there and have suggestions for lodging, restaurants, etc, do share!

Saturday, February 11, 2012

Lie-Nielsen Hand Tool Event Wrap-up

I have good news and bad news.  The good news first:  The Lie-Nielsen Hand Tool Event was a ton of fun.  Bad news towards the end of this entry.

Not sure if I won a door prize yet, but here is a spoiler: I am not really the kind of dude who ever wins things.  Not amazing things like a LN tool, anyway.

This event was well worth the 3-hour drive for me.  If you are already deeply connected to a local network of hand tool users, maybe it would not be as great but for me it was a blast to be surrounded by serious hand tool nerds for a little while.  It was of course also wonderful to handle the hundreds of tools on display and freely ask questions, view demonstrations, and generally revel in the company of fine folks and hand tools for a couple hours.

It was graciously hosted by the Northwest Woodworking Studio , a place I had been to once before to take a class on hand tool use.  I had mixed feelings about the class, but communication with director Gary Rogowski left me feeling better about it and so it was especially good to meet him today and even get a personal dovetailing lesson.  He gave me some very good ideas which I am quite keen to try out as soon as possible.


The school is housed in an unassuming industrial area of Portland, but its very unique in that by industrial I do not mean giant multi-acre refineries and warehouses... this is an area studded with tiny workshops, glass supply stores, coffee shops, cabinet makers, eco-building suppliers, bicycle shops, and so on.  I love Portland.  Anyway, you would barely know anything was happening other than by this sign.  An almost unmarked door, closed tightly and almost locked-looking, held this for those who opened it:


I wish I had taken better, and more, photos but I was frankly too busy lifting and inspecting almost every one of these tools.  It was especially nice to be able to compare their sharpening to my own.  These were all supremely sharp and truly ready to use; it gave me a little insight as to what to seek when setting up the tools I use each day.  I was able to work with identical copies of what I normally do, only without any doubt as to my own set-up and honing abilities.  This alone was worth the price of admission.  Well, quite a bit more, since this was free.


Lie-Nielsen tools are wonderful, and I love every single one that I have put into use so far.  It needs to be said, though, that Blue Spruce Tools are in a different league when it comes to appearance and feel.  David Jeske, who happens to be an amiable fellow (as almost all hand tool makers somehow seem to be), creates these works of art in his home.  They feel almost liquid in the hand, but still as firm as the figured maple and other jewel-like hardwoods the handles are made of.  He has a mesmerizing display of sizes and styles available.  Its difficult to explain how cool some of the impossibly small inlay chisels were, not to mention the elegant paring chisels, the marking gauges which made me want them even though I have plenty of marking tools already, and and and and and.  Really good stuff.  Expensive but I can't say overpriced.  He had a paring chisel with a grinding scuff on the top - no problem to function at all.  It was marked way down.  I wanted it badly.  Very badly.  I left it there for someone else, more because I am broke than through any act of willpower or compartmentalization of material wants.


These images are really not good but they do show what it was like.  I actually used every single saw Lie-Nielsen had there, which I believe is all of them they offer.  You know that feeling of looking at an incredibly alluring website or catalog where you just want every single thing, and you wonder what they are like?  You dream of being able to use them all.  That is what I did today.  It was free.


There were tons and tons of impromptu demos.  These guys have such wonderful careers...  Not only making tools, but showing them off to completely appreciative nerds.  This photo shows Mr. Glen-Drake talking about saw sharpening.  Someone asked him how long it takes to sharpen a saw, and without missing a beat, he pulled out a large wooden model of saw-tooth configurations, a shop-made saw vise, and sharpened a saw.  He gave great advise to people about sawing ergonomics, and he filed the teeth off one of his saws to show what dull looked (and sounded) like.  Then he sharpened it again and let them feel the difference by using it.  He also wore a really bad-ass leather apron.  Woodbutcher is a term he has earned in the most awesome of ways.


And finally, the bad news.  Fans of Lie-Nielsen already know what the above is... but for the un-initiated, its a #51.  This is a plane that does one thing only and does it as well as the laws of physics allow: it rides on a shooting board with authority and trims and trues the edge of a board, especially end grain.  Its really, really expensive.  The bad news:  it is so nice.  It works.  Its for real.  It is better than they say.  It works almost effortlessly. I tried it on walnut, curly maple, and oak.  It just goes "snisssssk" and ejects a shaving.  It feels so good in the hand, completely free of the borderline agony my work with a jointer on its side causes.  As a 90% cheaper option, they did have a "hot dog" clip-on pad which might work on a Stanley (I was advised to take micrometer measurements and call them into the company) and it felt really nice.  But this thing was so nice that I have to say it:  It is actually worth the $500 if you have it.  I don't.  But I will always want this thing.

See you next time!

Friday, February 10, 2012

Lie-Nielsen Event in Portland, Oregon

Short notice, but if you live in the Northwest and were not already aware, there is a Lie-Nielsen Hand Tool Event in Portland today and tomorrow. I'll be driving up tonight to spend a bit of time there tomorrow.


http://www.lie-nielsen.com/?pg=108

Admission is free!

Its at the The Northwest Woodworking Studio: 1002 SE 8th Ave. Portland, OR 97214 Friday, 10am - 6pm Saturday, 10am - 5pm I'm looking forward to meeting Ron Hock and David Jeske of Blue Spruce Toolworks, among others who may be there. Anyone else planning to go?

Thursday, February 9, 2012

[basics] Simple Dovetailed Box


The last post started with a rough board and took it to a square board, ready for use.  In this one, we will start with that board and end up with the carcase of a little dovetailed box.  Please note that this is not a true beginner's project, this is actually where I am after doing about 30 of these test joints.  However, I did want to show as clearly as possible how to do this relatively simple (and overly mystified) process entirely with hand tools.  This is just one way, and I am no expert by any stretch.  However, this is fairly accurate by all my book-learnin' and should suffice to serve as an overview for the process.  A little research will yield lots more in-depth information, tips, and strategies.

To start, all four pieces are laid out and matched.  Since this is a square box, they should be exactly the same lengths, but you could make a rectangular box with 2 long pieces and 2 shorter ones.  I like to immediately label the boards on the inside, with letters for each joint.  There are a couple considerations here: the inside face should actually be the straightest.  It sounds strange, since you want to outside of the box to look good, but you can always smooth the outside after assembly.  It is critical that the insides of the joints be right-angles, though.  Also, you want to avoid knots anywhere near the tails and pins, which I did not do here.  It turned out ok, but I was flirting with death.

Here's the pieces laid out and ready for work.  I have no idea what size they are: that is the beauty of this process.  It doesn't matter at all, as long as the pieces are the same size.  Use a shooting board if they are not.


Then, baselines need to be marked on all boards.  Ideally you would set the gauge from each partnering board each time.  In this case, I just verified that the gauge was set correctly by comparing it to each board.  It agreed, so I used one setting for all boards. You can actually use boards of various thicknesses if you take care to adjust your baseline.  This is advanced voodoo, though, so I would suggest using 4 boards of exactly the same thickness if possible as you are learning.


The baseline is then marked on all boards by running the cutting edge along the board's face:


I like to then go back over the line with a pencil to make it easier to see:


For the next steps, I use a "Bench on Bench" which brings the work up higher, and also has a nice long vise.  Your shop will most likely vary, but you do need some way to hold the board very stable as you mark and cut it.  I've used cheap screw-vises clamped to the bench in a pinch.  It works just fine but is a huge hassle to set up and adjust.  My BOB is held to my bench with holdfasts, and is quite solid.


Use dividers to mark the shoulder of the half-pins on either side of the board.  Use the same setting for both sides.  Note that this whole process shown here is cutting away the pins to leave the tails.  This is called "Tails First" and is just one way to do this.  "Pins First" has its own pros and cons, but will not be covered here.  The size of these half-pins is up to you, but its suggested they be about (or at least) half as wide as your stock is thick.  I have just been using this one setting, about 1/2", on all my dovetails, conveniently having this tiny pair of dividers set to that size and leaving it there.


Then use a square to turn the prick from the dividers into a line.  This is my gramp's old machinist square from his days as a Detroit auto engineer.  Its nice to have him in the shop with me.  Mark your lines on both ends of the board.


The next part is fairly difficult to explain, so I tried to make a little video to help.  It is still rather complicated, but simple once you finally get it.  In short, you set a pair of dividers so that you can take a step for each tail you want and land on the far shoulder line.  In this case we will make 3 tails, so we want to step across 3 times, with the 3rd landing right on the far line.  Then, the dividers are opened just a bit (about 1/3rd of the width of the pins we want).  Step across again, and you will land on the other side of your far line.  The gap between where you land and where the line falls will be the width of your pins.  If you like it, start over, leaving a prick for the first 2 steps.  Then, do the same thing, starting at the far line and walking back two steps, leaving a prick at each.  You will then be ready to mark your lines.  Hopefully this video will clarify some of it.


Next the lines we just made need to pulled down to the baseline on the face of the board, at appropriate angles.  You can do this with a dovetail marker, a bevel, or just guess.  This angle is somewhat arbitrary, so do whatever you think looks good or whatever your religious leader mandates.  Make sure to mark the waste:


The next step uses the legendary dovetail saw.  You could get by with a small rip carcase or tenon saw, or even one of the dual-sided Japanese saws.  You probably do not want to use a full-sized panel or handsaw, though.  This shows my dovetail saw:


It is time to cut the tails.  Keep the saw on the waste ("X") side of the line.  You can see on the 2nd tail I was too safe on one of them.  Luckily, it doesn't really matter here since the pins will be cut to fit whatever tails you make.  Some hardcore people won't even mark the tails, just cut them however they want by eye!  I like to keep it neat so I mark them and try to cut to the line.  This is good warmup for the pin cuts which must be right on the line.  Make sure you do not cut past the baseline, and keep the saw as square to the board as possible.  This is all easier said than done, and take a good bit of practice to start to feel natural.  It does happen though so hang in there!  As I mentioned, this is about joint #30 for me and it is just starting to feel right and work out well.


Now to remove the half-pins on the sides.  This was marked already with the marking gauge:


This is what Robert Wearing calls a "first class" sawcut:  put a chisel as wide as the mark (or wider) right into the knife line and give it a couple firm taps:


Then come back and scoop out a tiny "V" shape trough:


You should have a little notch with the wall on the line absolutely vertical, and an angled valley sloping into it.  This gives your saw a little wall or fence to ride against as you make the cut.  This also has the advantage of leaving a crisp edge where the wood will be visible, and your potentially gnarly saw cut will start "underground", inside the joint.


This cut should be made as carefully and vertically as possible.  I have found that the more I have to use a chisel on it, the more I mess it up, so I try hard to saw it right the first time.  Repeat on the other side.

With the half-pins cut, it is time to clear out the pin sockets.  I use a coping saw:


I start the saw in the middle of the pin, so there is no danger of messing up the existing cuts.  There are many ways to do this, but this is how I do it:


Then back across to the other side, getting as close as you dare to the baseline:


Do it again for the other pin:


Now chisels will be used to clear out the remaining waste.  I like to set the workpiece on a bit of scrap, and secure it with a holdfast:


It is difficult to photograph the stages of chisel work, so you will have to do some trial and error.  I do take the common approach to only go halfway down, and then flip the board and work from the other side.  I also take as thin a bite as possible with each chop, getting closer and closer to the baseline, and eventually putting the chisel right into the knifeline for a final pare.  This process is much cleaner if you take very thin slices each time.  Rushing and taking off huge blocks of material at a time may work for experts, but going slow and steady, even painstakingly, has been working for me.  Here is the tailboard after being cleaned up:


Now the pinboard is put into the vise, and the tailboard just cut is laid on top of it precisely how it will fit together.  I use a wide chisel back to align the edges.  This takes some practice but it gets easier.  Once can also route a shallow rabbet on one board to align them.  I believe this is a fantastic approach but I have not been integrating it into my workflow yet.  This process also changes if you are going "Pins First".  I like to secure the board with a holdfast while transferring marks, but this can actually introduce more error and is a bit like training wheels.  I won't continue to do it much longer.


With the tailboard held firmly in place (by holdfast or hand), it is time to mark the pins using a knife.  The main drawback of "Tails First" is that a pencil will not fit into the sockets, so you do need a specialized knife.  It can be an X-Acto type, but a true woodworker's marking knife will make you glad you have it.


The lines just made with the knife are then pulled down to the baseline using a square, again carefully marking the waste:


Cuts are again made with the dovetail saw.  This is the crucial time.  The cuts should be right up against the pencil lines, and be perfectly square to the board.  The baseline must not be crossed.  This is the most nerve-wracking part of the process for me, and it is one reason I am glad to have had the tailboard as a "warmup" just prior.  This one came out pretty well!


The waste is again removed with a coping saw:


Then once again chisels are used to clean it up.  In this case, nice wide chisels can make quick work of it.  Be very careful not to damage the walls of the pins!


Here's the pinboard after the chisel work:


It is just about time to see how its going to fit!  Time for a deep breath and prayer if you are into that sort of thing.  First, though, I ease the corners of the tailboard, starting a bit below the face (so as to remain invisible).  This give glue someplace to go, and it also helps guide the pins gently into position like a ramp of sorts:


Now for the moment of truth...  I use a small hammer and a small pad of wood and gently knock the pins into their sockets.  Hey, not bad!  You may be alarmed that the tails and pins are not at all level with each other.  This is no problem, as the whole box will be planed once assembled.  What is important is that there are no gaps between the parts of the joints.  This one is pretty good!


Now, do this whole process again for the other 3 corners.  What, you thought you were done?


This one came out rather well.  It still needs a bottom, of course.  Perhaps it even needs a lid.  It could use some finish.

This does, I hope, show the basic concepts in building a simple "Tails First" dovetail box.  The procedure would be the same for a large chest, just using many more than 3 tails.  I've used very sturdy wood here, you could probably drive a car over this box.  I did want it to be clearly visible, and actually larger joints are easier than smaller ones.

Thanks for reading!