
The last post started with a rough board and took it to a square board, ready for use. In this one, we will start with that board and end up with the carcase of a little dovetailed box. Please note that this is not a true beginner's project, this is actually where I am after doing about 30 of these test joints. However, I did want to show as clearly as possible how to do this relatively simple (and overly mystified) process entirely with hand tools. This is just one way, and I am no expert by any stretch. However, this is fairly accurate by all my book-learnin' and should suffice to serve as an overview for the process. A little research will yield lots more in-depth information, tips, and strategies.
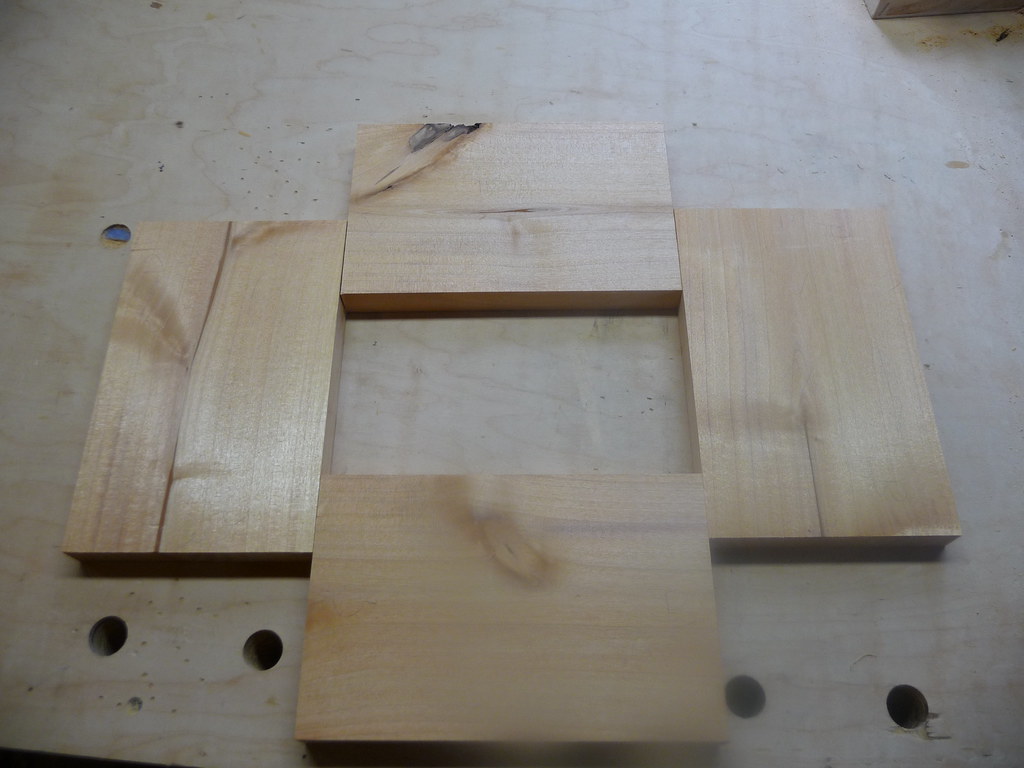
To start, all four pieces are laid out and matched. Since this is a square box, they should be exactly the same lengths, but you could make a rectangular box with 2 long pieces and 2 shorter ones. I like to immediately label the boards on the inside, with letters for each joint. There are a couple considerations here: the inside face should actually be the straightest. It sounds strange, since you want to outside of the box to look good, but you can always smooth the outside after assembly. It is critical that the insides of the joints be right-angles, though. Also, you want to avoid knots anywhere near the tails and pins, which I did not do here. It turned out ok, but I was flirting with death.
Here's the pieces laid out and ready for work. I have no idea what size they are: that is the beauty of this process. It doesn't matter at all, as long as the pieces are the same size. Use a shooting board if they are not.
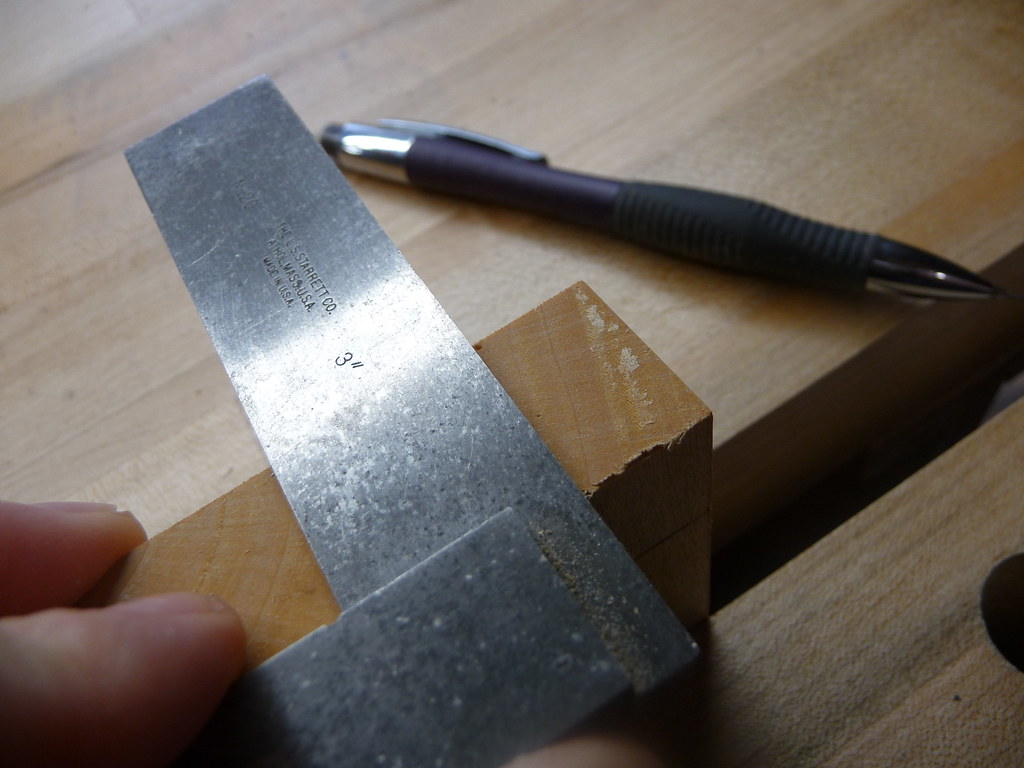
Then, baselines need to be marked on all boards. Ideally you would set the gauge from each partnering board each time. In this case, I just verified that the gauge was set correctly by comparing it to each board. It agreed, so I used one setting for all boards. You can actually use boards of various thicknesses if you take care to adjust your baseline. This is advanced voodoo, though, so I would suggest using 4 boards of exactly the same thickness if possible as you are learning.
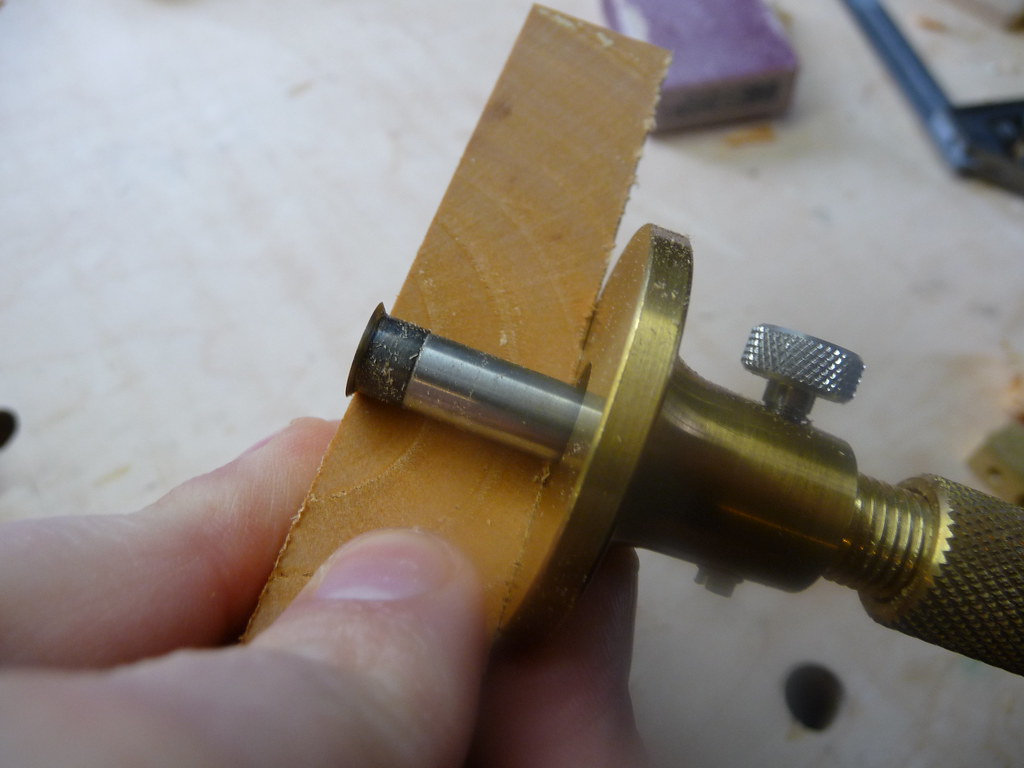
The baseline is then marked on all boards by running the cutting edge along the board's face:

I like to then go back over the line with a pencil to make it easier to see:

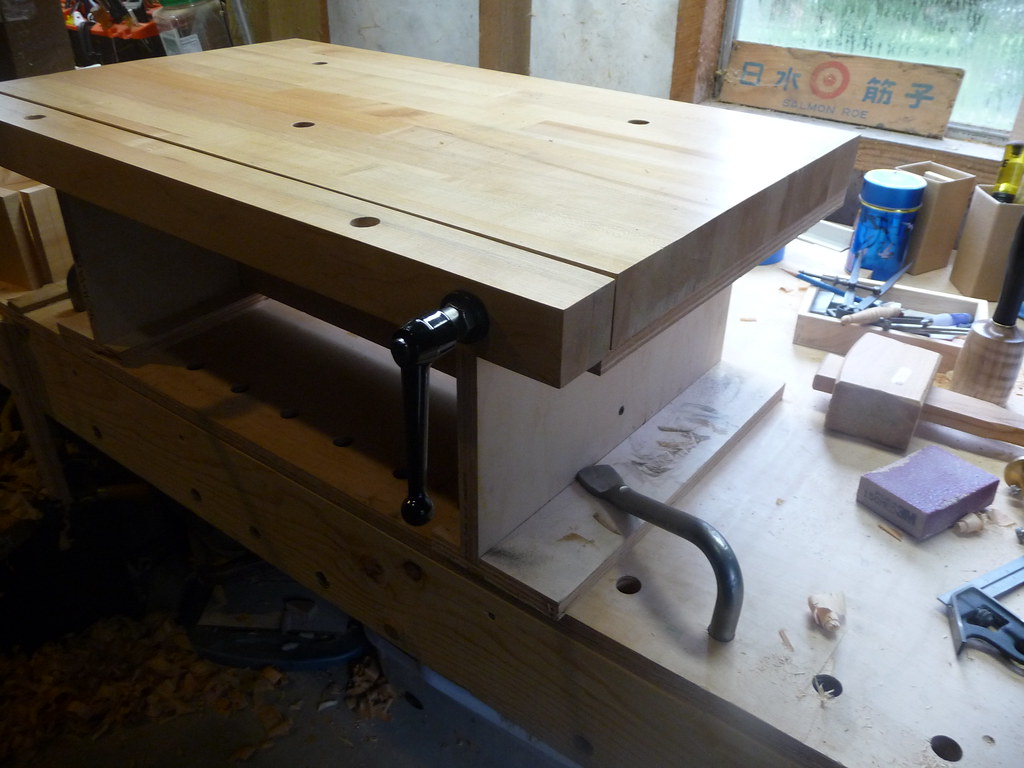
For the next steps, I use a "Bench on Bench" which brings the work up higher, and also has a nice long vise. Your shop will most likely vary, but you do need some way to hold the board very stable as you mark and cut it. I've used cheap screw-vises clamped to the bench in a pinch. It works just fine but is a huge hassle to set up and adjust. My BOB is held to my bench with holdfasts, and is quite solid.
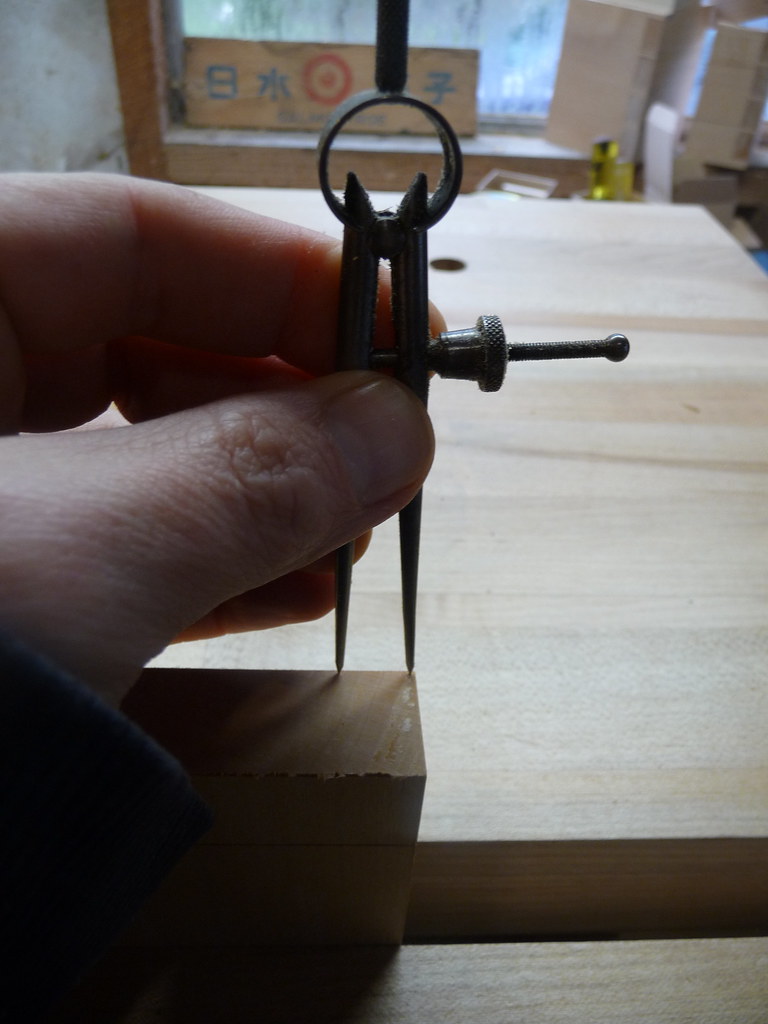
Use dividers to mark the shoulder of the half-pins on either side of the board. Use the same setting for both sides. Note that this whole process shown here is cutting away the pins to leave the tails. This is called "Tails First" and is just one way to do this. "Pins First" has its own pros and cons, but will not be covered here. The size of these half-pins is up to you, but its suggested they be about (or at least) half as wide as your stock is thick. I have just been using this one setting, about 1/2", on all my dovetails, conveniently having this tiny pair of dividers set to that size and leaving it there.
Then use a square to turn the prick from the dividers into a line. This is my gramp's old machinist square from his days as a Detroit auto engineer. Its nice to have him in the shop with me. Mark your lines on both ends of the board.
The next part is fairly difficult to explain, so I tried to make a little video to help. It is still rather complicated, but simple once you finally get it. In short, you set a pair of dividers so that you can take a step for each tail you want and land on the far shoulder line. In this case we will make 3 tails, so we want to step across 3 times, with the 3rd landing right on the far line. Then, the dividers are opened just a bit (about 1/3rd of the width of the pins we want). Step across again, and you will land on the other side of your far line. The gap between where you land and where the line falls will be the width of your pins. If you like it, start over, leaving a prick for the first 2 steps. Then, do the same thing, starting at the far line and walking back two steps, leaving a prick at each. You will then be ready to mark your lines. Hopefully this video will clarify some of it.
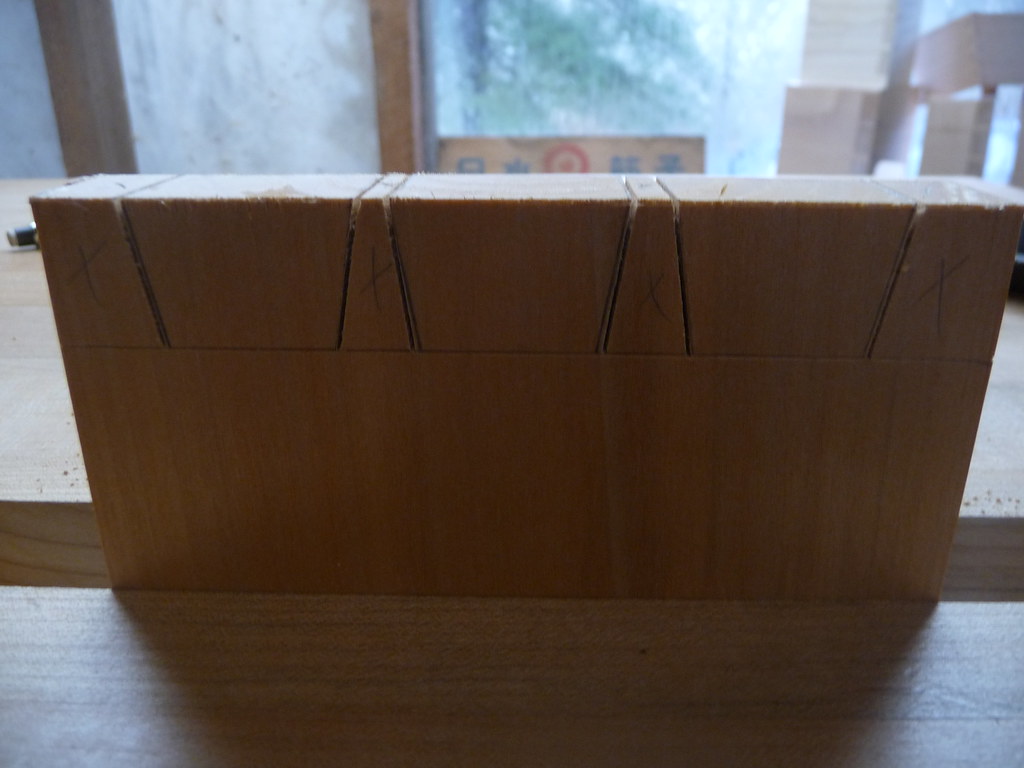
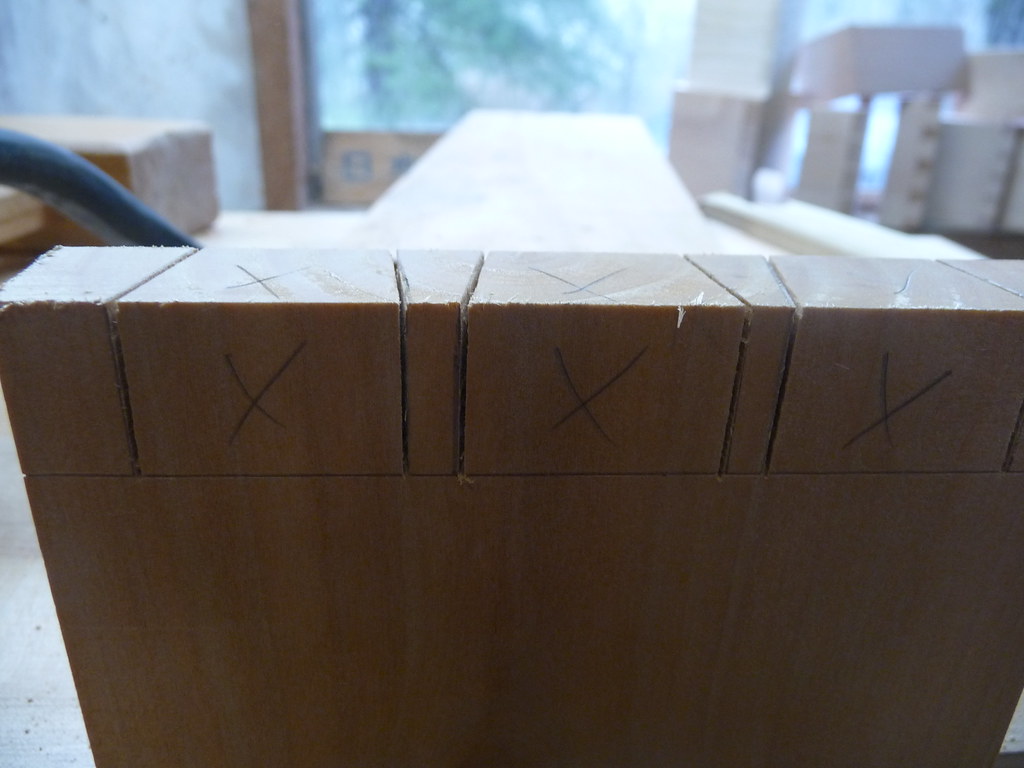
Next the lines we just made need to pulled down to the baseline on the face of the board, at appropriate angles. You can do this with a dovetail marker, a bevel, or just guess. This angle is somewhat arbitrary, so do whatever you think looks good or whatever your religious leader mandates. Make sure to mark the waste:

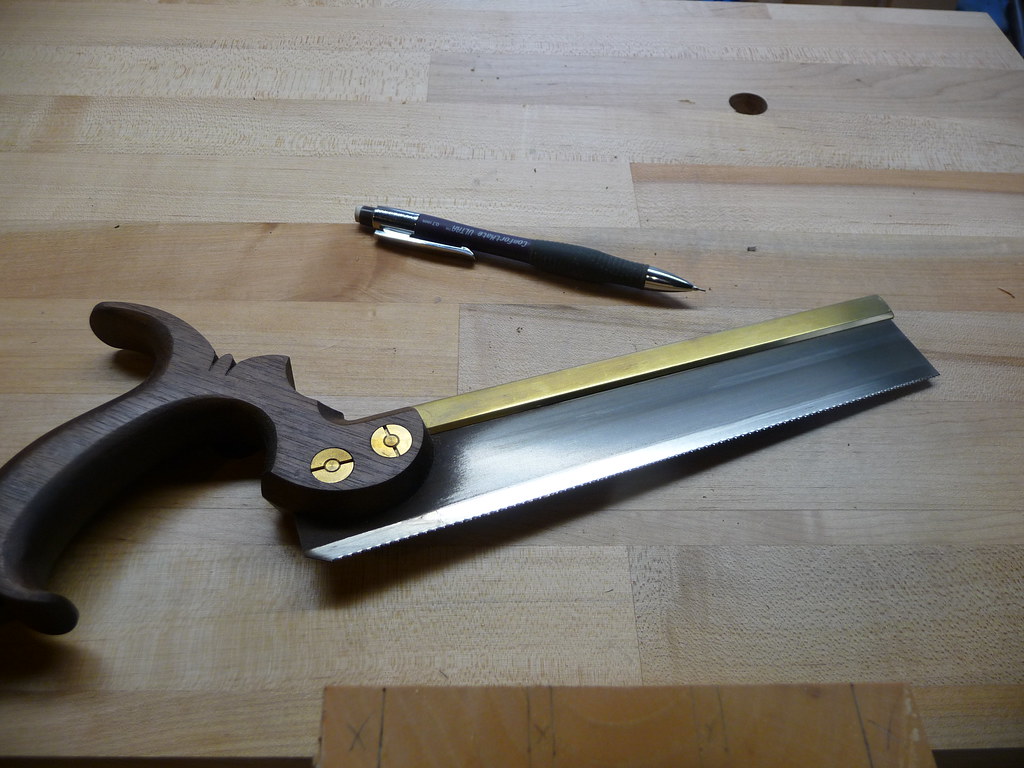
The next step uses the legendary dovetail saw. You could get by with a small rip carcase or tenon saw, or even one of the dual-sided Japanese saws. You probably do not want to use a full-sized panel or handsaw, though. This shows my dovetail saw:
It is time to cut the tails. Keep the saw on the waste ("X") side of the line. You can see on the 2nd tail I was too safe on one of them. Luckily, it doesn't really matter here since the pins will be cut to fit whatever tails you make. Some hardcore people won't even mark the tails, just cut them however they want by eye! I like to keep it neat so I mark them and try to cut to the line. This is good warmup for the pin cuts which must be right on the line. Make sure you do not cut past the baseline, and keep the saw as square to the board as possible. This is all easier said than done, and take a good bit of practice to start to feel natural. It does happen though so hang in there! As I mentioned, this is about joint #30 for me and it is just starting to feel right and work out well.
Now to remove the half-pins on the sides. This was marked already with the marking gauge:
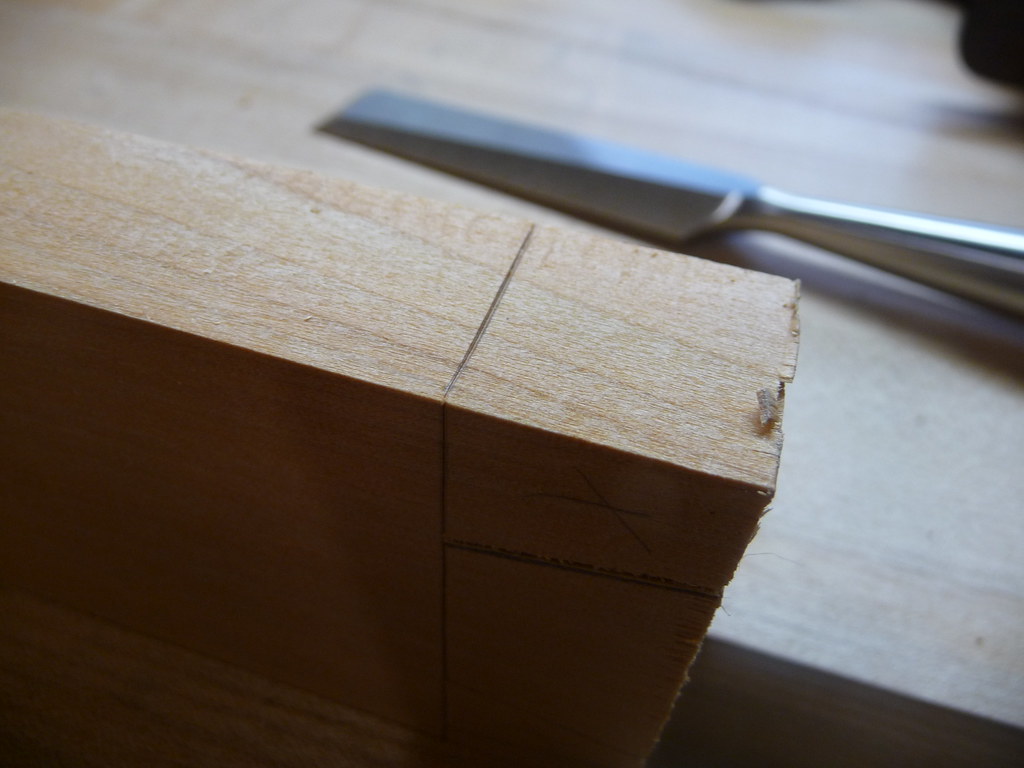
This is what Robert Wearing calls a "first class" sawcut: put a chisel as wide as the mark (or wider) right into the knife line and give it a couple firm taps:
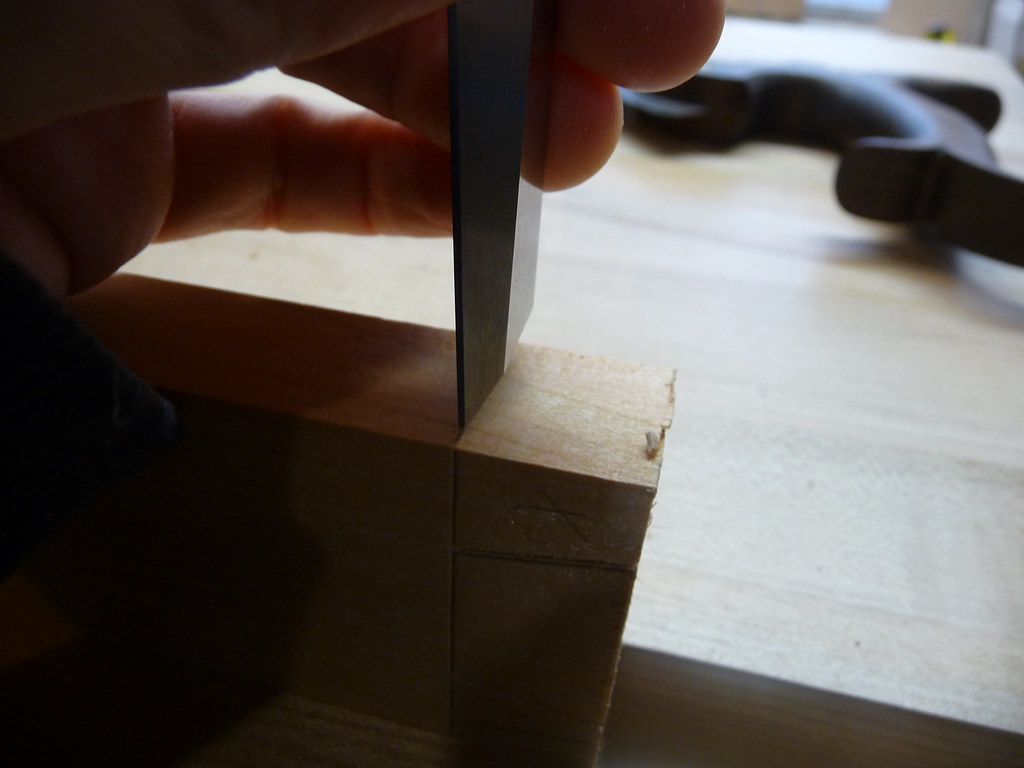
Then come back and scoop out a tiny "V" shape trough:
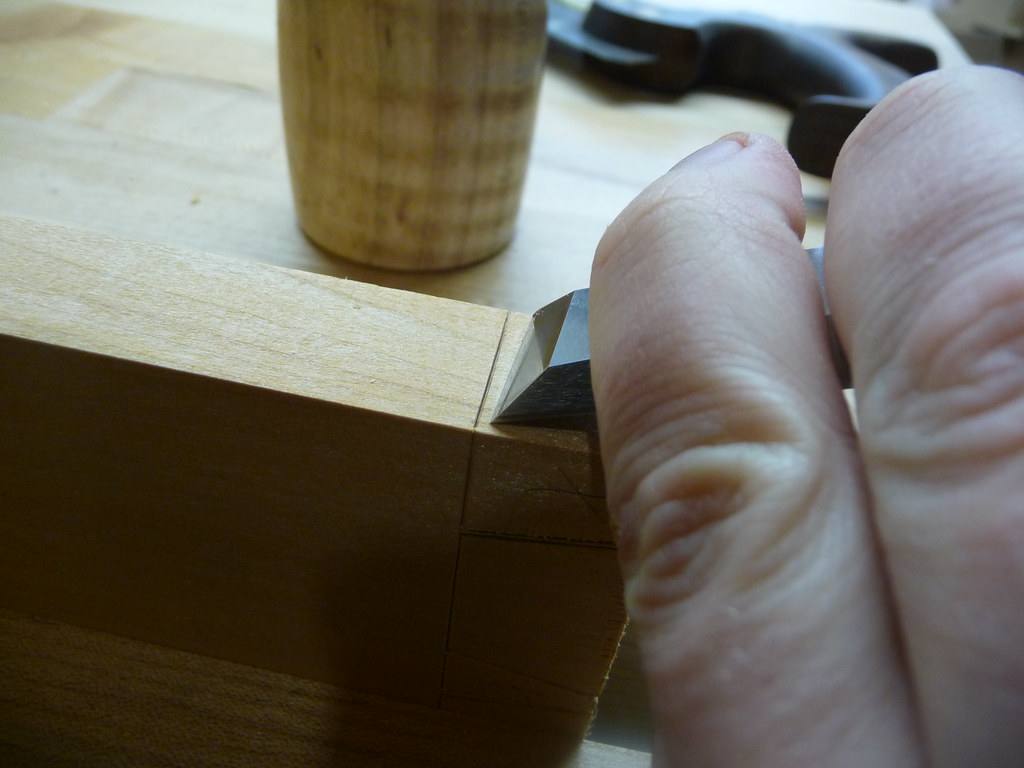
You should have a little notch with the wall on the line absolutely vertical, and an angled valley sloping into it. This gives your saw a little wall or fence to ride against as you make the cut. This also has the advantage of leaving a crisp edge where the wood will be visible, and your potentially gnarly saw cut will start "underground", inside the joint.
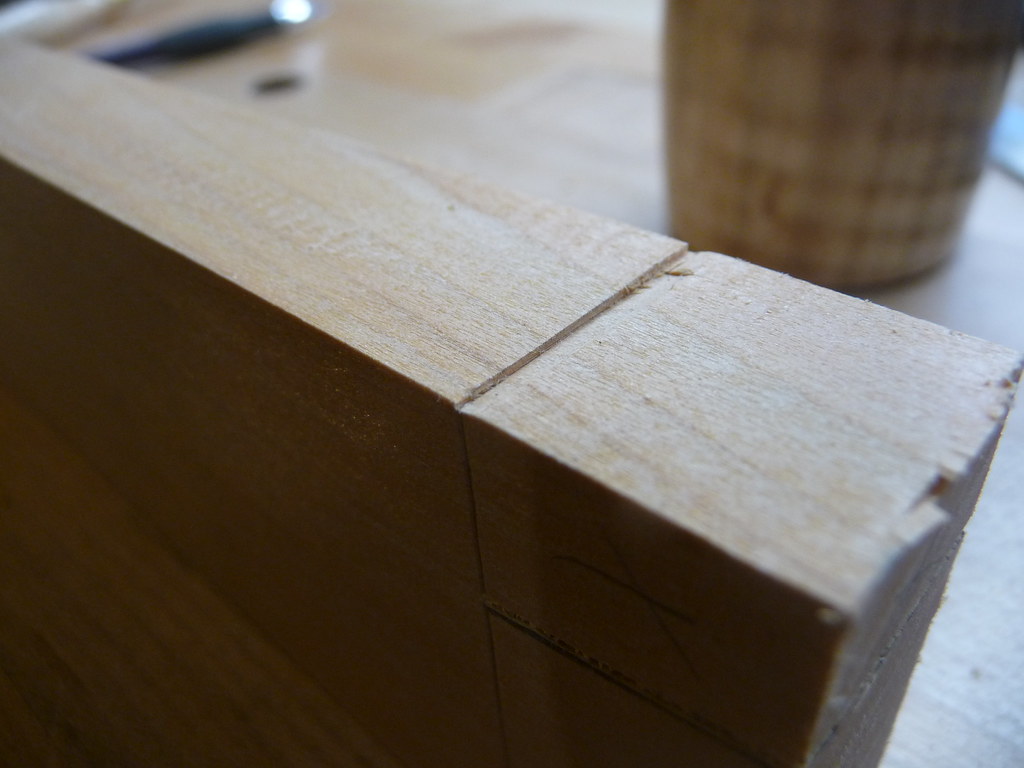
This cut should be made as carefully and vertically as possible. I have found that the more I have to use a chisel on it, the more I mess it up, so I try hard to saw it right the first time. Repeat on the other side.
With the half-pins cut, it is time to clear out the pin sockets. I use a coping saw:

I start the saw in the middle of the pin, so there is no danger of messing up the existing cuts. There are many ways to do this, but this is how I do it:

Then back across to the other side, getting as close as you dare to the baseline:
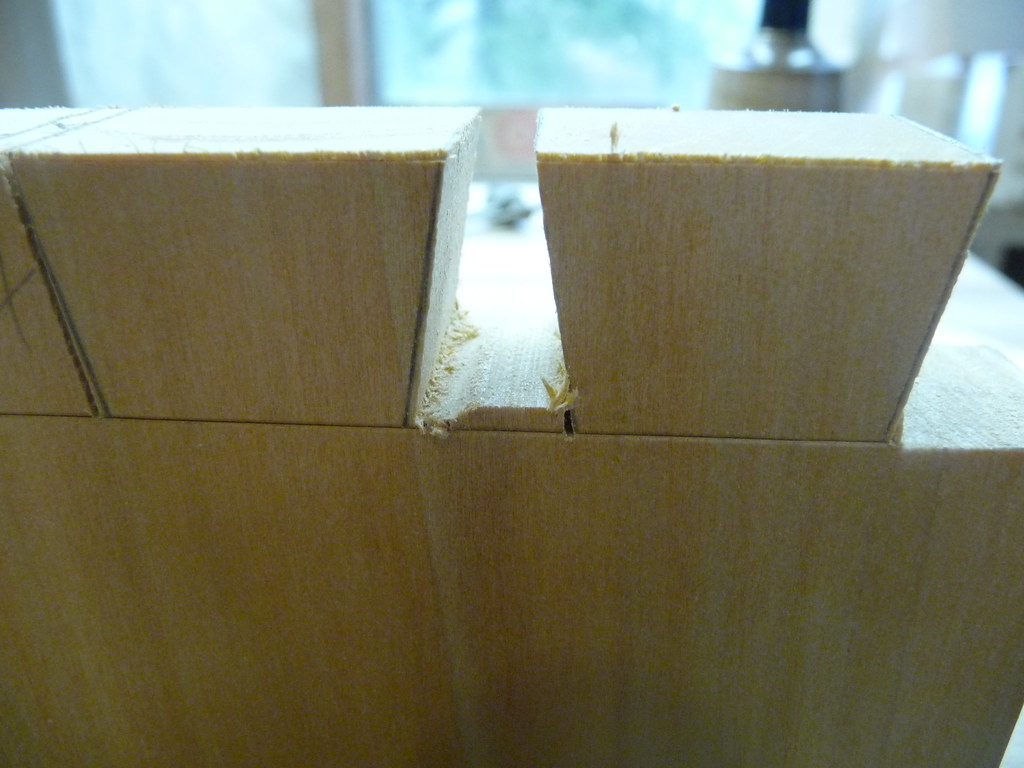
Do it again for the other pin:
Now chisels will be used to clear out the remaining waste. I like to set the workpiece on a bit of scrap, and secure it with a holdfast:

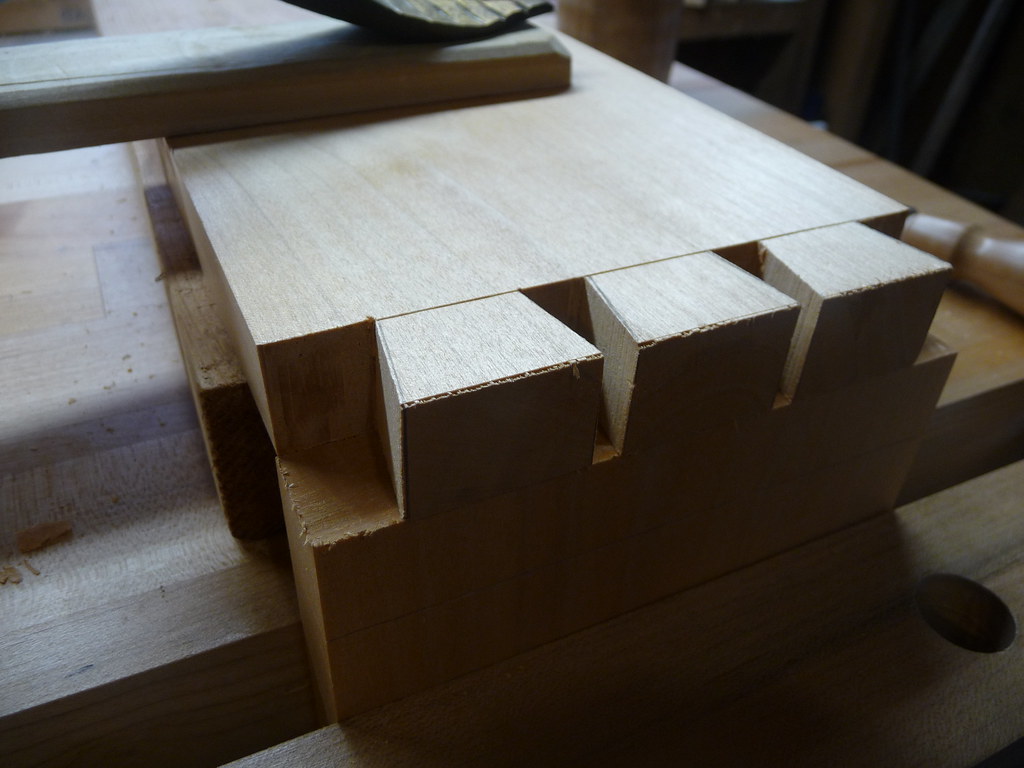
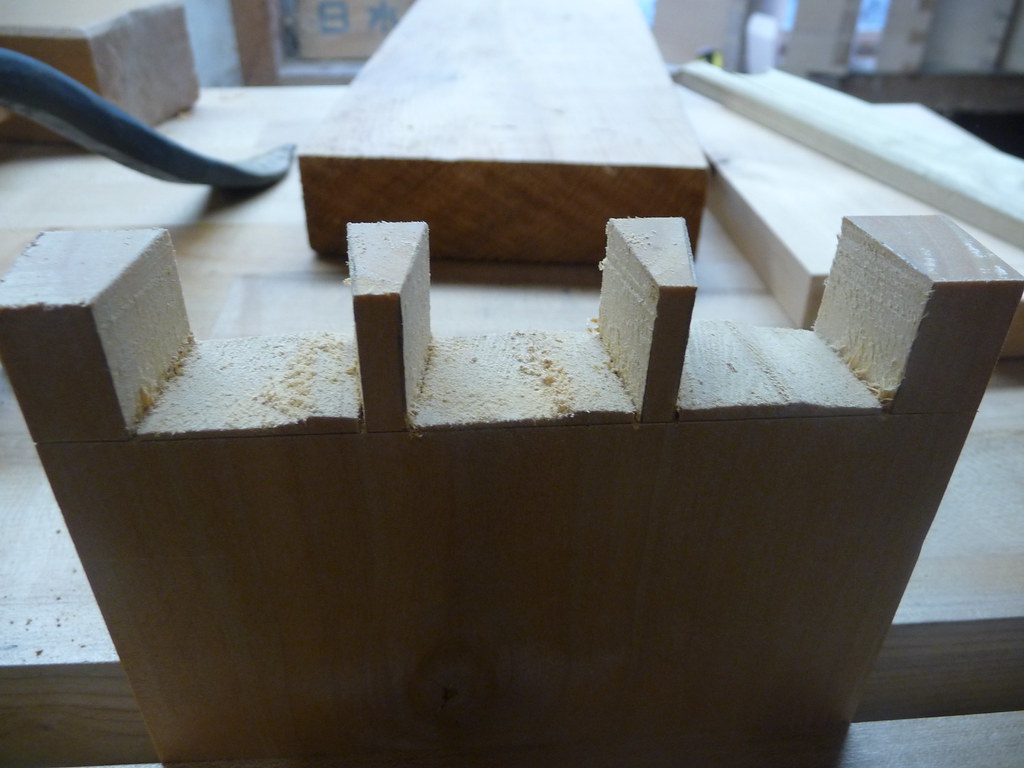
It is difficult to photograph the stages of chisel work, so you will have to do some trial and error. I do take the common approach to only go halfway down, and then flip the board and work from the other side. I also take as thin a bite as possible with each chop, getting closer and closer to the baseline, and eventually putting the chisel right into the knifeline for a final pare. This process is much cleaner if you take very thin slices each time. Rushing and taking off huge blocks of material at a time may work for experts, but going slow and steady, even painstakingly, has been working for me. Here is the tailboard after being cleaned up:
Now the pinboard is put into the vise, and the tailboard just cut is laid on top of it precisely how it will fit together. I use a wide chisel back to align the edges. This takes some practice but it gets easier. Once can also route a shallow rabbet on one board to align them. I believe this is a fantastic approach but I have not been integrating it into my workflow yet. This process also changes if you are going "Pins First". I like to secure the board with a holdfast while transferring marks, but this can actually introduce more error and is a bit like training wheels. I won't continue to do it much longer.
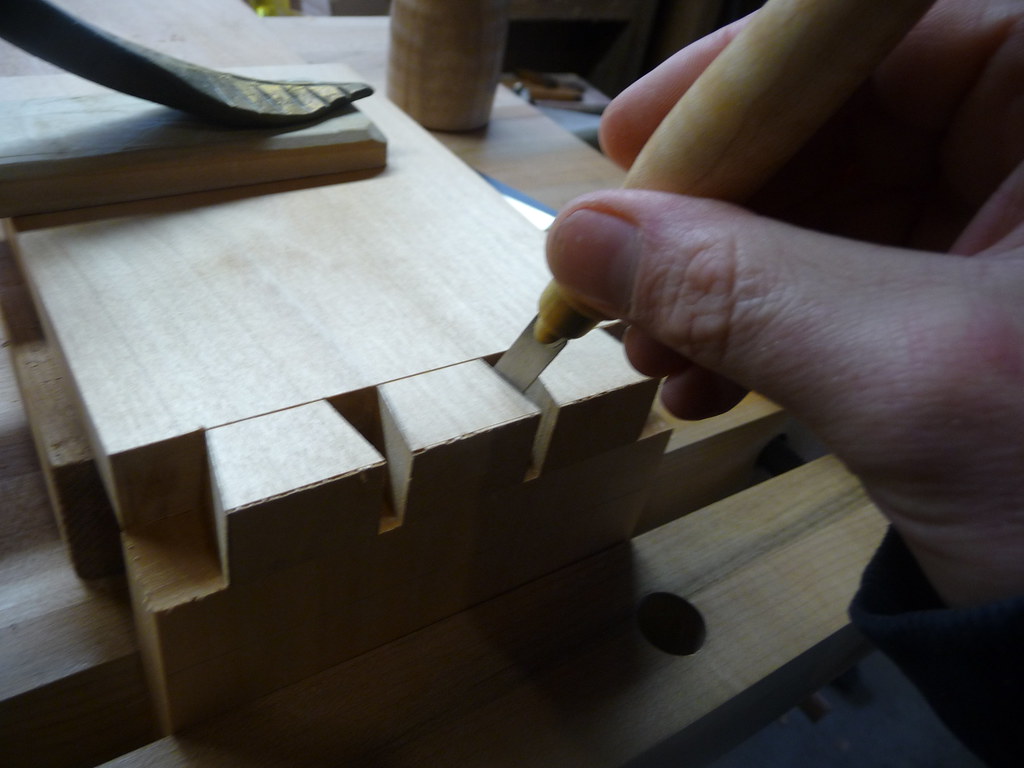
With the tailboard held firmly in place (by holdfast or hand), it is time to mark the pins using a knife. The main drawback of "Tails First" is that a pencil will not fit into the sockets, so you do need a specialized knife. It can be an X-Acto type, but a true woodworker's marking knife will make you glad you have it.
The lines just made with the knife are then pulled down to the baseline using a square, again carefully marking the waste:

Cuts are again made with the dovetail saw. This is the crucial time. The cuts should be right up against the pencil lines, and be perfectly square to the board. The baseline must not be crossed. This is the most nerve-wracking part of the process for me, and it is one reason I am glad to have had the tailboard as a "warmup" just prior. This one came out pretty well!
The waste is again removed with a coping saw:
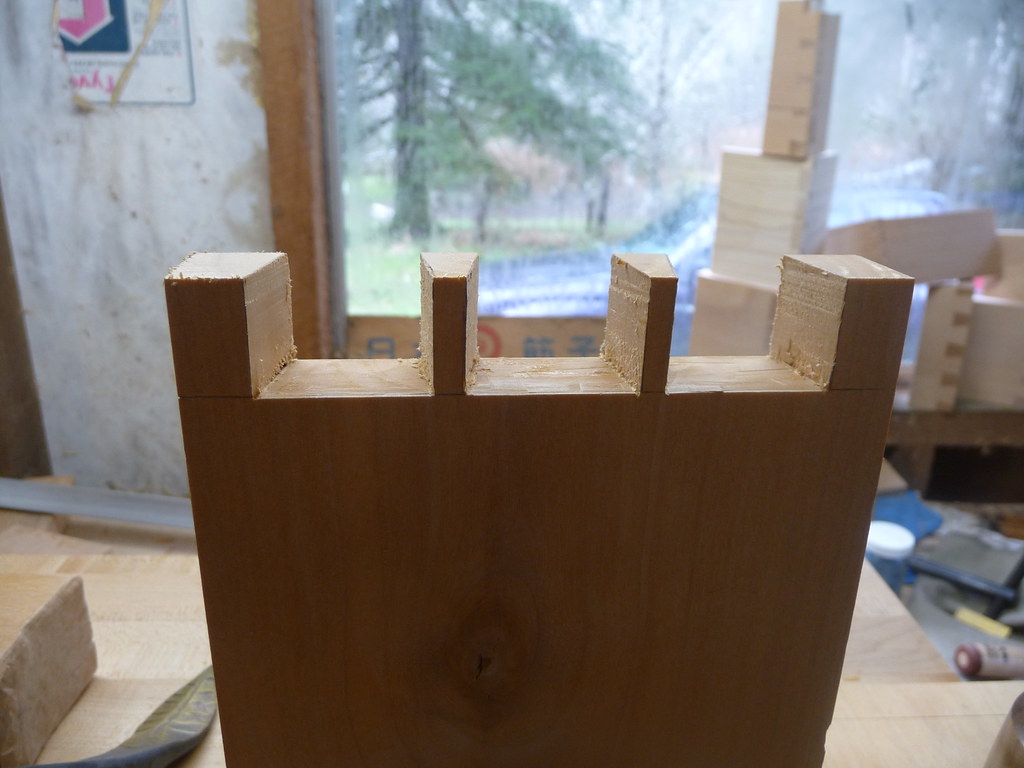
Then once again chisels are used to clean it up. In this case, nice wide chisels can make quick work of it. Be very careful not to damage the walls of the pins!

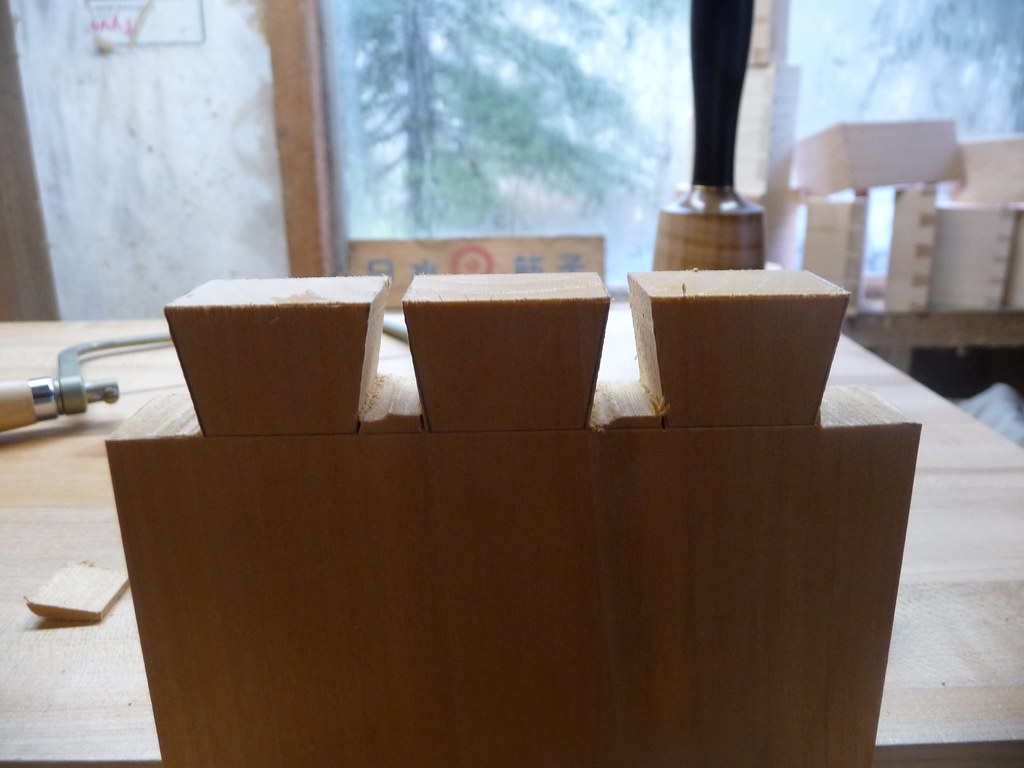
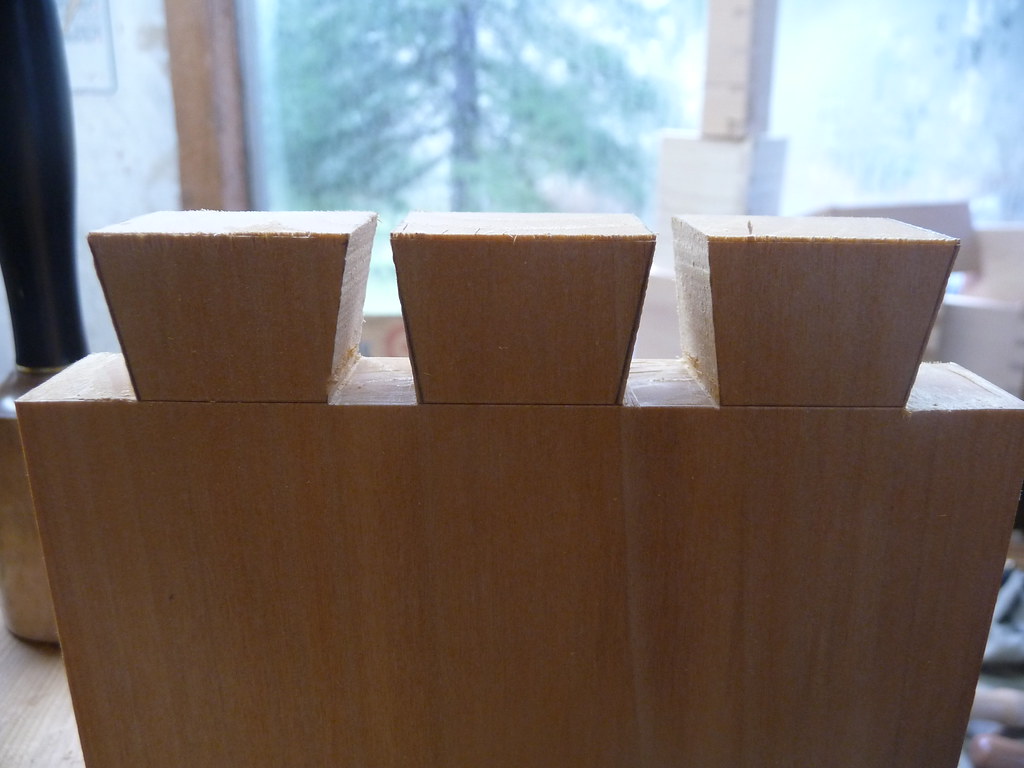
Here's the pinboard after the chisel work:
It is just about time to see how its going to fit! Time for a deep breath and prayer if you are into that sort of thing. First, though, I ease the corners of the tailboard, starting a bit below the face (so as to remain invisible). This give glue someplace to go, and it also helps guide the pins gently into position like a ramp of sorts:

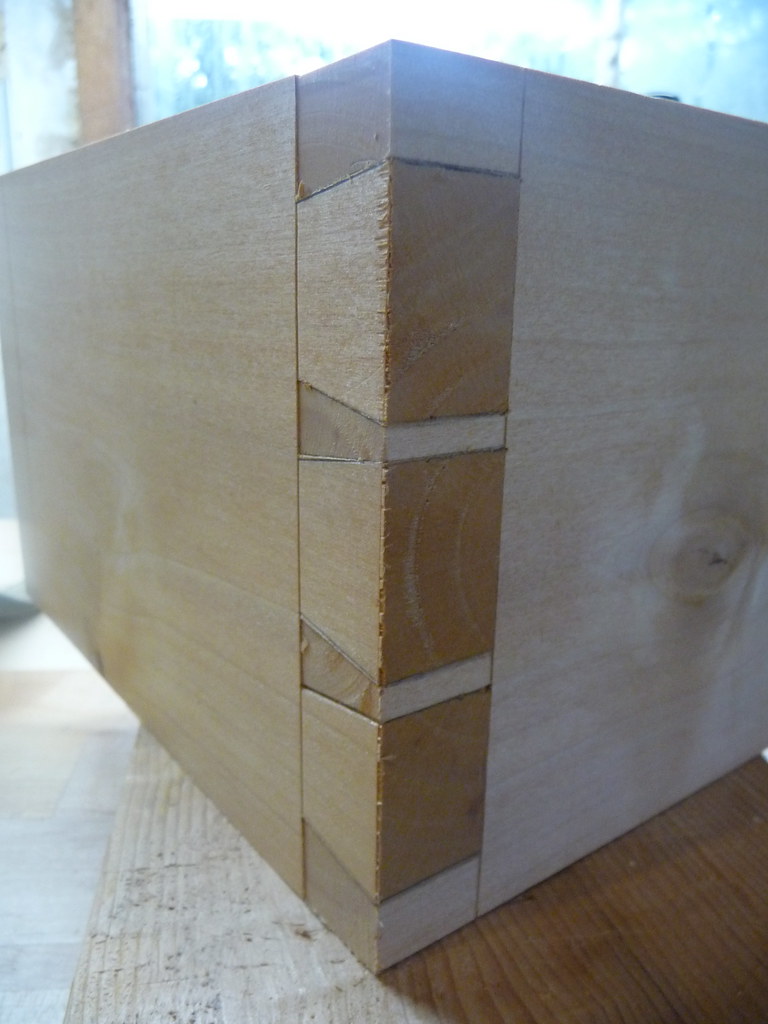
Now for the moment of truth... I use a small hammer and a small pad of wood and gently knock the pins into their sockets. Hey, not bad! You may be alarmed that the tails and pins are not at all level with each other. This is no problem, as the whole box will be planed once assembled. What is important is that there are no gaps between the parts of the joints. This one is pretty good!
Now, do this whole process again for the other 3 corners. What, you thought you were done?

This one came out rather well. It still needs a bottom, of course. Perhaps it even needs a lid. It could use some finish.
This does, I hope, show the basic concepts in building a simple "Tails First" dovetail box. The procedure would be the same for a large chest, just using many more than 3 tails. I've used very sturdy wood here, you could probably drive a car over this box. I did want it to be clearly visible, and actually larger joints are easier than smaller ones.
Thanks for reading!
Very nice tutorial, thanks.
ReplyDeleteLooks awesome to me - aint nothin wrong with those joints!
ReplyDeleteNicely detailed, and explained.
ReplyDeleteI enjoyed your clear explanation of the process. How do you attach the bottom of the box. Would making a rabbet on the inside to slot in a panel interfere with the integrity of the dovetails?
ReplyDeletecardboardbird - a groove is fine and is what would often be used in a drawer. A simpler method is to nail it onto the bottom and then conceal that with a strip of molding. The upcoming School Box series of posts will address this.
ReplyDeletethanks for reading!
A clear and simple tutorial, well done. (I will come back to this post when I get this far in my own attempts)
ReplyDeletewhat angle do you cut at
ReplyDelete