Friday, July 29, 2011

Stopgapping continues


I've gotten a little more work done on the stopgap workbench, namely adding a row of dogholes along the front edge.  I used dividers set at 3", then drilled out about every other one, and then started filling in the gaps.  It might be too many holes too close, but this is a quick and dirty bench and I need the practice drilling plumb holes with the brace and auger.  I started to put a few in the front skirt as well.  Some designs for a simple sliding deadman came to mind, as did a jig to mark subsequent rows of dogholes and a dog-seating planestop.

Monday, July 25, 2011

A diversion from the Norm

Just needed to record and share this awesome bit of engineering.  I've been wanting to sell my scrollsaw, but this has me thinking twice:

http://steveg769.bizland.com/spiralsbysteven2/id6.html

Would love to try some of these.

My take on the trinity


Lost Art Press  has really been cranking out some wonderful books.  Inspired by this review, I thought I might join in the chorus of high praise.

The Joiner and Cabinet Maker is a ridiculously fantastic book - one of the most interesting and exciting I can think of.  Its core is an anonymous 1839 fictionalized account of an apprentice's experience in a cabinetmaking shop in rural England.  What makes it so amazing is that it is the only known book of the era to actually detail not only the apprenticeship system and how it really played out, but it also takes great pains to describe in incredibly granular detail how to perform several woodworking operations - including 3 projects in their entirety.

The prose is very well-written and amusing.  I especially enjoyed the young customer's delight upon receiving his custom hod-rodded schoolbox; he can't help but to operate the lock mechanism over and over just for the satisfaction of its steady click.

This in itself is fantastic reading, but this volume also includes new additions from the publishers which tremendously enhance it.  Joel Moskowitz provides extremely thorough contextualization and historical footnoting, while Chris Schwarz details his own experiences in re-creating the projects from the book.  I really cannot praise it highly enough - anyone interested in traditional woodworking needs to consider it a must read, and I would suspect its fairly interesting just for those who are interested in history and might skim through some of the technical sections.

My only criticism would be that it lacks an index, which is oddly the case for all three of these books.  I am sure it was considered, and if it was just too much to do in order to get the books published, I am fine with the inconvenient omission.

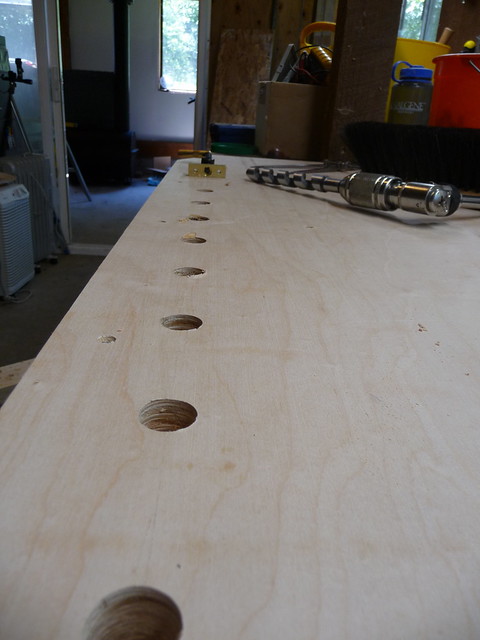
I'm taking this book very seriously, and in fact planning to spend all of my woodworking time dedicated to mastering the projects and techniques in the books (note the name of this blog).  I will be detailing this exercise here soon enough - in the meantime I am preparing wildly.

~~~

The Anarchist's Toolchest by Christopher Schwarz is this year's Must Read for anyone interested in woodworking, our disposable economy, and the future of manufacture in America.  It is part reference library informing the reader of which tools are essential, how to choose and restore them, and how to build an heirloom toolchest to store them in.  The book continues into ontological renovation, however, delivering heavy food for thought while tricking you into breezing through its enjoyable pages.  I can't add much to the discussion sparked by Godet Woodworking, other than to say you need to get this , read it, and live it.  It sadly lacks an index, as mentioned above.

~~~

Robert Wearing's "Essential Woodworker" is perhaps not as suitable for the armchair crowd, but is a wonderful introduction for new woodworkers, or fine-tuning for those who believe they know it all.  Very lucid style, excellent illustrations, and rich examples make this a pleasure to refer to.  It can take several readings of a section for it to sink in, but this is due to incredible density of the subject matter being presented rather than through any fault of the author.  The tips are all heavily contextualized; there are tips on specific tool technique in the section on how to build a table rather than in a "how to use tools" portion of the book, so it warrants a complete reading from cover to cover.

There is much to love about these books and so little to criticize.  Its been a long time since I have found three books so exactly catered to my needs as an amateur woodworker, my ideology, and my tastes as a reader.  Lost Art Press is really one to watch, and all involved in these projects have my deepest gratitude and appreciation.

Weekend finds

Very busy on a special project, which will be revealed here soon, but I did have a few minutes to look at the garage sales in my area this weekend.


Grabbed this pair of Starrett dividers (they cleaned up very well) along with a set of auger bits and an expansive bit for $5.  Not too bad, I feel.  Here's the rusty one above, after a few minutes effort:


Spent a little more on this:


A Stanley #5 from about 1925.  Its in excellent shape.  I haven't even sharpened it yet and it took great shavings.  The iron appears totally square, so I will give it the suggested camber for use as a fore plane, and most likely add another iron or two, a straight one and a toothed one.

Monday, July 18, 2011

Sharpening unpleasant chisels

I have some Marples chisels I bought primarily for carpentry a couple years ago.  I always looked forward to tasks that called for them - creating mortises for hinges has been the most common but anytime I needed to do some "fine" work (by carpentry standards) I would grab them.  They do the work, with enough persuasion, but have never been sharp enough to be truly accurate or enjoyable.  Their metric dimensions (despite imperial labels) are also a con.  Some of the chisels in the set have never been used, so they will serve as a good example of how lame a tool can be right from the factory.

At any rate, I've decided to tune these up to the best of my abilities, partly to ensure I have good enough freehand honing technique before I move on to more expensive tools.

These are coated in a lacquer to protect them from rust.  This is a fine idea, except for the fact that the lacquer also interferes with sharpening, so it had to go.  I donned gloves and respirator and gingerly used some lacquer thinner which rapidly did its dirty work.

Here is a chisel back, ready to be polished.  You can easily see the factory tool marks and the overall hazy finish:


This is a shot of the front:


Since they are new, I did not need to grind and skipped the 220 grit wetstone.  A good while was spent on the 1000 grit, a little bit on the 4000, and the 8000 brought about a mirror finish rapidly.  It is very difficult to photograph, but the flattened and polished section of the back truly is mirror-like now:


After bringing a tiny section of the top to a similar mirror polish, a slight 2ndary microbevel was added, just barely visible here as an extra glint of light on the edge.  The idea is that the microbevel will dull quickly but only take a few strokes to resharpen (rather than the whole cutting edge).


This last photo just shows an unpolished chisel on the left, and one which I worked on the right.  They now cut pretty well, and might even be serviceable for fine woodworking except for the unpleasant (poorly balanced and topheavy) handles and the fact that they are metric despite being labelled in inches.  Chisels can and should be used as measuring devices - making a dado or groove the width of a 1/2" chisel, for example, instead of measuring, marking, and then cutting.  However, this set is metric and uses "close enough" imperial labels, which are not "close enough".

Paint while we wait

While awaiting the arrival and installation of new wheels, the grinder recieved a bit of an overhaul. Disassembled, 20+ years of metal shavings scraped out, cleaned, scrubbed, and finally repainted. We all know new paint makes everything run smoother.

I'd love to find and learn to use a hand-powered grinder at some point.

Friday, July 15, 2011

The Stopgap Bench


I am planning to build a workbench based on Chris Schwarz's Roubo plans. It would be convenient to have a workbench in order to build it, and so I have slightly improved my existing built-in bench. Its much too tall for me - I might build a platform to stand on, but it is extremely sturdy (3" thick Douglas fir) and flat. It is not, however, smooth. Its made of boards which are not only chamfered, but they have a bit of a gap between them as well. I added a layer of 3/4" maple ply to the top to address that, and added a skirt of fir 2x6, which is tall enough to allow a row of dogholes along the front (and through a backer glued to the board) for a holdfast. I will also add a crochet. Dogholes will be added to the top, but I am also not afraid to screw down some battens as planing stops anywhere I need. I doubt I will add a vise although a wonderdog would be most welcome. I will likely also add a deadman or jack of some sort to help support work along the front face of the bench.

Recent Finds


A few saws I have recently found. They all need some serious scrubbing and de-rusting and sharpening, but I believe they can be brought into excellent serviceable condition. The Disston 26" saw, about 11tpi, has a slight kink near thetoe, but I believe it is mild enough that it can be hammered out. The totes have seen better days and I look forward to replacing them someday but they are comfortable and fit for use as-is. I'll send these out to a pro since I am not confident in my sharpening yet and it will be cheaper than a saw vise.

eggbeaters


A couple Millers Falls eggbeater drills I have restored. They've been taken apart, degreased, cleaned, and oiled. The chucks have been rebuilt, including making some new springs from guitar strings. They now work very smoothly. I would love to repaint them. These are a ton of fun to use and I actually look forward to needing to bore holes. Even the smell of their oil is appealing.


What is this?


"Penn" brand small saw... the teeth are not super-aggressive but I am wondering if this is more of a green wood pruning saw than it is a woodworking tool.

Thursday, July 14, 2011

Plan your work, work your plan


Trained by my engineer grandfather as well as shop teachers to always carefully plan my work, it was a bit of a deviation to create these 2 projects. Both were done entirely freehand without even a clear idea of what the end products would look like, just a simple idea. These also should not be considered any kind of example of woodworking, but I feel the approach warrants mention as an occasional mental exercise.

In the case of the garden gate, I knew that I needed some serious bracing to keep it rigid through the seasons, and angled braces natually lend themselves to the diamond pattern. That was the only vision I had, so I made the diamond first, then attached hardware cloth to make a "window" (I had envisioned a solid door). The built-in flower box just organically emerged as the shape filled out. I'm quite pleased with how it turned out and many of our guests seem to enjoy the flowers in an unexpected location. Sticks near the in-place construction site begged to become the trellis, and the rest just happened.

After building a rather complex chicken coop according to some very thorough plans, I decided to simply wing it for the 2nd coop. In this case, the only guiding concept was that I had some hand-split cedar shakes to use as shingles, so it needed to have a sloping roof. I also noticed that the birds seem to enjoy shade, so I elevated the entire structure to provide them a shelter while still "outside". The double-fence of our chicken moat provided the support posts for the coop and again, the design just unfolded as I built it. It is definitely rustic, some might even say an eyesore-grade bit of redneck engineering, but in general I don't mind it and it fits into the quirky nature of our property rather well. It certainly suits the birds just fine.

In general I do prefer to be detail oriented, thoughtful in my planning, and exact in my execution. However, I think this type of freeform work is excellent when an occasion allowing flexibility presents itself. The type of problem-solving and mental gymnastics required to "wing it" are much different than the skills needed to design and follow a plan. I believe both approaches are valid for various situations, and practice makes perfect (or close enough).

Maple


This is probably considered carpentry more than woodworking, but it shows what rough lumber can look like after cleaning up. I do not have a jointer or planer, so this did take some time, but I am fairly pleased with the results. These rough-sawn maple boards were stacked in the barn when we moved into our house - they still had bark on the edges and fairly severe saw marks. I had to scrub off a bit of a nasty layer of rodent leavings, etc, but they did clean up nicely. Sadly my photography cannot do justice to the "3d" effect of the figuring in the wood - it looks like waves of translucent light dipping above and below the surface of the boards.

The little landing near the stairs had no railing, and with a child in the house we needed to take care of that. The double-duty of the shelves there has already proven quite useful. The posts are anchored with Lee Valley's nifty brackets. They were not cheap but they allowed a fairly simple installation process.

I still have a handful of these boards left. I would love to resaw some of them since they are an inch thick - a bit much for small boxes and the like. I've been pondering what else to do with it... but having sat for 20 years already, I don't think they are in a rush to go anywhere.

The new shop: before


I should taken better "before" pics, since I am pretty excited to show the "after" once its complete. These will have to suffice to illustrate the dismal condition of the space before work began in earnest. It bears mention that this is actually AFTER an initial cleaning. The place had never been finished to begin with, and an odd assortment of people had been living in it for years until we moved in. Lots of rodent nests, empty food wrappers, cigarettes, you get the idea. The current state is that it is mostly drywalled and primed, the plumbing has been ripped out and replaced with Pex, the unpleasant kitchen counter is gone, and the woodstove has been sanded, cleaned, and painted. Soon the drywall will be complete, a floor will go in, and paint and trim can commence. Then... woodworking!


Wednesday, July 13, 2011

Ethical woodworking?

How can a hobby such as woodworking be ethical?

Well, for me it is not really considered a hobby. Its actually something close to spiritual, but that is a topic for another post. Any pursuit will have costs and impacts associated with it; consider the impact of riding off-road motorcycles or the acreage and feed requirements of keeping horses. Even using computers involves lots of toxic materials, shipping parts across the globe and back, and so on.

Once the initial impact of creating metal tools is considered, there is very little other waste. There is no electricity created and burned, no fuel burned, no batteries filling a landfill. True, wetstones and frame saw blades might be purchased from time to time, but compared to other activities, woodworking has very little waste.

What waste there is, in the form of sawdust and shavings, is rather valuable in its own right. Both my home and my shop are heated using wood stoves. Cardboard is viewed as a precious resource in winter here, and wood shavings are the best of all for getting a fire going. Sawdust is valuable both as a mulch for plants and to create firestarters with wax.

Living inside a National Forest, I am all too aware of the problems with logging. It might seem paradoxical to be ecology minded while also utilizing wood products - however, I have also seen that truly sustainable harvesting of forests is not only possible, but is essential for forest health. Overcrowded forests are not healthy; just as a forest benefits from predators controlling an exploding deer population, so selective harvesting of trees helps ensure forest health. Its possible to fell, split, and process small trees directly for woodworking, and this is my aim whenever possible. When its not, local species are preferred. Here in the Pacific NW, we have rampant growth of alder - a beautiful hardwood widely considered a "weed" tree. We also have copious quantities of cedar, douglas fir, and hemlock... all excellent materials for various projects.

The very act of woodworking with hand tools brings about an ethical mindset. Conservation of material (its expensive!) is important. Care of tools is also important. You do not want to replace a $300 plane after carelessly dropping it or letting it rust. At the same time, if creating projects for others, great care is necessary to ensure the end product will last for generations.

Its taken me many years to realize that people understood many of life's issues hundreds or thousands of years ago, and it is to me an exciting honor to connect with other woodworkers through the ages by tracing their footsteps, feeling the same sensations in my hands as they did, viewing trees as they did, and hopefully, on occasion, thinking the same thoughts they did.

A final thought regarding the durability of this work: I would like to create woodcraft using tools similar to those my grandfather used.  At the same time, I would like for my grandchildren to end up using my tools.  This is simply not possible with most pursuits, especially computers and other high-tech fields such as the one my daughter's father is employed in.  The longevity of the tools, techniques, and artifacts of woodworking are the very essence of sustainability in every sense of the word.

Hello!

Welcome to the Joiner's Apprentice. Here my story will be chronicled as I learn traditional woodworking.