
As I was preparing a post for "Get Woodworking WeeK", a wonderful thing happened. An unexpected guest stopped by right in the middle of my woodworking. This gave me a reason to show him what I was doing and now one more person in the world has a basic idea of how to turn a board right out of the tree into a simple box. Unfortunately, I did not photograph all of this process, but I did get a number of images and there will be a couple more in the second part of this entry in a couple days.
There are already a number of great tutorials on processing lumber with hand tools, so these are more just to wet your whistle or give you a very basic overview of the kinds of techniques used. I will note that I did actually try to take some videos but in reality I have a long way to go in terms of gear and technique until I can make usable videos in my dark winter shop. I would love to move in this direction, but for now the woodworking itself is taking the front seat.
With all that out of the way, what I set out to do was take a board right from the tree (well, right off of a gasoline-powered "portable" sawmill) and onto the workbench. In reality, most beginners will buy boards ready-to-go from a lumberyard, but I think its useful to see what would happen, even if you don't do it yourself. Note that this is akin to an artist making their own paper and/or paint (as they did, once upon a time), so don't feel bad if you don't do this or don't want to. My goal is merely to show what the machines are doing for you, and more than that, show that IF you wanted to, its not that hard and you can actually do a better job than a machine. The secret ingredient, other than skill and knowledge as lubricants, are time. This gets tricky with one-off pieces because hand tooling can be faster than setting up and testing a machine's settings. That said, I will say that as a very slow beginner, it takes me about an hour and a half to really dress a board from the rough into wholly square and usable shape. This would take about 15 minutes on a planer for me to do a similar job, with slightly inferior results. The jointer plane leaves a very, very nice finish while brand new planer machine blades leave a merely very nice finish. The hand tools required are about half the price, and the pleasure of working by hand is remarkably better. You can talk over the shhhhhk of a plane, but a planer requires ear protection. You can also get a nice little aerobic workout while planing, while using a planer involves little more than clenching your jaw as the blades take hold, and holding your breath to keep the dust away.
That said, here is what goes on in the shop:
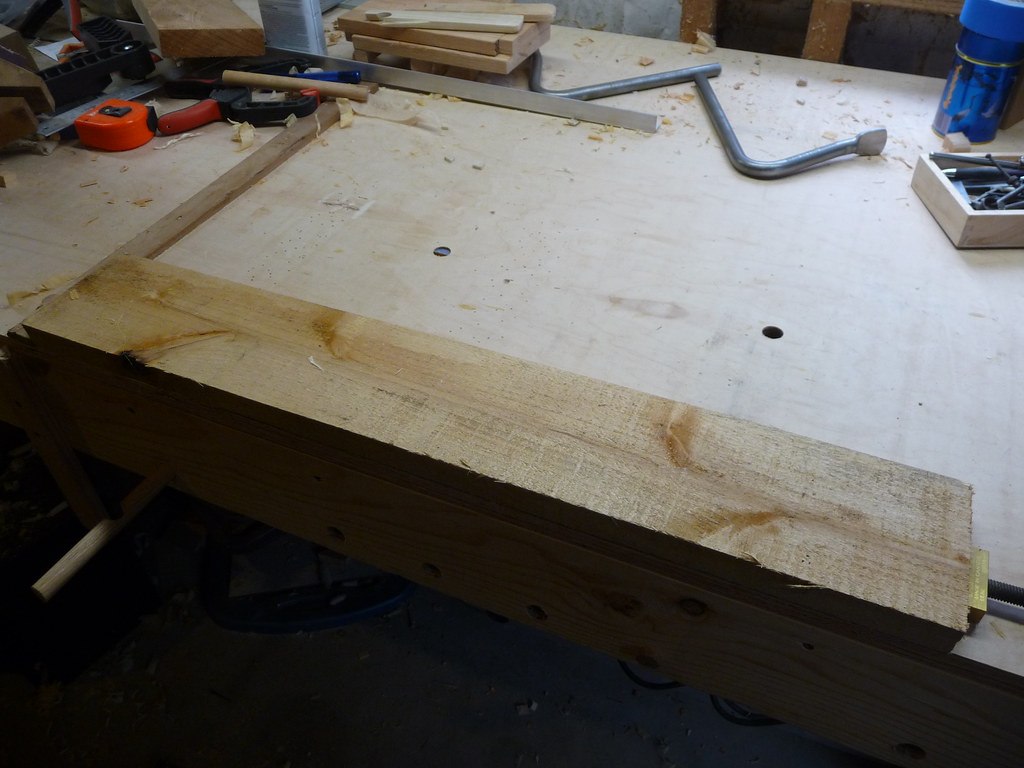
First, we pick a suitable board. This is a 9' piece of alder from a tall tree that was cut down and sliced into boards using a gasoline powered bandsaw mill. Many home-millers will use a chainsaw mill. This is just fine. The bandsaw will leave a slightly finer cut, but the chainsaw mill will let more people get into more areas making more boards... so there is no real advantage either way. What matters is that you get some wood to work!
The board I used is the one on the bottom of this image... about 7" wide and 1 and 1/4" thick.

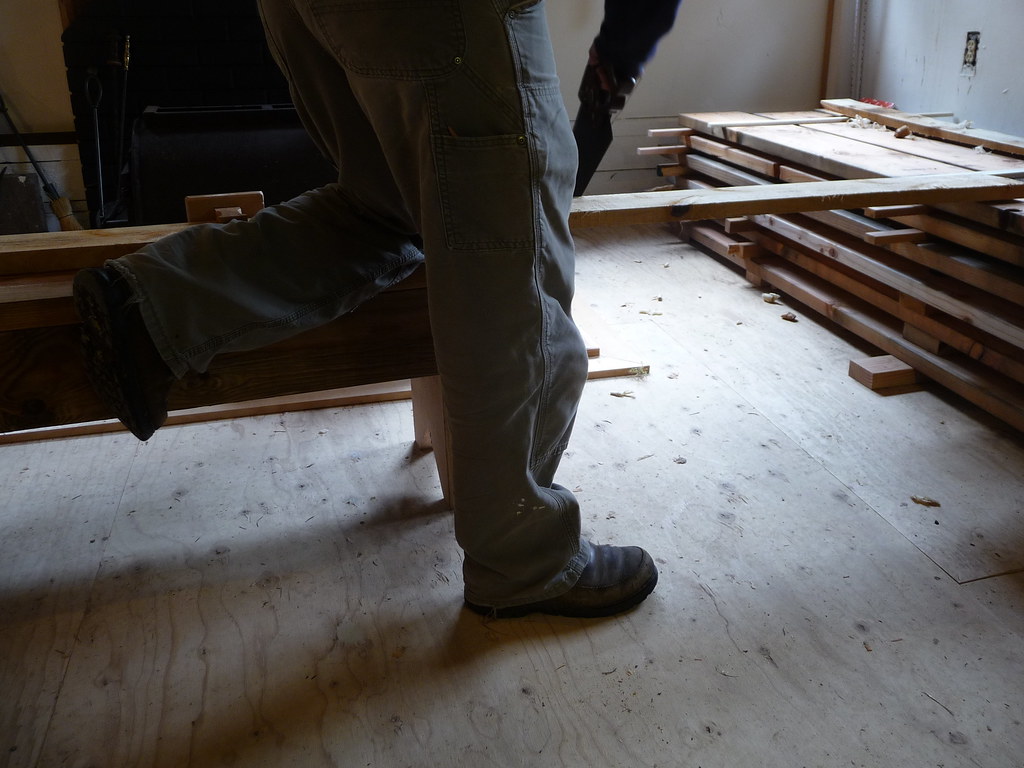
The first thing I did was to break it down into 3 pieces, roughly 3' long. I process each of them seperately. Given a nice 8' long workbench, I would do as much as possible in one pass so that they will all be the same thickness and width. My temporary workbench can't handle boards that long, and I wanted to cut this into bite-sized pieces for speed. And so I cut... Here is the board on a sawbench, with the other end resting on the woodstack. You could and should use a 2nd sawbench for the other end, but in this case the stack was the same height as my bench and it worked out better. The main thing is that you do want the other end supported so the board won't break and splinter as you are halfway through cutting it. You can see I am using a holdfast to secure the board. This is nice, but is not needed and I usually do not do it. If you have one, and there is a hole for one in your bench, it is a really nice way to work.

The next photo, terrible as it is, does show how I am using my knee to hold the board in place. This is why the sawbenches are the height that they are - each should be made for each user, right at kneecap height.
With the boards cut to length, one of them is set on the workbench. I first determine the flatter side and put that one down. You don't want the board rocking as you work, so the more stable side down will allow you to more carefully sculpt a flat side. Then when you flip it, the more troublesome side is done second, while held fully in place with your nice flat side on the bench.
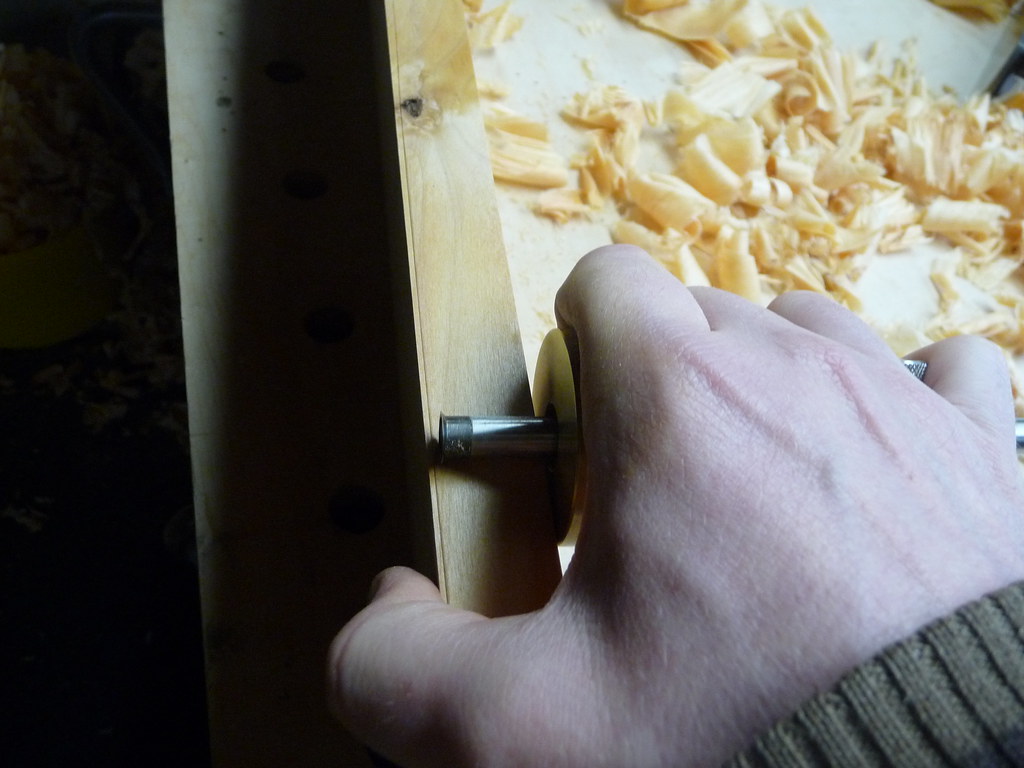
While not needed, I do like to hold the board tightly in place with a "Wonderdog". You could use a batten, a tail-vise, or any number of things. Sometimes I skip this device since it is too easy to accidentally rub the plane on top of it... but it does lend a bit of security to your first aggressive swipes. Here is a closer look at the Wonderdog and what it does. It also partially answeres a frequent qucstion: "what are all those holes in your bench for?"

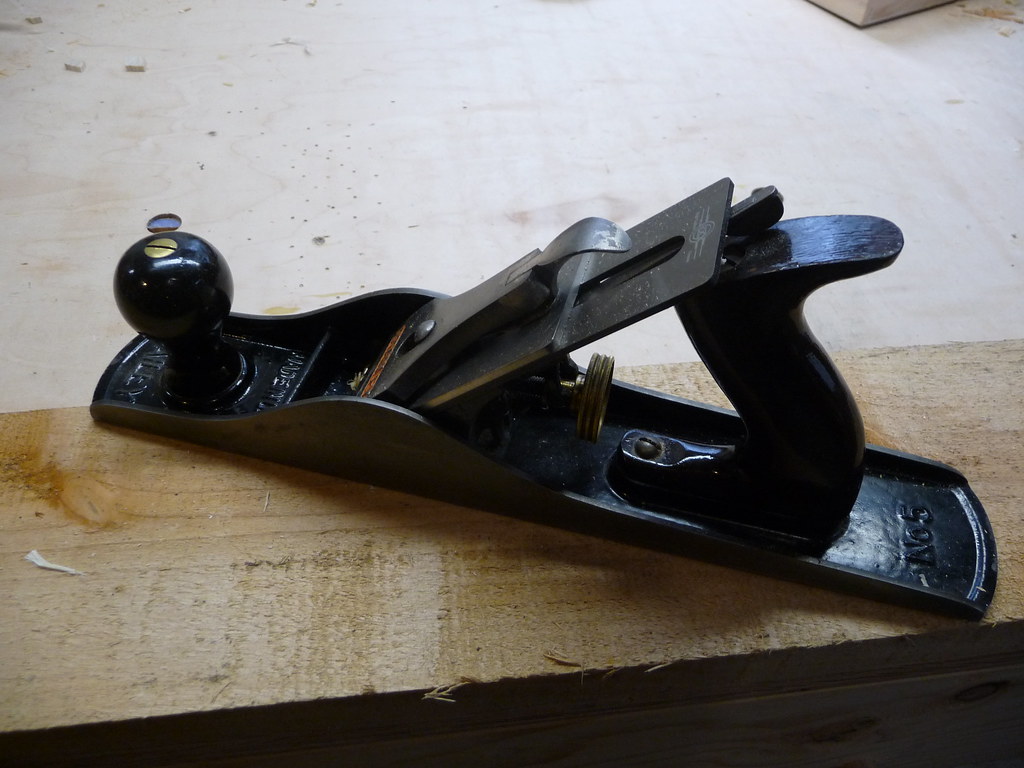
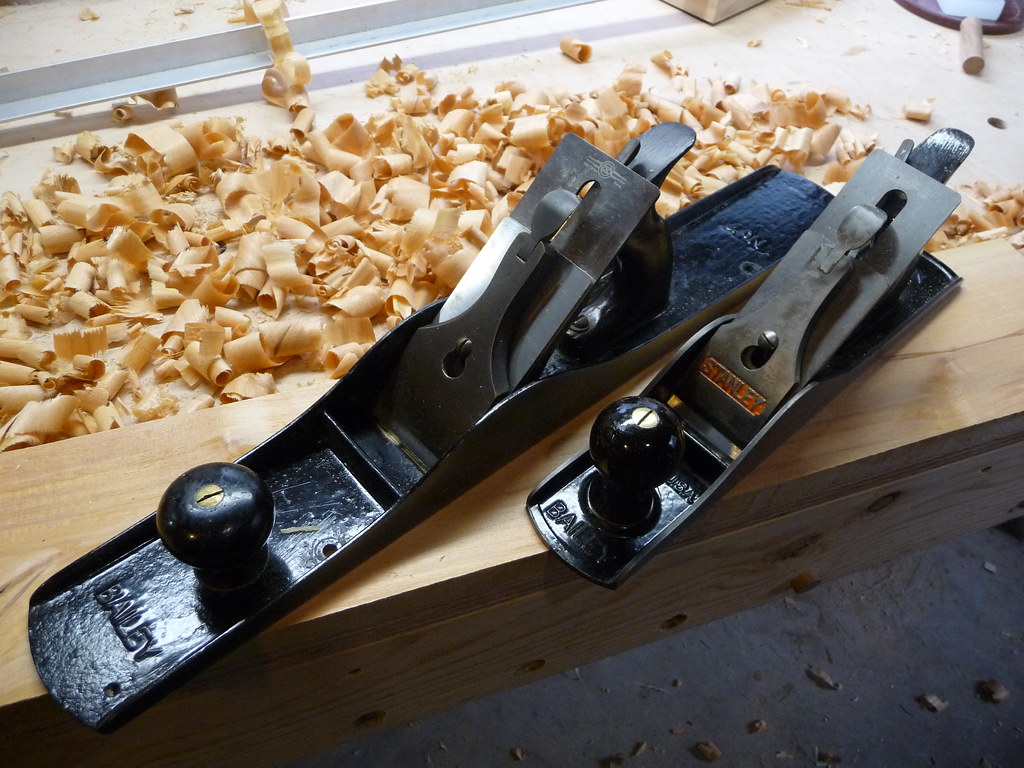
Next up, I use the jack plane, a Stanley #5 in my case, to roughly flatten the board. I did shoot a video here but it is not so usable. This is a bit of woodworking magic, and so someday I hope to do it justice, but for now I can only try to explain. The jack plane has a curved blade in it, so it takes "scoops" out of the wood. This rapidly removes most of the troublesome high spots while ignoring the low spots. After a few passes all over the board, the low spots remain as they were and the high spots are gone, You are left with a level board, but it will have a pattern like ocean waves on it. In many cases, you can leave this texture as an interesting byproduct of hand tooling. Its very nice to look at and touch, unlike saw marks. I was somewhat surprised to learn that you start with the mid-sized plane, which is the roughest tool. Then the jointer, which is the largest, and finish with a smoother, which is the smallest. It takes a little bit of understanding to realize why you go from medium size, to larger, to smaller in order of resolution. That would take a blog post or two on its own to explain, so you have to trust me. Here is the jack plane:
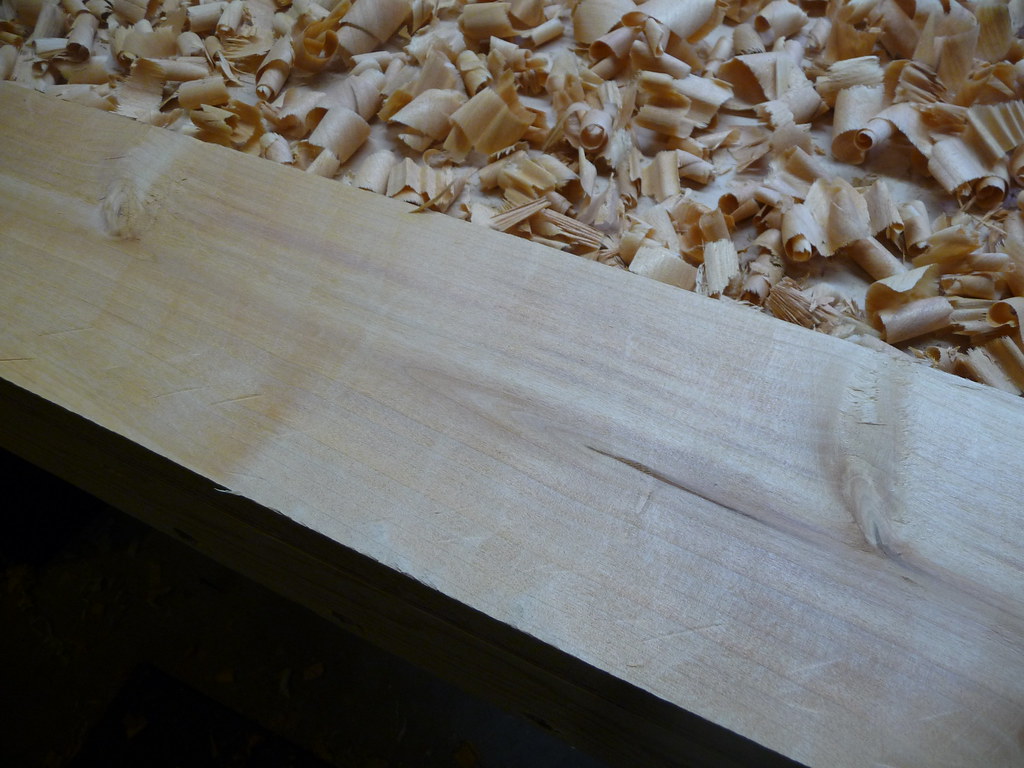
And after a few passes with it, the board is flat and shiny. Note that the photos make it look much nicer than it is. There are actually scalloped curves that are very visible on the board, and while the shine of the board is starting to come out, it is nowhere near the glass-like texture it should have. This is simply my lack of photography skills butting against the fact that wood is probably one of the most difficult to photograph materials around.
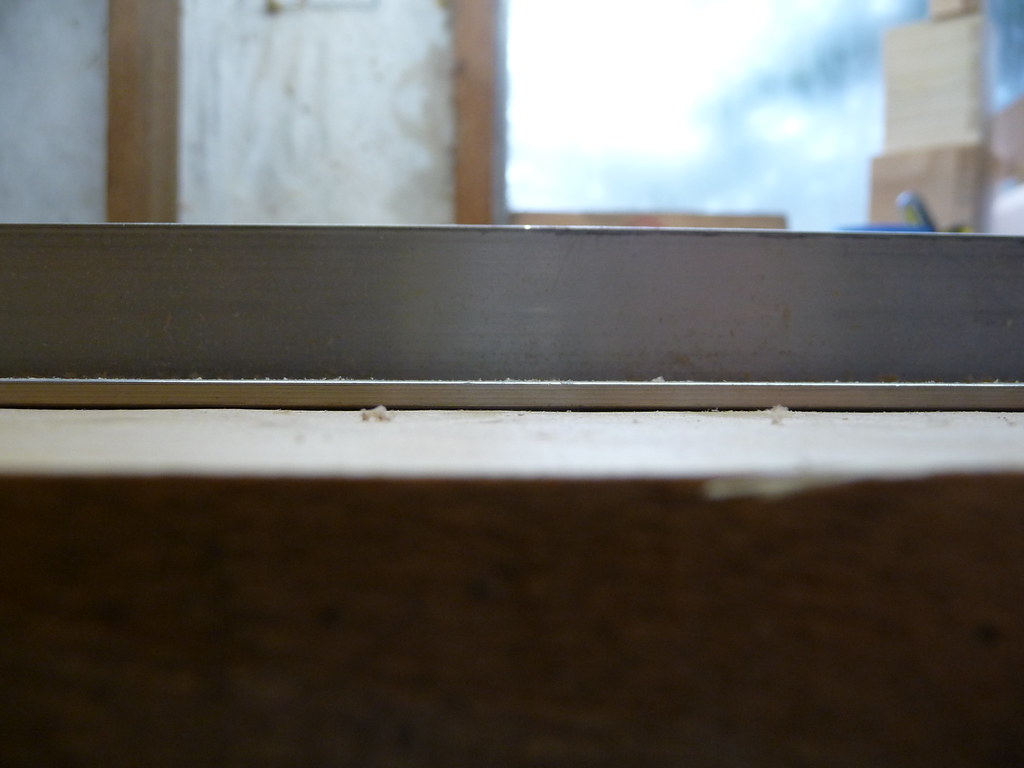
I use a cheap piece of angle-aluminum as a long straight edge. These are very accurate, and though not historical or aesthetic, they are an affordable instant answer.
This shows, although its hard to see in the photo, that while there are still some gently undulations, the board is flat.
I then use the jointer, the larger of the two in the next photo. I use a Stanley #7, but many people might prefer a #8. I am small, so I choose smaller tools. The #7 is still pretty huge. It will make the board even flatter and in many cases smooth enough to use. You could also keep using a jack plane, but swap out a straight iron for the cambered (curved) one if you were on a tight budget. You could even keep the curved one in and back it way up, taking the slimmest possible shaving, but this would take a long time and be quite tedious. Still, you do not need a jointer plane for much work.
Its not easy to photograph, but the jointer almost automatically gets the board flat. When you are getting full width, full-lenght shavings, you have a flat board. Some work with the straight-edge (or side of plane) and the aluminum angle as winding sticks, will show that the board is flat and free of warp, twist, cupping, and bowing.
The board, having one true face, is marked as such, and turned onto its edge:

This edge is then planed straight using the jointer, and again tested for square against the flat face just established, and tested for flatness and straightness using the aluminum angle. When this is good, we are halfway home!
To get the other edge straight and the board edges parallel (a consistant width along the whole board) I use a panel gauge off the edge we just established. This leaves a nice crisp knifeline where parallel would be:

The board is put on the other end, and planed down on edge (paying attention to high spots if need be) until the line is reached. A nice thing is that the knife line is such that the plane shavings will suddenly show a ragged edge when the line is reached. When this happens take one or two more shavings until you get perfect, full-length shavings and you will know you are there.
For the final thickness, the concept is the same. The edge is marked from the first true face. This board was a bit angle or wedge shaped to start with, so one end was thicker than the other. I used a smaller marking gauge, but you could use a pencil held against a ruler if you are good:
You can see in the next two photos that the line varies from less than a 1/32 to more than a 1/32nd. Not bad overall, but it is enough to need to be addressed. This is done just like the flattening on the first face, but paying attention to the high spots (thicker end of the board). There is a bit of back and forth, testing and re-testing. I have a long way to go, but have already learned so much. There is a lot of trial and error as well as just learning to feel and read the board and your tools. Note that I do not measure these lines in general, this is only for the purpose of illustrating:


With that last face flattened, we now have a board ready to use for a project. Here is the board just squared compared to the other end of it, still in the rough:
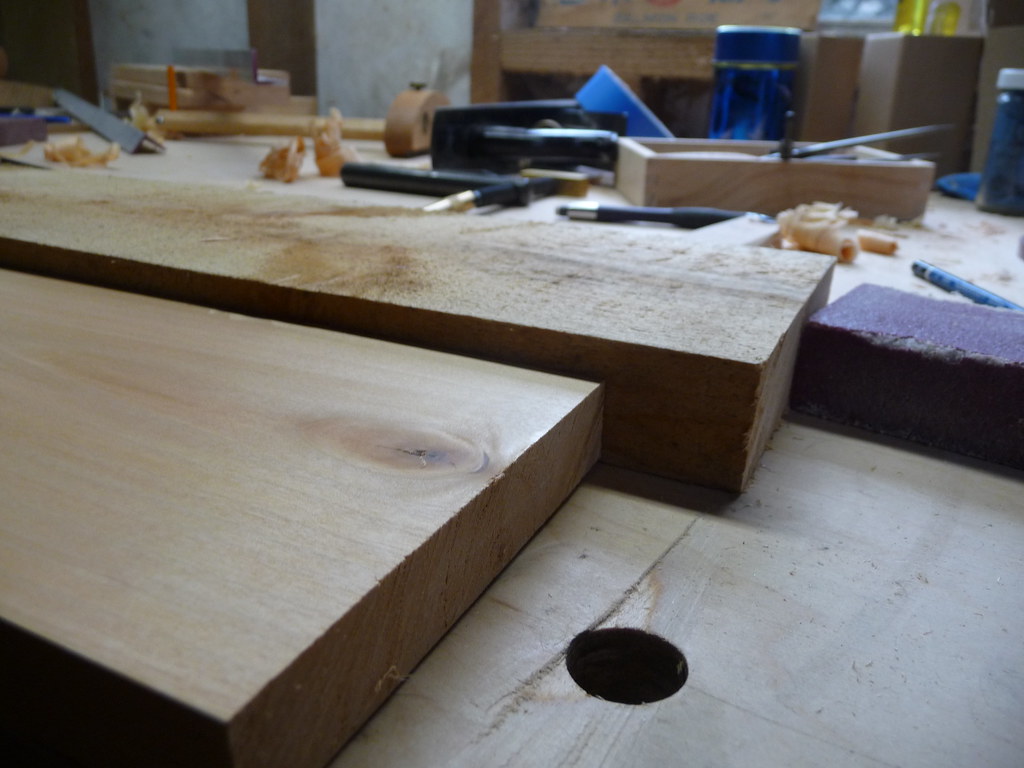

As you can see, we lost a lot of material! But, we went from a bendy, wavy, wedgy rough board to a glassy-smooth perfectly square board of the finest quality. As a byproduct, while doing this, every bit of reversing grain, knot, and otherwise problematic area became obvious. These could and should be judiciously marked with pencil or chalk. This board, finishing out at just over 3/4 of an inch, is ready to be made into something... which will happen next time!
If you have any questions on this process, please let me know and I will do what I can to address it.
Very didactic, thanks!
ReplyDeleteThese steps make us appreciate the speed of using milled lumber. One of the biggest challenges I continue to have is removing twist in a board. It's quite difficult to remove with either rough or milled lumber and really makes me focus on picking the best boards while at the lumberyard.
ReplyDeleteRich - removing twist is actually not too hard, although I admit I didn't show much of that! The use of winding sticks makes it somewhat simple. It is then important to mark the high corners with chalk or a pencil, and then simply plane away the marks you just made. I was able to do this the first time I tried, the only problem is that as you are learning, you will take off much more material than you need, just as in this photo essay I took off a whole half-inch. Someone more skilled who knows exactly where to remove a thin sliver can end up with a thicker piece.
ReplyDeleteGounthar - glad you enjoyed it!
Very nice :0) I'm about to dive into this topic myself, just might print out this blog entry and take it down the shop with me for reference...
ReplyDeleteSomeone mentioned the aluminum winding stick idea: here is a little more:
ReplyDeletehttp://www.popularwoodworking.com/woodworking-blogs/chris-schwarz-blog/the-traditional-tool-section-of-lowe%E2%80%99s
Hello,
ReplyDeleteI'm a novice woodworker. Having never taken rough stock down to a finished board, how long can I expect to plane a 4/4 rough board to say, 3/4" or even 1/2" for making craft pieces? A friend of mine who has woodworking experience, said it would take hours, and that it would be wise to invest in a thickness planer. I just don't have room for machines.
Thanks,
Mark
Mark, planing down to a 1/2 will take some time, but it is possible and I have done it. You didn't specify a length, nor your tools. With a foreplane (or scrub plane if you have to) you can make very rapid work of it. A powered planer is very nice to have but not at all necessary. If you really want a lot of 1/2" stock, a bandsaw to resaw your 4/4 stock would be the best choice.
ReplyDeleteI would advise you to build skill with a foreplane (jack plane with a 8" radius iron) and a jointer plane. It will be much faster work than you or your friend will predict.
upriver,
DeleteThank you for your reply. I have a Stanley #4, and a Bailey 14" plane, amongst router and block planes. Where would I find the 8" radius iron, and would it convert into either one of my planes. I've been checking out online woodworking stores and ebay for scrub planes.
A classmate of mine in an intro to fine woodworking mentioned that Christopher Schwartz said that scrub planes were intended for carpenters doing framing at job site, and that a foreplane is the preferred hand tool method. If either of the planes I mentioned won't do the trick, what plane do you suggest I obtain to fit the 8" radius iron?
upriver,
ReplyDeleteAddendum to my last post: I've figured out that I need to grind a blade to the required radius. There's a well done video on the Renaissance Woodworker about this process. Will a recent, inexpensive Buck Bros. jointer plane suffice for this cause?
Mark, I will get back to you soon. I have been out of town. I may do a blog post addressing your questions, since you are not the first to ask. I've talked about thicknessing before, and lots of others have too, but it is fairly straight forward and perhaps it is time to re-state some of the solutions and answer the questions.
ReplyDelete