Another suggestion was to go ahead and make boxes, even if the joints aren't perfect. I had been shying away from this approach, valid as I think it is, because I don't always have time in the shop to do multiple joints at once and like the sense of completion of these little individual joints. It was also suggested that I actually glue the joint, as the glue can affect the final appearance in a few ways.
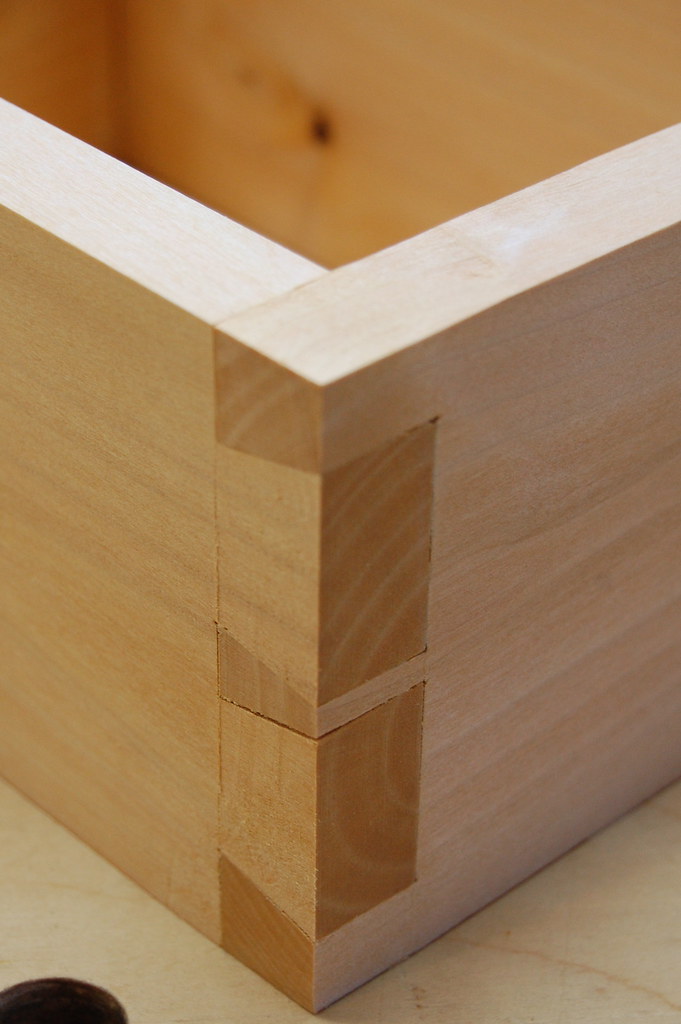
Well, yesterday I did go ahead and make a box carcase, and used a square to ensure that the floors were flat. Still not perfect, but definitely a bump forwards and with my "dovetail month" total now at 20, I feel pretty good about where I might be with 11 more. Maybe we'll make it 12 more, for 3 more boxes. I feel like this one is actually good enough for shop use or a gift to a family member (the type who would frame my childhood art class disasters and proudly display them).
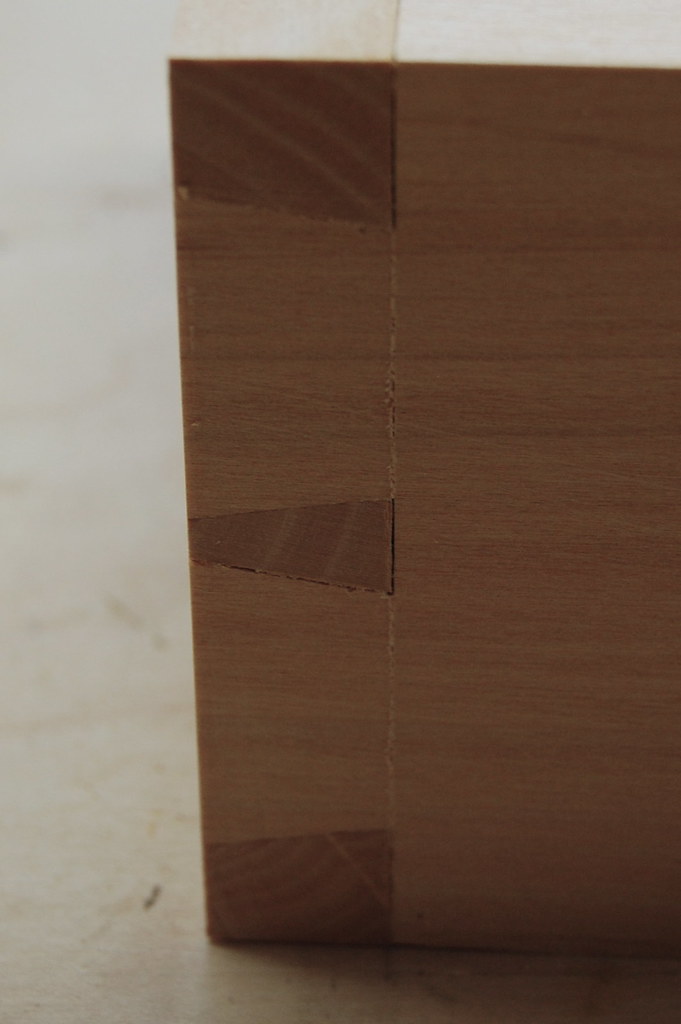
I do have to admit to cheating here though: the joints have only two tails. I am not sure if this reduction in number of joints is the reason for the sudden improvement, or if its the above. I'll resume 3 and 4 tailed joints next, but it is nice to have something go together fairly well. The shoulders one the tailboard (or the half-pin sockets) give me the most trouble. I use the dovetail saw to make them, and start the cut in a chisel V-groove cut out of the knifeline. The dovetail saw leaves a bit of a rough surface, and I think my attempts to smooth it introduce roundness. Perhaps my sawing technique needs to improve, or perhaps my chiseling does more harm than good. I'll keep working on both.
The box is made from alder milled from a tree in a neighbor's yard. I saw this tree when it was a log sitting next to the bandsaw mill. Its quite satisfying to dimension and true it by hand, and cobble together something resembling an artifact from it!

Well done! I think the suggestion of making boxes instead of just joints was a good one. I think you're far enough along to move on from just two board practice joints. Keep up the good work.
ReplyDeleteThose joints look great. One thing to remember is that certain woods compress more than others. If you are making a pine box, you can leave more meat on the wood and it will compress without damaging anything. That will give you a tight fit that looks great.
ReplyDeleteIf you are using wood like hard maple, then your cuts have to be spot on because the wood wont move without exploding.
Also, the gaps in your joins are probably because you are cutting ON your knife line. You should be cutting next to your layout line on the waste side. It takes practice because it's so easy to want to fall into the scribe line.
Your base lines look good. There is a little gap and it looks like it's because you have a little bit of compression when you were chiseling on the line. Just be mindful of compression and make sure your chisels are very shape. I touch mine up often when I am using them a lot. It helps to have an efficient system for sharpening.
I hope this helps
Thanks Baconj.
ReplyDeleteJerseytool - I am trying to cut next to the lines. If anything, I usually leave too much waste, though I am trying to cut right up to them all the time. I usually start it ok, but occassionally wander a bit too far towards the waste, leaving more to pare. I think my paring is usually what messes it up.
I'm using mostly hemlock (not so great to work) and alder (very nice, as far as I am concerned). Jim Toplin calls it "Poor Man's Cherry" and claims it is a great wood to learn on.
I do sharpen often and hone each time I work. I am sure I will get better at sharpening too, as time goes on. I look forward to the upcoming LN Tool event where I can see how others keep their chisels sharp and get a chance to try them to see if I am missing anything. Maybe I will even bring some of my tools for comparison.
Thanks for the comments!
What kind of saw are you using? Have you tried a few different saws? Sometimes a different saw can make all the difference. Sometimes a sharpened saw will make all the difference. Although I am sure you have a nice saw.
ReplyDeleteThe way I learned to saw to a line was to take a piece of wood and a dovetail marker and score(with a knife) as many lines as I can on the board about a quarter to three eights of an inch apart. You can make verticle lines and sloped lines just like you would encounter while making dovetails.
Then you can practice repetitive cutting (and marking). Make a baseline, mark and cut away. When you have filled the board, cut off the end and remark and repeat.
Having a chance to make cut after cut will allow your muscles to retain muscle memory with regaurds to cutting straight and next to the line.
If you do this for several days you will greatly improve your control of the light saber... er I mean dovetail saw.
I practiced until I couldn't stand it. Then I did it some more the next day. You will get to the point of cutting fast accurate lines in your practice board. Eventually you will get to a point where you wont need to pare your cuts. Thats will save you tons of time, especially if your project has a couple dozen dovetails.
If you think about it, doing it this way causes you to get real saw time without having to stop and chisel out waste and complete a dovetail. You end up practicing your marking gauge, dovetail marker, and verticle marking skills. And you get used to the feel of the saws personality, quarks, and sweet spots. And oh how sweet it is.
Hi Upriver ... Looks like its all coming together bit by bit. Not that I have done loads of joints as you know, but I have noticed that most joints improve their appearance with glue. How about a video (or couple of videos) of you doing the key parts... marking, sawing & chiselling? Im sure some of the ninjas would offer advice based on actually watching you?
ReplyDelete