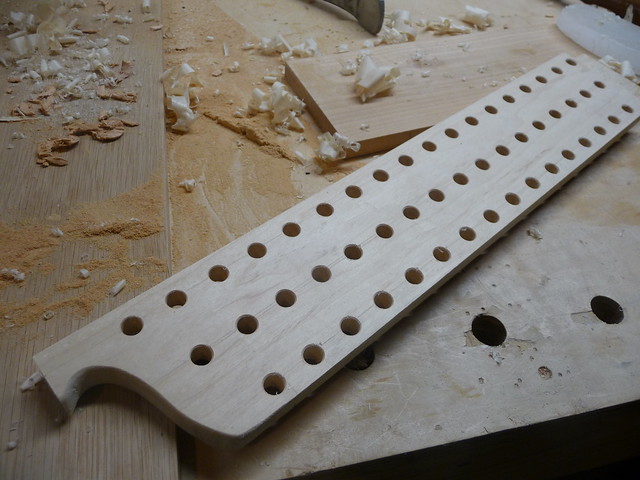
The stretchers are all complete and believe me I am eager to put the base together. However, it is easier to do some operations on the legs while they are still loose; namely, the hole for the vise screw, the mortise for the parallel guide, and the holdfast holes. To properly place the hole for the vise screw, I first needed to build the chop.
Here it is roughed out:
That is 4 inches of cherry, and it was not easy to rip nor to shape. Why so thick when the usual is closer to 2 inches? It will become clear.
I also cut the mortise for the parallel guide, and built the guide:
This is made of some hard maple(?) I found on the streets of Portland in someone's trash pile. It is extremely dense and heavy. Not the most interesting grain patterns, but that is perfect for this task.
I've been having trouble finding oak straight enough for my drawbore pins to attach the guide, but I am not done sifting through my stash yet, either.
Thursday, August 30, 2012
Tuesday, August 21, 2012
[Workbench] Legs and Stretchers
There is little to say about laminating, planing, and gluing up the legs and stretchers for the Roubo workbench, but that is what has been happening. The only note I have really made is that the inner boards, which make up the tenons, should be planed to exact finished dimension but th outer boards should be left fat so that they can be planed in the end. This is probably obvious to someone who has done this kind of thing before (or is smarter than I am) but it did occur to me after the first leg, so only one of them might be a few hairs under spec; the rest are good to go at 5" square.
Not photographed because there is not much to see yet is the vise chop which I am making out of wild cherry lumber. It will be much thicker than most, because I intend to create a mortise for the roller guide to slip into (a la Jim Tolpin).
I did use the tablesaw to chamfer the track for the sliding deadman. Every time I use that thing, I think "I do not want to do this anymore". I should listen to myself at some point, but I still suffer thinking that powertools are faster. It may have been, in this case, since it took just a second to set it up and cut the two chamfers, but I was tense and uncomfortable the entire time. Planing, on the other hand, is fun and relaxing. Maybe I should just sell the tablesaw and be done with it. "But what if I need to install another floor someday?" I ask myself... Even I do not relish the thought of ripping dozens of floor boards by hand. Renting might be the answer here.
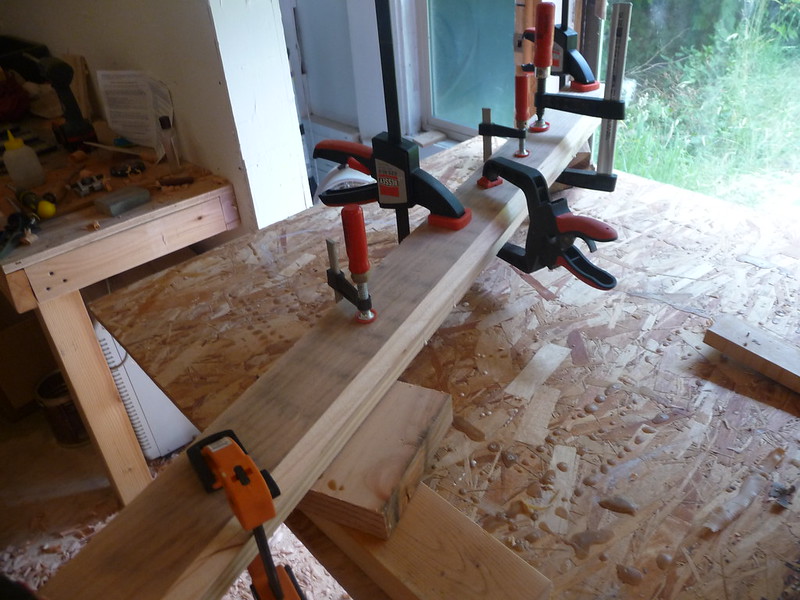
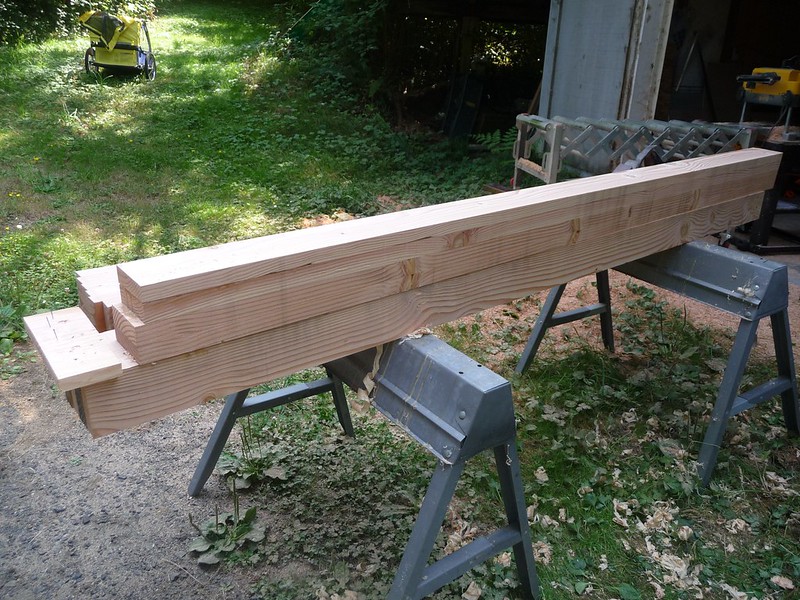
Here's the front stretcher, with deadman track, glued up:
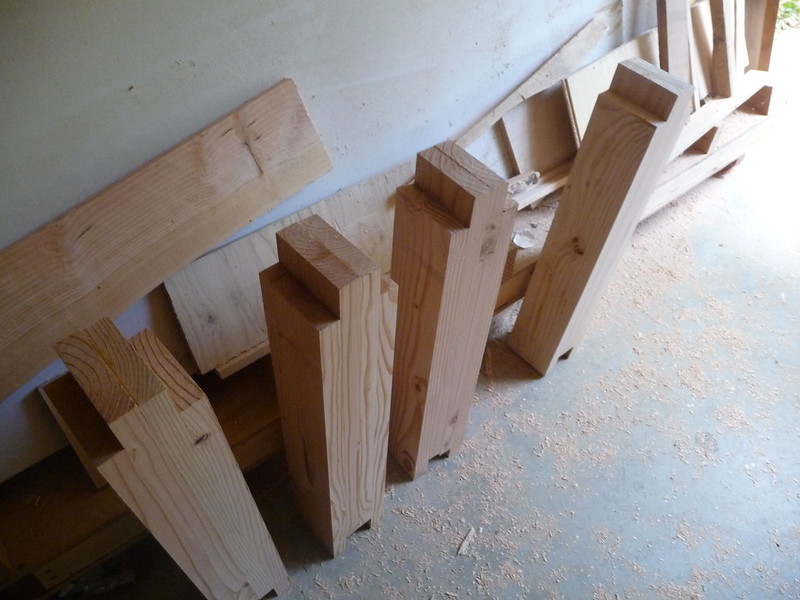
Anyway, the legs are essentially complete, although the tenons need a little tuning despite using nailed-on spacer blocks to align them. They also need to be trimmed to length (or is it now "height"?).
Here are some legs:
Next up will be boring holes and mortises for holdfasts, vise, stretchers, and parallel guide in the legs. Then the front and rear stretchers will be installed, and then the side stretchers.
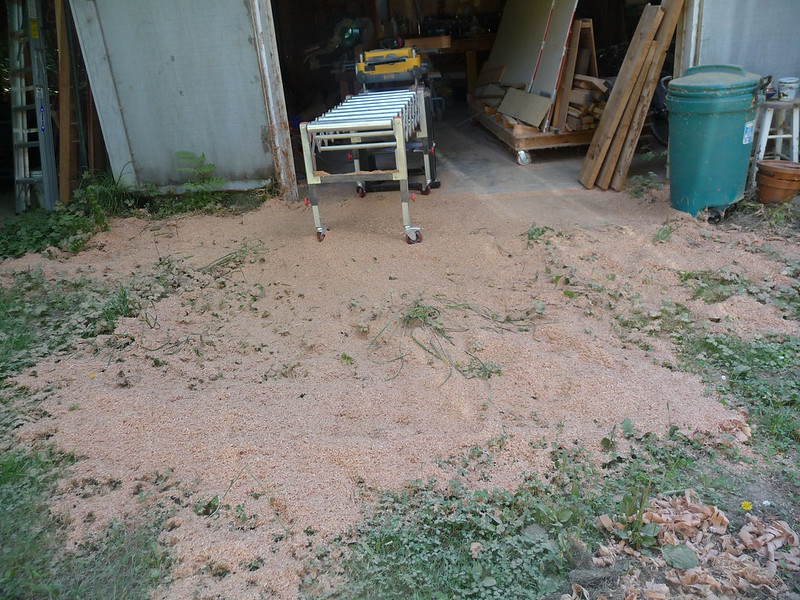
All of the planing has made quite a pile of dust. The wood-loving mushrooms in my yard are going to have a very good year:
Not photographed because there is not much to see yet is the vise chop which I am making out of wild cherry lumber. It will be much thicker than most, because I intend to create a mortise for the roller guide to slip into (a la Jim Tolpin).
I did use the tablesaw to chamfer the track for the sliding deadman. Every time I use that thing, I think "I do not want to do this anymore". I should listen to myself at some point, but I still suffer thinking that powertools are faster. It may have been, in this case, since it took just a second to set it up and cut the two chamfers, but I was tense and uncomfortable the entire time. Planing, on the other hand, is fun and relaxing. Maybe I should just sell the tablesaw and be done with it. "But what if I need to install another floor someday?" I ask myself... Even I do not relish the thought of ripping dozens of floor boards by hand. Renting might be the answer here.
Here's the front stretcher, with deadman track, glued up:
Anyway, the legs are essentially complete, although the tenons need a little tuning despite using nailed-on spacer blocks to align them. They also need to be trimmed to length (or is it now "height"?).
Here are some legs:
Next up will be boring holes and mortises for holdfasts, vise, stretchers, and parallel guide in the legs. Then the front and rear stretchers will be installed, and then the side stretchers.
All of the planing has made quite a pile of dust. The wood-loving mushrooms in my yard are going to have a very good year:
Thursday, August 16, 2012
[Workbench] Flattening and Patching
The two large beams I created, being about 11.5" apiece could fit through my planer. However, they are very heavy and I would certainly need some assistance feeding them through. I would like to say that my work ethic and commitment to traditional methodology prevented me from using the planer, but in fact it was a kind of impatience and laziness. I went ahead and joined the two hunks into the final 22 3/4" bench top.
I then realized how much work it would be to flatten the whole thing with a jack plane, so I got my 2.5 year old daughter to do it. I told her that it would be fun, and she believed me!
Once she had the top relatively flat (although quite scalloped since it is a jack plane) I was able to trim the ends. Again, I was tempted to use a circular saw but decided to use my coarse crosscut saw. It was way easier than I had thought, and did not take very long. Following the cutline was not a problem and the result is fairly square. It will need a tiny bit of truing once the bench is all assembled but not a lot. This is a good thing because trimming 4" of end grain doesn't sound all that fun.
Here's the top, at its final dimension of just over 4" thick, 22 3/4" wide, and 7' 6" long:
You can see that despite intentionally choosing the clearest wood possible, there are still a number of gnarly areas. Ignoring the very good wisdom of testing materials before implementation, I mixed up some epoxy and added food coloring, a bit of orange and a more substantial dose of brown, thinking it would look vaguely like juices from a fir tree. The result is more like something from a horror film, but it will mostly be planed away and hopefully not too bad:
Next I will flatten the bottom (since that is where the legs will attach) and build the legs. I've ordered vise hardware and now need to design the chop.
I then realized how much work it would be to flatten the whole thing with a jack plane, so I got my 2.5 year old daughter to do it. I told her that it would be fun, and she believed me!
Once she had the top relatively flat (although quite scalloped since it is a jack plane) I was able to trim the ends. Again, I was tempted to use a circular saw but decided to use my coarse crosscut saw. It was way easier than I had thought, and did not take very long. Following the cutline was not a problem and the result is fairly square. It will need a tiny bit of truing once the bench is all assembled but not a lot. This is a good thing because trimming 4" of end grain doesn't sound all that fun.
Here's the top, at its final dimension of just over 4" thick, 22 3/4" wide, and 7' 6" long:
You can see that despite intentionally choosing the clearest wood possible, there are still a number of gnarly areas. Ignoring the very good wisdom of testing materials before implementation, I mixed up some epoxy and added food coloring, a bit of orange and a more substantial dose of brown, thinking it would look vaguely like juices from a fir tree. The result is more like something from a horror film, but it will mostly be planed away and hopefully not too bad:
Next I will flatten the bottom (since that is where the legs will attach) and build the legs. I've ordered vise hardware and now need to design the chop.
Sunday, August 12, 2012
[Workbench] Laminating Beams and a Little Something Extra
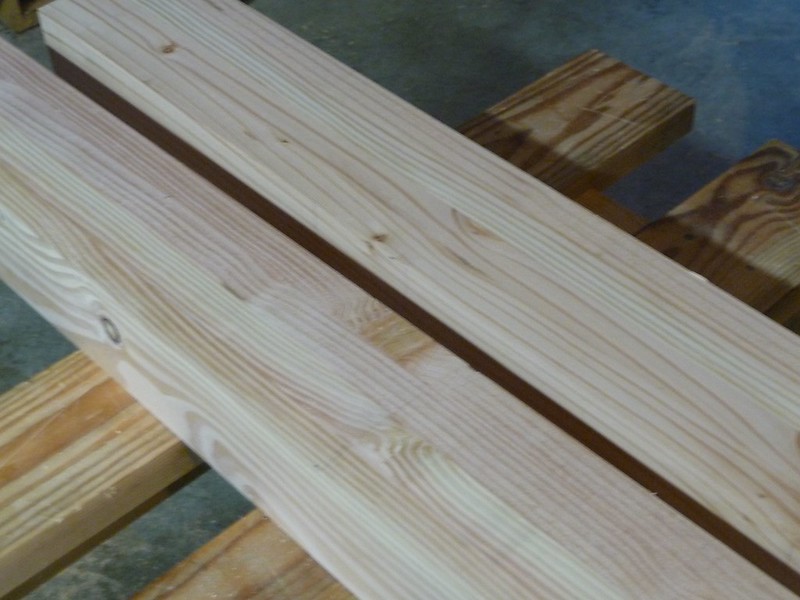
The workbench top is coming together, literally. All the boards have been glued into groups of 2 and then 4. Those four are now joined into roughly 12" wide groups of 8. One more glue up and planing and the top will be complete.
To get the beams to fit nicely together, I had to do some jointing. I lack a power jointer, and would have used it in this case. Instead, I had to figure out how to plane these long beams since they would not fit on my current bench. The simplest answer I could come up with was to clamp the other beams together, creating enough mass to hold still, and then use that resulting hunk as the workbench. That's what it is, after all! I nailed on a simple planing stop, and this worked perfectly.
I've been really enjoying this wooden jointer plane, and that is what I used for these:
The resulting beams were square and ready to be glued up into superbeams. One is dry, the other is in clamps still. Needless to say, they are quite heavy and I am not sure if I will try to run them through the power planer or not. I will be finishing them by hand regardless.
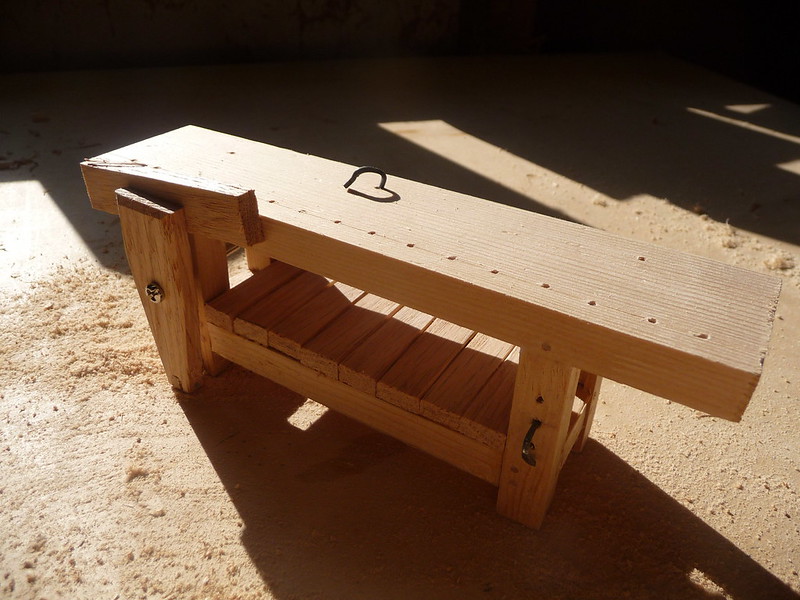
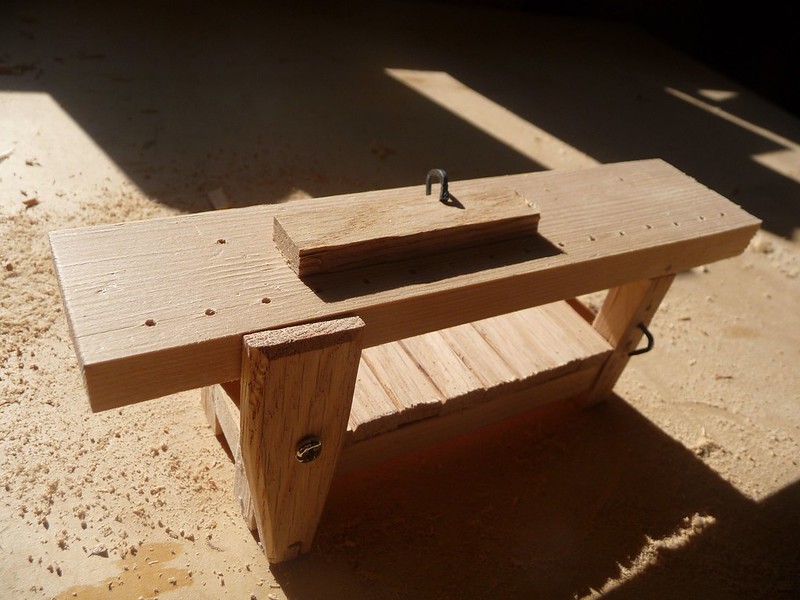
While the glue was setting, I started to think about the rest of the construction of the bench, and even did a practice run, ironing out a lot of the kinks in my understanding. Here is the result:
The vise is wholly functional, but it definitely needs a new handle. I will also admit that there is only one hole in the parallel guide, since I do not anticipate adjusting the capacity all that often. The vise is otherwise a pretty faithful version of the common leg vise. The guide is pegged into a mortise in the chop. The holdfasts are also functional, but not as finely made as the others I use. These were fine finish cut nails in another life.
Yes, I even pegged the tenons. I did not go so far as to drawbore them, but I did create pegs from toothpicks and they improved the rigidity greatly:
To get the beams to fit nicely together, I had to do some jointing. I lack a power jointer, and would have used it in this case. Instead, I had to figure out how to plane these long beams since they would not fit on my current bench. The simplest answer I could come up with was to clamp the other beams together, creating enough mass to hold still, and then use that resulting hunk as the workbench. That's what it is, after all! I nailed on a simple planing stop, and this worked perfectly.
I've been really enjoying this wooden jointer plane, and that is what I used for these:
The resulting beams were square and ready to be glued up into superbeams. One is dry, the other is in clamps still. Needless to say, they are quite heavy and I am not sure if I will try to run them through the power planer or not. I will be finishing them by hand regardless.
While the glue was setting, I started to think about the rest of the construction of the bench, and even did a practice run, ironing out a lot of the kinks in my understanding. Here is the result:
The vise is wholly functional, but it definitely needs a new handle. I will also admit that there is only one hole in the parallel guide, since I do not anticipate adjusting the capacity all that often. The vise is otherwise a pretty faithful version of the common leg vise. The guide is pegged into a mortise in the chop. The holdfasts are also functional, but not as finely made as the others I use. These were fine finish cut nails in another life.
Yes, I even pegged the tenons. I did not go so far as to drawbore them, but I did create pegs from toothpicks and they improved the rigidity greatly:
Monday, August 6, 2012
[Workbench] And So It Begins (plus a School Box)
About ten months ago, I stacked some douglas fir boards to acclimate. Here's the pile:
They were 20' long 2x10s at the lumber yard, but I had them cut into 10' lengths there to make them more manageable. What I actually need are closer to 2x4s, but wider boards are generally straighter and higher-quality wood from older, larger trees. This stuff is not wholly clear of defects or free of knots, but they are indeed fairly straight and should suffice for this purpose.
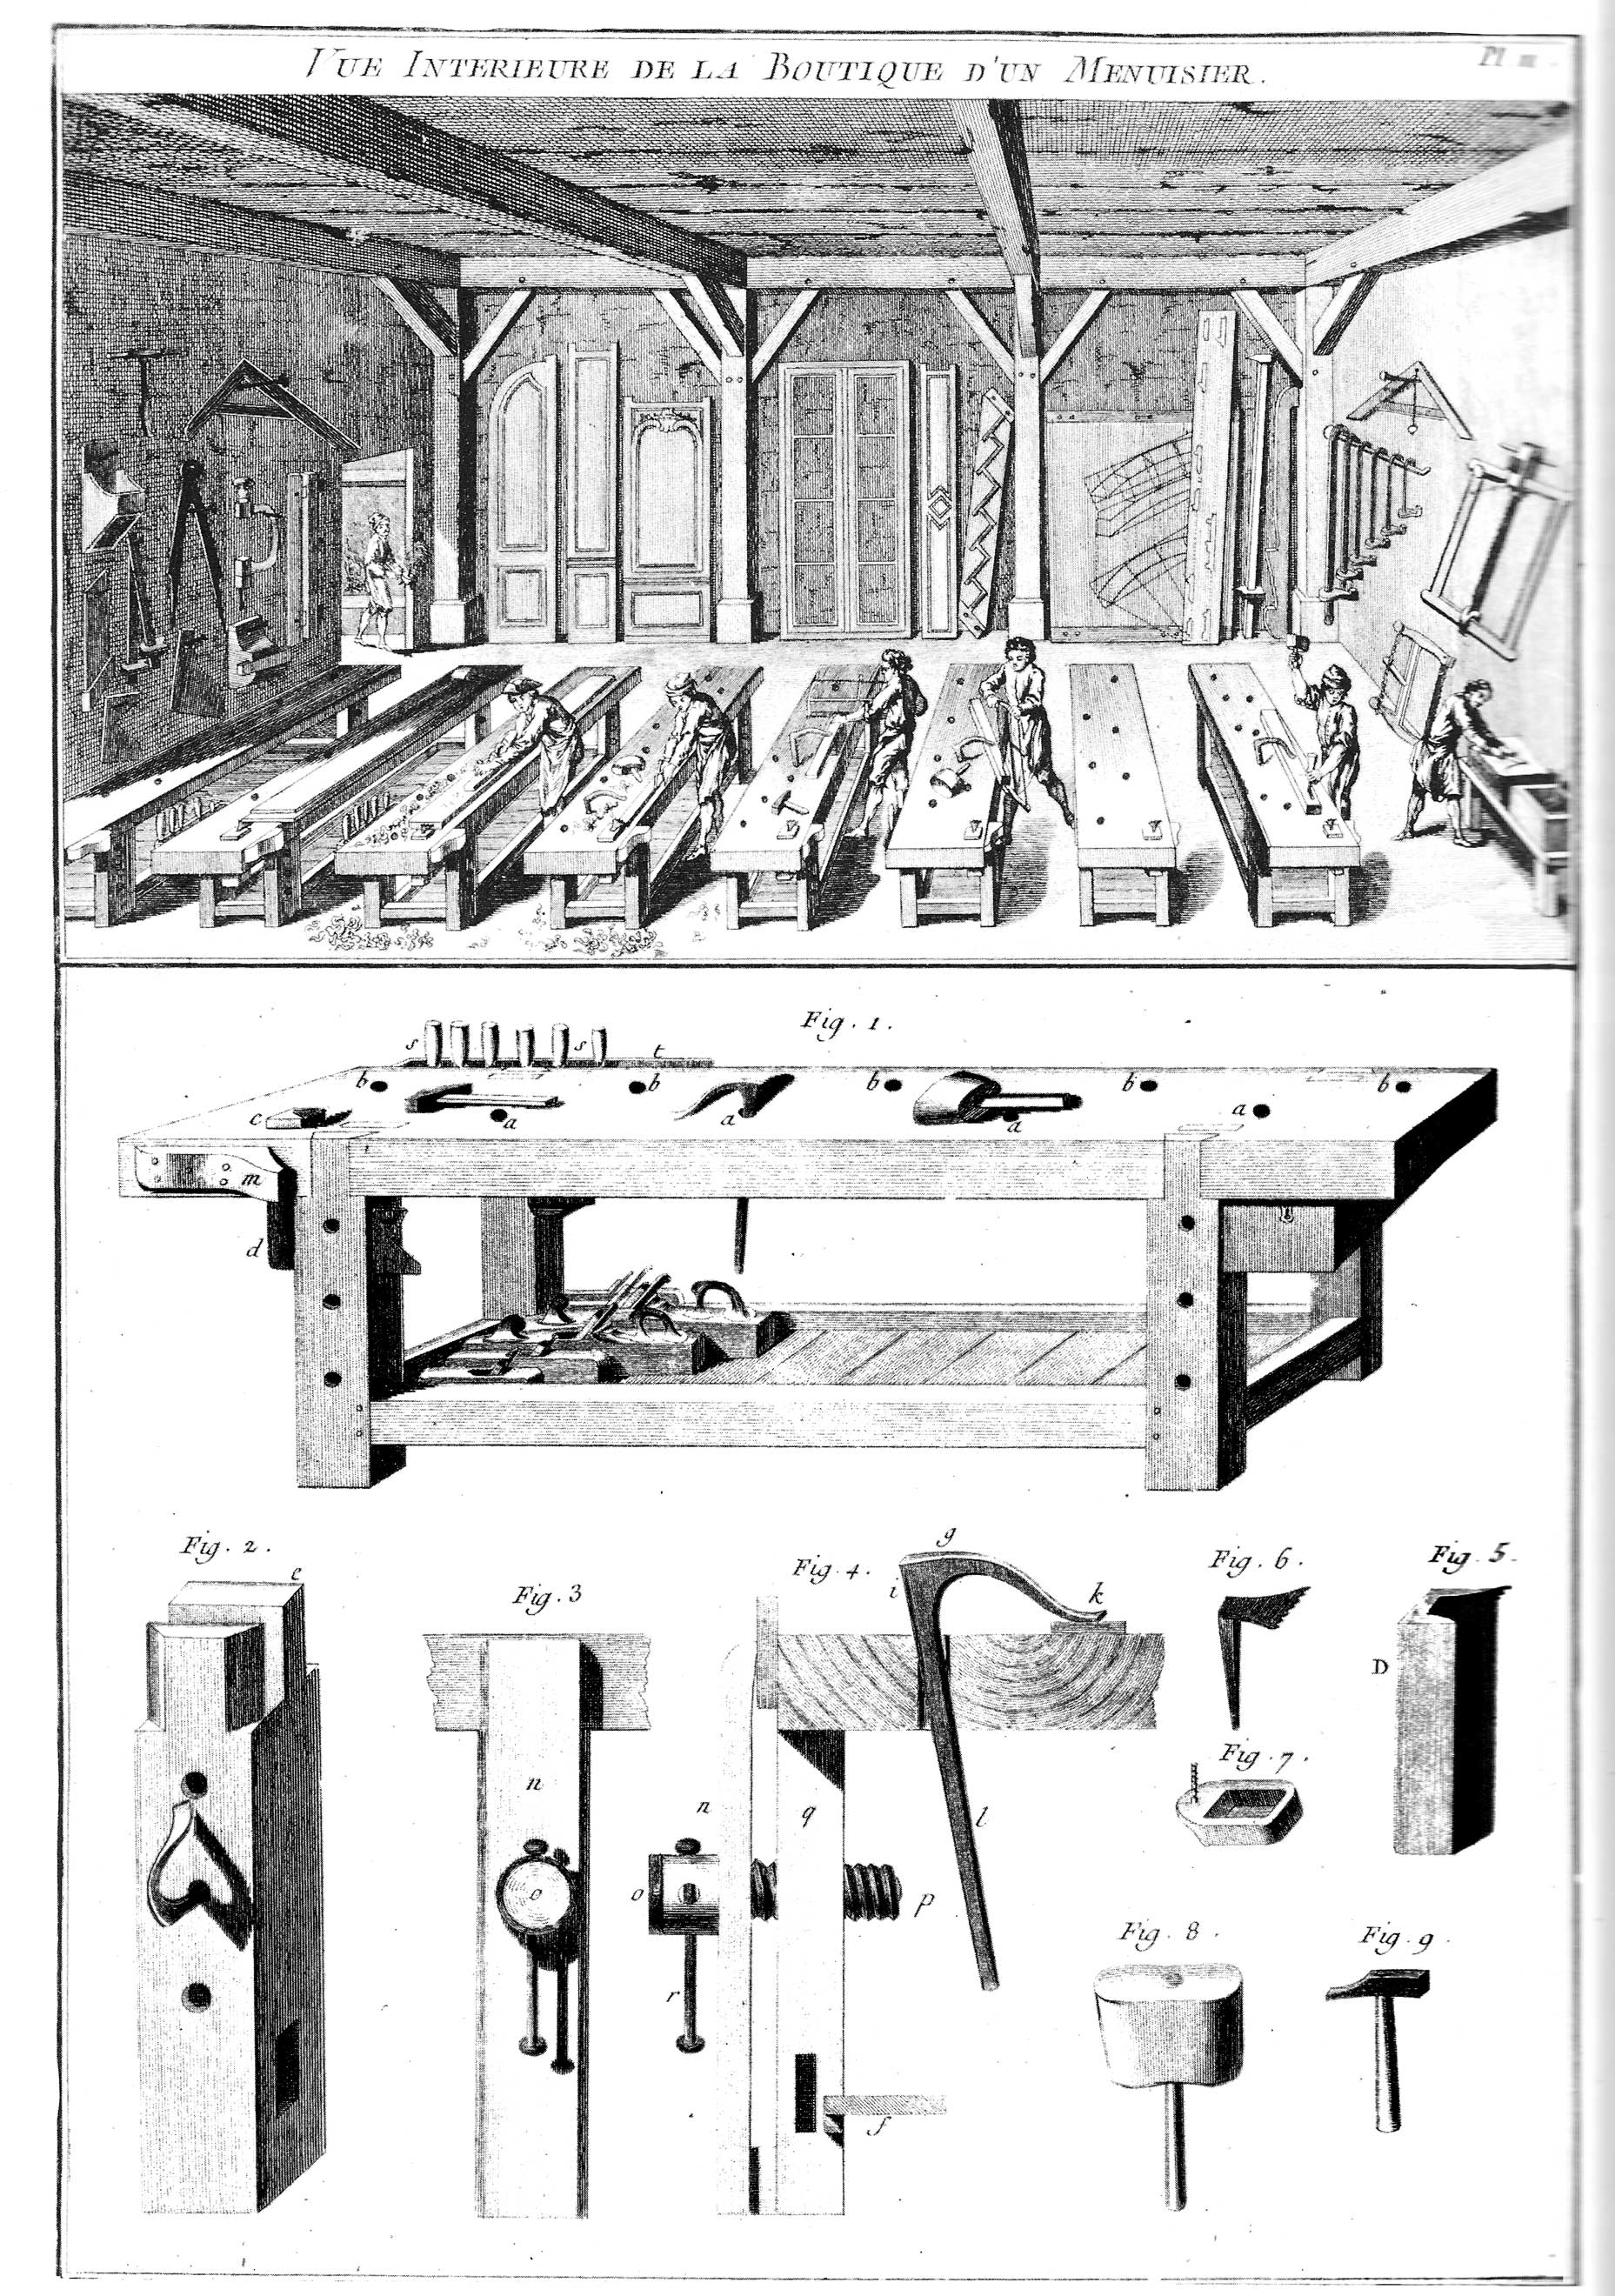
I am planning to build an 18th Century French workbench, commonly known as "The Roubo. It is a fairly popular design (perhaps even trendy) among contemporary woodworkers, but that is not the reason for my choice. After looking at dozens of styles and designs, this is the only one which truly spoke to me. It is simple, clean, as sturdy as possible, and both sensible and flexible. An original looked something like this:
Of note are the overall blocky dimensions, the front legs and stretchers being absolutely flush with the edge of the top, and the holes for holdfasts in the legs. I will likely add a leg vise to the front left leg, and some other workholders. At any rate, this massive table is going to become my main bench with any luck.
I'm starting with the top; this is so that the bench can begin seeing use before the legs are complete. I also plan to build the legs to fit the top, which seems simpler to me than the reverse.
The top will be a 24" (or so) glued-up collection of roughly 4" thick boards, and be about 8' long. Since my boards were 10', that gives me 2 feet to eliminate on each board in case the ends are checked (cracked) or have bad knots.
After cutting the boards to length and ripping them in 2 (I did use a tablesaw, sorry purists), I planed them straight and flat so that they would fit together without gaps.
Here are the boards ready to go, much cleaner than they were from the lumberyard. I am not worried about the rounded edges on one side, since they will be planed dramatically once assembly is complete.
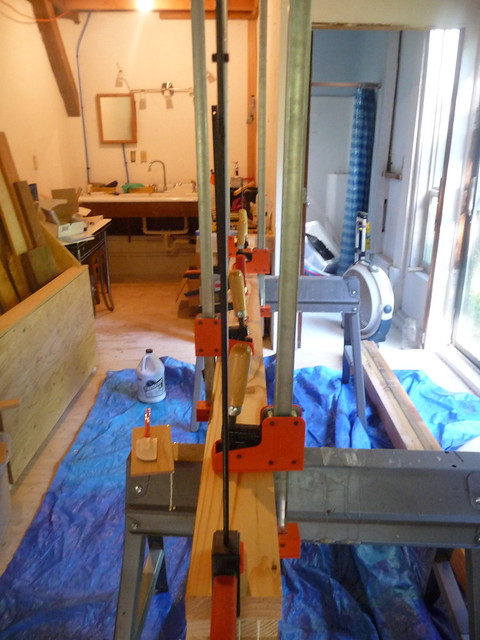
These were slathered in glue (yes, I bought a gallon jug of it) and held together with about every long vise around. There is a vise every foot, and that is maybe still not as many as the ideal.
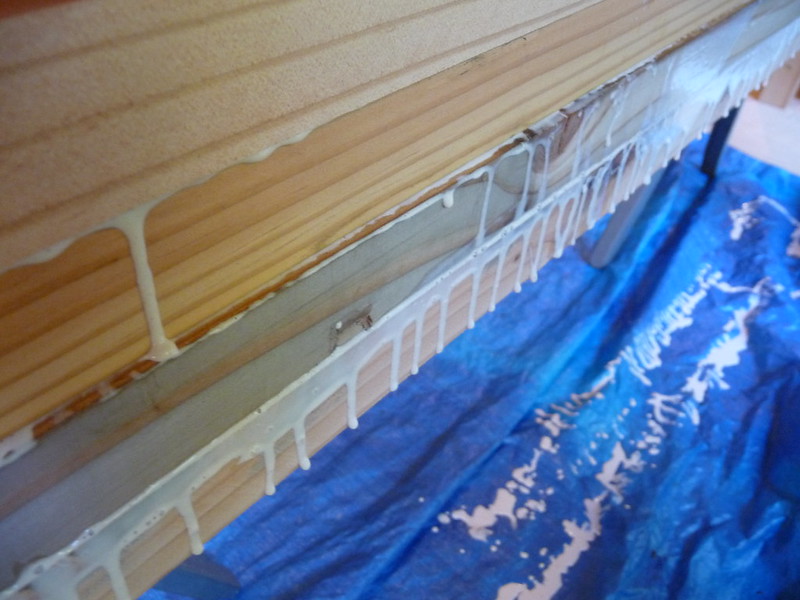
A great deal of glue came out as the vises were tightened. It might seem wasteful but I really wanted to ensure good coverage and adhesion.
The end result is not at all pretty, yet. The boards are not perfectly aligned, and the rounded edges make humps and shadows where the boards join. Planing the resulting big beam will take care of that in short order. This is the result once the glue has dried, before the planing (which will happen next time).
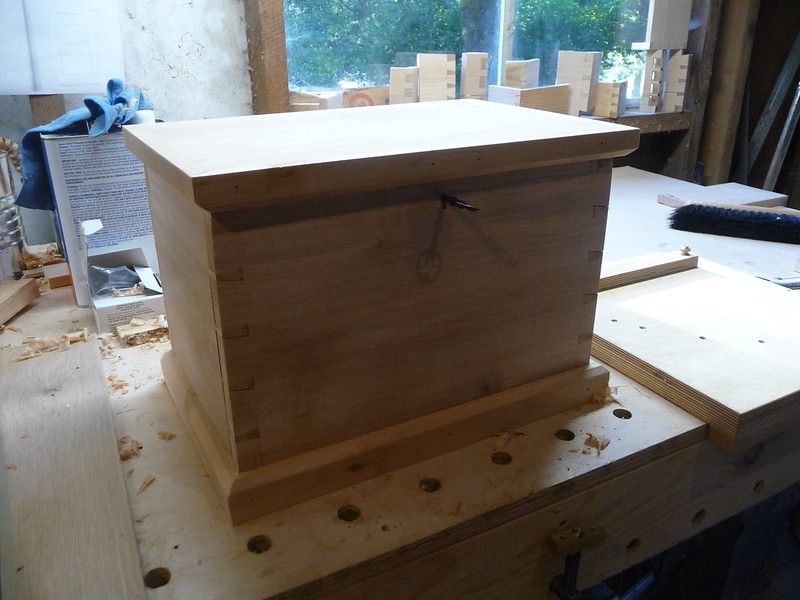
Meanwhile, I attached the moulding to another school box. This one still needs its outside surfaces smoothed (and the dovetails leveled) and then some finish. It went together way faster than the previous ones, just 3 sessions of a couple hours each. I believe the experience gained with the tool chest and its vast array of dovetails was rather valuable. I was also able to make this box completely by memory with no consulting of the text, although I did grab dimensions from an existing box using dividers.
2 of the 4 beams for the top are now glued up. 2 more need to be built, and then all need to be planed and glued to each other, and then planed again. At that point, the legs will be built. Soon a decision needs to be made regarding the vise hardware and how it will be mounted, as these accommodations are much simpler to arrange before the bench is built.
They were 20' long 2x10s at the lumber yard, but I had them cut into 10' lengths there to make them more manageable. What I actually need are closer to 2x4s, but wider boards are generally straighter and higher-quality wood from older, larger trees. This stuff is not wholly clear of defects or free of knots, but they are indeed fairly straight and should suffice for this purpose.
I am planning to build an 18th Century French workbench, commonly known as "The Roubo. It is a fairly popular design (perhaps even trendy) among contemporary woodworkers, but that is not the reason for my choice. After looking at dozens of styles and designs, this is the only one which truly spoke to me. It is simple, clean, as sturdy as possible, and both sensible and flexible. An original looked something like this:
Of note are the overall blocky dimensions, the front legs and stretchers being absolutely flush with the edge of the top, and the holes for holdfasts in the legs. I will likely add a leg vise to the front left leg, and some other workholders. At any rate, this massive table is going to become my main bench with any luck.
I'm starting with the top; this is so that the bench can begin seeing use before the legs are complete. I also plan to build the legs to fit the top, which seems simpler to me than the reverse.
The top will be a 24" (or so) glued-up collection of roughly 4" thick boards, and be about 8' long. Since my boards were 10', that gives me 2 feet to eliminate on each board in case the ends are checked (cracked) or have bad knots.
After cutting the boards to length and ripping them in 2 (I did use a tablesaw, sorry purists), I planed them straight and flat so that they would fit together without gaps.
Here are the boards ready to go, much cleaner than they were from the lumberyard. I am not worried about the rounded edges on one side, since they will be planed dramatically once assembly is complete.
These were slathered in glue (yes, I bought a gallon jug of it) and held together with about every long vise around. There is a vise every foot, and that is maybe still not as many as the ideal.
A great deal of glue came out as the vises were tightened. It might seem wasteful but I really wanted to ensure good coverage and adhesion.
The end result is not at all pretty, yet. The boards are not perfectly aligned, and the rounded edges make humps and shadows where the boards join. Planing the resulting big beam will take care of that in short order. This is the result once the glue has dried, before the planing (which will happen next time).
Meanwhile, I attached the moulding to another school box. This one still needs its outside surfaces smoothed (and the dovetails leveled) and then some finish. It went together way faster than the previous ones, just 3 sessions of a couple hours each. I believe the experience gained with the tool chest and its vast array of dovetails was rather valuable. I was also able to make this box completely by memory with no consulting of the text, although I did grab dimensions from an existing box using dividers.
2 of the 4 beams for the top are now glued up. 2 more need to be built, and then all need to be planed and glued to each other, and then planed again. At that point, the legs will be built. Soon a decision needs to be made regarding the vise hardware and how it will be mounted, as these accommodations are much simpler to arrange before the bench is built.
Monday, July 30, 2012
Tool Chest Completed and Another School Box Begins
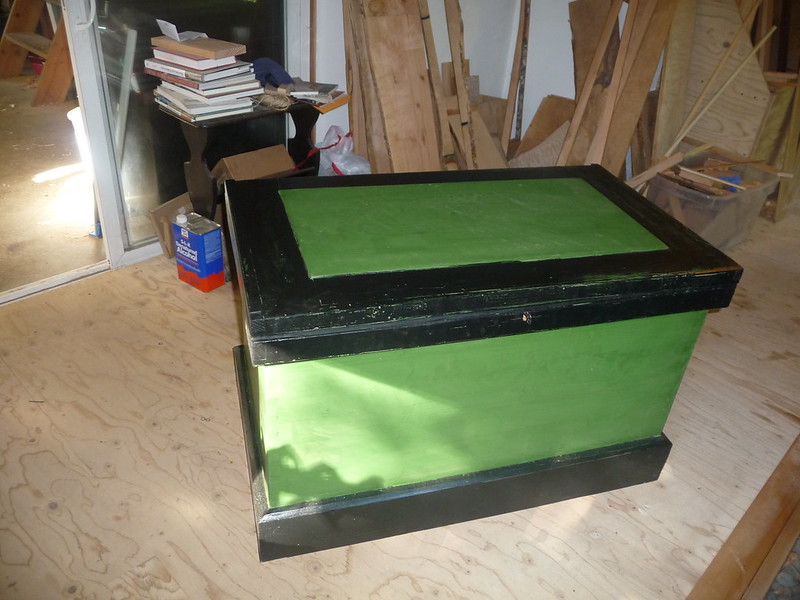
I could (and probably will) continue to tweak the tool chest forever. With a bit of black milk paint on the faces of the tills, and the whole thing oiled a few times, I am calling it complete. The joinery saws do need some sort of additional cleats but otherwise it is entirely functional. I am impressed with the overall design and ergonomics; I believe it is much more than adequately robust and is very comfortable to use. It is certainly heavy. It was really a perfect learning experience and I almost want to make another just to implement what lessons were harvested from the copious mistakes made while building this one.
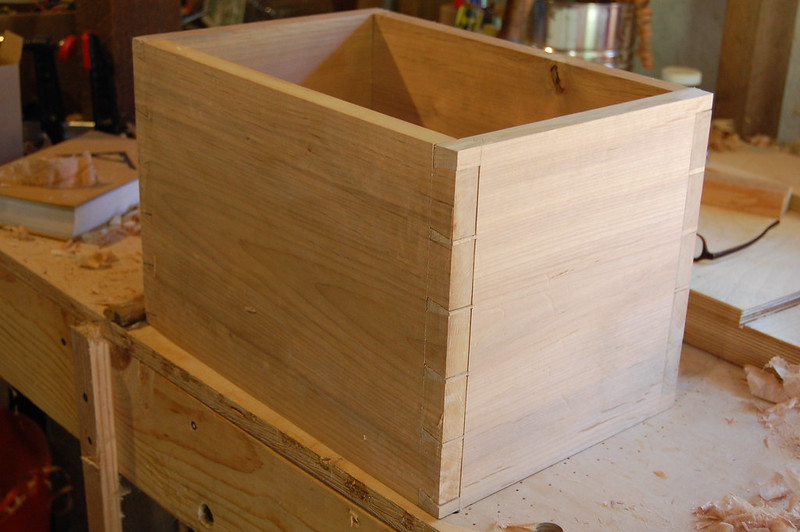
With that project, at least nominally, out of the way, I was able to prepare some panels for the next school box, and join the corners. My dovetailing is certainly getting faster. A tiny bit more accurate, too. I don't have any more fir thin enough for the bottom of this one, so have to think about how I will approach that.
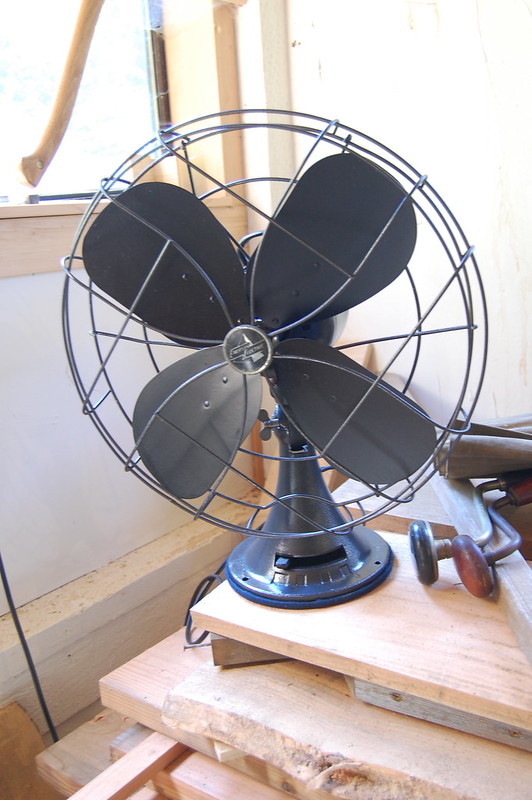
Last but not least, since summer has been blazing here on the NorthWest Coast, reaching well into the low 80s, I have landed a long-overdue fan. This thing looks cute but has some serious torque and really moves the air. I will likely use it more for ventilation while finishing than to actually keep cool, but I do think it is a powered appliance that most hand-tool shops should consider, if any.
With that project, at least nominally, out of the way, I was able to prepare some panels for the next school box, and join the corners. My dovetailing is certainly getting faster. A tiny bit more accurate, too. I don't have any more fir thin enough for the bottom of this one, so have to think about how I will approach that.
Last but not least, since summer has been blazing here on the NorthWest Coast, reaching well into the low 80s, I have landed a long-overdue fan. This thing looks cute but has some serious torque and really moves the air. I will likely use it more for ventilation while finishing than to actually keep cool, but I do think it is a powered appliance that most hand-tool shops should consider, if any.
Wednesday, July 25, 2012
[Tool Chest] Home Stretch
The Tool Chest is in the final stages of fitting and finishing. It still needs a few bits, like another coat of black trim paint (although I sortof like how it already looks 20 years old), an escutcheon plate for the lock, and I am tempted to paint the front faces of the tills black since I don't fully enjoy how the pine looks.
It is now 100% functional, however!
The space is a bit tighter than I had thought. It came out a tiny bit shorter than I wanted due to the boards I had available, and so the top drawer is a little shallower than I would have liked. I also added a possibly inefficient rack for joinery and bow saws as well as rasps to the front wall. This eats up a bit of space for the tills to slide so makes the bench planes marginally harder to get to. None of this is that bad.
Its possible I have a few too many tools. Time will tell which earn their keep and which get voted off.
I did want to make a chisel tote because my current bench doesn't have a rack nor a good space for one. I would have loved to have fit a whole rack on the front of the chest but I opted instead to put the bowsaw and joinery saws on the front wall. It's all securely yet temporarily installed so I can reconfigure this without too much hassle.
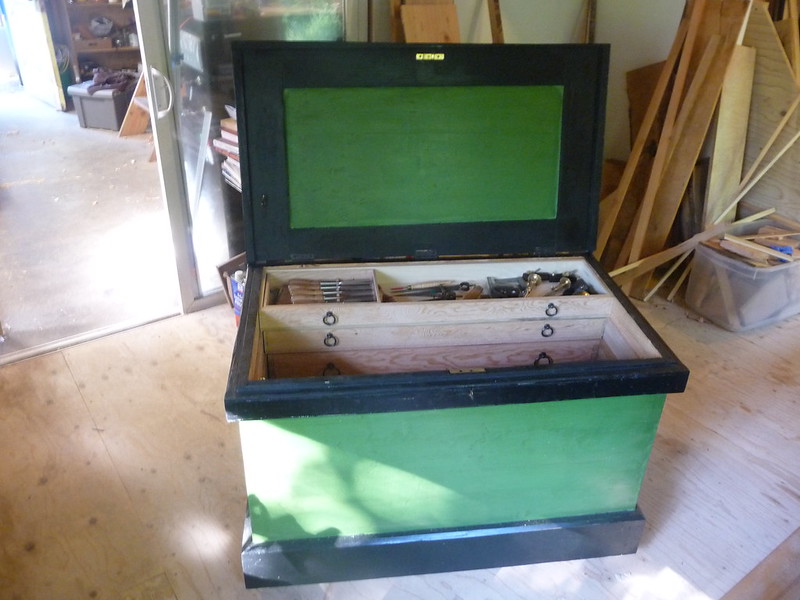
Here's where it is at now:
You can see the edge is pretty rough with the green poking through. It still needs another coat or two of black and a final oiling. I was impatient to get on with the interior so have saved these final coats for last. The idea that I might also bang it up a bit while finishing the interior was on my mind.
I painted the inside of the lid as well. I wasn't initially planning to do this but the wood was frankly a bit ugly. I might mount some very thin tools to the inside surface, or ???
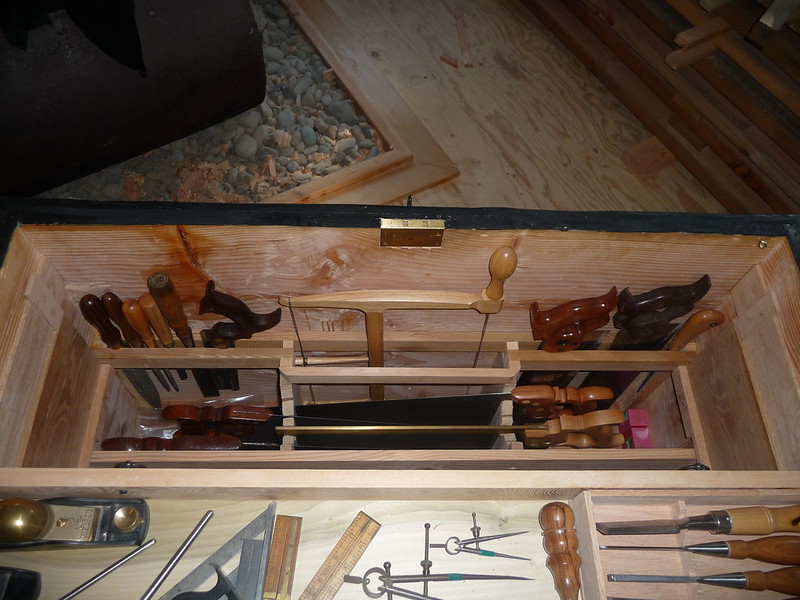
This shows the joinery saws, bow saw, and a few rasps and a mortise float in a rack on the front. These are the tools I was most nervous about having bang around loose in the tills. This eats up a bit of space (especially the bow saw) so it might not last. I do like how convenient it all is though. The saws need some cleats of some sort to support them better.
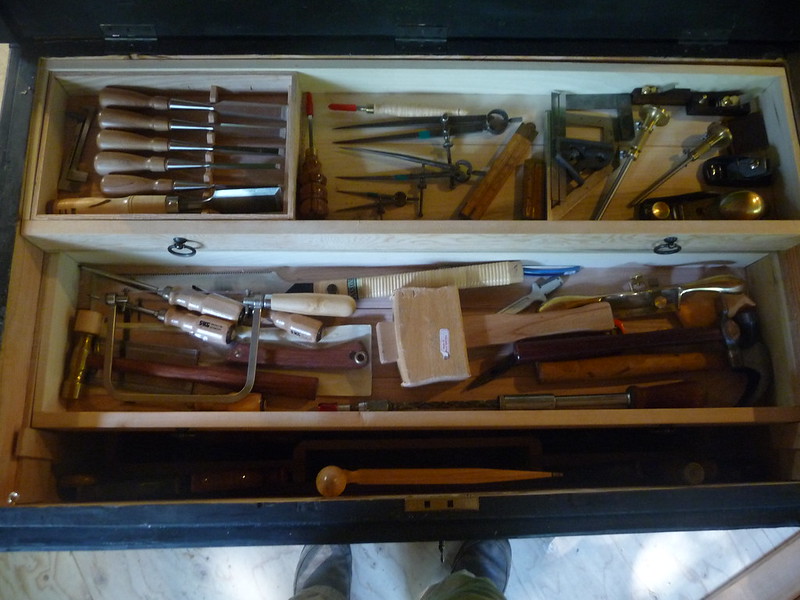
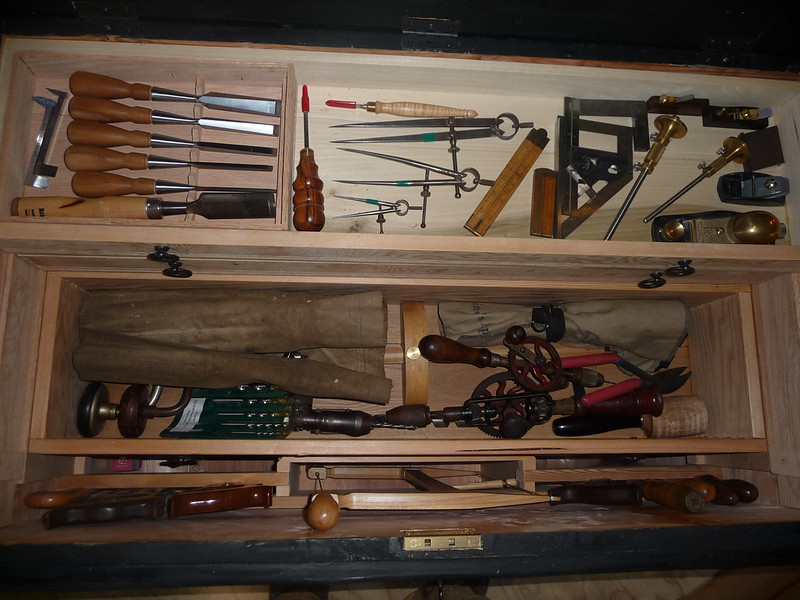
The top till is the shallowest and holds bench chisels and marking/measuring stuff. Also a block plane and a couple tiny planes that may or may not stick around. I hardly ever use them but they are so small and could really be useful for some future narrow scrapes. You can also make out some of the bench planes on the floor.
Disobeying the rules of compartmentalizing, I did put the chisels into a little tray of their own. This is because it takes up less space than the roll I had been using, and is easy to carry to the bench. I plan to build a rack for the workbench I will build which might remove the need for this tray, but that is the beauty of how flexible and temporary this all is.
My set of 5 bench chisels + a 1.5" and 2 lock chisels just fits along the width of the till. The support I built needs a little tweaking but is already helping out. It might be more space-efficient to alternate the directions of the chisels but that also seems more likely to stab me. I'll think about it.
The middle till has the striking tools, coping saw, flush cut and keyhole saw, and other oddballs. Not sure how this will ultimately end up. It is a bit more of a jumble than I would like. I probably shouldn't have the Japanese ryoba saw in there as it does not purely fit into my work flow but it is dang handy. It should probably live out in the garage and come in for rescue missions when needed, late at night when no traditional woodworking purists are around to see it.
The bottom till is the deepest and that is where the largest loose tools go. Braces, auger bits, drills, panel gauge, and so on are all in here. I probably don't need 2 sizes of brace or drill, but I am still auditioning and shaking down which I prefer. I might build a box for the auger bits at some point because the roll takes up more space than it seems like it needs to.
I'm looking forward to calling this case closed and getting on with other stuff. That said, it has been a blast to build and is highly suggested for anyone wanting a traditional way to protect and organize their tools. The discipline of only keeping tools which fit into it is going to be tricky, but I love the idea.
It is now 100% functional, however!
The space is a bit tighter than I had thought. It came out a tiny bit shorter than I wanted due to the boards I had available, and so the top drawer is a little shallower than I would have liked. I also added a possibly inefficient rack for joinery and bow saws as well as rasps to the front wall. This eats up a bit of space for the tills to slide so makes the bench planes marginally harder to get to. None of this is that bad.
Its possible I have a few too many tools. Time will tell which earn their keep and which get voted off.
I did want to make a chisel tote because my current bench doesn't have a rack nor a good space for one. I would have loved to have fit a whole rack on the front of the chest but I opted instead to put the bowsaw and joinery saws on the front wall. It's all securely yet temporarily installed so I can reconfigure this without too much hassle.
Here's where it is at now:
You can see the edge is pretty rough with the green poking through. It still needs another coat or two of black and a final oiling. I was impatient to get on with the interior so have saved these final coats for last. The idea that I might also bang it up a bit while finishing the interior was on my mind.
I painted the inside of the lid as well. I wasn't initially planning to do this but the wood was frankly a bit ugly. I might mount some very thin tools to the inside surface, or ???
This shows the joinery saws, bow saw, and a few rasps and a mortise float in a rack on the front. These are the tools I was most nervous about having bang around loose in the tills. This eats up a bit of space (especially the bow saw) so it might not last. I do like how convenient it all is though. The saws need some cleats of some sort to support them better.
The top till is the shallowest and holds bench chisels and marking/measuring stuff. Also a block plane and a couple tiny planes that may or may not stick around. I hardly ever use them but they are so small and could really be useful for some future narrow scrapes. You can also make out some of the bench planes on the floor.
Disobeying the rules of compartmentalizing, I did put the chisels into a little tray of their own. This is because it takes up less space than the roll I had been using, and is easy to carry to the bench. I plan to build a rack for the workbench I will build which might remove the need for this tray, but that is the beauty of how flexible and temporary this all is.
My set of 5 bench chisels + a 1.5" and 2 lock chisels just fits along the width of the till. The support I built needs a little tweaking but is already helping out. It might be more space-efficient to alternate the directions of the chisels but that also seems more likely to stab me. I'll think about it.
The middle till has the striking tools, coping saw, flush cut and keyhole saw, and other oddballs. Not sure how this will ultimately end up. It is a bit more of a jumble than I would like. I probably shouldn't have the Japanese ryoba saw in there as it does not purely fit into my work flow but it is dang handy. It should probably live out in the garage and come in for rescue missions when needed, late at night when no traditional woodworking purists are around to see it.
The bottom till is the deepest and that is where the largest loose tools go. Braces, auger bits, drills, panel gauge, and so on are all in here. I probably don't need 2 sizes of brace or drill, but I am still auditioning and shaking down which I prefer. I might build a box for the auger bits at some point because the roll takes up more space than it seems like it needs to.
I'm looking forward to calling this case closed and getting on with other stuff. That said, it has been a blast to build and is highly suggested for anyone wanting a traditional way to protect and organize their tools. The discipline of only keeping tools which fit into it is going to be tricky, but I love the idea.
Subscribe to:
Posts (Atom)