It is now 100% functional, however!
The space is a bit tighter than I had thought. It came out a tiny bit shorter than I wanted due to the boards I had available, and so the top drawer is a little shallower than I would have liked. I also added a possibly inefficient rack for joinery and bow saws as well as rasps to the front wall. This eats up a bit of space for the tills to slide so makes the bench planes marginally harder to get to. None of this is that bad.
Its possible I have a few too many tools. Time will tell which earn their keep and which get voted off.
I did want to make a chisel tote because my current bench doesn't have a rack nor a good space for one. I would have loved to have fit a whole rack on the front of the chest but I opted instead to put the bowsaw and joinery saws on the front wall. It's all securely yet temporarily installed so I can reconfigure this without too much hassle.
Here's where it is at now:
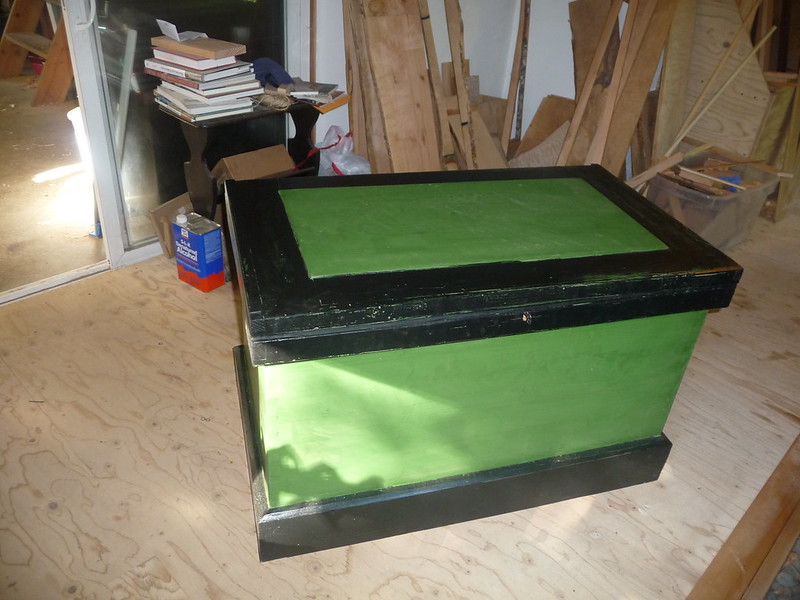
You can see the edge is pretty rough with the green poking through. It still needs another coat or two of black and a final oiling. I was impatient to get on with the interior so have saved these final coats for last. The idea that I might also bang it up a bit while finishing the interior was on my mind.
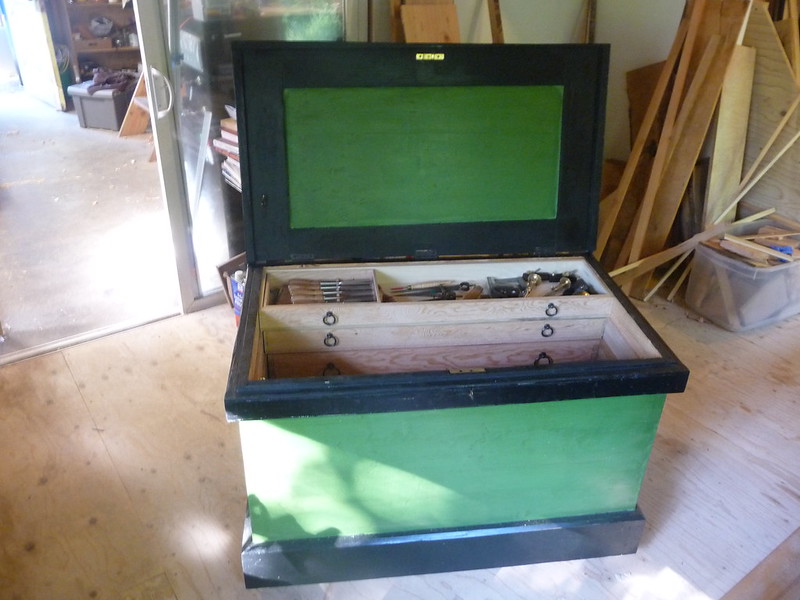
I painted the inside of the lid as well. I wasn't initially planning to do this but the wood was frankly a bit ugly. I might mount some very thin tools to the inside surface, or ???
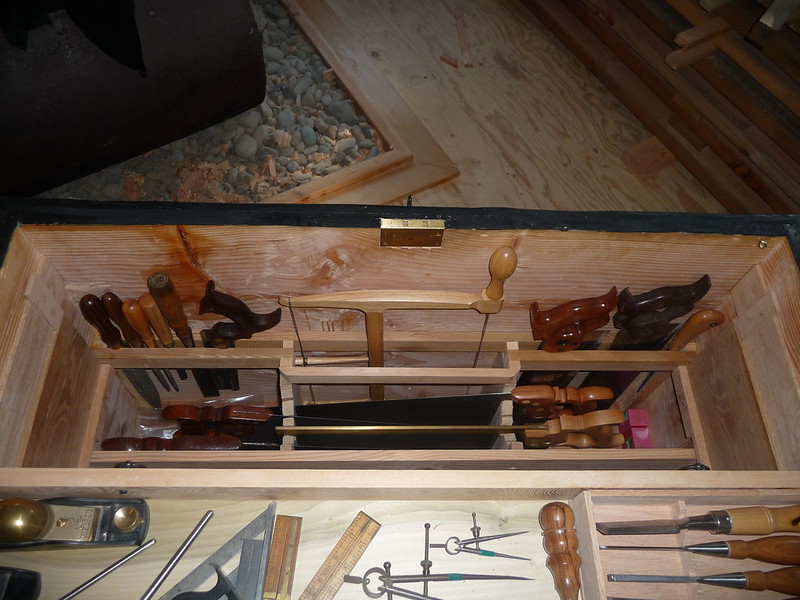
This shows the joinery saws, bow saw, and a few rasps and a mortise float in a rack on the front. These are the tools I was most nervous about having bang around loose in the tills. This eats up a bit of space (especially the bow saw) so it might not last. I do like how convenient it all is though. The saws need some cleats of some sort to support them better.

The top till is the shallowest and holds bench chisels and marking/measuring stuff. Also a block plane and a couple tiny planes that may or may not stick around. I hardly ever use them but they are so small and could really be useful for some future narrow scrapes. You can also make out some of the bench planes on the floor.
Disobeying the rules of compartmentalizing, I did put the chisels into a little tray of their own. This is because it takes up less space than the roll I had been using, and is easy to carry to the bench. I plan to build a rack for the workbench I will build which might remove the need for this tray, but that is the beauty of how flexible and temporary this all is.

My set of 5 bench chisels + a 1.5" and 2 lock chisels just fits along the width of the till. The support I built needs a little tweaking but is already helping out. It might be more space-efficient to alternate the directions of the chisels but that also seems more likely to stab me. I'll think about it.
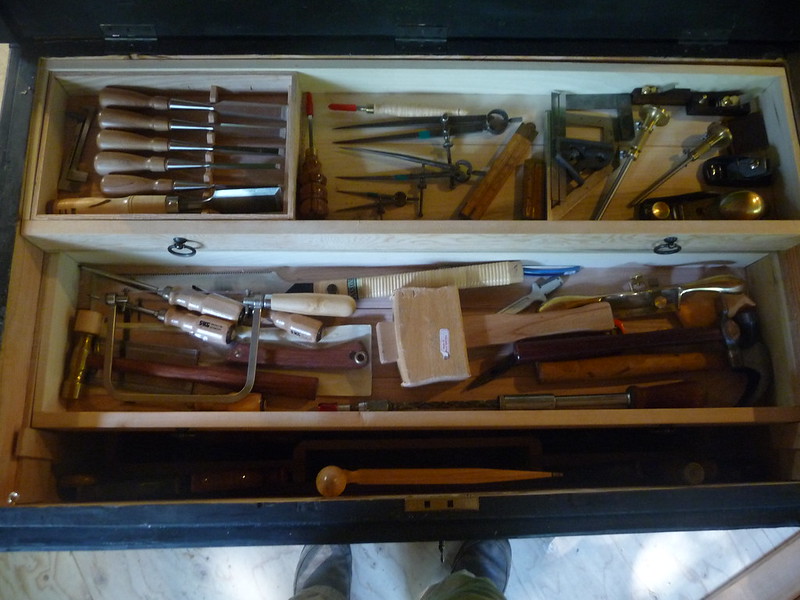
The middle till has the striking tools, coping saw, flush cut and keyhole saw, and other oddballs. Not sure how this will ultimately end up. It is a bit more of a jumble than I would like. I probably shouldn't have the Japanese ryoba saw in there as it does not purely fit into my work flow but it is dang handy. It should probably live out in the garage and come in for rescue missions when needed, late at night when no traditional woodworking purists are around to see it.
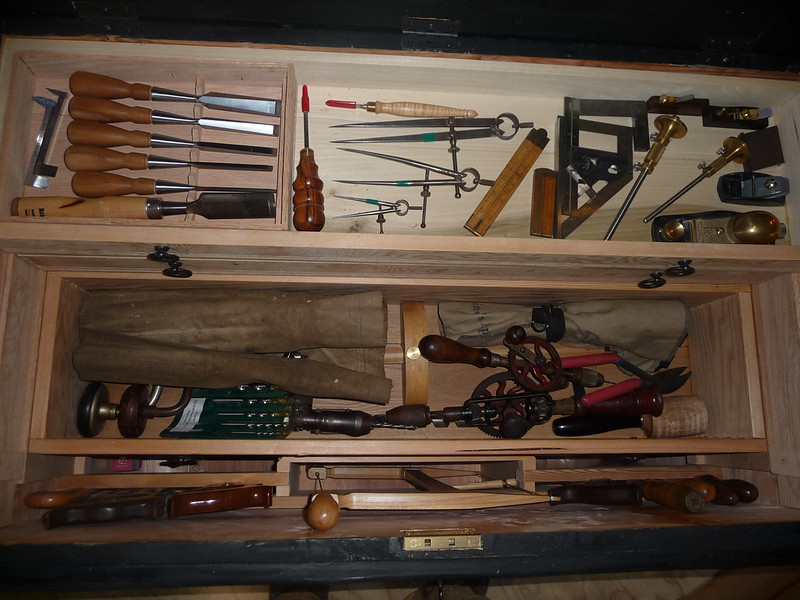
The bottom till is the deepest and that is where the largest loose tools go. Braces, auger bits, drills, panel gauge, and so on are all in here. I probably don't need 2 sizes of brace or drill, but I am still auditioning and shaking down which I prefer. I might build a box for the auger bits at some point because the roll takes up more space than it seems like it needs to.
I'm looking forward to calling this case closed and getting on with other stuff. That said, it has been a blast to build and is highly suggested for anyone wanting a traditional way to protect and organize their tools. The discipline of only keeping tools which fit into it is going to be tricky, but I love the idea.
Rob,
ReplyDeleteLooks great. And yes, there's nothing better than finishing a project (says they guy with a dozen different balls up in the air right now). What did the final dimensions end up being? Like you, when I build mine it will be contingent on the wood I have. I won't be able to get to 24" high, but I might compensate by making it a little longer. Of course by the time I build it I'll probably change the design five times over. Enjoy your tool chest.
-Eric
It's green! and beautiful. Filled with goodies.
ReplyDeleteDoes this portend a move soon?