Wednesday, February 8, 2012

[basics] Preparing Rough Stock for a Project


As I was preparing a post for "Get Woodworking WeeK", a wonderful thing happened.  An unexpected guest stopped by right in the middle of my woodworking.  This gave me a reason to show him what I was doing and now one more person in the world has a basic idea of how to turn a board right out of the tree into a simple box.  Unfortunately, I did not photograph all of this process, but I did get a number of images and there will be a couple more in the second part of this entry in a couple days.

There are already a number of great tutorials on processing lumber with hand tools, so these are more just to wet your whistle or give you a very basic overview of the kinds of techniques used.  I will note that I did actually try to take some videos but in reality I have a long way to go in terms of gear and technique until I can make usable videos in my dark winter shop.  I would love to move in this direction, but for now the woodworking itself is taking the front seat.

With all that out of the way, what I set out to do was take a board right from the tree (well, right off of a gasoline-powered "portable" sawmill) and onto the workbench.  In reality, most beginners will buy boards ready-to-go from a lumberyard, but I think its useful to see what would happen, even if you don't do it yourself.  Note that this is akin to an artist making their own paper and/or paint (as they did, once upon a time), so don't feel bad if you don't do this or don't want to.  My goal is merely to show what the machines are doing for you, and more than that, show that IF you wanted to, its not that hard and you can actually do a better job than a machine.  The secret ingredient, other than skill and knowledge as lubricants, are time.  This gets tricky with one-off pieces because hand tooling can be faster than setting up and testing a machine's settings.  That said, I will say that as a very slow beginner, it takes me about an hour and a half to really dress a board from the rough into wholly square and usable shape.  This would take about 15 minutes on a planer for me to do a similar job, with slightly inferior results.  The jointer plane leaves a very, very nice finish while brand new planer machine blades leave a merely very nice finish.  The hand tools required are about half the price, and the pleasure of working by hand is remarkably better.  You can talk over the shhhhhk of a plane, but a planer requires ear protection.  You can also get a nice little aerobic workout while planing, while using a planer involves little more than clenching your jaw as the blades take hold, and holding your breath to keep the dust away.

That said, here is what goes on in the shop:

First, we pick a suitable board.  This is a 9' piece of alder from a tall tree that was cut down and sliced into boards using a gasoline powered bandsaw mill.  Many home-millers will use a chainsaw mill.  This is just fine.  The bandsaw will leave a slightly finer cut, but the chainsaw mill will let more people get into more areas making more boards... so there is no real advantage either way.  What matters is that you get some wood to work!

The board I used is the one on the bottom of this image...  about 7" wide and 1 and 1/4" thick.


The first thing I did was to break it down into 3 pieces, roughly 3' long.  I process each of them seperately.  Given a nice 8' long workbench, I would do as much as possible in one pass so that they will all be the same thickness and width.  My temporary workbench can't handle boards that long, and I wanted to cut this into bite-sized pieces for speed.  And so I cut...  Here is the board on a sawbench, with the other end resting on the woodstack.  You could and should use a 2nd sawbench for the other end, but in this case the stack was the same height as my bench and it worked out better.  The main thing is that you do want the other end supported so the board won't break and splinter as you are halfway through cutting it.  You can see I am using a holdfast to secure the board.  This is nice, but is not needed and I usually do not do it.  If you have one, and there is a hole for one in your bench, it is a really nice way to work.


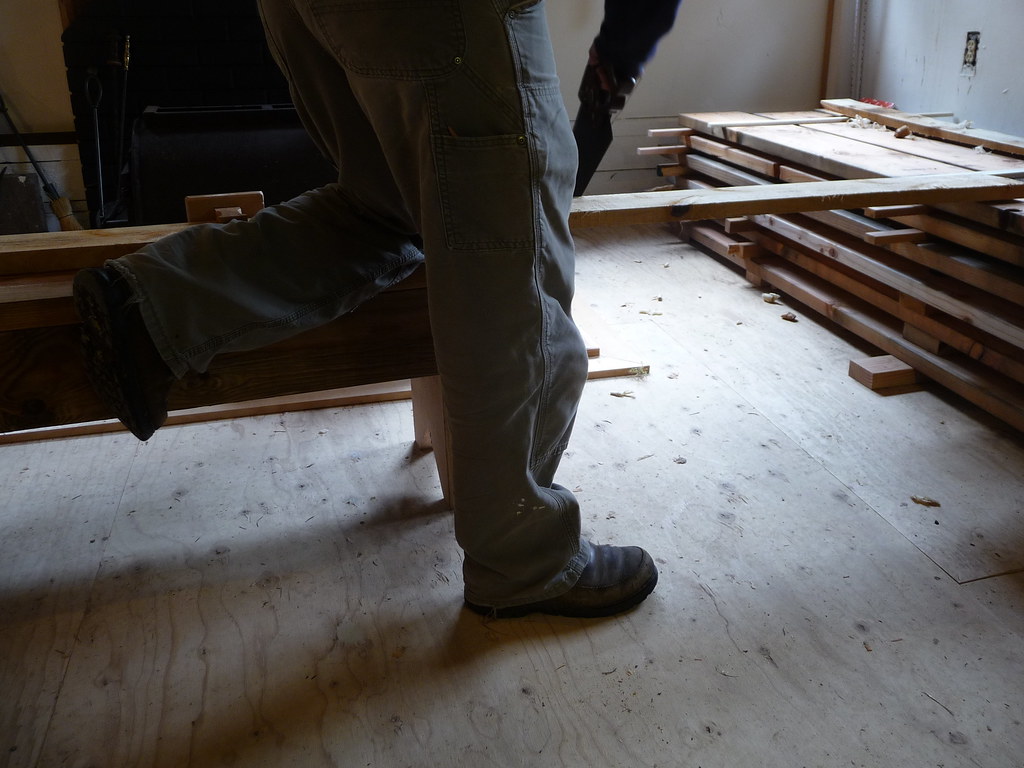
The next photo, terrible as it is, does show how I am using my knee to hold the board in place.  This is why the sawbenches are the height that they are - each should be made for each user, right at kneecap height.


With the boards cut to length, one of them is set on the workbench.  I first determine the flatter side and put that one down.  You don't want the board rocking as you work, so the more stable side down will allow you to more carefully sculpt a flat side.  Then when you flip it, the more troublesome side is done second, while held fully in place with your nice flat side on the bench.
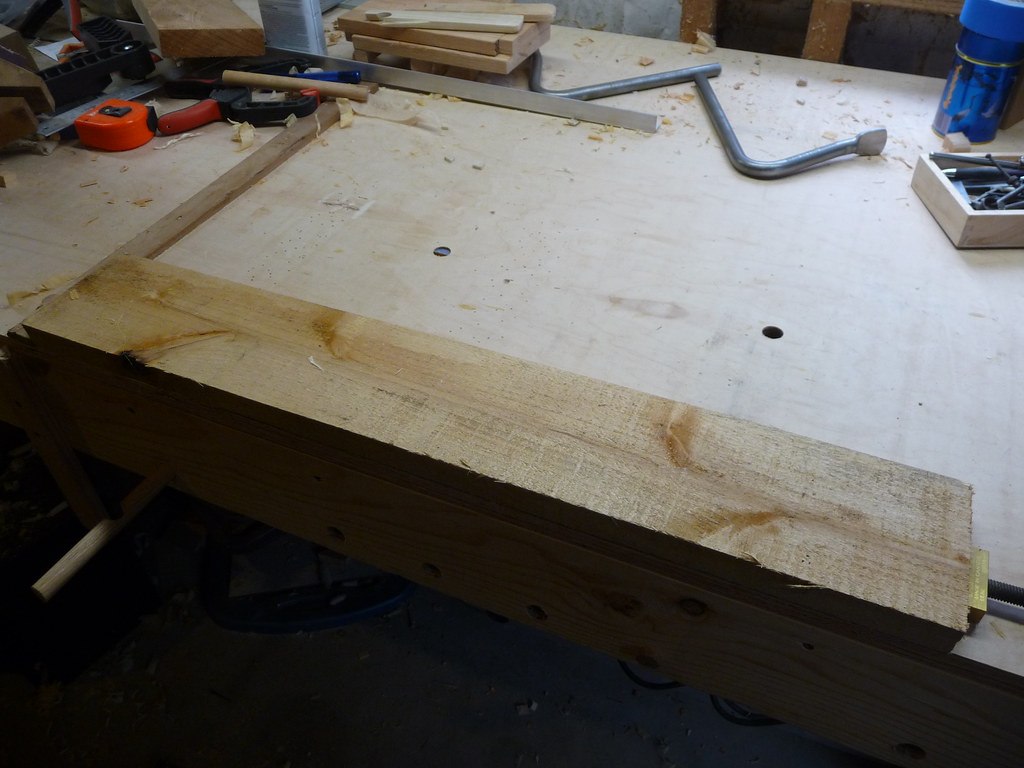

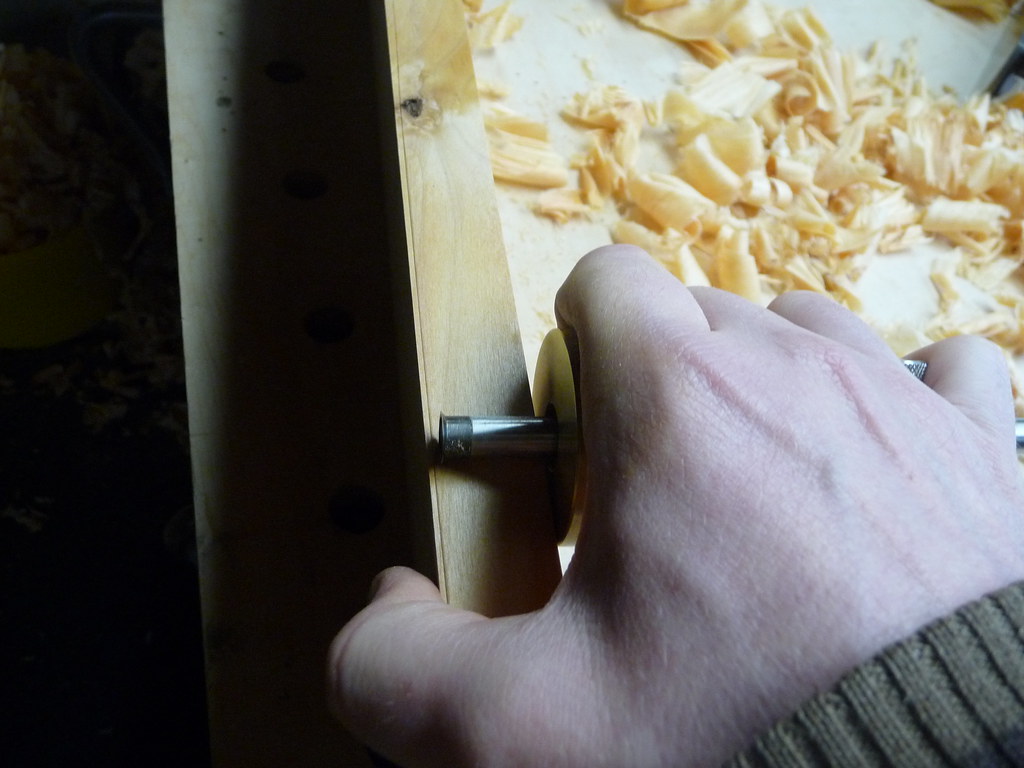
While not needed, I do like to hold the board tightly in place with a "Wonderdog".  You could use a batten, a tail-vise, or any number of things.  Sometimes I skip this device since it is too easy to accidentally rub the plane on top of it... but it does lend a bit of security to your first aggressive swipes.  Here is a closer look at the Wonderdog and what it does.  It also partially answeres a frequent qucstion: "what are all those holes in your bench for?"


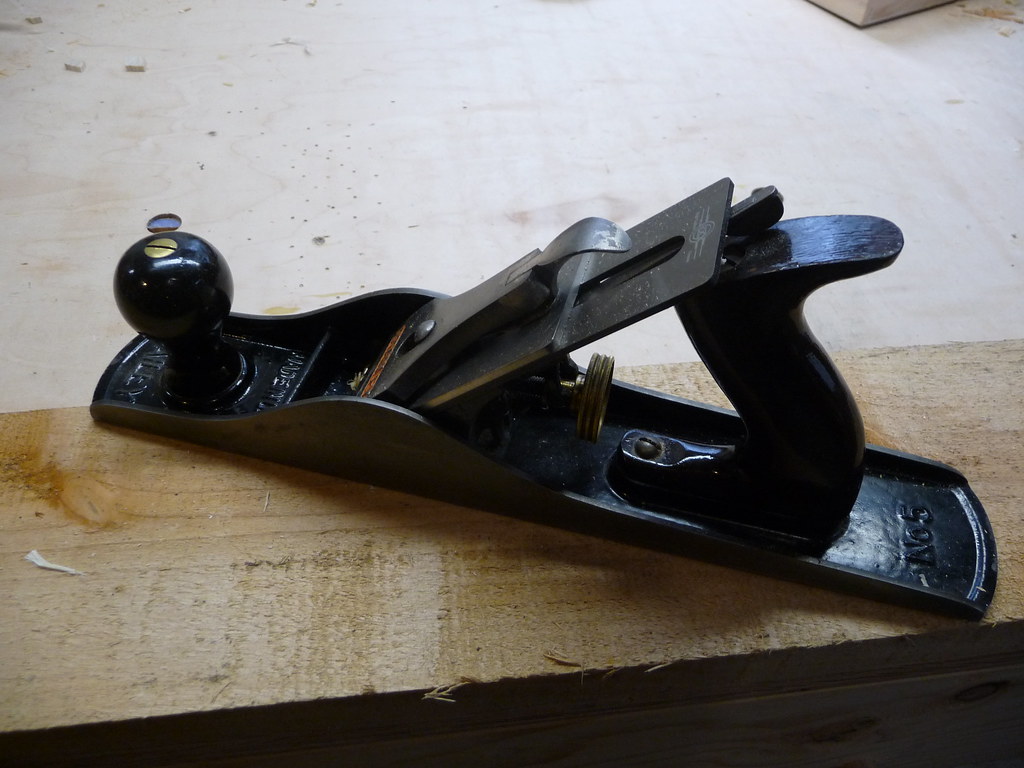
Next up, I use the jack plane, a Stanley #5 in my case, to roughly flatten the board.  I did shoot a video here but it is not so usable.  This is a bit of woodworking magic, and so someday I hope to do it justice, but for now I can only try to explain.  The jack plane has a curved blade in it, so it takes "scoops" out of the wood.  This rapidly removes most of the troublesome high spots while ignoring the low spots.  After a few passes all over the board, the low spots remain as they were and the high spots are gone,  You are left with a level board, but it will have a pattern like ocean waves on it.  In many cases, you can leave this texture as an interesting byproduct of hand tooling.  Its very nice to look at and touch, unlike saw marks.  I was somewhat surprised to learn that you start with the mid-sized plane, which is the roughest tool.  Then the jointer, which is the largest, and finish with a smoother, which is the smallest.  It takes a little bit of understanding to realize why you go from medium size, to larger, to smaller in order of resolution.  That would take a blog post or two on its own to explain, so you have to trust me.  Here is the jack plane:


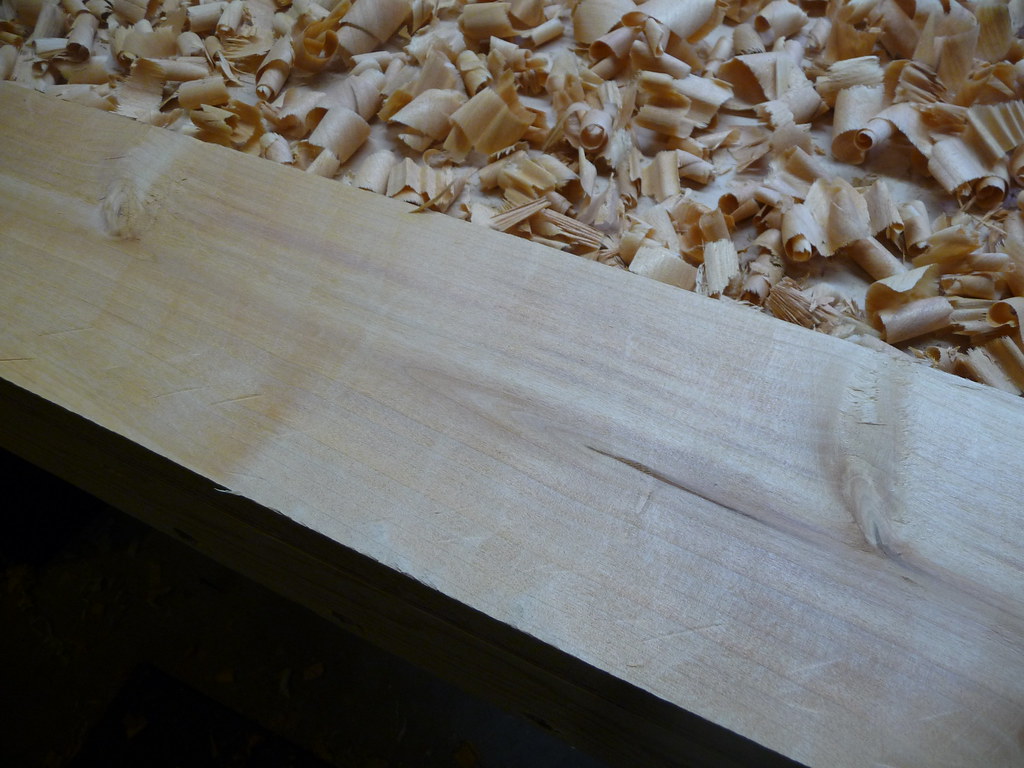
And after a few passes with it, the board is flat and shiny.  Note that the photos make it look much nicer than it is.  There are actually scalloped curves that are very visible on the board, and while the shine of the board is starting to come out, it is nowhere near the glass-like texture it should have.  This is simply my lack of photography skills butting against the fact that wood is probably one of the most difficult to photograph materials around.

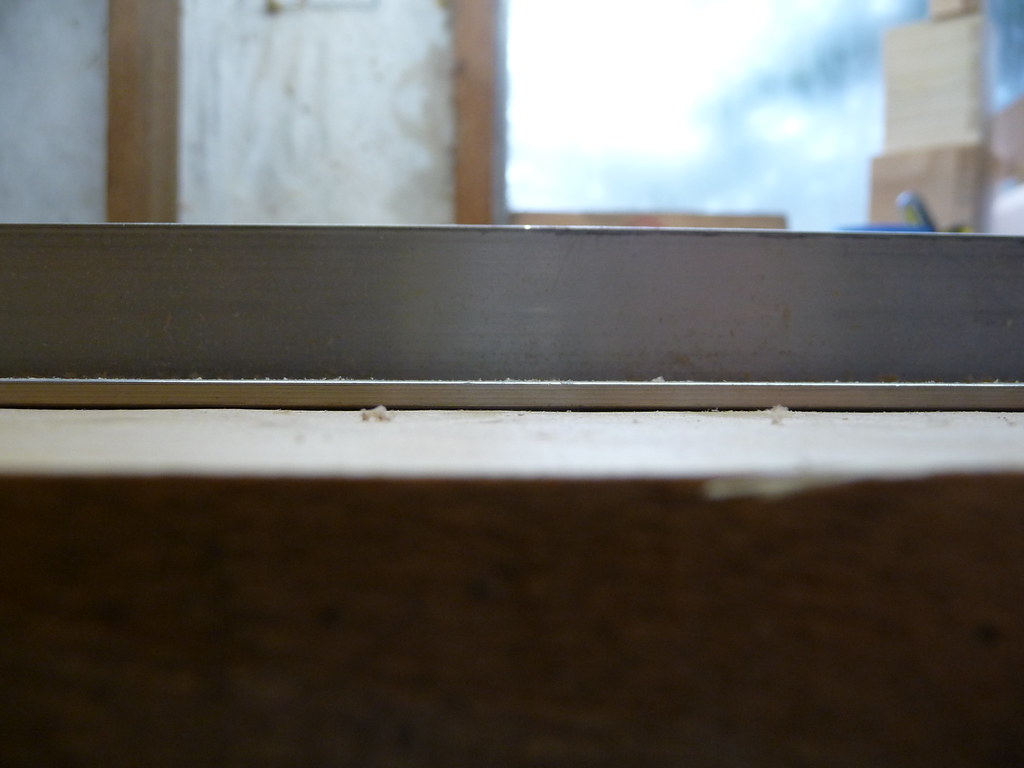
I use a cheap piece of angle-aluminum as a long straight edge.  These are very accurate, and though not historical or aesthetic, they are an affordable instant answer.

This shows, although its hard to see in the photo, that while there are still some gently undulations, the board is flat.


I then use the jointer, the larger of the two in the next photo.  I use a Stanley #7, but many people might prefer a #8.  I am small, so I choose smaller tools.  The #7 is still pretty huge.  It will make the board even flatter and in many cases smooth enough to use.  You could also keep using a jack plane, but swap out a straight iron for the cambered (curved) one if you were on a tight budget.  You could even keep the curved one in and back it way up, taking the slimmest possible shaving, but this would take a long time and be quite tedious.  Still, you do not need a jointer plane for much work.
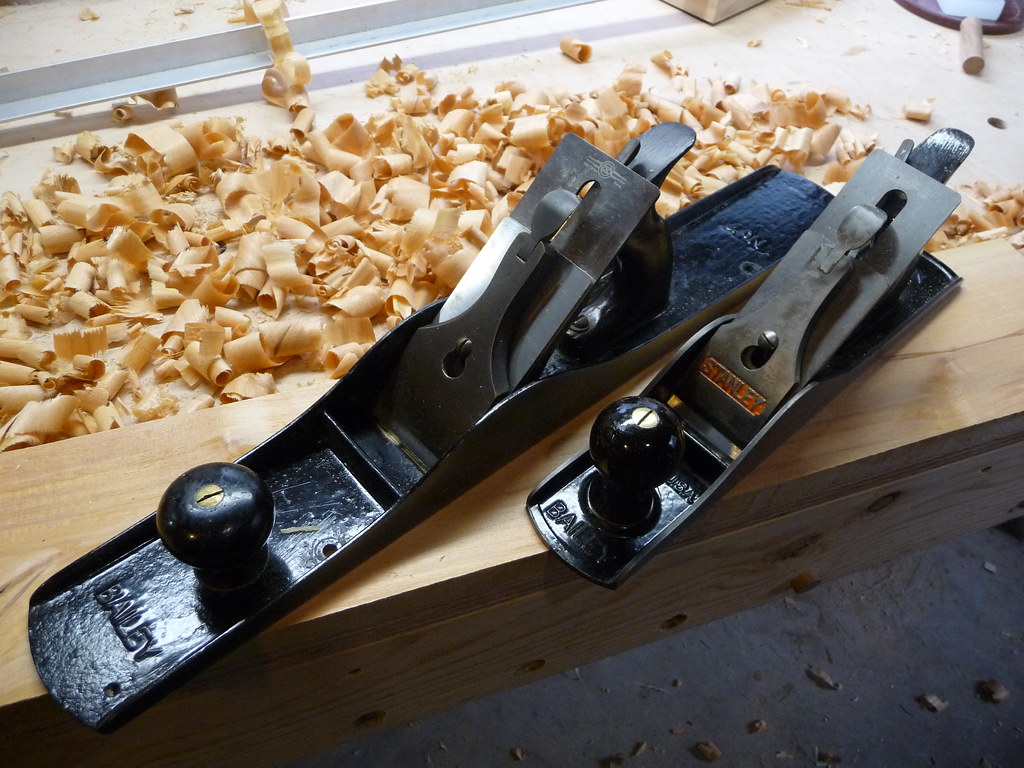

Its not easy to photograph, but the jointer almost automatically gets the board flat.  When you are getting full width, full-lenght shavings, you have a flat board.  Some work with the straight-edge (or side of plane) and the aluminum angle as winding sticks, will show that the board is flat and free of warp, twist, cupping, and bowing.

The board, having one true face, is marked as such, and turned onto its edge:


This edge is then planed straight using the jointer, and again tested for square against the flat face just established, and tested for flatness and straightness using the aluminum angle.  When this is good, we are halfway home!

To get the other edge straight and the board edges parallel (a consistant width along the whole board) I use a panel gauge off the edge we just established.  This leaves a nice crisp knifeline where parallel would be:


The board is put on the other end, and planed down on edge (paying attention to high spots if need be) until the line is reached.  A nice thing is that the knife line is such that the plane shavings will suddenly show a ragged edge when the line is reached.  When this happens take one or two more shavings until you get perfect, full-length shavings and you will know you are there.

For the final thickness, the concept is the same.  The edge is marked from the first true face.  This board was a bit angle or wedge shaped to start with, so one end was thicker than the other.  I used a smaller marking gauge, but you could use a pencil held against a ruler if you are good:


You can see in the next two photos that the line varies from less than a 1/32 to more than a 1/32nd.  Not bad overall, but it is enough to need to be addressed.  This is done just like the flattening on the first face, but paying attention to the high spots (thicker end of the board).  There is a bit of back and forth, testing and re-testing.  I have a long way to go, but have already learned so much.  There is a lot of trial and error as well as just learning to feel and read the board and your tools.  Note that I do not measure these lines in general, this is only for the purpose of illustrating:


With that last face flattened, we now have a board ready to use for a project.  Here is the board just squared compared to the other end of it, still in the rough:
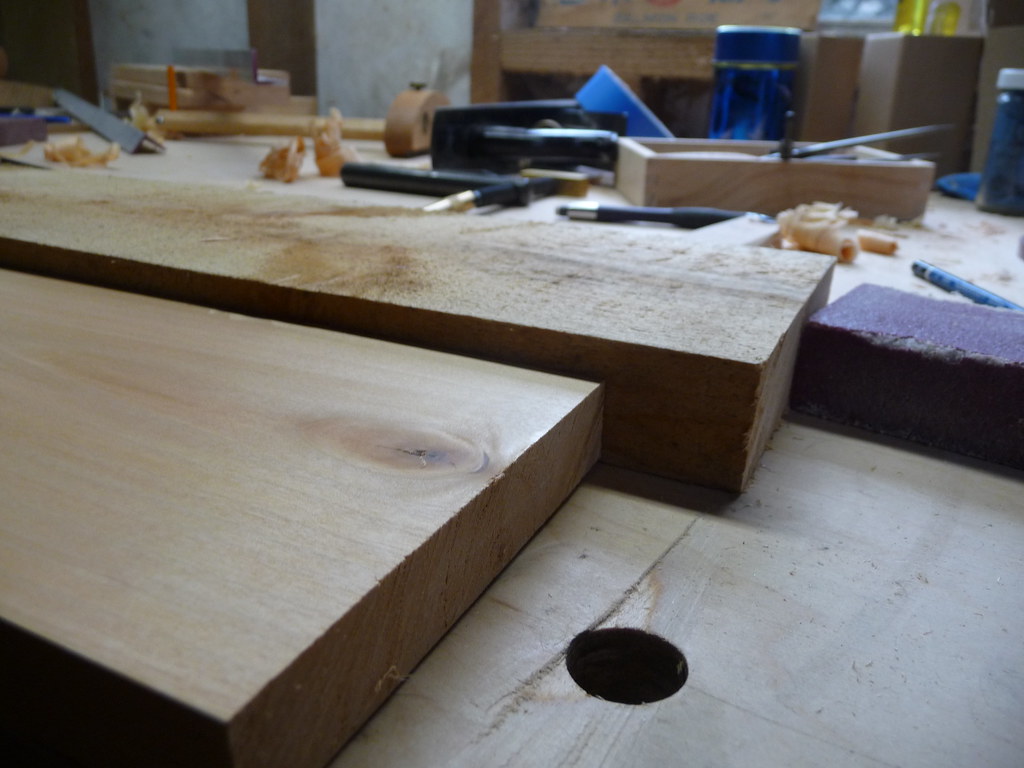


As you can see, we lost a lot of material!  But, we went from a bendy, wavy, wedgy rough board to a glassy-smooth perfectly square board of the finest quality.  As a byproduct, while doing this, every bit of reversing grain, knot, and otherwise problematic area became obvious.  These could and should be judiciously marked with pencil or chalk.  This board, finishing out at just over 3/4 of an inch, is ready to  be made into something... which will happen next time!


If you have any questions on this process, please let me know and I will do what I can to address it.


Friday, February 3, 2012

For Readers Who Do Not Work Wood

Next week, based on a call from the Tom's Workbench blog, woodworkers are invited to try and help others get involved.


If I were to prepare a blog post or two about something basic and oriented towards utter beginners, what would it be?  What would convince you to try a woodworking project?  What kinds of information would improve you understanding or boost your interest?

I know several readers of this blog are friends and family members who are interested in my journey with a lost art, but not particularly interested in woodworking in general.  I would like to make posts for you, so let me know what you would like to know and I will do my best to accommodate.  Otherwise, I will aim to just set up a couple very simple and clear tutorials for the benefit of future websearchers.

I'm still a beginner in the world of hand-tool woodworking, and so this entire blog could be considered beginner's information.  However, I have been told already that much of what I write is not easily understandable to novices, and also that I am a great teacher when I need to be, and so, what would you like to learn?

How to flatten a board by hand?  How to sharpen a chisel or plane iron?  How to use various marking and measuring tools?  A tour of my shop and how I use it?  Let me know...

4 More (at a time)

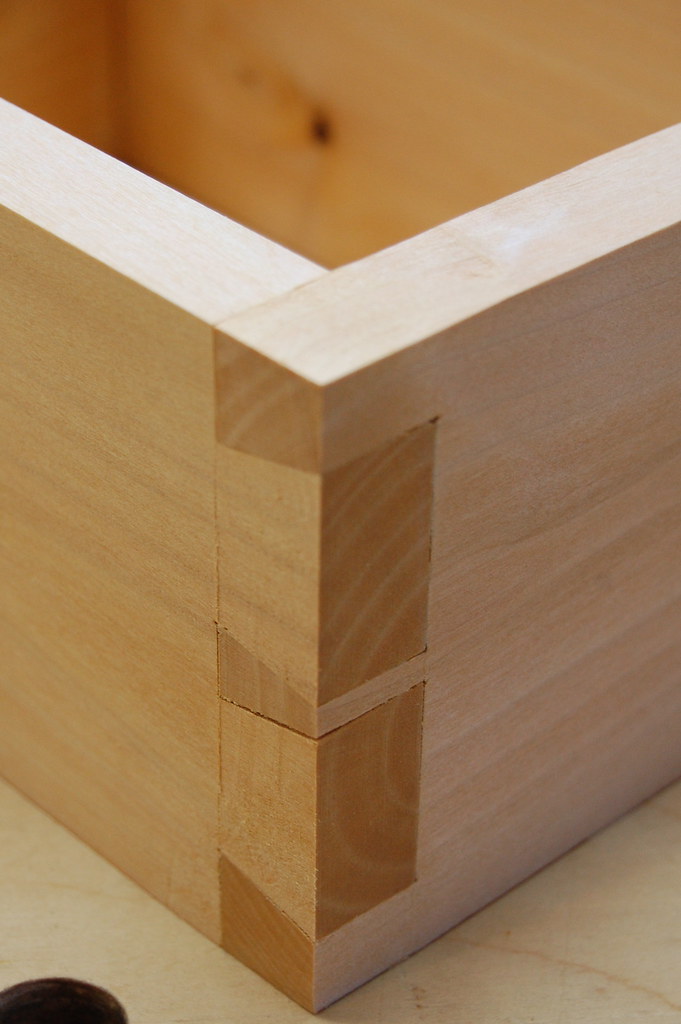
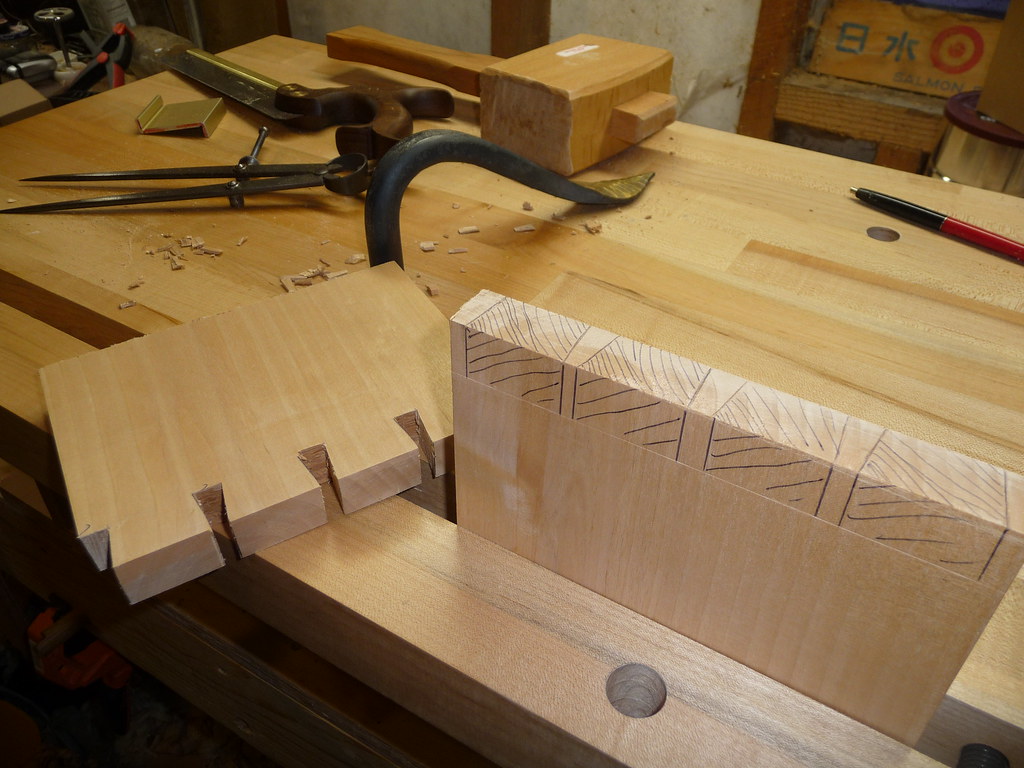
The plateau I have experienced in improving dovetail joints was frustrating.  I did get some good encouragement and suggestions.  One, which was painfully obvious in hindsight, was to check the floors of my sockets with a square.  I had been merely sighting along the baseline and using my eyes and fingers to check for flatness.  Obviously this was not working since I was still having trouble getting a good fit.

Another suggestion was to go ahead and make boxes, even if the joints aren't perfect.  I had been shying away from this approach, valid as I think it is, because I don't always have time in the shop to do multiple joints at once and like the sense of completion of these little individual joints.  It was also suggested that I actually glue the joint, as the glue can affect the final appearance in a few ways.

Well, yesterday I did go ahead and make a box carcase, and used a square to ensure that the floors were flat.  Still not perfect, but definitely a bump forwards and with my "dovetail month" total now at 20, I feel pretty good about where I might be with 11 more.  Maybe we'll make it 12 more, for 3 more boxes.  I feel like this one is actually good enough for shop use or a gift to a family member (the type who would frame my childhood art class disasters and proudly display them).

I do have to admit to cheating here though: the joints have only two tails.  I am not sure if this reduction in number of joints is the reason for the sudden improvement, or if its the above.  I'll resume 3 and 4 tailed joints next, but it is nice to have something go together fairly well.  The shoulders one the tailboard (or the half-pin sockets) give me the most trouble.  I use the dovetail saw to make them, and start the cut in a chisel V-groove cut out of the knifeline.  The dovetail saw leaves a bit of a rough surface, and I think my attempts to smooth it introduce roundness.  Perhaps my sawing technique needs to improve, or perhaps my chiseling does more harm than good.  I'll keep working on both.

The box is made from alder milled from a tree in a neighbor's yard.  I saw this tree when it was a log sitting next to the bandsaw mill.  Its quite satisfying to dimension and true it by hand, and cobble together something resembling an artifact from it!


Thursday, February 2, 2012

The BOB Lives On

I recently posted about my Bench on Bench from Tools for Working Wood failing.  [edit:  I recently learned that this is not in fact built by Gramercy Tools, but by Philadelphia Furniture Workshop. It was a real disappointment because 1) the thing is not cheap, and 2) it is crucial to the types of work I am doing now.  It is also heavy and difficult to ship for repair.  Most disappointing of all, though, was a perceived lack of response by the generally expedient, patient, and all-around good-guy proprietor, Joel Moskowitz.

I removed the post because I did receive a reply from Joel, and he explained how to address the issue with my unit and also explained the reason for the delay in replying.  Its all too easy to become spoiled by instant customer service in this day and age, and in the end, I am now happy with the BOB again.

The issue is that the vise screws hook into nuts that are set into mortices cut into the bottom of the maple slab.  These mortises were obscured by my base, and I did not remove it to troubleshoot.  If I had, I would have cleared this issue up quickly.  Silly of me to not do so, but at the same time, this should not have been an issue to begin with.  One of the nuts had enough room in the mortise to float and spin freely, rather than remain in place.  Easily fixed with some shims.  I shimmed the other, more snug one as well and covered the mortises with tape to ensure this doesn't happen again.  It would be a simple step for this to be done before sales, but I do realize this is a specialty item and by its very nature, it is sold to tinkerers who should be able to figure this out.

So I will hold up my recommendation of the TFWW Bench-on-bench for anyone without the inclination, time, or skill to build their own.  In my case, it was a matter of wanting to get working using the vise, not wanting to get to work building a vise.  In general, I believe as many appliances as possible should be shop-made, but there are always times when purchasing one can make sense, and if this is your situation, I recommend this deivce.  Perhaps the assembly instructions could be augmented to suggest adding shims and tape before attaching the base, or perhaps I am just a rare knucklehead who is able to break about anything in unique ways.

Joel has always been very patient with my newbish questions about his tools (as well as his contributions to The Joiner and Cabinet Maker book).  I will continue to respect his toolmaking, scholarship, and business although this was a bit of an easily-avoidable issue on both of our parts.

Now that the vise is functioning perfectly again, its back to the shop!


Wednesday, February 1, 2012

Trouble with Tails

Dovetail troubles...

I can blame the wood: hemlock is a soft wood.  It crushes and chips instead of slicing nicely.  I've also been using poplar, which is much nicer to work, and alder, which is my favorite of all but I do not have much more scrap material to work with.

I can blame my tools: try as I might, I am not sure my chisels are entirely flat and sharp.  They look good, to me.  They have a nice mirror-polish on the backs (8000 grit waterstones) and using essentially the same techniques to sharpen them as I do for plane irons.  They act like razors when taken to paper or my armhair, and they pare nicely translucent very thin slices even on douglas fir.  Maybe I need to sharpen them even more finely?

I mostly blame myself.  Just not enough experience yet.  I've cut 16 sample joints, and will not feel terrible about it until I've hit 30 or 40... However, I have reached a plateau of sorts and am out of ideas.

One of the main issues is that I can never get them to seat all the way, as can be seen by the red circles here:


It would seem there is some obstruction in the socket.  However, on some of these joints I can actually see light all the way through, indicating that they are "pinched" into levitation by the side walls.  Its probably a combination of all kinds of sloppiness adding up.

My tails (cut first) usually look pretty good.  I can cut next to the line fairly well, and leave a rather smooth surface after cutting out the waste.  I do all that I can to get the bottom of the socket plumb and smooth, without crossing the baseline.  In the cases where I do cross the baseline, its understandable to have a gap, but I generally do not make this mistake (anymore) and am still baffled.

Marking seems to go ok, though it is never easy.  Cutting the end grain is not easy, despite using a proper knife.  Its impossible to tell if an effective cut was made until the whole process is complete (the cuts are not easily visible while the boards are in place).  Making multiple passes on each cut introduces error so I try to do it right the first time.  In general, they look good and seem to match the socket shapes.

Cutting to this line must be one of the biggest problems I have.  Again, it looks fine after cutting.  I am not obviously wandering from the line or skewing the saw.  And again, the chisel work seems to go ok, but the end fit tells a different tale.  I have been easing the backsides of the tails to make assembly easy (though it took me a while to actually wrap my head around which parts will not be visible).

My errors tend to be gaps, but at times I also have too tight of a fit, creating a split, such as outlined in red here:


When test-fitting, I have a hard time identifying which part is causing the problems, and my solutions to pare a little here and there, as Thomas does, generally makes matters worse.

I am confident that more practice will help, and I am nowhere near giving up.  I am, however, temporarily out of ideas on what to consciously improve.  All there is to do is just keep adding more joints to the pile and keep at it.  I am actually only halfway through "dovetail month" and so was not expecting to be proficient yet.  It is just a frustrating plateau, after some leaps and bounds of improvement in understanding, if not execution, my last 3 joints have not improved significantly.

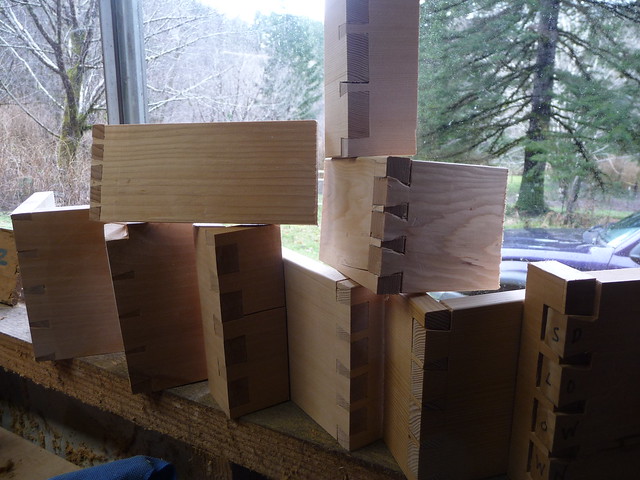
Here's a pile of some of them:


This post is not a solicitation for advice, although I would gladly accept it if my issues are indicative of something specific.  Its more just thinking out loud, logging my frustration, and an honest portrayal of the fact that woodworking is work.  Like a cooking show, none of it is as simple as it looks.  In fact, the more you know about it, the more you realize the difficulties.  I also realize that these skills must be learned by doing.  No amount of video-viewing and reading can transfer these skills beyond a shallow understanding.  And so I persevere...

In brighter news, check out these awesome mini-rules from Josh Clark.

I am especially fond of the tiny 3" one... it opens to 12" and has a very useful caliper.  I'll keep this one in my pocket for trips to the lumberyard for sure.


Thursday, January 26, 2012

How to Make an Old Jointer Plane Act Newer

Its common knowledge that adding an improved iron and chipbreaker to an old Stanley plane will improve its performance.  In fact, a set from Ron Hock was among my very first premium handtool purchases.  However, the iron did not fit my plane, and I was afraid to tamper with it.  Until today.

There are no images because it is not a photogenic operation...  I just made a thin scribe with a square and put tape down to mark the mouth, clamped the plane in a vise (with wooden shims to pad the jaws), and went to work with a file.  I was nervous about opening it too far, so stopped, put the frog back into place and tested it 3 times before I had it open enough.  When it did fit, my mind was blown.  This jointer, an old #7, was already a joy to use.  Now its an amazing joy.  I can dial it almost as fine as a smoother, but the real magic is on the shooting board.  Before, I was getting an odd stripe on the end grain, although I could find no nick in the iron.  I was also getting slightly out-of-square ends, although this was remedied by flipping the board and taking a couple more cuts.  However, now the shooting is not only easier, but much more accurate.  Should have done this a long time ago!

One little benefit of this set-up is that now I can keep the frog snugged right up front, where it should be, so that the iron is supported at the very bottom by the plane body itself.  When the frog is retracted, there is a slight gap there.  It might only be a few millimeters, but every bit helps in the war on chatter.

I use a Hock iron and chipbreaker in my jack plane (a #5) and it is fantastic as well.  In that case, I had them grind a 10 degree camber on it for me since I was a little nervous about making such a drastic modification to the stock iron.  I would now not hesitate to do this myself, but if you are new to hand planes and are planning to buy an iron from Ron, it might be worth it to inquire about this service.

The desire for a Lie-Nielsen #7 is fading, as is the desire for a #51 Shooting Plane.  Wait, who am I kidding? I still want a #51.  While my jointer now shoots nicely, it is still murder on the hands to do for very long.  There is just not a comfortable spot to hold it which is also effective. Not sure its an issue worth $500 to fix, but I do dream of such things.

Sunday, January 22, 2012

[review] Tiny Homes and a Tiny Tiny Homes Book

This is a mild departure from the normal topics here, but it is related so bear with me.


I've long been a fan of Lloyd Khan. From his early work with the Whole Earth team, to his Shelter books, and more recently, his books focusing on hand made houses and those in the Pacific Northwest, I have eagerly read and enjoyed everything he has put out - even his book about septic systems.  So it is no surprise that I recently jumped on the chance to preorder his latest masterpiece, Tiny Homes: Simple Shelter.  


The book is all you would expect from a Lloyd publication.  While the subject matter is tiny homes (he defines them as 500 sq ft or less), the book is not tiny.  However, he did include one that is!

Many pages of the original were reproduced in this matchbook-sized pocket version.  A gimmick to be sure, but it is a great one!


The book is fascinating, detailing not only homes but shops and studios as well.  Without any heavy-handed philosophy, it makes it clear that minimalism has merit and simplicity and beauty can and should be lifelong partners.  Lloyd admits that he himself does not currently live in a "tiny house" but he has spent his fair share of time bulding them and living in them, and he details some of his portable surfing rigs for travels in Baja.

Most of these structures have handmade components since this type of structure just isn't compatible with modern building materials and methods (for the most part... there are some prefab exceptions).  You'll therefore find inside gorgeous carvings, custom moldings, and homes built off-grid with hand tools, often from local natural materials.  Incredibly inspiring stuff for anyone with any interest in wood or building.

While not a how-to book, this book is an excellent addition to the hand tool enthusiast's library.

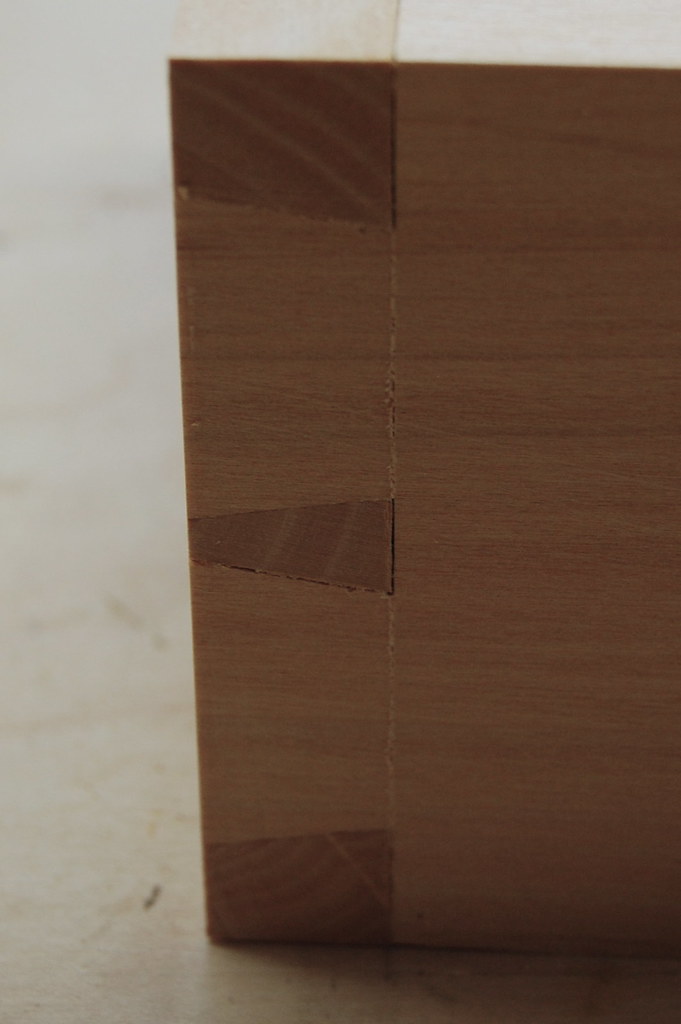
If this is too far off-topic for you, here is another dovetail joint.  They are getting better, but this one still has two flaws: baseline was crossed with the saw, and I accidentally rounded the corners of the tails while "easing" them into place.  Still, a structurally excellent joint that is rock-solid without glue.  A wholly acceptable joint is in sight!