Today, the schoolbox needed a bottom.
The board chosen was rough-milled Douglas Fir from my road, with a tiny "live edge" at that. Since the bottom is purely functional, not as aesthetically important, but does need to be strong, I figured it would be better to use a little fir than plane down alder into such a thin board. I was able to use one solid piece, rather than jointing and gluing a larger panel, and I also made the decision not to orient it as Thomas did, "for strength" but ran the grain lengthwise, as modern wisdom would have it.
Here's the bottom board, with the live edge of bark still attached and visible:

I've been going back and forth between sawing on the sawbenches and just doing it off the edge of my bench. I am not sure which is "right" and so I am going by results. The bench is too high for almost all operations (it was not originally a woodworking bench) but I do like the standing height for precision saw work more than the sawbench height, which I feel is better for rough operations. I've been flirting lately with using my fine crosscut panel saw on the bench as much as my backsaw. Sinful in some ways, but it is working very well. I feel I am almost as accurate with it as I am with the carcase saw, but there is one major problem. With a benchhook, the work is wholly supported underneath and there is almost no danger of the board floppping over and breaking off as the cut is complete. To address this, I have pulled my sawbenches up to act as cutoff supports, but in cases of just trimming a tiny bit off a light board, I have had good luck just going carefully and orienting the saw to cut the front edge before the cut is complete, so that if any "ripping" happens, it is inside the cut rather than on the edge.
Here's the ripping setup I used for a thin piece of Douglas Fir (the partition):

This might be very "wrong" in any number of ways, but it did work just fine. The board is held in place with a holdfast (the golden leaf thing, with a pad of scrap protecting the workpiece). Like the fine crosscut saw, this rip saw is very precise when enough care is taken. Hardly any shooting needed to happen after the cut. I am pretty pleased with this setup, given my non-ideal workbench!
Once the board was cut to nearly the right size, it was time to nail it on. I've found it is almost always best to secure a piece before drilling, and in the case of something like this bottom, it is best to hold it in place, too. Turns out that a bit of tape is just enough to keep it from pulling up as the drill is removed, and so I use it. Not period correct, but Thomas does not say how he pulls this off, he merely nails the bottom on. Clamps would be better, I guess, but this painters tape has fit the bill for me.
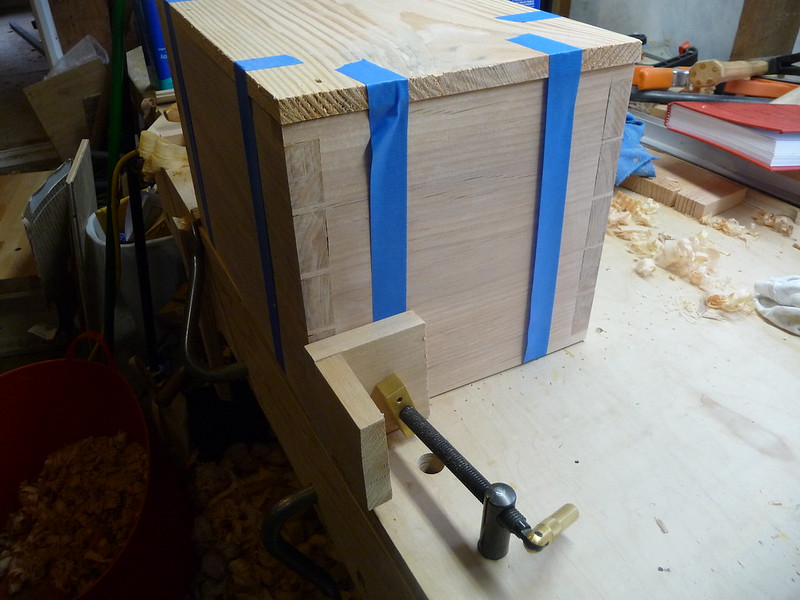
You can also see, in that picture, the Wonderdog pressing sideways on the box (against the planing stop, not in view). This little jammy, which is essentially a benchdog with a screw-vise built in, has saved me lots of money and cost me only a bit of time. It is not really a replacement for an end vise or a wagon vise, but it has worked for me 100% of the time, because I have neither of those. It is a little annoying at times, but it does work and is utterly flexible. I have not attached a wooden jaw to it yet since I am not sure what the dimensions should be, and so I just put a piece of scrap between it and the work. In the above, you can see that I used a sample piece from "dovetail month" to pad the work. This little piece of hardware is something I would certainly suggest to someone on a budget. It sounds expensive but compared to the hardware it is apparently replacing, its a steal. It works on the vertical too, if your apron has holes, like mine does).
Once the bottom was nailed on, it needed to be trimmed to size. This is easy on the long grain, but for the edge grain, some serious planing had to happen, so the box needed to be held securely in place. Slab of tree to the rescue!
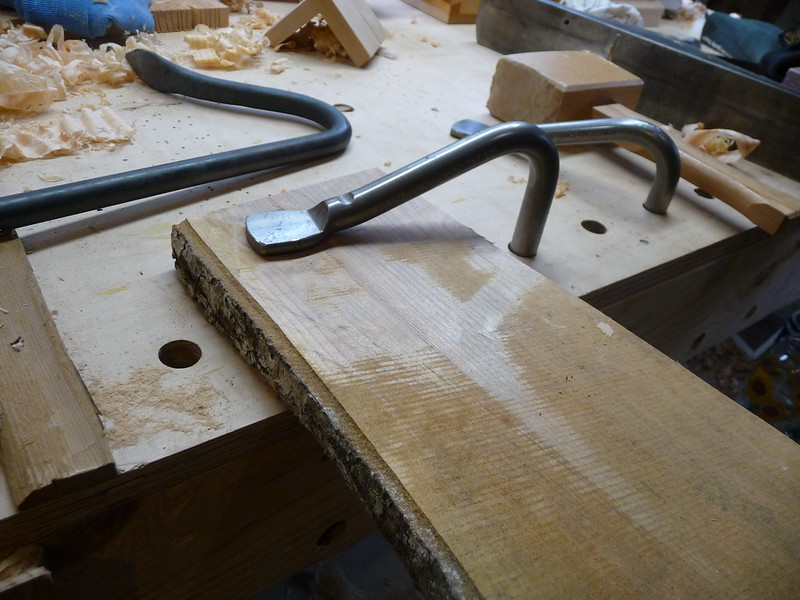
A holdfast securing a board (in this case a pretty raw one) is plenty to hold the box in place. I should say though, that I have a "vertical" planing stop screwed to my bench. I am sure I am not the inventor of this appliance, but I am not sure where I got the idea other than it seemed reasonable. It works very well, and is not often in the way. Its just a thin strip of wood screwed to the apron, removable in 5 minutes if need be, but there has been no need thus far.
The box shell is slipped over this "diving board" thusly:

and is then clamped down with a holdfast (on another pad of scrap).
The box then is immobilized, and planing is simple enough. I still use denatured alcohol to make the end-grain softer. With the Douglas Fir this is even more important, as it really likes to flake out in big hunks.
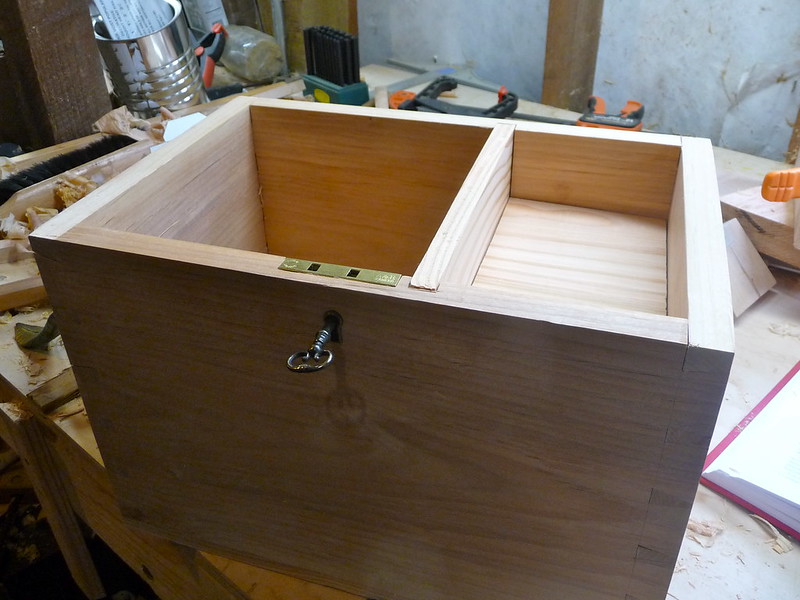
This time, I did not go by "the book" but installed the partition and lock before doing the moulding. I really cannot think of any advantage to doing the moulding first, and it does create a disadvantage: the box is no longer "square" so manipulating it is a bit of a hassle. The partition was made from the same Doug Fir as the bottom, and went in simply. The lock was also simple, much faster than the first time around, since no figuring out needed to happen, it is just a simple complicated mortise.
I again use the birdcage awl to make the hole for the lock's pin. Not sure if I have discussed it before and so I will again. It is a really neat tool, really just a sharp square with a pointed tip:
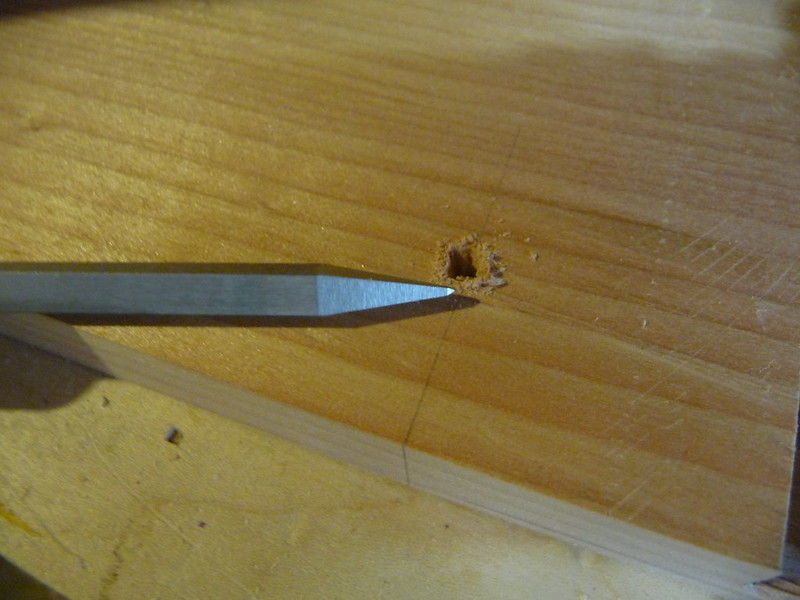
By spinning those sharp edges around, a hole is rapidly ground out of the wood. Here's what the tool looks like if it isn't clear:
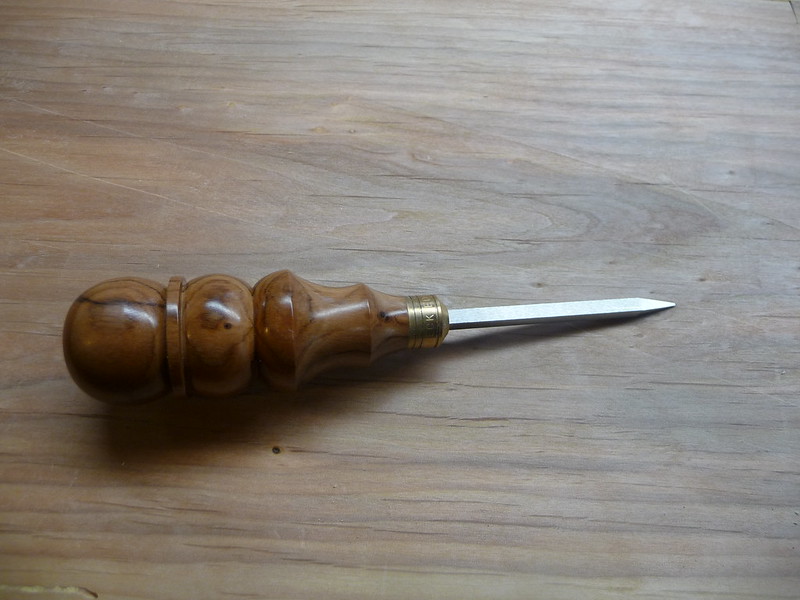
This is different from a scratching awl, which is shaped like an ice-pick, and is probably what comes to mind when most civilians think of an awl. Likewise, a brad awl was the old standby for making little holes, but almost nobody uses one anymore and I do not have one (although I would like one). A brad awl is more like a sharp flathead screwdriver or spinning chisel, but the birdcage awl is unique in that the arrises or edges of the tool do the work. The square shape becomes round as the tool is twisted back and forth, and all in all this is a very nice way to work, especially in a tight spot like this where a drill would not fit. I am not sure I would say every hand tool woodworker needs a birdcage awl, but it is a really great tool and it is too bad that it has fallen into oblivion as lithium batteries and cheap drill bits have taken over the jobs.
I also spent some time using rasps to create the keyhole shape, which (after knowing what to expect) was remarkably easier than the first time. I made a minor mistake, although it is advantageous to my skills, by choosing escutcheon inserts which require a rather precise hole to fit into. The oval-shaped ones have much more tolerance for concealing ugly holes... And so with the ones I chose, some fancy rasping has to happen. It is really not that bad though, and is almost enjoyable.
At the end of the work day, I had the shell complete, with a bottom, the partition in place, and the lock and escutcheon liner installed. The partition still needs to be planed down and fine-fitted. The lid still needs to be created, and hinges installed, and of course the moulding has to be created and attached. This box has gone much more quickly than the first, though, and I am looking forward to the others.
Man, you are really coming along. Making progress much faster than I am...
ReplyDeleteAnd a shout out from the Schwarz himself? Very, very cool :0)
Wondering, what size and shape rasps did you find we're useful for the keyhole?
ReplyDeleteJ Contract, I use the rasps suggested by Christopher Schwarz: a Cabinetmakers, a Modeler's, and a Rat Tail rasp. For the keyhole, I used only the modeler's and rat tail.
ReplyDelete