A while ago I mentioned building an apothecary chest based on a design from a book about their history. I learned a great deal in building it, but was not satisfied with the end result. Part of the carcase shifted during glue-up (It was square, I swear!!!) and so despite tweaking the hinges, planing the bottom, and other emergency fixes, the thing was just frustrating. I shrugged and promised myself to rebuild it someday.
In the meantime, the cabinet just languished. One of the pulls I hastily made for it broke, and I was not motivated to fix it. Well, I have been in the mood to tie up loose ends lately, so I finally adjusted it.
There is nothing I can do about the carcase being misshapen, short of rebuilding it. I did, however, disassemble it and plane it enough so that it opened and closed sweetly. I built a new latch and pulls for the front, and outfitted the shelves with a lip to help secure the contents. I created and installed a little pull for the maple drawer face, and I built a shelf for the whole thing to sit on.
The dark wedge-shaped shadow on the top right shows clearly how out of square it is.
Part of me wanted to treat it like a Japanese ceramic student... to destroy the botched item and move on to the next one. However, I instead mounted it next to my bed to serve as a reminder every day that I need to work at my work. Besides, its still perfectly serviceable.
One of my frivolous pursuits is that of incense and, in particular, tree resins. As these can be pretty pricy, I tend to buy the smallest sample quantities available. I have quite a little pile of myrrhs, copals, frankinsenses, sandalwoods, and other aromatic resins.
Given the spirit of the original chest is to organize tinctures, herbs, and medical paraphernalia, an incense cabinet seemed a fitting purpose.
The inside offers plenty of storage space, and was designed around a module of some glass apothecary jars I purchased. These will serve to hold the various treasures. The narrow slots on the sides of the center section are perfect for the tongs, scoops, and other implements used when melting aromatic saps. My electric incense heater sits comfortably atop the cabinet.
Much nicer than the shoebox I was using before, imperfect as it is.
Soon, back to making new things.
Monday, April 21, 2014
Monday, April 14, 2014
School Chest + Packing Cabinets
A while ago, I made the Joiner and Cabinet Maker Packing Boxes out of poplar, since it was the only thin stock I could find in the area. It turned out to be a good exercise on many levels, but the deepest lesson took a while to reveal itself. I now know how unstable poplar can be. The packing box lids are held down with a beefy batten and clinched nails... they should be quite strong. However, these warped like crazy. I had them nailed shut for a while, so they seemed flat, but as soon as I pulled the nails out, the doors sprung back into a saddle shape. This makes for an unsatisfying box.
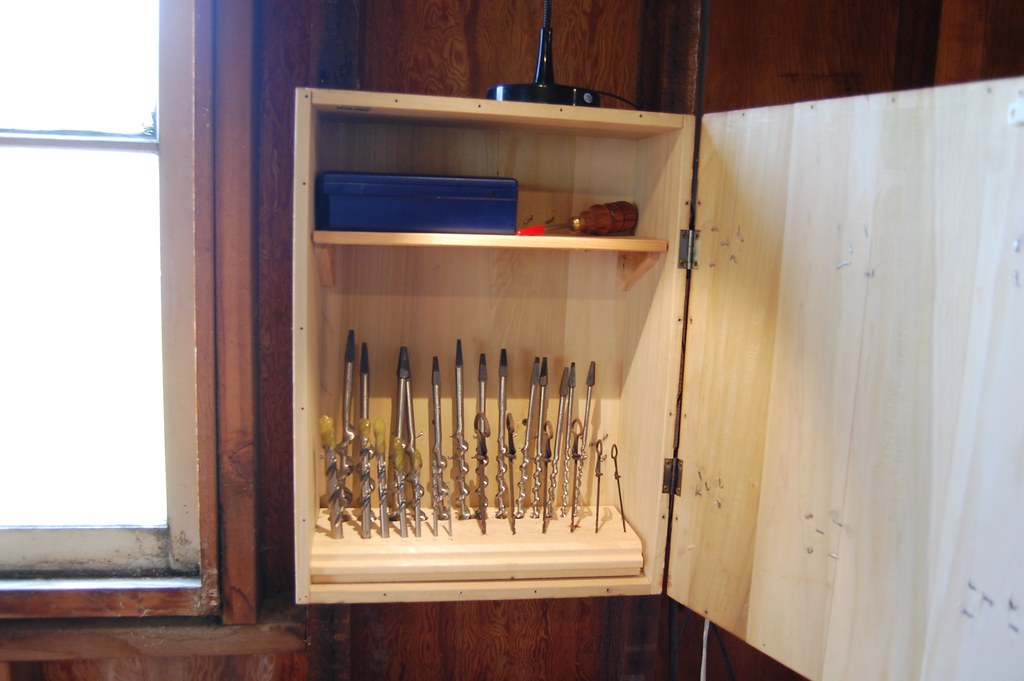
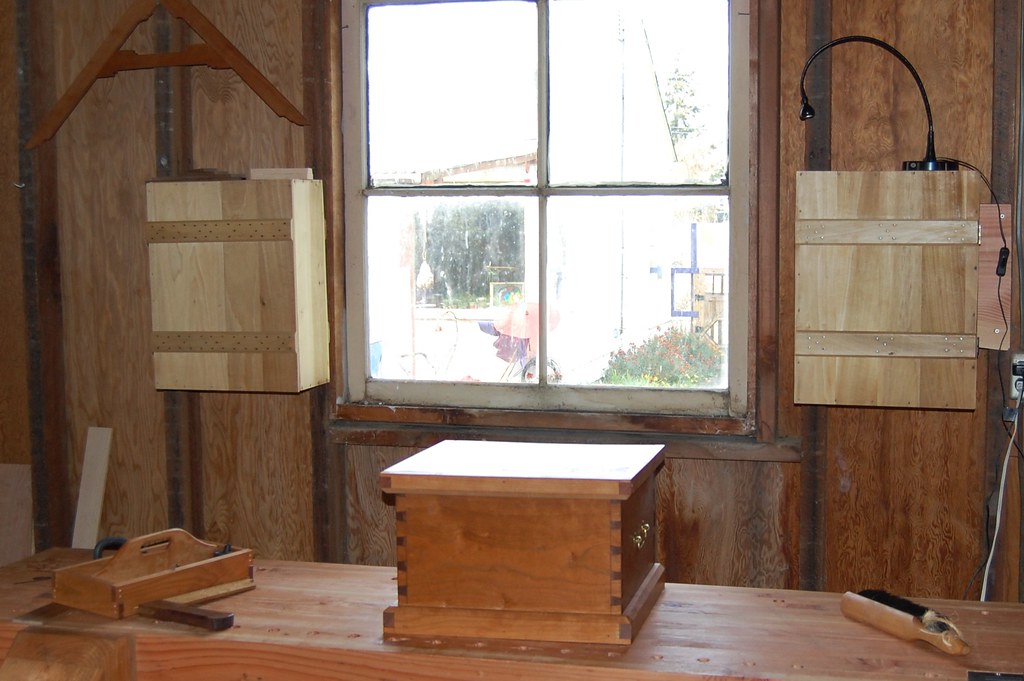
However, it does not matter for shop cabinets! The doors still do not close satisfyingly crisply, but I put some of those hokey cabinet magnets in them, and they work just fine. I realized that while I do enjoy working right out of the tool chest, I do not like working out of tool rolls. That has been remedied, as I now have a place for auger bits, gimlets, and eggbeater drill bits. The other cabinet is awaiting it's purpose, but I am certain it will prove handy.
The bit holder is maybe temporary, I simply drilled holes in a piece of pine. It might be ok. I would maybe like to add a support for the shafts of the bits, or maybe hang them. Dunno yet but I am glad I don't have to dig out the roll and unroll it each time I need one now. I will also note that I do use gimlets pretty frequently, at least the small ones. They are quite handy for pilot holes, and possibly faster than setting up the eggbeater drill. I would use the drill if there were more than a couple holes. I've also been thinking about improving my gimlets by adding some sort of loose sleeve to hold onto, their crude finish is not comfortable.
Here is the pair of "packing cabinets" in their newfound orientation:
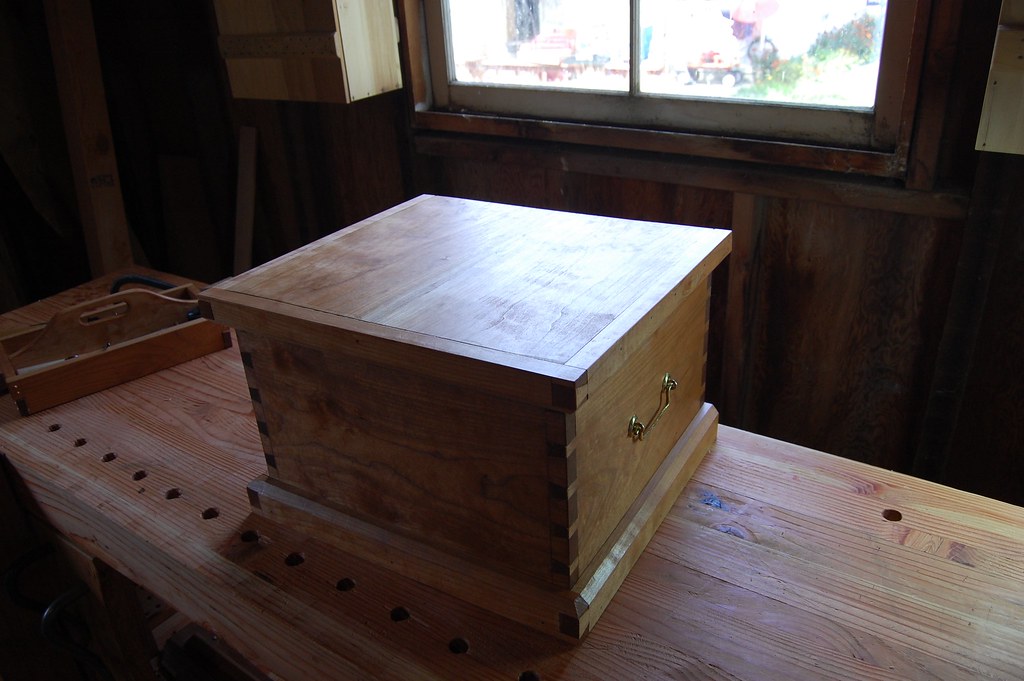
And what is that overgrown School Box there, you say? What a great question. That is what I called the Anarchist's School Box back in October when I started it. It is finally warm enough in the shop again so I have finished it up. Here is a closer look:
This is a bit larger than the J&CM School Box, and so I felt it needed lifts. After quickly flirting with some wooden versions, I felt that more elegant brass fit the bill a bit better.
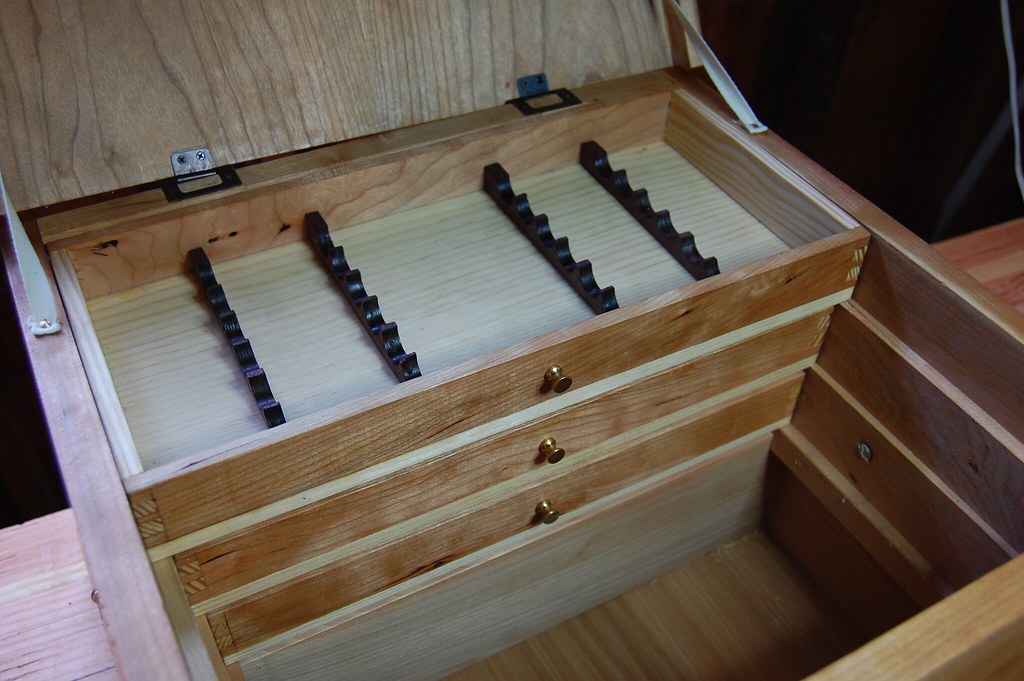
This box is for a fountain pen collector, and so it has 3 tills for the pens, which reveal room below for ink, notebooks, and other supplies.
The top till has pen holders made of walnut. I simply bored 6 holes into a small scrap, which I then resawed to make it thinner, and then ripped those in half. The other tills are empty for the user to outfit as he wishes.
The body is made of cherry, while the tills have cherry fronts and backs with pine sides. The box bottom is cedar. I am pleased with how it turned out, and now want a miniature toolchest of my own! Instead of Anarchist's School Box, I think it might be more appropriate to call this a School Chest. I hope it is enjoyed, as I certainly enjoyed building it.
However, it does not matter for shop cabinets! The doors still do not close satisfyingly crisply, but I put some of those hokey cabinet magnets in them, and they work just fine. I realized that while I do enjoy working right out of the tool chest, I do not like working out of tool rolls. That has been remedied, as I now have a place for auger bits, gimlets, and eggbeater drill bits. The other cabinet is awaiting it's purpose, but I am certain it will prove handy.
The bit holder is maybe temporary, I simply drilled holes in a piece of pine. It might be ok. I would maybe like to add a support for the shafts of the bits, or maybe hang them. Dunno yet but I am glad I don't have to dig out the roll and unroll it each time I need one now. I will also note that I do use gimlets pretty frequently, at least the small ones. They are quite handy for pilot holes, and possibly faster than setting up the eggbeater drill. I would use the drill if there were more than a couple holes. I've also been thinking about improving my gimlets by adding some sort of loose sleeve to hold onto, their crude finish is not comfortable.
Here is the pair of "packing cabinets" in their newfound orientation:
And what is that overgrown School Box there, you say? What a great question. That is what I called the Anarchist's School Box back in October when I started it. It is finally warm enough in the shop again so I have finished it up. Here is a closer look:
This is a bit larger than the J&CM School Box, and so I felt it needed lifts. After quickly flirting with some wooden versions, I felt that more elegant brass fit the bill a bit better.
This box is for a fountain pen collector, and so it has 3 tills for the pens, which reveal room below for ink, notebooks, and other supplies.
The top till has pen holders made of walnut. I simply bored 6 holes into a small scrap, which I then resawed to make it thinner, and then ripped those in half. The other tills are empty for the user to outfit as he wishes.
The body is made of cherry, while the tills have cherry fronts and backs with pine sides. The box bottom is cedar. I am pleased with how it turned out, and now want a miniature toolchest of my own! Instead of Anarchist's School Box, I think it might be more appropriate to call this a School Chest. I hope it is enjoyed, as I certainly enjoyed building it.
Tuesday, April 1, 2014
Tolpin's Tool Tote
With the weather finally turning favorable (my shop is currently unheated) and the addition of a drawknife and spokeshave to my tool kit, I did some long-overdue woodworking this week.
I've used a little dovetailed box for a few years to hold my benchtop essentials: marking knife, marking gauges, square, folding ruler, dividers, lead holder + sharpener, shims (for stabilizing a not-yet flat board during planing), and paraffin. Maybe a bench dog or two will hang out in there. The problem is that my box is too deep, stuff just piles up, and it is always feeling possible to stab myself on divider points or marking knife if not careful.
And so whenever I watch Jim Tolpin work, putting his marking knife back into his little benchtop tote, never needing to dig to pick it up again, I am always a little envious. It is one of those projects that probably everyone needs to do, but it never really rises to the top of the list. While doing some Spring cleaning, I decided enough was enough and put one together.
It's a fun little project, and does not take long. It is also a good exercise in harmonic design. I have no idea how many inches long or high or deep it is, the members were all sized relative to each other using whole-number ratios and stepping out onto a story stick using dividers. The base module was my handspan, which, more often than not, is agreeable to hand tools and other objects intended to be held in a hand. I did not want to make it too large, or it would be tempting to really fill it up... this is just for the essentials.
The handle (mildly figured maple in my case) was fun to shape with the drawknife, and pretty quick, too. I always need more practice making fair curves and doing symmetrical work, and I learn a great deal each time. This was no exception... Slowing down and creating a good template out of the right material is, for me, mandatory.
One design detail if you do decide to build one of these, is that ideally the short ends-- which the divider is rabbeted into-- should have their lap-fingers on the bottom. In this way, as the tote is lifted, the fingers will then lift the sideboards. With something this small and light it probably does not matter, but Jim did notice that in his book he shows a version with them oriented the less-ideal way.
I'm looking forward to seeing the cherry sides and ends darken and contrast more with the maple as time goes on. The bottom is pine, which was beveled just enough to fit into a groove which travels along the lower inside faces of the side and end boards.
I've used a little dovetailed box for a few years to hold my benchtop essentials: marking knife, marking gauges, square, folding ruler, dividers, lead holder + sharpener, shims (for stabilizing a not-yet flat board during planing), and paraffin. Maybe a bench dog or two will hang out in there. The problem is that my box is too deep, stuff just piles up, and it is always feeling possible to stab myself on divider points or marking knife if not careful.
And so whenever I watch Jim Tolpin work, putting his marking knife back into his little benchtop tote, never needing to dig to pick it up again, I am always a little envious. It is one of those projects that probably everyone needs to do, but it never really rises to the top of the list. While doing some Spring cleaning, I decided enough was enough and put one together.
It's a fun little project, and does not take long. It is also a good exercise in harmonic design. I have no idea how many inches long or high or deep it is, the members were all sized relative to each other using whole-number ratios and stepping out onto a story stick using dividers. The base module was my handspan, which, more often than not, is agreeable to hand tools and other objects intended to be held in a hand. I did not want to make it too large, or it would be tempting to really fill it up... this is just for the essentials.
The handle (mildly figured maple in my case) was fun to shape with the drawknife, and pretty quick, too. I always need more practice making fair curves and doing symmetrical work, and I learn a great deal each time. This was no exception... Slowing down and creating a good template out of the right material is, for me, mandatory.
One design detail if you do decide to build one of these, is that ideally the short ends-- which the divider is rabbeted into-- should have their lap-fingers on the bottom. In this way, as the tote is lifted, the fingers will then lift the sideboards. With something this small and light it probably does not matter, but Jim did notice that in his book he shows a version with them oriented the less-ideal way.
I'm looking forward to seeing the cherry sides and ends darken and contrast more with the maple as time goes on. The bottom is pine, which was beveled just enough to fit into a groove which travels along the lower inside faces of the side and end boards.
Sunday, March 16, 2014
Jim Tolpin's Spring Cleaning Tool Sale is Here!
HOW IT WORKS:
First come, first serve.
Send me (rob dot campbell at gmail dot com) any questions you have about the items. Jim and I will work with you to answer to your satisfaction. Once you want an item, send me an email claiming your intent to purchase, and I will send you payment instructions. Cash, personal check, money order, and paypal are all acceptable. Items will be shipped upon receipt of payment. If you want multiple items, shipping may be reduced.
Save on the shipping by picking up personally in Port Townsend, WA.
All items are sold as-is so please ask any questions before purchase. That said, if you truly feel an item was misrepresented and you return it undamaged, we will be reasonable.
Send me (rob dot campbell at gmail dot com) any questions you have about the items. Jim and I will work with you to answer to your satisfaction. Once you want an item, send me an email claiming your intent to purchase, and I will send you payment instructions. Cash, personal check, money order, and paypal are all acceptable. Items will be shipped upon receipt of payment. If you want multiple items, shipping may be reduced.
Save on the shipping by picking up personally in Port Townsend, WA.
All items are sold as-is so please ask any questions before purchase. That said, if you truly feel an item was misrepresented and you return it undamaged, we will be reasonable.
Stanley 10 1/2 Carriage Maker's Plane
SOLD THANK YOU
Funky Drip Edge Plane:
This was sold as a plane to create the drip edge on a window sill. Jim picked this up many years ago and never did put it to work. It would be fun to see it put into actual use, or you may prefer it as an unusual and arguably handsome display piece.
SOLD THANK YOU
SOLD THANK YOU
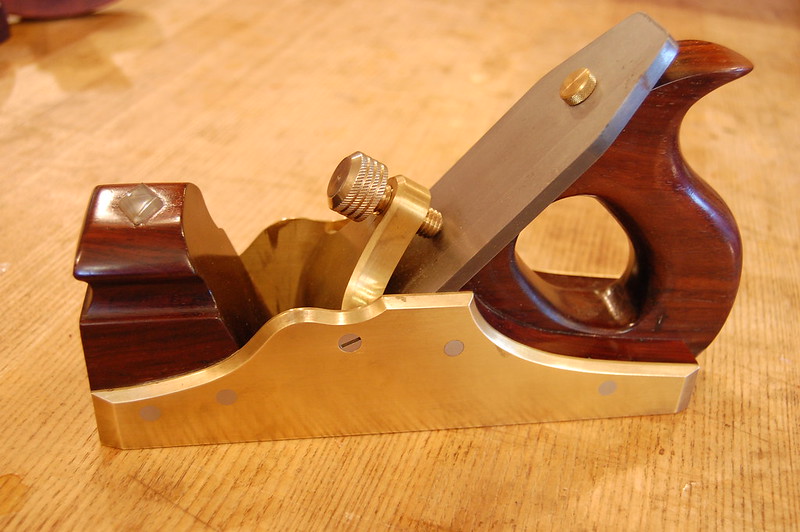
Ron Brese Smoothing Plane:
This was leftover from a previous sale. Two buyers expressed interest but did not follow through. This plane works well but Jim is moving towards smaller and lighter tools and this plane deserves to be used.
$ Make an offer
$ Make an offer
Lie-Nielsen #4 Bronze Smoothing Plane:
Everyone wants a LN smoothing plane. Here is one at a great price. Jim has decided he prefers the #3 size for his body and his work, but just as many people prefer the slightly larger #4. This has been Jim's daily driver for a while, so it is not as shiny as a brand new one but it is in excellent shape, the blade is good, and this will outlive you (and your kids) if you treat it well. Jim has inscribed his name on the side. Yours would look good next to it.
SOLD THANK YOU
Independence Tool Company Dovetail Saw
This is the legendary tool from the legendary makers. Lie-Nielsen ended up purchasing this company and this saw remains the model for their version. This is a wonderful (and rare) saw, and I would not hesitate to purchase it myself if I had not already acquired a Lie-Nielsen. This is numbered 178 and Jim inscribed his name on it. This was Jim's favored dovetail saw for quite a while so it has some expected patina and scuffs but is overall in great shape. Possibly better-than-new since Jim has sharpened it and it will arrive ready-to-use.
An article about the saw by Christopher Schwarz
SOLD THANK YOU!
An article about the saw by Christopher Schwarz
SOLD THANK YOU!
Brace:
I couldn't find a maker's mark on this brace, but it would be a terrific user. It has a 12" sweep and the chuck appears to have been overhauled since it is unusually clean and smooth. The ratchet mechanism works well, but is a bit unusual; each direction of travel has it's own on/off toggle. The handles are wooden.
SOLD THANK YOU
Handmade Layout Square:
Jim talks about the process of building a square in his book, The New Traditional Woodworker. He also uses it as an exercise in his beginning woodworking classes. Wooden squares are light, won't ding your projects, and won't damage your marking knife. Jim made this one of walnut and quartersawn oak, using copper fasteners to secure the blade in place. This square is quite true. This could be your personal square, or the one you use to lay out your own. I like these enough that I'd say it makes a decent and affordable bit of wall art, too.
SOLD THANK YOU!
Mortise Gauge:
This is a cool tool. Has the two pins you need to mark both sides of a mortise, but also has a single pin AND a knife of sorts (although this bit might need some fine tuning to work properly). I am fond of this unit, it is kindof freaky, kindof bad-ass looking, and kindof dignified, all at once. It works just as intended but if I were hanging onto this I think I would put it on my desk in an office and invent a new story anytime someone asked what it was.
SOLD THANK YOU
Bridge City SS2X4 Saddle Square:
Sometimes your work has contours or angles other than 90. This unique tool addresses that. This has some tarnish spots which could be removed without undue effort, but it is up to you if you want to brighten it or keep the patina.
SOLD THANK YOU!
Bridge City SS-DT Dovetail Saddle Square:
As above, this lets you transfer layout onto non-perpendicular surfaces. Gives you a choice of 2 popular dovetail slopes. This was over a hundred bucks new and you can't even buy them anymore, so this is a serious score for those who are into this kind of thing.
SOLD THANK YOU!
Bridge City DG-2 and HG2:
This is a three-in-one wondergizmo. It is a depth gauge, a height gauge, and with the removable cutter installed, a panel/marking gauge. You can see some tarnish in the photo but this tool is fully functional and very accurate with it's ability to calibrate. Bridge City tools are always beautiful and this is no exception. Read more about it: http://www.bridgecitytools.com/default/dg-2-depth-gage.html
Original packaging is long gone, but the booklet is included.
SOLD THANK YOU
Buck Brothers Chisel:
My measurements show this thing as 31/32nds of an inch wide. Maybe it was meant to be metric, what is that, 25.5mm? Maybe my ruler is wrong. Anyway, relatively wide chisels like this are super-useful even if you are not using it to create a groove exactly one inch wide. This has a leather pad on the handle and the blade is in great condition. Could easily be your every day workhorse, or, if you are already set you could throw it in your household repair box and have the nicest beater chisel on the block.
SOLD THANK YOU
Lie-Nielsen Mortise Chisel (5/16"):
Great condition, no issues, Jim happened to have a spare so here's your chance to save a bit as well as say "Oh yeah, that was Jim Tolpin's" whenever your buddies admire it.
SOLD THANK YOU!
HOW IT WORKS:
First come, first serve. Send me (rob dot campbell at gmail dot com) any questions you have about the items. Jim and I will work with you to answer to your satisfaction. Once you want an item, send me an email claiming your intent to purchase, and I will send you payment instructions. Cash, personal check, money order, and paypal are all acceptable. Items will be shipped upon receipt of payment. If you want multiple items, shipping may be reduced.
Save on the shipping by picking up personally in Port Townsend, WA.
All items are sold as-is so please ask any questions before purchase. That said, if you truly feel an item was misrepresented and you return it undamaged, we will be reasonable.
Save on the shipping by picking up personally in Port Townsend, WA.
All items are sold as-is so please ask any questions before purchase. That said, if you truly feel an item was misrepresented and you return it undamaged, we will be reasonable.
Friday, March 14, 2014
Jim's Tool Sale will begin Sunday, Mar 16 at 2pm Pacific
In an attempt to keep it somewhat fair this time around, I am going to pre-announce the launch point of Jim's tool sale in advance. The sale will start Sunday, Mar 16 at 2pm Pacific. This should give folks all over a chance to be near a computer if they choose.
Here are a couple of the items which will show up:
- A Stanley 10 1/2 carriage maker's plane (wide rabbeting plane)
- An Independence Tool Works dovetail saw serial #178(the one Lie-Nielsen took their design from)
- one of Jim's handmade squares as seen in The New Traditional Woodworker
- some gently-used LN tools
- Bridge City layout tools
and more! It should be a good one, and this time you have had your warning if you want to be able to jump on any of the deals.
Thanks for your patience and continued interest.
NOTE: Inquiries about these tools received before the listing and prices go live will be ignored.
rob and jim
Here are a couple of the items which will show up:
- A Stanley 10 1/2 carriage maker's plane (wide rabbeting plane)
- An Independence Tool Works dovetail saw serial #178(the one Lie-Nielsen took their design from)
- one of Jim's handmade squares as seen in The New Traditional Woodworker
- some gently-used LN tools
- Bridge City layout tools
and more! It should be a good one, and this time you have had your warning if you want to be able to jump on any of the deals.
Thanks for your patience and continued interest.
NOTE: Inquiries about these tools received before the listing and prices go live will be ignored.
rob and jim
Tuesday, March 4, 2014
Bonus Jim Tolpin Tool Sale!!!
It was claimed that the final round of Jim Tolpin's tool sale had concluded.
Nothing is certain. Not in woodworking, not in blogging, and not in blogs about woodworking.
In a day or two I will have another batch of fine tools available, and I daresay this will be the best yet.
Hints: Bridge City, Independence, Lie-Nielsen.
When will the blog talk about woodworking again? Well, I have a new roof on my (formerly cold and leaky) shop. The weather is turning. Soon I will be woodworking again, so soon I will be writing about it again. Thanks for your patience!
Nothing is certain. Not in woodworking, not in blogging, and not in blogs about woodworking.
In a day or two I will have another batch of fine tools available, and I daresay this will be the best yet.
Hints: Bridge City, Independence, Lie-Nielsen.
When will the blog talk about woodworking again? Well, I have a new roof on my (formerly cold and leaky) shop. The weather is turning. Soon I will be woodworking again, so soon I will be writing about it again. Thanks for your patience!
Tuesday, January 14, 2014
Woodworking in Canada
This weekend I was fortunate enough to be able to assist with the Lie-Nielsen Tool Event in Sidney, BC. While being only 35 miles away from my home in Port Townsend as the crow flies, this crow cannot fly and so instead it takes a few hours by car and ferry, and then some time as determined by the friendly (we hope) immigration and customs officials.
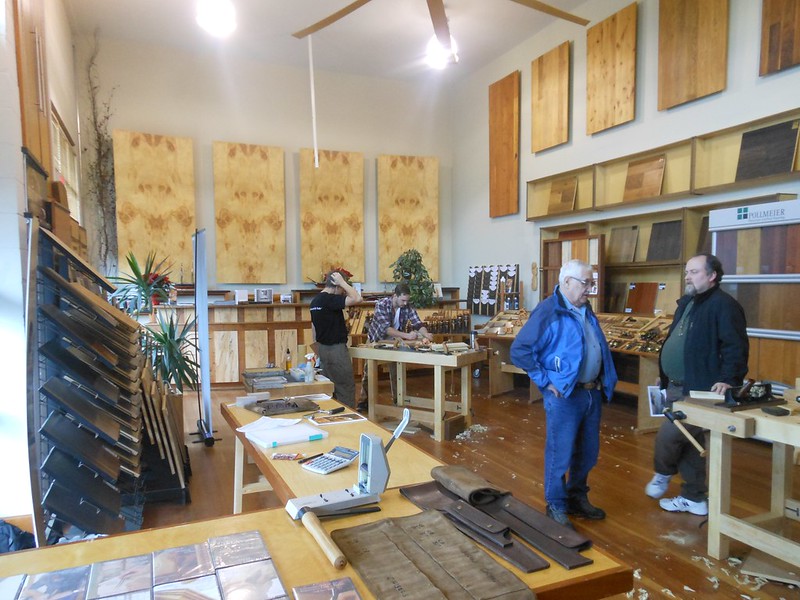
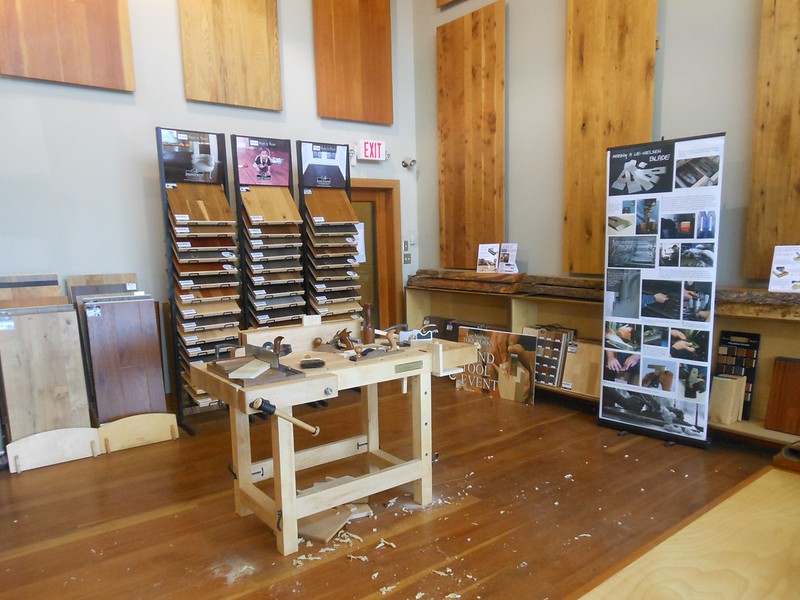
Arriving Thursday afternoon, I met with Jeremy Tomlinson, the Canadian rep for the company. I had met him before at the Wooden Boat Festival, but it was quite enjoyable to have some more time learning about his fascinating background and career. With Jeremy, a very simple question can turn into a 30-minute long answer, and this is a good thing. I was introduced to the order-placing process and some of the business practices of the company, and then we set up the event space. Sadly I was too busy to take a lot of photos, but you have probably seen this stuff before... a few workbenches to test tools upon, a sharpening station, an order desk, and of course the glorious racks of demo tools, each tuned up and ready for the public to test-pilot.
The Event took place at West Wind Hardwood, a small family-run business. There is a cliche in the US about how nice Canadians are, and it is well-founded! These folks were utterly gracious in hosting us, even as we had to take over their flooring showroom for a day. Lots of fun getting to know the staff there, as well as perusing their stash of hardwoods and antique tools. If I had not taken a passenger ferry with just a backpack to haul my stuff, I would have been sorely tempted by some of their figured maple!
We also took a moment to check out the Lee Valley store. While I have seen their catalogs for years, I had never been to one of their shops. Very interesting! They keep most of the good tools behind glass, so it is not all that easy to get a feel for them, but the employees are helpful enough with questions. Of course while walking between islands of tools, one is confronted with all the weird and wonderful impulse-purchase items that Lee Valley is so skilled at sourcing. Their gardening section would probably lure me in if I lived nearby.
The Tool Event went smoothly, lots of happy customers. One of them went ahead and put together a complete dovetail joint while "trying out the chisels". I made a quick tenon to demonstrate how the shoulder planes are used. A young woman came in and learned to flatten a board with a handplane, and was giggling nonstop about how fun it was. Another fellow came in to outfit his shop with all the basics... I envied him!
Of course everyone enjoyed trying the #51 shooting plane, although nobody purchased one. We can all dream...
I was happy to learn that the Lie-Nielsen plow plane will be out soon. Photos of it are stunning! It has a much improved depth stop. I was told it will be $225, and include a 1/4" iron with others available later.
Personally, I came to the conclusion (after much repeated trial) that I might really prefer a #8 jointer to my familiar #7. Time to start saving up!
I had such a good time that I might also go to Vancouver Event. This will be held at the Roundhouse, where Mr. Tomlinson teaches his woodworking classes. I am eager to see the space after hearing about it. What a great asset to the Vancouver area!
I've been to a handful of these Tool Events and I have to continue to highly recommend them. Even (or especially) if there is no intent to purchase a tool, the wisdom and inspiration available is priceless, and free!
I must also tack on a photo of the West Wind shop dog, Ruby. A troublemaker, for sure, but such velvety ears make up for many a sin. Any guesses on her heritage? Her master was not sure. I have my guesses, but who knows. She is larger than she might look in this image; at six years old, she was about as large as a dog could be and still have you wanting to pick her up. The perfect "big dog in a small package" as far as I am concerned. I look forward to seeing her, and British Columbia, again.
Arriving Thursday afternoon, I met with Jeremy Tomlinson, the Canadian rep for the company. I had met him before at the Wooden Boat Festival, but it was quite enjoyable to have some more time learning about his fascinating background and career. With Jeremy, a very simple question can turn into a 30-minute long answer, and this is a good thing. I was introduced to the order-placing process and some of the business practices of the company, and then we set up the event space. Sadly I was too busy to take a lot of photos, but you have probably seen this stuff before... a few workbenches to test tools upon, a sharpening station, an order desk, and of course the glorious racks of demo tools, each tuned up and ready for the public to test-pilot.
The Event took place at West Wind Hardwood, a small family-run business. There is a cliche in the US about how nice Canadians are, and it is well-founded! These folks were utterly gracious in hosting us, even as we had to take over their flooring showroom for a day. Lots of fun getting to know the staff there, as well as perusing their stash of hardwoods and antique tools. If I had not taken a passenger ferry with just a backpack to haul my stuff, I would have been sorely tempted by some of their figured maple!
We also took a moment to check out the Lee Valley store. While I have seen their catalogs for years, I had never been to one of their shops. Very interesting! They keep most of the good tools behind glass, so it is not all that easy to get a feel for them, but the employees are helpful enough with questions. Of course while walking between islands of tools, one is confronted with all the weird and wonderful impulse-purchase items that Lee Valley is so skilled at sourcing. Their gardening section would probably lure me in if I lived nearby.
The Tool Event went smoothly, lots of happy customers. One of them went ahead and put together a complete dovetail joint while "trying out the chisels". I made a quick tenon to demonstrate how the shoulder planes are used. A young woman came in and learned to flatten a board with a handplane, and was giggling nonstop about how fun it was. Another fellow came in to outfit his shop with all the basics... I envied him!
Of course everyone enjoyed trying the #51 shooting plane, although nobody purchased one. We can all dream...
I was happy to learn that the Lie-Nielsen plow plane will be out soon. Photos of it are stunning! It has a much improved depth stop. I was told it will be $225, and include a 1/4" iron with others available later.
Personally, I came to the conclusion (after much repeated trial) that I might really prefer a #8 jointer to my familiar #7. Time to start saving up!
I had such a good time that I might also go to Vancouver Event. This will be held at the Roundhouse, where Mr. Tomlinson teaches his woodworking classes. I am eager to see the space after hearing about it. What a great asset to the Vancouver area!
I've been to a handful of these Tool Events and I have to continue to highly recommend them. Even (or especially) if there is no intent to purchase a tool, the wisdom and inspiration available is priceless, and free!
I must also tack on a photo of the West Wind shop dog, Ruby. A troublemaker, for sure, but such velvety ears make up for many a sin. Any guesses on her heritage? Her master was not sure. I have my guesses, but who knows. She is larger than she might look in this image; at six years old, she was about as large as a dog could be and still have you wanting to pick her up. The perfect "big dog in a small package" as far as I am concerned. I look forward to seeing her, and British Columbia, again.
Subscribe to:
Posts (Atom)