
Monday, March 12, 2012
Dovetailed Bed
While awaiting arrival of the hinges for the schoolbox, I decided to make a bed for my daughter. It has a dovetailed frame, decorative molding all around, and shaped feet. It did not take long to make. Shown here without finish, it will probably stay that way.


Tuesday, March 6, 2012
[Schoolbox] Bottom, Partition, and Bonus Box
The morning started out with some unexpected snowfall, so getting a fire going in the shop was the first order of business. Shortly after, a bottom was added to the box. Thomas was told by his master to put it on with the grain running front to back, which would make it stronger. However, this would also increase the risk of the bottom changing size with the seasons. I was willing to do it Thomas's way, unwise as it may be, but since I had a board which would fit one way and not the other, I went ahead and put it on with the grain running side-to-side. This should be more stable over time. Future boxes might serve as experiments, though the results may not be in for 50 years or so.
One of the great advantages of hand tool woodworking is that numbers rarely need to be involved in the measurements. I just traced the box onto the bottom board, and cut around it. This leaves an oversized bottom:

This is a simple matter to trim with planes:

Thomas then moves onto the molding, but I decided to do the partition first, so that the box would remain flat while working on it. I cannot think of any reason the molding should be done before the partition work. In fact, I would have done the lock installation, too, but don't have the lock yet.
Using a small block of wood as a template, the dovetail saw was used to make a shallow (1/8th ") cut, 3 inches long. Its ok that the cuts go beyond the partition, as they will rarely be seen. Still, I could have made them much shorter, and will in the future for a neater box.

I made this cut on both walls, and then cut the template block itself to size it for the 2d cut:

As the thickness of the partition boards is 1/2", it was simple to find a chisel of that exact size, making clearing out the dado a simple matter. It is always a great policy to size your components from a tool that you have, and this is a main reason I use Western tools and not Japanese; it is a lot easier to make a 1/2" dado with a 1/2" chisel than it is to do metric conversions from millimeters:

After the chisel work, I ensured the bottom of the dado was flat and smooth with a small router plane:

I have not really shown this tool much before, but it is very handy. Called a "hag's tooth" in the olden days, it is simply a sharpened iron bent at 90 degrees from the vertical, for controlling the depth of a groove or other recessed area. It should not be used to actually clear the groove, but is perfect for cleanup. This shows how the blade is shaped; a wonderful example of an utterly simple tool that is also just about perfect at what it does:

Next up was cutting the partition wall. I left it slightly oversized, so that I could gradually trim it until that magic moment when it fits snugly. Again, no measuring with numbers, just drawing a line in the right place:

And then onto the shooting board. A few swipes, test fit, repeat until perfect fit is achieved. This way of working is a lot nicer than trying to cut something at 9 13/65th inches.

The partition is supported underneath by some cleats. There was no real reason to make these perfectly square, but while I had the shooting board out, I did:

There were then installed on the sides. You can see how the dado cuts extend longer than they need to:

The partition is nailed and glued to the bottom, and slipped into place. It is then trimmed to fit at the top, again with no measuring:

The molding was then attached, and the box itself is about done. It still needs a lock, hinges, and a lid:

It is bigger than it might seem:

I wanted to get going on the lid, but needed to prepare another 9' board in the rough and that sounded like too much work at the moment. Instead, I put a bottom on this practice box, and finally got around to something I have been wanting to do for a while: making a measuring and marking organizer for my gauges, knife, pencils, dividers, etc. I used the same concept as the Schoolbox partition, but flipped 90 degrees for a wider base. I drilled some simple holes (not exactly sure how I want to use it yet), and planed the "holder" down a bit so that it left a gap just wide enough for squares on the back edge. The holder lifts out easily, so everything can be packed underneath it. I will probably add a lid at some point, but for now it is way better than the overflowing little tray I was using.

The hardest part of this was definitely the mitres on the molding. With total concentration, I was able to get them to fit rather nicely during the dry fit, but for whatever reason, they opened up a tiny bit while nailing them down. This is one area where I need a lot of practice, but it is good to have the box nearing completion. Next steps are to create the lid (and its similar molding), install hinges, and a lock. Then its on to box number two, unless I finally start on the workbench, like I want to...
One of the great advantages of hand tool woodworking is that numbers rarely need to be involved in the measurements. I just traced the box onto the bottom board, and cut around it. This leaves an oversized bottom:
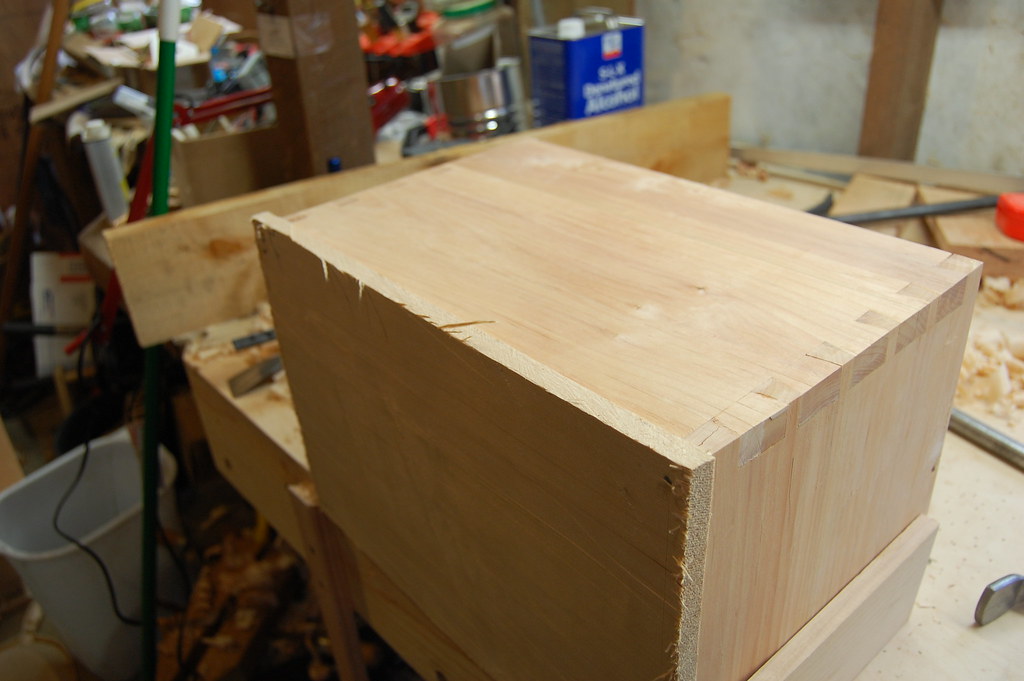
This is a simple matter to trim with planes:

Thomas then moves onto the molding, but I decided to do the partition first, so that the box would remain flat while working on it. I cannot think of any reason the molding should be done before the partition work. In fact, I would have done the lock installation, too, but don't have the lock yet.
Using a small block of wood as a template, the dovetail saw was used to make a shallow (1/8th ") cut, 3 inches long. Its ok that the cuts go beyond the partition, as they will rarely be seen. Still, I could have made them much shorter, and will in the future for a neater box.
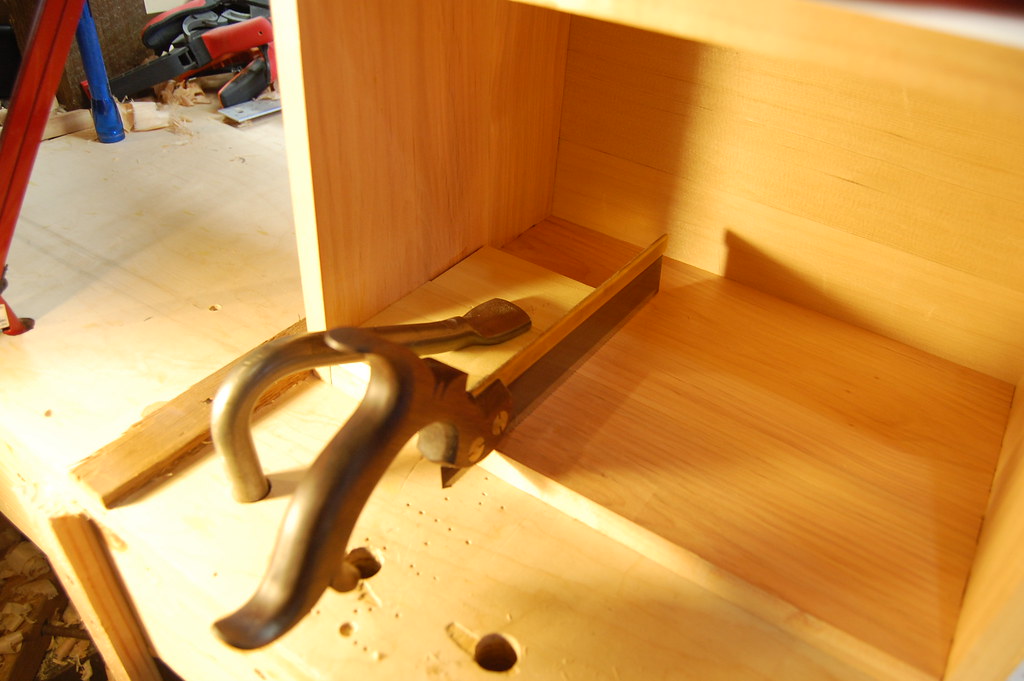
I made this cut on both walls, and then cut the template block itself to size it for the 2d cut:
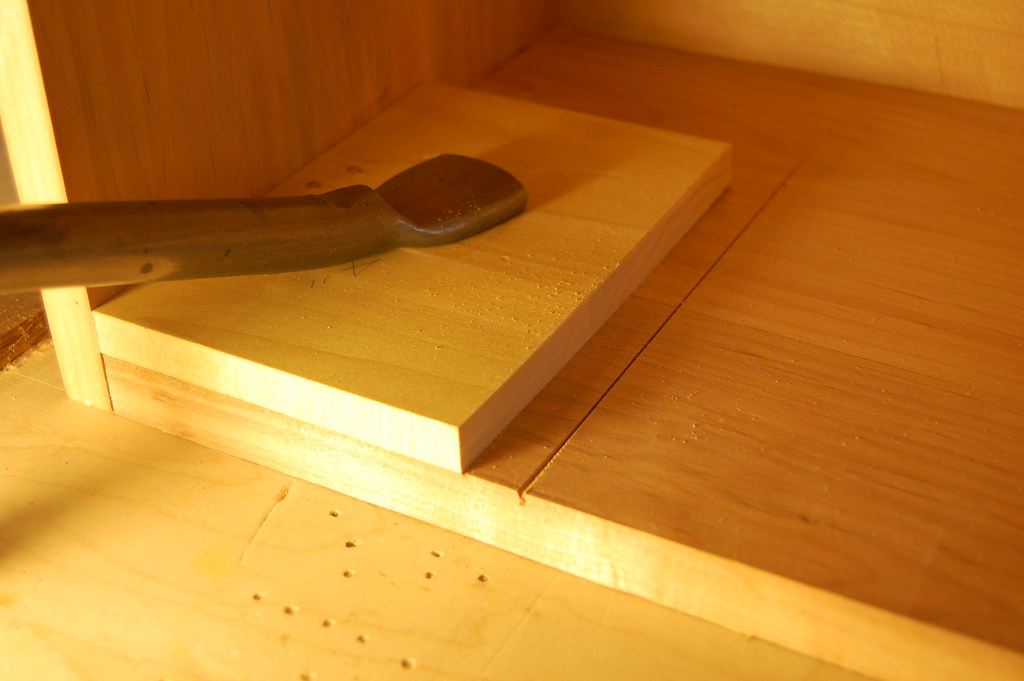
As the thickness of the partition boards is 1/2", it was simple to find a chisel of that exact size, making clearing out the dado a simple matter. It is always a great policy to size your components from a tool that you have, and this is a main reason I use Western tools and not Japanese; it is a lot easier to make a 1/2" dado with a 1/2" chisel than it is to do metric conversions from millimeters:

After the chisel work, I ensured the bottom of the dado was flat and smooth with a small router plane:
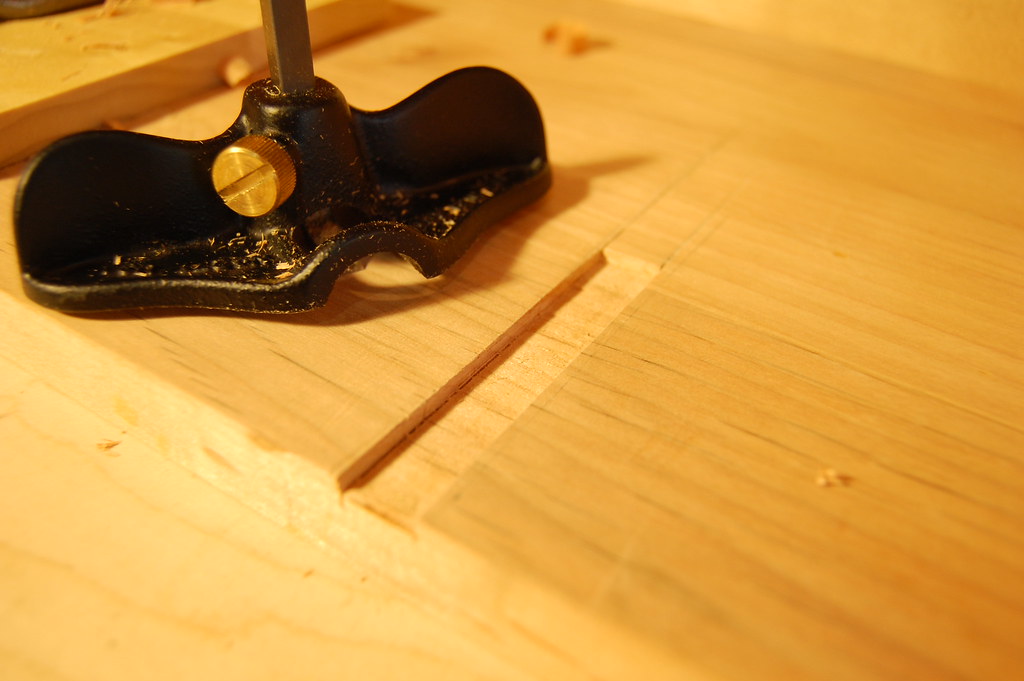
I have not really shown this tool much before, but it is very handy. Called a "hag's tooth" in the olden days, it is simply a sharpened iron bent at 90 degrees from the vertical, for controlling the depth of a groove or other recessed area. It should not be used to actually clear the groove, but is perfect for cleanup. This shows how the blade is shaped; a wonderful example of an utterly simple tool that is also just about perfect at what it does:
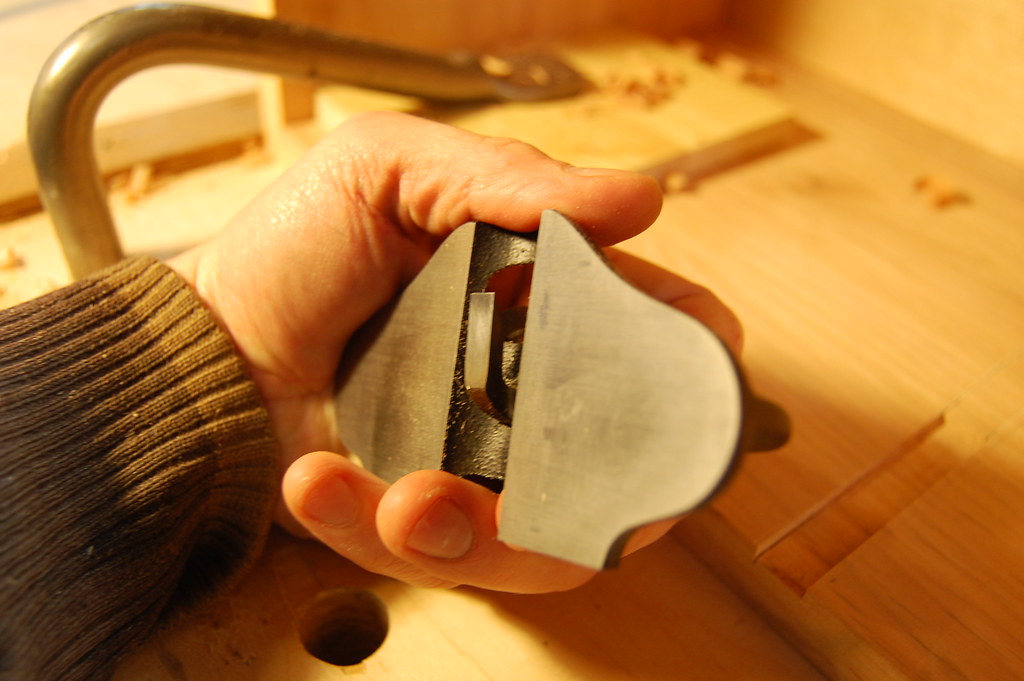
Next up was cutting the partition wall. I left it slightly oversized, so that I could gradually trim it until that magic moment when it fits snugly. Again, no measuring with numbers, just drawing a line in the right place:

And then onto the shooting board. A few swipes, test fit, repeat until perfect fit is achieved. This way of working is a lot nicer than trying to cut something at 9 13/65th inches.
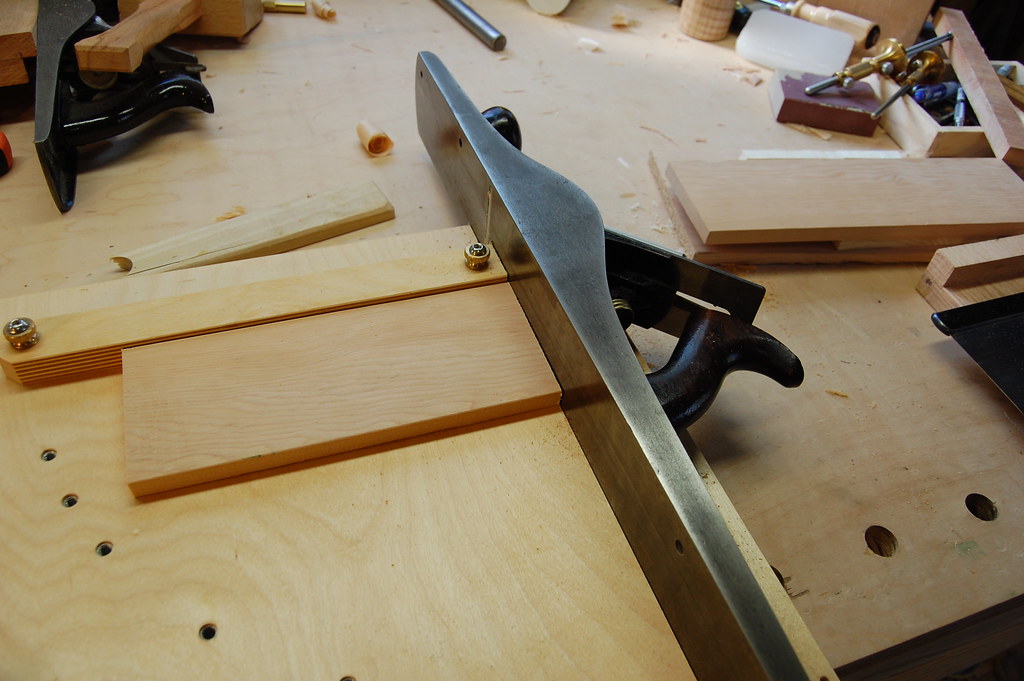
The partition is supported underneath by some cleats. There was no real reason to make these perfectly square, but while I had the shooting board out, I did:

There were then installed on the sides. You can see how the dado cuts extend longer than they need to:
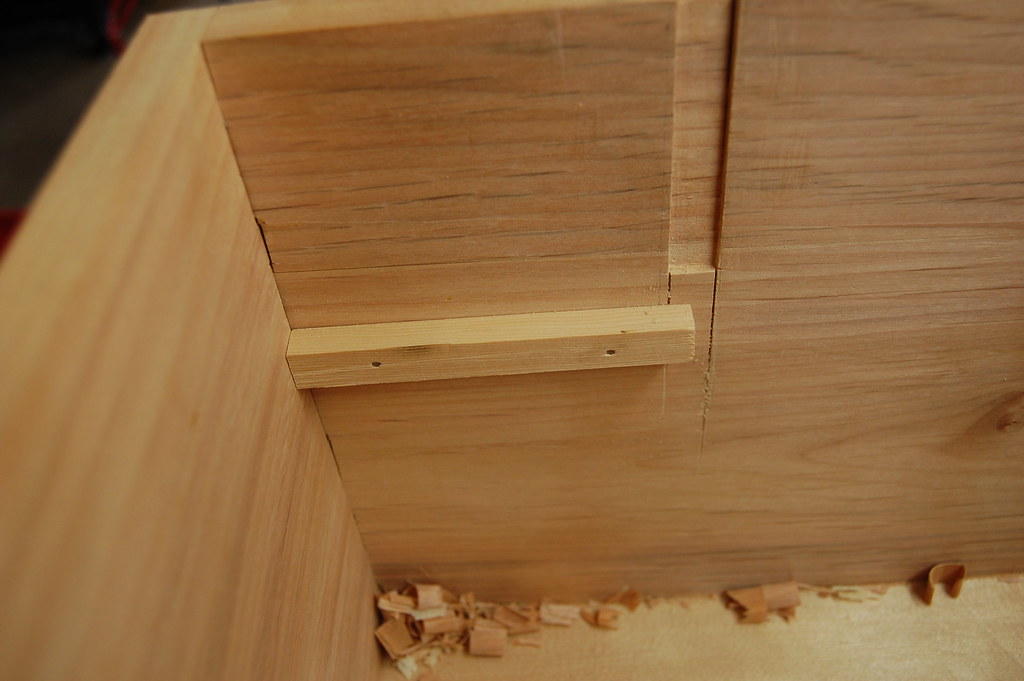
The partition is nailed and glued to the bottom, and slipped into place. It is then trimmed to fit at the top, again with no measuring:
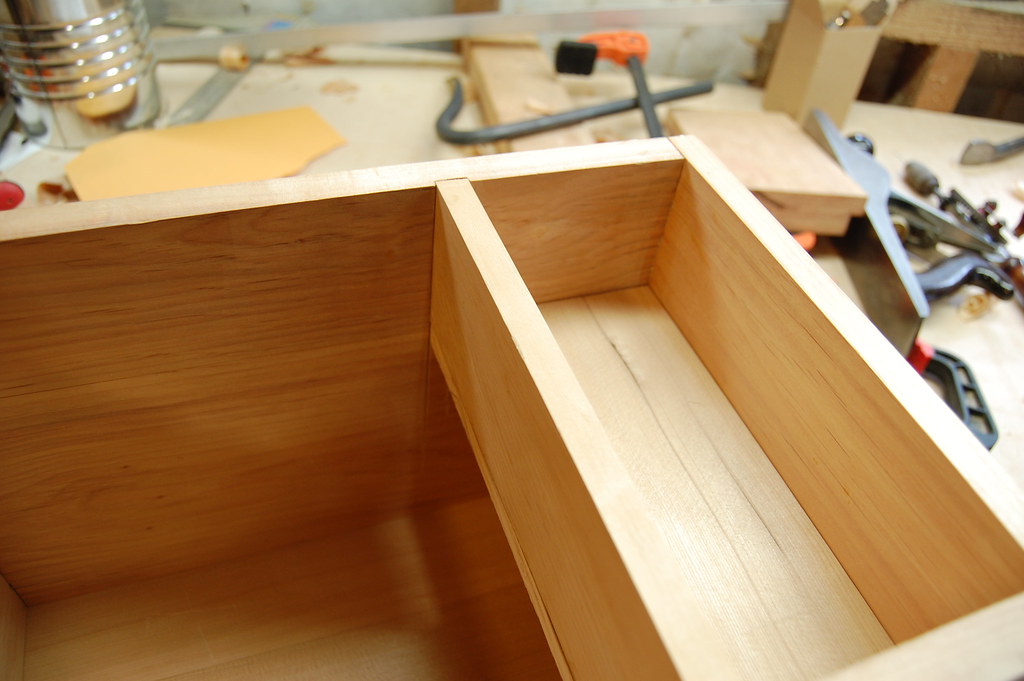
The molding was then attached, and the box itself is about done. It still needs a lock, hinges, and a lid:
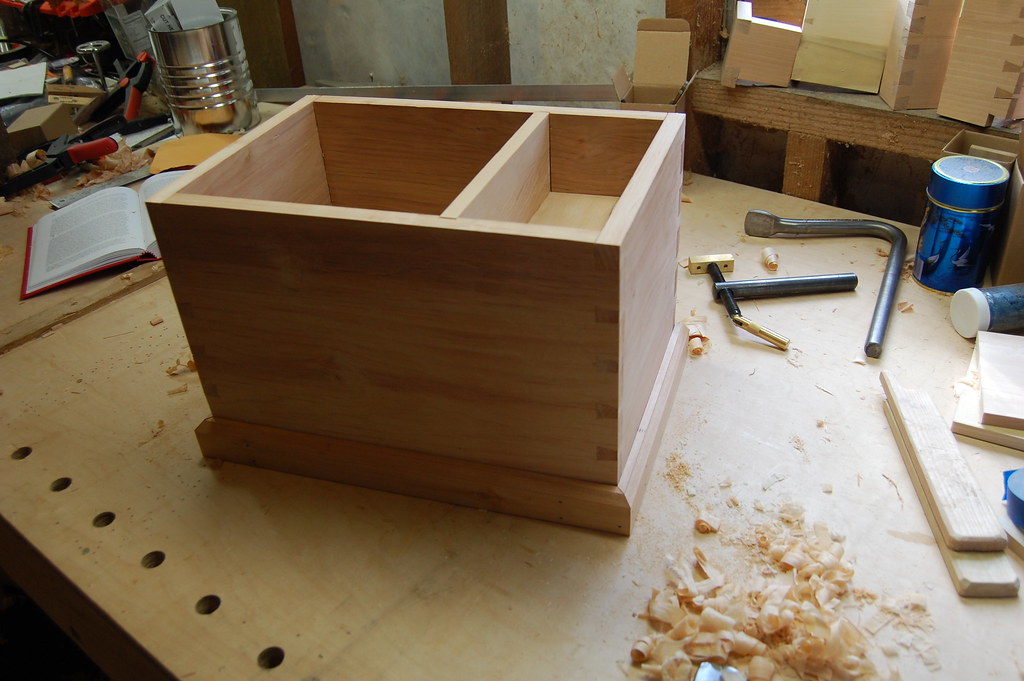
It is bigger than it might seem:
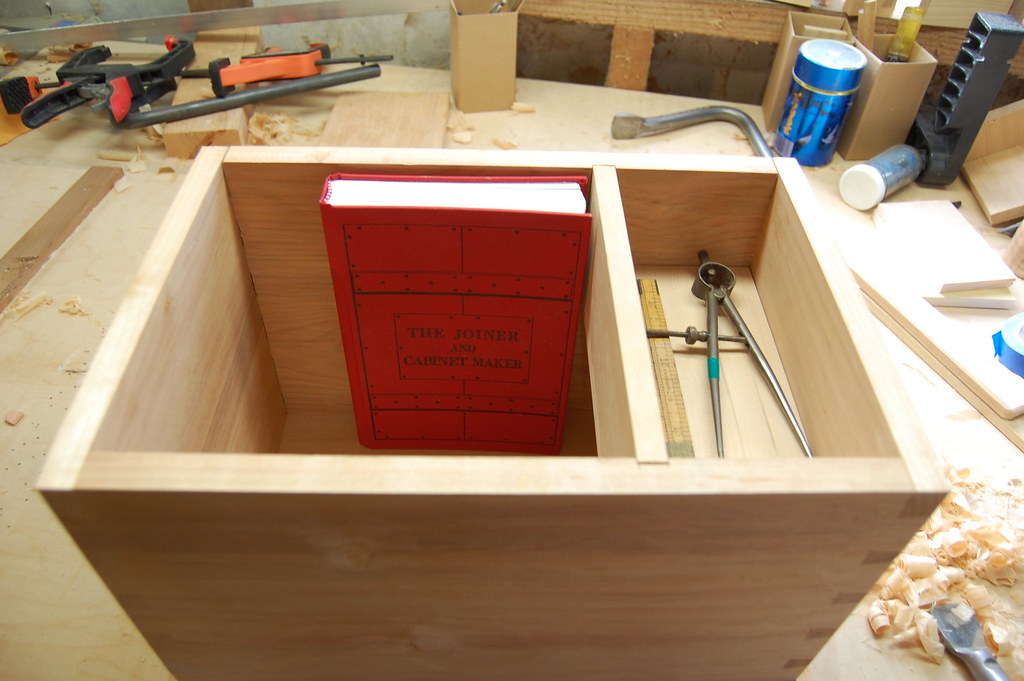
I wanted to get going on the lid, but needed to prepare another 9' board in the rough and that sounded like too much work at the moment. Instead, I put a bottom on this practice box, and finally got around to something I have been wanting to do for a while: making a measuring and marking organizer for my gauges, knife, pencils, dividers, etc. I used the same concept as the Schoolbox partition, but flipped 90 degrees for a wider base. I drilled some simple holes (not exactly sure how I want to use it yet), and planed the "holder" down a bit so that it left a gap just wide enough for squares on the back edge. The holder lifts out easily, so everything can be packed underneath it. I will probably add a lid at some point, but for now it is way better than the overflowing little tray I was using.

The hardest part of this was definitely the mitres on the molding. With total concentration, I was able to get them to fit rather nicely during the dry fit, but for whatever reason, they opened up a tiny bit while nailing them down. This is one area where I need a lot of practice, but it is good to have the box nearing completion. Next steps are to create the lid (and its similar molding), install hinges, and a lock. Then its on to box number two, unless I finally start on the workbench, like I want to...
Sunday, March 4, 2012
[Schoolbox] Bottom and Molding
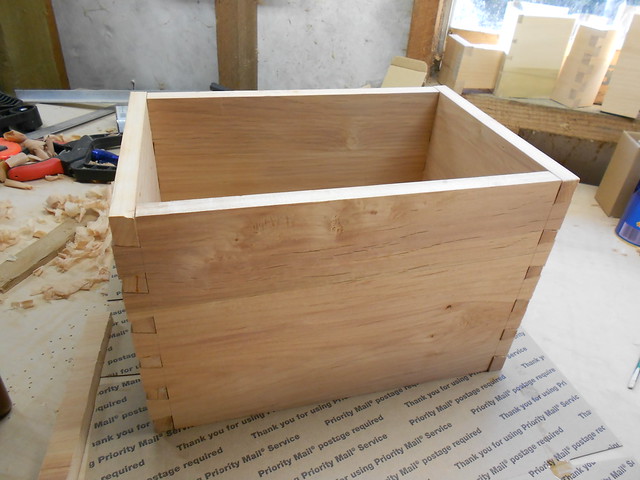
With the glue dry, it was simple enough to trim the pins and tails flush with the carcase. It was tempting to smooth the entire outside at this point but as there is some assembly left to do, I know it will be wasted effort. Here's the shell more or less complete, minus final smoothing:

Not shown is the planing, jointing, and glueing up of the planel for the bottom. I had almost forgotten about that, since I was thinking about getting the molding put on. The bottom goes on first though, so that will be next time. While the glue was setting, I did get started on the molding. I've learned its much simpler to plane molding while the board is as wide as possible, so here it is in progress:

And here it is about done. It is just a simple 45-degree chamfer, but I think its simpleness complements the basic nature of the box as a whole. I might made one with a slightly more complex molding profile later on:

The board was then marked for a 1 1/2" tall strip of molding:
Which was then ripped off and planed to the line:

It was a challenge to cut the miters, but it seems like it will go together ok:

Next time, the bottom will be put on, the molding attached, and perhaps starting on the interior partition.
I am puzzled by one thing, but perhaps it will become clear in time. I would rather do the partition first, as the operations on the inside of the box will be awkward with the molding attached. I can easily use another piece of the molding stock to level it, but I really wonder why Thomas (and then Chris) did the molding first.
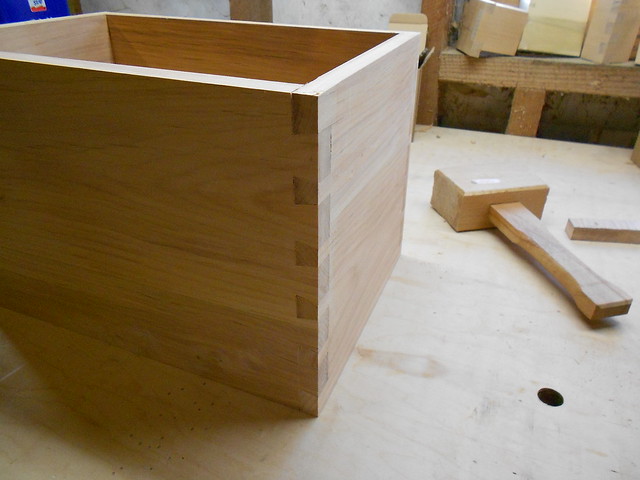
Not shown is the planing, jointing, and glueing up of the planel for the bottom. I had almost forgotten about that, since I was thinking about getting the molding put on. The bottom goes on first though, so that will be next time. While the glue was setting, I did get started on the molding. I've learned its much simpler to plane molding while the board is as wide as possible, so here it is in progress:
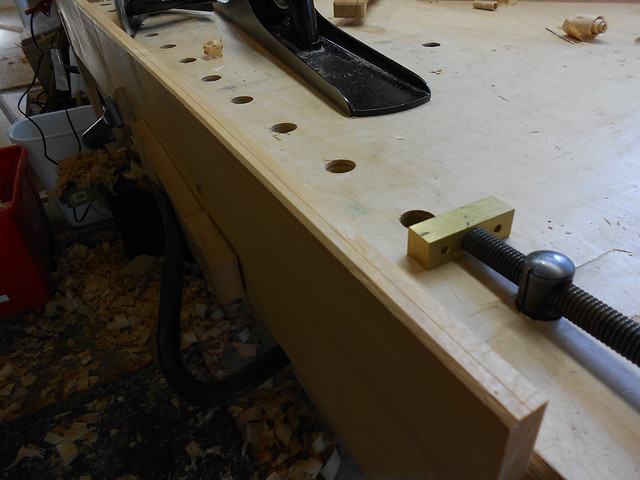
And here it is about done. It is just a simple 45-degree chamfer, but I think its simpleness complements the basic nature of the box as a whole. I might made one with a slightly more complex molding profile later on:
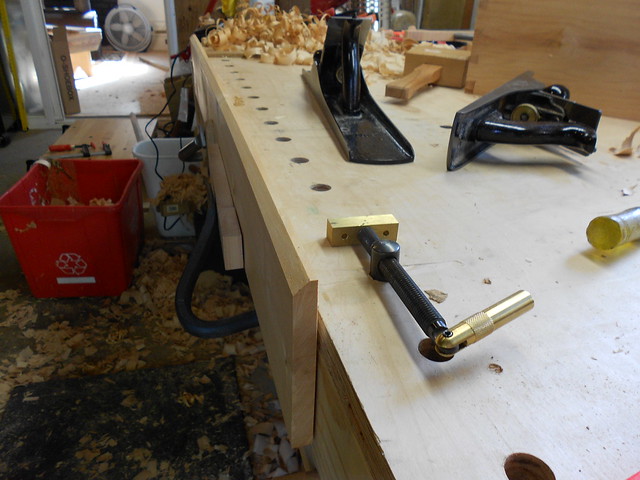
The board was then marked for a 1 1/2" tall strip of molding:
Which was then ripped off and planed to the line:

It was a challenge to cut the miters, but it seems like it will go together ok:

Next time, the bottom will be put on, the molding attached, and perhaps starting on the interior partition.
I am puzzled by one thing, but perhaps it will become clear in time. I would rather do the partition first, as the operations on the inside of the box will be awkward with the molding attached. I can easily use another piece of the molding stock to level it, but I really wonder why Thomas (and then Chris) did the molding first.
Saturday, March 3, 2012
[Schoolbox] Carcase Comes Together
"And now for dovetailing the corners," say Thomas, half afraid to attempt so large a joint, for as yet he has practiced only on smaller pieces; but the same care and attention which make a good joint look good with small pieces will also work with large ones.
-- The Joiner and Cabinet Maker, 1839

I did do one more practice joint to warm up before cutting these, and it came out ok; not as perfect as I would like but I moved on anyway. These, also, are not as perfect as I would like but it is more compelling to be making an actual item than just practice joints. I've also told myself that I will most likely use this box to practice application of milk paint, and there is therefore a lot of room for cosmetic error. Nonetheless, like most of my practice joints, it did go together in a way which is mechanically sound, resulting in a very strong box. The glue is now drying, and the way it will actually look will become clear when the glue has dried and the pins and tails and trimmed even with each other.
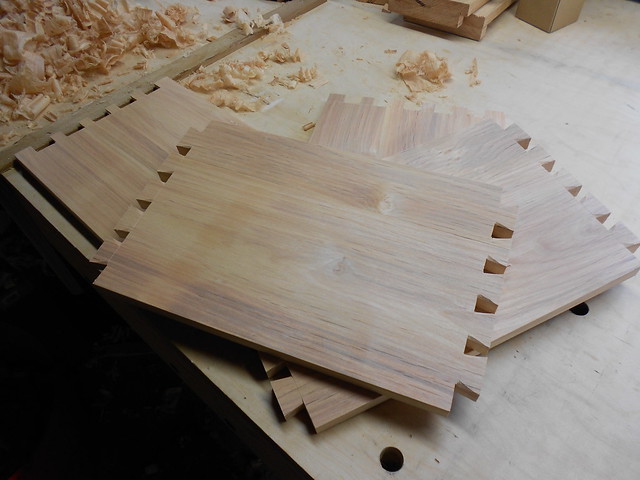
I will likely go into more detail about Thomas's exact methodology for dovetailing in an upcoming box, but in this case I want to just get through the construction so that a complete understanding of it from start-to-finish is gained. I'll then be recursively focussing on sub-elements with each new schoolbox made. Here is the first one, drying and waiting trimming and exterior planing:

-- The Joiner and Cabinet Maker, 1839
I did do one more practice joint to warm up before cutting these, and it came out ok; not as perfect as I would like but I moved on anyway. These, also, are not as perfect as I would like but it is more compelling to be making an actual item than just practice joints. I've also told myself that I will most likely use this box to practice application of milk paint, and there is therefore a lot of room for cosmetic error. Nonetheless, like most of my practice joints, it did go together in a way which is mechanically sound, resulting in a very strong box. The glue is now drying, and the way it will actually look will become clear when the glue has dried and the pins and tails and trimmed even with each other.
I will likely go into more detail about Thomas's exact methodology for dovetailing in an upcoming box, but in this case I want to just get through the construction so that a complete understanding of it from start-to-finish is gained. I'll then be recursively focussing on sub-elements with each new schoolbox made. Here is the first one, drying and waiting trimming and exterior planing:
Thursday, March 1, 2012
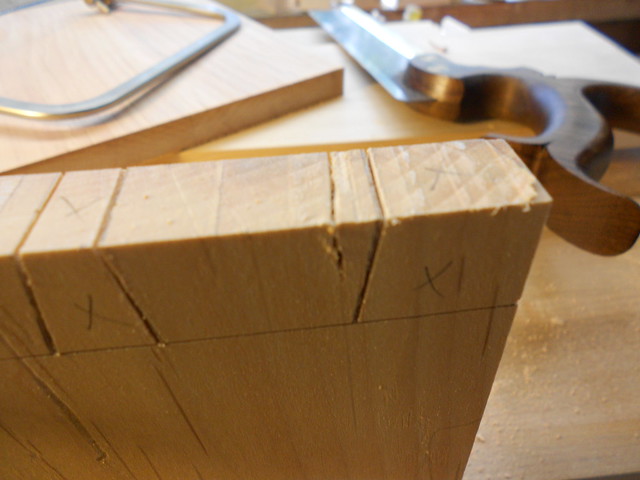
[oops] "x" marks the spot
Its a good habit to mark or shade your waste areas, so you don't accidentally cut into the part you wish to keep. Despite such efforts, this happened anyway:

Wednesday, February 29, 2012
A Most Important Tool

"To begin with, however, he finds Sam's bench so covered over with tools and shavings, that he really cannot lay the board upon it; not that Sam has been doing any very great quantity of work, but that he very much dislikes the trouble of putting away his tools and sweeping the shavings off the bench: but by this slovenliness he makes himself moure trouble after all, for he can hardly ever find the tool that he wants: just when he has got the side of a box nicely placed to fit over the end, the brad-awl is missing which he needs to bore a hole, and five minutes are lost in searching fot it, if, indeed, he does not rather bang in the nail to make a hole for itself, without caring whether it split the wood or not. The tidy workman clears his bench every day when he leaves his work; his tools being all put by, he sees whether each is in its place, and if any are missing he recollects at once whether he has lent them to any one, or left them anywhere where he has been using them, or knows whether he had better look for them among the shavings."
-- The Joiner and Cabinet Maker, 1839
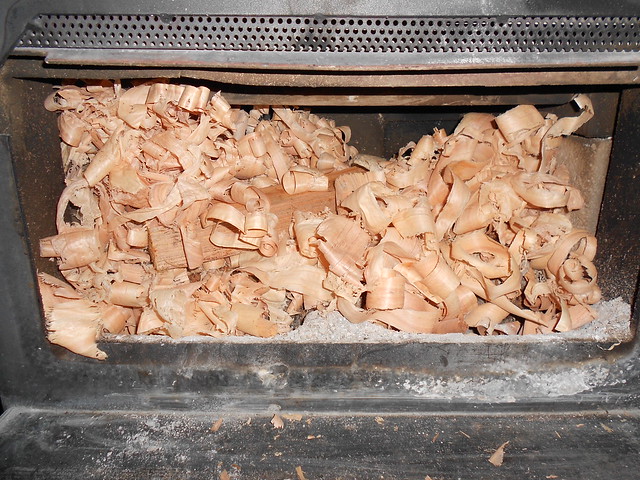
First of all, I hope you enjoy the wonderously long nest of clauses the author of the above employs constantly throughout the text. I really do, mind-bending as the grammar can be. More important than the writing style is that early on in the text the importance of cleanliness is pointed out in graphic detail, and this truly is a foundational skill for a craft as messy as woodworking can be. I purchased a brush like the one above long ago, mostly for sweeping the mountains of sawdust off of my tablesaw and mitresaw. However, it is proving its worth even moreso to clear the incredible volumes of shavings off the bench. As with any good tool, it acts as an extension of the arm, and with an almost psychic ability, it is easy to tell the brush to flick the shavings off while leaving behind heavier tools and pieces of scrap wood. When doing an operation as shaving-intensive as thicknessing wood, it is likely to need to sweep shavings every ten minutes or so, filling huge tubs . Some woodworkers will put these onto a garden bed as mulch, some put them into the trash. I find them far too valuable to do either. Mine get my woodstoves started with very little effort. They ignite readily, burn cleanly, and as they are generally harder woods, they pack a punch when it comes to getting the stove hot and the kindling lit. This workshop appliance is not given much credit in most discussions of outfitting a shop, but I might say it should be the first "tool" purchased.


Tuesday, February 28, 2012
[Schoolbox] Making Boards from a Tree
The title here is an allusion to a book I am pretty excited about reading (Make a Joint Stool from a Tree: An Introduction to 17th-century Joinery), but is also maybe an appropriate description for the tasks of today. Many woodworkers are used to going to a lumberyard or home center and buying some boards neat and square and ready to go. I've made shelves of this kind of material several times myself. I've even seen these shrinkwrapped. However, both as a nod to wanting to do things as Thomas did, and also because the lumber I have on hand is very rough, I had to cut, flatten, true, joint, glue, and thickness the boards all by hand. I won't go into much detail about the planing process, but you can read more about it if you are interested in this post about preparing rough stock.
I left off last time with a very rough board from a local alder tree cut into 1"+ boards with a chainsaw. I cut it into 2 manageable pieces (each will provide 2 smaller boards), jointed the edges, and glued them together.
"When Thomas comes to his work the next day, he finds the glue firmly set in all the joints that he had put together. He first scrapes off with a broad chisel such glue as has worked out from between the edges, and puts back into the glue-kettle any that comes off quite clean and free from chips."
-- the Joiner and Cabinet Maker, 1839
And here is the jointed, glued, and dried board:

Thomas was using hot hide glue in his shop. I am also opting to use hide glue for a number of reasons, but I am compromising authenticity and using a modern "liquid" hide glue. It has many of the same advantages and is much more convenient. The glue dries to a tacky, flexible material somewhat like rubber cement. It is easy to scrape off, and is gentle on tools, where some modern glues dry hard as a rock and can damage steel edge tools like chisels and planes. I did not put my scraped glue back into the pot, as Thomas did, but I do like that example of thrift. The strength of hide glue is impressive; I was unable to snap apart a joint by hand. It is said that the wood will likely split before the joint will come apart, and I believe it.
I then ripped the bark edge off of the boards. I would have preferred to flatten the board and save the ripping for later, but planing the bark seemed like an unwise way to work. Instead, I estimated where the final edge would be and added on a bit of room for error.
Here's the board with the bark edge removed and grossly trimmed to width:

The difference in thickness of the boards looks pretty dramatic there, and it was, perhaps 1/4" at its highest. This is no problem for the jack plane though. Its cambered (curved) edge allows huge chunks to be taken out with each stroke, and it really only takes a couple minutes to go from that glue-together monstrosity to a board which is rather flat, if not smooth. It does leave a wavy texture behind, but that will be address with a jointer plane. Here it is after the work with the jack plane:

There is still a difference in board color which reveals the joint. However, it feels pretty good to the touch and is a decent joint, color mis-matching aside. One could argue that the contrasting color is a design element, but I will not be so bold.
The board was then flattened normally using the try plane (or jointer plane), which in my case is a Stanley #7, over 100 years old. It does have an aftermarket iron in it which makes a nice noticable difference, much thanks to Ron Hock for creating these for us.
I did want to point out how magical hand planes can be. My rough cut to remove the bark was really terrible when you look at the pencil line which is the final width of the board. Notice the rather large expanse of wood left above it. By paying attention to where the high spots were and focussing on them, it did not take long to work down to the line. It can, in fact, be surprisingly quick so that if attention wanders, its easy to very quickly go past the line. For the curious, the sad state of this board was a result of my original rip cut wandering from the line, so I flipped it and tried from the other direction. The intersection wasn't pretty. At any rate, the plane zipped this waste off easily, and it is actually fun.
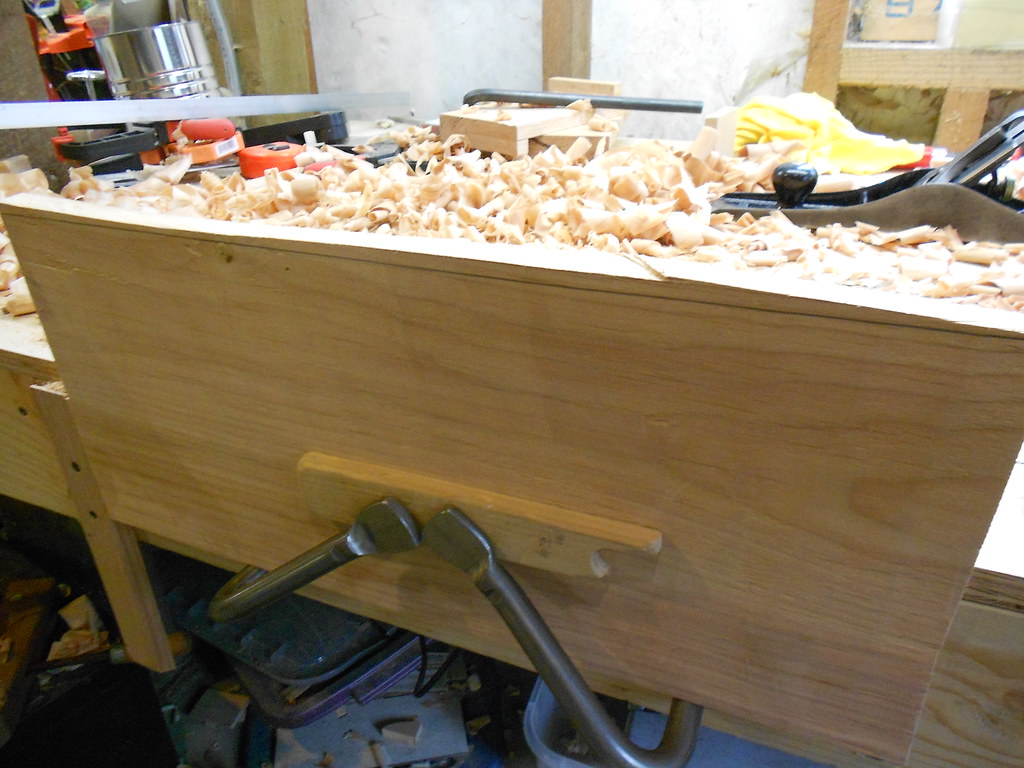
Less fun, however, are lengthy sessions of thicknessing using a hand plane. While the jack plane can quickly remove rather thick shavings (perhaps up to 1/16" of an inch) it is still painstaking to reduce a large board by a great degree. Ideally, the boards would be sawn to close to desired thickness, and the mere act of flattening and truing the boards would bring it to target thickness. The problem with my boards are that they were cut with a pronounced wedge shape, being 1/2" thicker at one end than the other. As I would like all 4 walls of the box to be of equal thickness, I had to find the thinnest spot and make that be the target. This left me with some steep hills to plane off, and wishing that Thomas could travel forward in time and use the shop's planer machine. I remained true to the spirit of this experience, but I did make flirty eye contact with my planer a couple times.
While a planing machine has a built-in stop which can be set for desired thickness, there is no such thing in the hand tool world. What there is, though, is pretty cool. I set a cutting gauge to the thinnest part of the board, and cut this setting onto the edge of the board on all four sides. I then traced over that with a pencil for visibility, but the gauge has another way of communicating:
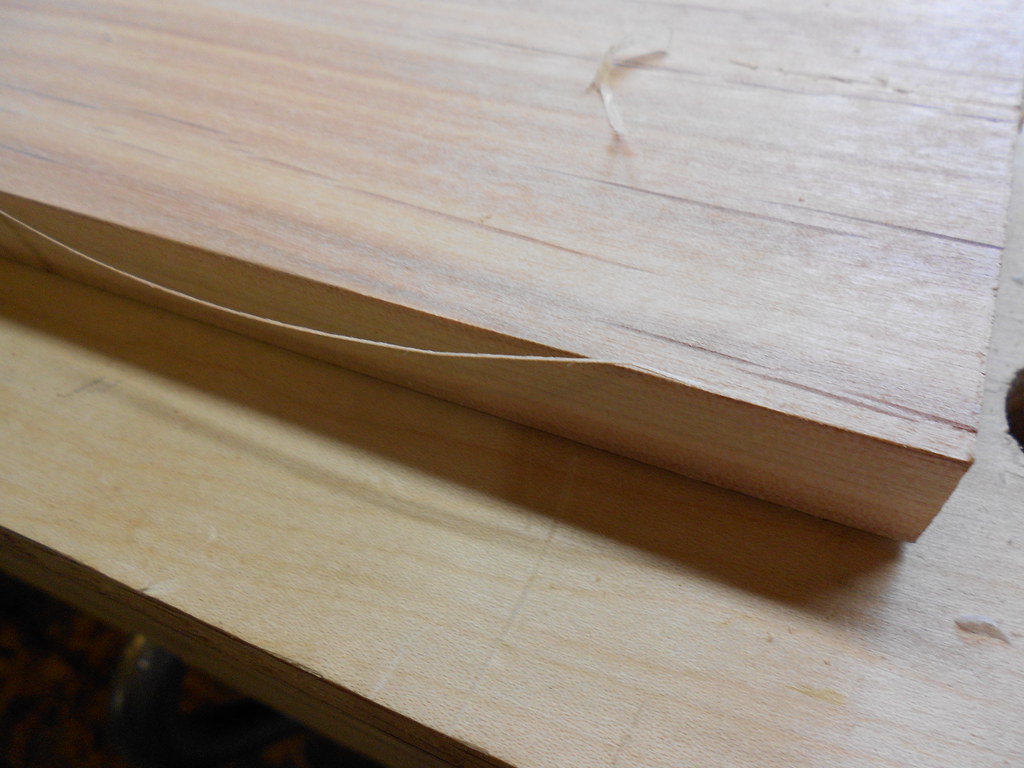
When the plane's edge actually reaches the gauges line (which is much like a knife line) something like the above usually happens. Sometimes a shaving with a ragged edge will appear just before this point, like a warning. Then the thin bit of wood above the cut-line strings off like this. One or two more strokes, and the knifeline is gone, and your target is reached. I love this stuff!
It was then time to cut out the individual boards (panels?) for the box.
"To cut across a piece of wood so wide as this, where accuracy is required, a sash-saw is used; that is, a saw with a thinner blane and finer teeth than that which Thomas used for cutting out his wood roughly; it is also strengthened by a piece of iron or brass at the back. It takes its name from being much employed in the making of window-frames or sashes."
-- the Joiner and Cabinet Maker, 1839
I do not technically have a sash saw, which is a rip saw 14" long and with 4" of depth. It is suggested that saws hand-filed in a rip configuration, that is, for splitting a board down its length, have just enough accidental fleam (angling of the tooth filing away from perpendicular) to also cross-cut nicely enough. Many joiners will have dedicated crosscut and rip backsaws, but Thomas has only the one sash saw. If you are looking for a sash saw, Gramercy makes some that are very highly regarded. However, I already have a 12" "carcase" saw which is very similar and in fact similar enough that the expense of a slightly larger saw is not warranted for this use. Mine is a "hybrid" tooth pattern, which means it is similar to Thomas's saw with some intentional "accidental" fleam, allowing it to crosscut and ripcut admirably. It does crosscut very well and is a joy to use. Today my "sash saw" was this Bad Axe carcase saw:
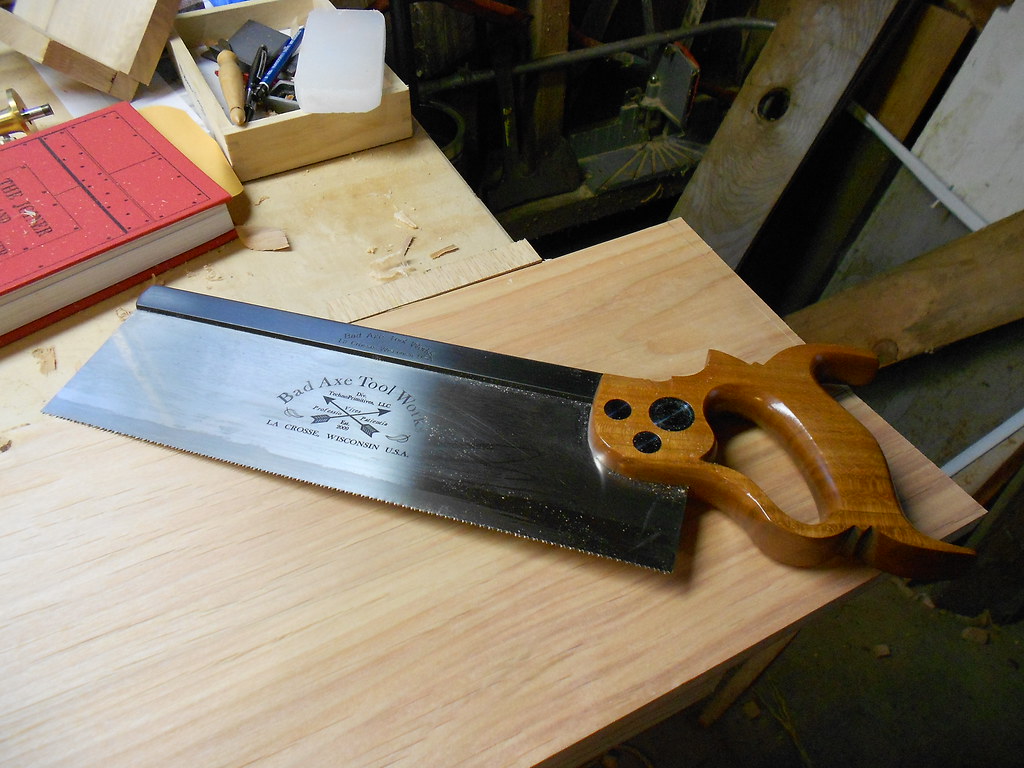
This board is about as wide of one as I would want to cut with this saw. It worked out just fine, and in fact I was able to split the cutting line without much trouble. It was, however, noticeably more difficult than the narrower boards I am typically cutting.
To mark my cut, I used a large try-square and drew a marking knife along its edge. As my eyesight is not that of a 14-year-old any longer, I almost always then drag a .3mm pencil point down the cutline, leaving a nice crisp mark:
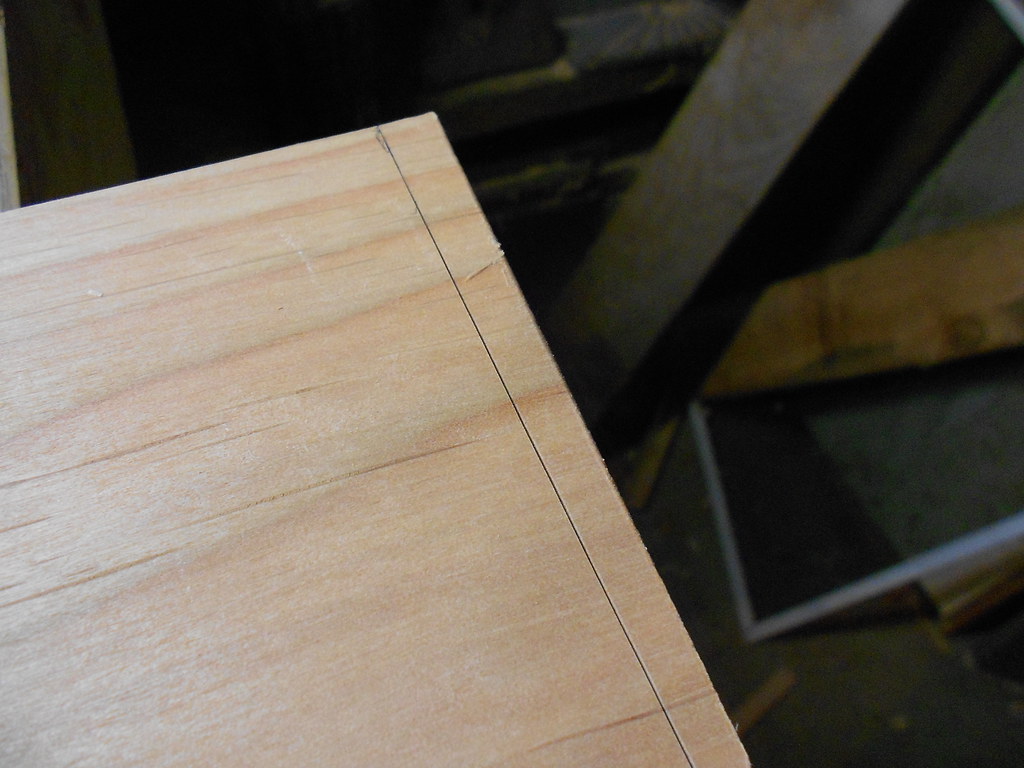
As I mentioned above, with this nice sharp carcase saw it is not very difficult to follow the line and make a cut which hardly needs any correction, if any. I did shoot all the saw-cut edges of the boards to ensure square:
"For squaring a corner also, much assistance is gained by a contrivance which every joiner has ready for the purpose. It consists of a board that may be fixed on the bench when wanted, and which is furnished with a cross piece standing up about an inch all across it, and set exactly square to its edge. It is sometimes called a shooting-board, as the plane is shot rapidly along the edge that is to be planed. "
-- The Joiner and Cabinet Maker, 1839
This is where I will reveal a gem from my deep stash of "duh" moments. I have been a fan of rubbing parrafin wax on the soles (bottoms) of my metal planes since the beginning. It makes a noticeable difference in how easy it is to push the plane, and I always have a chunk of it next to me while working. It needs to be refreshed quite frequently. With that in mind, I waxed the side of my plane for shooting. This works, but it is a little messy. Sawdust etc sticks to the waxy side and is difficult to remove. The smarter thing to do is to wax the track of the shooting board itself. You probably already knew that.
At some length, I had my four boards cut out, squared, and sized relative to each other.
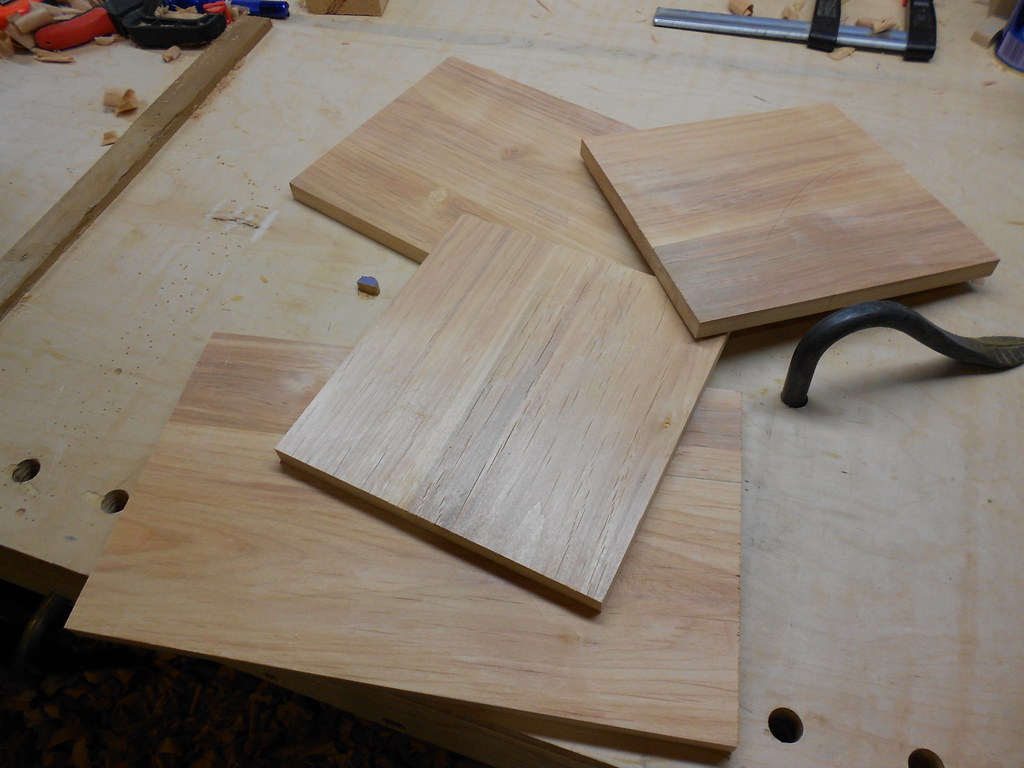
While I have been aware of the School Box for a long time, and studied photos, video, and written descriptions of it, I was still a little surprised at how big it is. Sixteen inches wide is, to me, larger than it sounds. With that in mind, I wanted to get a sneak peek at how this box will shape up:

It will hold a few books and then some! I am pleased with the progress, yet also am realizing that the board I have chosen will be a bit of a challenge to really smooth nicely. It has a couple minor knots and areas where the grain reverses like crazy. They did not get in the way of the flattening, but I think smoothing is going to take a little work. A card scraper will probably be required, and the box will never look as great as it could have if I had taken only the clearest areas of the board. However, I still believe this one will finish handsomely, and making use of the entire board leaves me feeling better than scrapping some of the board and moving onto another would have. I also feel the wood I have selected is more than nice enough for this first attempt. Perhaps down the line I will get much pickier and even make attempts to exploit grain pattern into a cohesive intentional design.
Next time, the boards will be marked and cut for dovetails, and the shell of the box assembled!
Subscribe to:
Posts (Atom)